Table of Contents
Advertisement
Quick Links
U s e r M a n u a l
E a s y B r a i l l e
Ha n d y T e ch E le kt ro n ik Gm b H; B ru n ne n st ra ße 1 0; 72 1 60 Ho rb ;
Phone: +49 74 51 55 46 0;
E-Mail:
inf o@handytech.de
Version 3.1
Horb, January 2008
Handy Tech Elektronik GmbH
©
All Rights Reserved
G e rm an y
Fax: +49 74 51 55 46 67
; Internet:
www.handytech.d e
Advertisement
Table of Contents

Related Manuals for Handy Tech easy braille

Summary of Contents for Handy Tech easy braille
- Page 1 E a s y B r a i l l e Version 3.1 Horb, January 2008 Handy Tech Elektronik GmbH © All Rights Reserved Ha n d y T e ch E le kt ro n ik Gm b H; B ru n ne n st ra ße 1 0; 72 1 60 Ho rb ;...
-
Page 2: Table Of Contents
Turning the Power On ................10 Energy Saving Features ................10 Operation as a Braille Display ..............10 Braille Input with the Easy Braille Function Keys (SPC+ 1 2 7) (Chord 3.4.1 Table of Key Commands for Controlling the PC ....... 12 Configuration Mode .................. - Page 3 IMPORTANT INFORMATION ................33 Symbols on the Device ................33 Safety Notes in Accordance with the Standards for Medical Devices .. 33 General Safety Information............... 33 Handling the Easy Braille ................. 34 Warranty ..................... 35 Technical Support ..................35 COPYRIGHT NOTICE..................36 APPENDIX ........................
-
Page 4: General
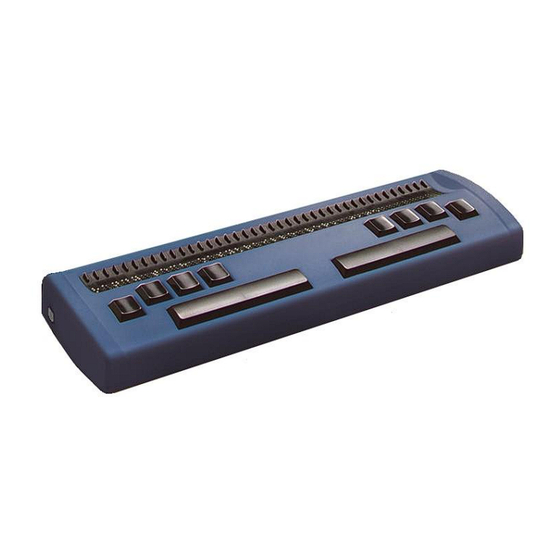
We recommend keeping the device handy, so that you can follow along with the instructions in this section. Set up the Easy Braille in front of you so that the two long keys are closest to you. These two keys are navigation keys. They also act as the space bars while you are entering text. -
Page 5: Representations And Conventions Used In This Manual
General Elektronik GmbH If your Easy Braille is not equipped with the Bluetooth option, it receives its power via the USB interface. It can thus be switched on only when the USB cable is connected to a PC and the PC is turned on. The USB port for connecting the device to a computer is located on the left side of the Easy Braille's housing. -
Page 6: Installation
The other end features a small, flat plug. Please connect the square plug to the port on the left side of your Easy Braille. The flat plug is then plugged into the PC's USB port. -
Page 7: Connecting The External Power Supply Unit
Easy Braille Installation Elektronik GmbH If the Easy Braille is to be used as a medical device, the PC must conform to all Medical Device Standards, or else it must have a ground connection or be connected to an isolating transformer. -
Page 8: Bluetooth Connection To A Mobile Telephone
"OK" to close the window. The Bluetooth device has now been connected and can be used. You now have a wireless connection between your Easy Braille and your PC and can use all of the functions just as if there were a cable connecting the two together. -
Page 9: Carrying Bag For Easy Braille With Bluetooth
Open the two press studs at the front of the left and right sides of the bag. The Easy Braille can now be lifted out of the bag. This also provides access to the battery compartments on the bottom of the device and you can, for example, remove the insulating strip before using the device for the first time. -
Page 10: Start-Up
Energy Saving Features If no key is pressed or the display does not change on the Easy Braille for several minutes (default setting: 45 minutes), the device will switch into sleep mode. In sleep mode, the Braille modules are turned off and some of the electronic modules are also deactivated. -
Page 11: Braille Input With The Easy Braille Function Keys (Spc+ 1 2 7) (Chord B)
Braille Input with the Easy Braille Function Keys (SPC+ 1 2 7) (Chord B) It is possible to use the Easy Braille's function keys for Braille character inputs to the PC with the aid of a screen reader. This feature is especially advantageous when you... -
Page 12: Table Of Key Commands For Controlling The Pc
The cursor routing keys are abbreviated as CR (e.g., CR12 = cursor routing key above Braille module 12). PC key(s) Chord Emulated on the Easy Braille by commands Activate/deactivate Chord B SPC + 1 2 7... -
Page 13: Configuration Mode
Please note that any settings you make here have a significant effect on the operation of the Easy Braille. Make sure that you are completely certain what these effects will be before you make any changes. All settings remain stored even if the Easy Braille is switched off. - Page 14 Handy Tech Easy Braille Start-Up Elektronik GmbH However, there is no actual conversion from 8-dot to 6-dot Braille code, but this is unnecessary for most characters. Entering [3] once again toggles the display back to 8-dot representation. The following message will appear on the Braille modules:...
- Page 15 This key can be used to control the connection to the PC. Possible messages which may appear are: ’Bluetooth OFF’: the Easy Braille can be connected to the PC only via a USB cable. ’Bluetooth ON’: the Easy Braille can be connected to the PC only via the wireless Bluetooth interface.
-
Page 16: Settings For Handy Tech Braille Displays
The universal Handy Tech Braille display driver features several optional settings for operating your Easy Braille with your PC and screen reader. In order to open the Settings window, press the [1 8] keys simultaneously. The Settings window can also be opened up from the Start menu, under "Programs –... -
Page 17: Atc
"Status Cells" tab, you can specify some of the options for these status modules. The field "Device" allows you to specify which Handy Tech Braille system or Braille display you are using. By default, the actually connected device is recognized and becomes the default setting here. -
Page 18: Key Actions
Repeat Keys: Keyes, defined as repeat keys, will repeat their action continually while be pressed. 4.4.1 Key Lock Single keys of the Easy Braille can be locked to prevent unintentional functions by pressing a key by mistake. This is helpful when starting to learn how to use the Easy Braille. -
Page 19: Miscellaneous
Info In the "Info" tab sheet you find important information about your Easy Braille and the driver software, you are using. In the field "Active Braille display" you find the type of Braille display, you are using, as well as the interface it is connected to and the serial number of your Braille display. -
Page 20: Screen Reader Operations
Braille in a format that can be used by blind persons. The Easy Braille serves to display the Braille data. Since only a small portion of the current screen contents can be displayed at any time on the Braille display, it is necessary for the screen reader to transmit only the information that is relevant in any given situation to the Braille display. -
Page 21: Screen Readers Under Windows, Example Jaws
There is more text to the left and right in the window line 5.1.1 Overview This table lists all functions associated with the Easy Braille's control keys. We have not included an exhaustive description of each of the functions, because these are contained in the JAWS for Windows manual. - Page 22 Operations Elektronik GmbH Key / Braille Dot Function [1 8] Driver configuration dialog (as of Handy Tech JAWS Driver version 3.x) [4 8] Toggle between focused text on Braille display/same text as on screen. [5 8] Activate the JAWS cursor.
-
Page 23: Screen Readers Under Windows, Example Hal/Supernova
In addition to the navigating functions, the most important keys under Hal/SuperNova on the Easy Braille are the [7] and [3] keys. Key [7] switches on the "live focus" while [3] activates the "virtual focus". Virtual focus is used for exploring the contents of the computer screen, including activating the Windows elements when they are displayed on the Easy Braille. - Page 24 Handy Tech Easy Braille Screen reader Operations Elektronik GmbH Key / Braille Dot Function [1 8] Handy Tech configuration dialog [4 8] Expand gap on/off [5 8] Use virtual focus [2 3] Beginning of line [5 6] End of line...
-
Page 25: Screen Reader Under Windows, Example Window-Eyes
5.3.1 Overview Your Easy Braille, just like all the other Handy Tech Braille displays, is supported by Window-Eyes. The following table provides an overview of Window-Eyes commands that can be entered with the control keys on the Braille display. We have not included an exhaustive description of each of the functions, because they are already contained in the Window-Eyes manual. -
Page 26: Talks Premium: Screen Reader For Mobile Telephones
Talks, then "0" again. To stop the voice output, keep pressing the Talks key for a little while. If you connect your Easy Braille to the mobile telephone via the Bluetooth interface, you can also activate all functions of the telephone from the Braille keyboard. You can, for example, navigate to the right with [R] or to the left with [L]. -
Page 27: Identification Letters
5.4.3 Braille Commands The following table shows the commands for controlling the mobile telephone from the Braille keyboard of the Easy Braille. Note: some functions are only available on Series 80 Phones, which is also listed below: Key on mobile telephone... -
Page 28: Tips For The Use Of Talks Premium
Handy Tech Easy Braille Screen reader Operations Elektronik GmbH Key on mobile telephone Keys on the Easy Braille (description) Ctrl+x (Cut) L + 1 3 4 5 (Chord x) Ctrl+v (Paste) L + 1 2 3 6 (Chord v) Ctrl+f (Find) - Page 29 Handy Tech Easy Braille Screen reader Operations Elektronik GmbH Use of the Braille output without speech output makes operations with the mobile telephone considerably faster. We therefore recommend that you disable speech output whenever you are using only Braille output.
-
Page 30: Battery Management
Instead of rechargeable batteries, you can also use normal dry batteries of the same size in your Easy Braille. If you do so, take great care that the device never attempts to charge these batteries, i.e. never plug in the external power supply unit with dry batteries in the Easy Braille. -
Page 31: Battery Capacity Display
However, it still draws a small current even in this state, and you should therefore not leave your Easy Braille in this state for longer than one day. It is best to recharge the batteries immediately. If this is not possible, you should at least switch off your Easy Braille with the main switch. -
Page 32: Replacing The Batteries
1. Switch off your Easy Braille and disconnect the cable of the external power supply unit. 2. If your Easy Braille is in the carrying bag, disconnect all cables and remove the device from the bag. 3. Turn your Easy Braille over to provide access to the bottom of the device. -
Page 33: Important Information
The ambient temperature should be between +10° C (= 50° F) and +40° C (= 100° F) and the relative humidity should not exceed 80%. The Easy Braille may not be used in moist rooms (such as bathrooms), since a voltage of 200 V is generated inside it. -
Page 34: Handling The Easy Braille
Do not drop your Easy Braille, and avoid exposing it to strong vibrations. It is better for your Easy Braille if you take care to operate it with clean hands, because otherwise the tactile pins can become sticky and may release only if prodded. -
Page 35: Warranty
Technical Support The Easy Braille is a highly complex product. Although it has been optimized to be as easy to use and as self-explanatory as possible, errors in understanding or operation, which may impede your use of the device, may occur. Please consult this user manual first if you encounter difficulties. -
Page 36: Copyright Notice
Notice Elektronik GmbH Copyright Notice All rights reserved, copyright Handy Tech Elektronik GmbH. No portion of this user manual may be reproduced in any form without prior written permission from Handy Tech Elektronik GmbH. Windows is a registered trademark of Microsoft, Inc. -
Page 37: Appendix
Handy Tech Easy Braille Appendix Elektronik GmbH Appendix Guidance manufacturer's declaration electromagnetic emissions Guidance and manufacturer's declaration - electromagnetic emissions The Braille display is intended for use in the electromagnetic environment specified below. The customer or the user of the Braille display should assure that it is used In such an environment. -
Page 38: Guidance And Manufacturer's Declaration - Electromagnetic Immunity
Handy Tech Easy Braille Appendix Elektronik GmbH < 5 % U < 5 % U (>95 % dip in U (>95 % dip in U for 5 s for 5 s Power frequency 3 A/m 0,3 A/m If image distortion occurs,... -
Page 39: Recommended Separation Distances Between Portable And Mobile Rf Communications Equipment And The Braille Display
Handy Tech Easy Braille Appendix Elektronik GmbH Field strengths from fixed transmitters, such as base stations for radio (cellular/cordless) telephones and land mobile radios, amateur radio, AM and FM radio broadcast and TV broadcast cannot be predicted theoretically with accuracy. To assess the electromagnetic environment due to fixed RF transmitters, an electromagnetic site survey should be considered.
Need help?
Do you have a question about the easy braille and is the answer not in the manual?
Questions and answers