Table of Contents
Advertisement
Advertisement
Table of Contents
Troubleshooting

Summary of Contents for MTS Systems Ultimate TV
- Page 1 MTS Ultimate TV User Guide...
-
Page 2: Table Of Contents
MTS Ultimate TV set-top box equipment care and maintenance ....... . - Page 3 Getting started ..................31 Program your MTS Ultimate TV remote to control your TV, DVD, home theatre receiver, or other devices ..31 Power control for multiple devices .
-
Page 4: Welcome To Mts Ultimate Tv
All you need is to set up your MTS MyAccount • MyPicks & Ultimate Picks – Did you know you can keep track of up to 6 channels at once on your Ultimate TV? Go to channels 92 & 93 to set them up. -
Page 5: Mts Ultimate Tv Set-Top Box Equipment Care And Maintenance
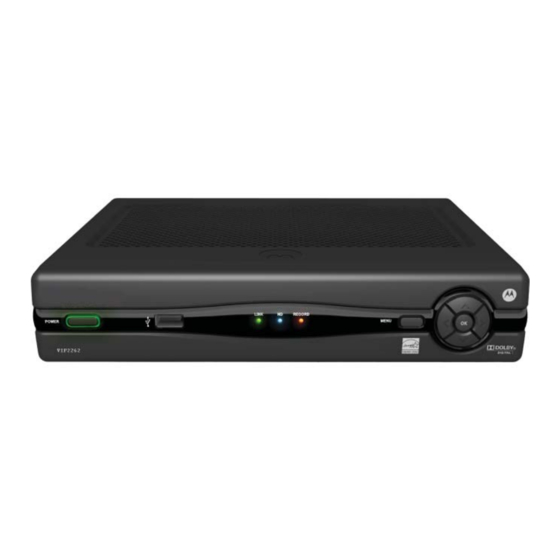
Equipment care and maintenance • TO REDUCE RISK OF ELECTRIC SHOCK, DO NOT REMOVE COVER (OR BACK). • PVR Set-top boxes (VIP 1216/2262) contain a hard drive, which means they require careful handling to avoid damaging the drive. • To allow the hard drive to spin down properly, wait at least 10 seconds after disconnecting power before moving the Set-top box. -
Page 6: Getting To Know The Buttons On Your Mts Ultimate Tv Remote
Getting to know your remote control Set your TV to STB mode or your MTS service will not Change video input (Must be work. On some remotes this in TV mode for TV service to button is labelled MTS. work) Pause Live TV* Record TV* with just one click Skip forward in 30-second... -
Page 7: The Tv Basics
TV Basics Navigating the on-screen menus Menus and screens When in the MENU, GUIDE, MTS Video on Demand, or Recorded TV screens: • Use the ARROW buttons and/or the CH | PG button to highlight items in the screen. The highlighted item shows the selection •... -
Page 8: Hide Or Remove Channels From Your Guide
The Program Info screen The Program Info screen displays information about all programs in the Guide, and provides access to a variety of options related to the program. • Press GUIDE • Press the UP/DOWN ARROWS or CH | PG to highlight the program •... -
Page 9: Setup Favourite Channels
Subscribed channel fi lter Enabling the fi lter only displays channels that are subscribed to • Press MENU • DOWN ARROW to SETTINGS then DOWN ARROW to highlight GUIDE and press OK • Highlight SUBSCRIBED CHANNEL SETTINGS and press OK •... -
Page 10: View Favourites
View Favourites • Press MENU • DOWN ARROW to LIVE TV, and DOWN ARROW again to FAVOURITES • To select the favourite list you want to view, highlight the list and press OK, your Favourites Guide will be displayed • To exit your Favourites List, select VIEW ALL CHANNELS •... -
Page 11: Search
Search You can search the guide and Video on Demand for your favourite programs from one place. You can also search by program name or actor. • Press the A button (Yellow Triangle), or; • Press MENU, then UP ARROW to SEARCH and press OK •... -
Page 12: Call Display On Tv
Call Display on TV See who’s calling right on your TV screen with MTS Ultimate TV ® Message Centre. TV Call Display is free when you subscribe to MTS Call Display on your MTS home phone. This feature is not available in Steinbach. -
Page 13: Myremote
MyRemote MyRemote lets you customize the A, B, and C buttons on your remote for one-touch access to your favourite MTS Ultimate TV channels, menu options, and applications. How to set up or change the A, B, and C buttons •... -
Page 14: How To Use Descriptive Video And Closed Captioning
How to use Descriptive Video and Closed Captioning Closed Captioning Set up Closed Captioning using MyRemote If you use closed captioning on a regular basis you should use MyRemote to set your B or C button on your remote to turn closed captioning on or off . How to use Captioning Once you have set up closed captioning on your remote you can turn it on or off... -
Page 15: Lobby Camera
Lobby Camera MTS Lobby Camera lets tenants with Ultimate TV in select apartments and condos view their lobby directly on their TV screen. • Tune to channel 1095 • Press OK to start the Lobby Camera access. You will be presented with a video stream of your building’s lobby camera •... -
Page 16: Whole Home Pvr Service
How many TVs can I watch at once? With MTS Ultimate TV your house can watch up to 7 programs at the same time: • Watch or record Live TV: Watch or record up to 3 HD or SD shows at the same time •... - Page 17 How to change single recording settings • Press RECORDED TV • Use the ARROW buttons to highlight the program recording (indicated by a red dot) • Press OK. The recording info page appears • Highlight RECORD SETTINGS, and press OK. The Record Settings screen appears •...
- Page 18 • STOP RECORDING – At Scheduled Time – 5 Minutes After – 15 Minutes After – 30 Minutes After – 1 Hour After – 2 Hours After – 3 Hours After • Highlight your choice and press OK • When choices have been selected, highlight SAVE CHANGES and press OK •...
-
Page 19: View Upcoming/Scheduled Recordings
When do my programs get deleted If the system has less than 25 MB of free disk space (which allows only a few minutes of playing time), the oldest program, based on the recording start date, is automatically deleted. To ensure important programs are saved, monitor the disk usage and pre-emptively delete old or unwanted recordings. - Page 20 • After the program fi nishes playing the Finished screen appears with the following menu options: • START OVER – Watch the program again • ERASE – Erase the program • RECORDED TV – Returns to recorded programs for another selection •...
-
Page 21: Cancel, Stop, Erase Recordings
Cancel, stop, erase recordings How to cancel recording from the Guide The easiest way to cancel a single or series recording is by using the Guide. Individually scheduled recordings are marked by a red dot, and series recordings are marked by three overlapping dots. •... -
Page 22: Resolving Recording Confl Icts
Resolving recording confl icts The PVR can record three programs at a time. Recording confl icts occur when additional recordings are attempted. How to resolve a single recording donfl ict When an individual recording confl icts with one or more previously scheduled recordings, a Recording Confl ict screen alerts you to the problem. -
Page 23: Mypvr
MyPVR With MyPVR you can record TV from anywhere you have an Internet connection. Set your PVR from your computer or mobile device and never miss a show. Just go to mts.ca/myaccount to schedule the recording. You can also delete recordings to free up PVR space. -
Page 24: Controlling Video On Demand Programs
Controlling Video On Demand programs You can control Video On Demand using the PAUSE, PLAY, STOP, REW, FF, SKIP REPLAY buttons. You are unsure of the expiration date for a video Watch rented movies unlimited times within the specifi ed timeframe noted in the movie information synopsis. •... -
Page 25: Parental & Rental Locking - Vod And Live Tv
Parental & Rental Locking – VOD and Live TV Default settings for parental locking • MTS TV Parental Control locks are set at 18A by default • Locked channels and programs still appear in the Guide and they can be scheduled to record, however the PIN is required to watch recorded locked programs •... -
Page 26: Getting Ready To Use Parental Locking
Getting ready to use parental locking • Press MENU • Use the DOWN ARROW to highlight SETTINGS • Highlight PARENTAL CONTROLS, and press OK • Highlight PARENTAL LOCKING, and press OK • A default PIN has been pre-set by MTS to 1234 to prevent access to Adult Content •... -
Page 27: Rental Locking
• To unlock the entire day, highlight UNLOCK ALL, and press OK. All blocks of time will now have the lock icons removed • To show only the locked time blocks for the day, highlight VIEW LOCKED ONLY and press OK. The VIEW LOCKED ONLY option becomes VIEW ALL •... -
Page 28: Changing The Pin
Changing the PIN • Press MENU • Press the DOWN ARROW to highlight SETTINGS • Highlight PARENTAL CONTROLS, and press OK • Highlight PARENTAL LOCKING, and press OK • Enter the four-digit PIN • Use the ARROW buttons to highlight CHANGE PIN, and press OK •... -
Page 29: Apps On Tv
Apps on TV We are constantly adding new apps to our TV service. Check mts.ca/ultimatetv for the most up-to-date list. To access Apps on TV you must also subscribe to MTS High Speed Internet service (any plan other than Light and Super Max). Visit our Apps on TV demo channel (channel 96) to try out our apps. -
Page 30: Ultimate Picks
Ultimate Picks Ultimate Picks lets you keep track of up to six shows at once within a genre! Choose from a selection of genres right on your TV screen like Kids, Movies, and Sports. • Tune to channel 92 and press OK •... -
Page 31: On-Tv Messaging
On-TV messages MTS Ultimate TV ‘Entertainment News’ and ‘TV Service’ message notifi cations will show up on your TV. A small window will pop-up in the lower right corner of your TV screen, indicating you have been sent a message. -
Page 32: How Do I Know Which Messages In The Log Have Been Viewed
How do I know which messages in the log have been viewed? The read / unread status of the messages are easy to see: • Messages that have been read will have an “open” envelope icon • Messages that have not yet been read will have a “new” envelope icon Purchasing Add-Ons MTS TV will let you know when there is an opportunity to purchase ‘add-ons’, such as specialty channels, through your TV. -
Page 33: The Remotes
Remote Controls There are 5 remote controls for Ultimate TV service. Each remote has slightly diff erent buttons and diff erent programming instructions, but the buttons on each remote operate in the same way. Look for the Motorola symbol on... -
Page 34: Remote Control Programming
User Tip: For the MXv4 (RF) remote, the mode Key (TV, DVD or AUX) will blink 5 times with each key press when batteries need replacement. Program your MTS Ultimate TV remote to control your TV, DVD, Home Theatre receiver, or other devices You can program your MTS TV Remote to control other devices using the TV, DVD, and mode keys. - Page 35 Program the TV, DVD, or AUX mode keys for ten popular brands of equipment Black MXv4 (RF) remote only: 1. Power on the device you want to program. Locate the 4-digit set up code for the device you want to program from the Manufacturer Code List 2.
- Page 36 Black MXv3 (RF) remote: 1. Turn on the device you want to control and point the remote at that device 2. Press and hold the mode key (i.e. TV, DVD, or AUX) you want to program 3. Without releasing the selected mode key (i.e. TV, DVD, or AUX), press and hold the OK key simultaneously 4.
-
Page 37: Power Control For Multiple Devices
(Black remotes only) If the search method doesn’t fi nd the code for your device, you can use the existing remote from your device to “teach” your MTS Ultimate TV remote how to control that device. Learning commands Motorola (MTS) -
Page 38: Set Volume Options For Multiple Devices
Black MXv4 (RF) with MTS logo remote: 1. Position your MTS TV remote 1-2 inches away from the device remote. Make sure the infrared ends of the remotes are pointed toward each other. e pointed toward each other. MXv4 Remote (RF) Your original remote 2. - Page 39 Lock the volume controls to one device Silver/charcoal remote: 1. Press and hold the STB/MTS key and hold the OK key simultaneously on the remote control 2. Release both the STB/MTS key and the OK key – all the mode keys will fl ash twice indicating programming mode 3.
-
Page 40: Reset The Remote
NOTE: If a programmed mode key has no volume commands of its own, then the volume control will normally operate the TV. If an invalid key is pressed, the selected mode key light fl ashes for 3 seconds and turns off . The remote control returns to normal operation and you will need to start over. -
Page 41: Connections And Devices
Set-top boxes with hard drives and those without hard drives have identical front panels and rear panel connectors; only the size varies. Ultimate TV has two PVRs (set-top boxes) – VIP 2262 and VIP 1216. Set-up instructions for both are included here. VIP 1216 PVR (160GB Hard Drive) - Page 42 Connecting to an HDTV, use one of: HDMI off ers higher quality than component video. If your HDTV has an HDMI input, use the HDMI connector. HDMI carries HDMI video and audio. If you connect your HDTV using HDMI, no ad- ditional audio connection to the TV is needed.
- Page 43 Connect to an HDTV – Video only • To determine your best connection, refer to Video Connection Options • If you are connecting to a DVI or Y Pb Pr input on your TV, a separate audio connection is required. Refer to Connect to an HDTV –...
- Page 44 VIP 2262 PVR – Option 2 Connect to an HDTV – Audio only • To determine your best connection, refer to Video Connection Options. • If you are connecting to a DVI or Y Pb Pr input on your TV, a separate audio connection is required. Refer to Connect to an HDTV –...
- Page 45 VIP 2262 Connect to a home theatre receiver – Audio only • To determine your best connection, refer to Audio Connection Options • This video connection method does not support HD video. For more information, see Connect an HDTV – Audio Only VIP 1216 Set-top box...
- Page 46 VIP 2262 – Option 1 VIP 2262 – Option 2...
- Page 47 Connect to a stereo TV • To determine your best connection, refer to Video Connection Options VIP 1216 Set-top box POWER TO TV TO WALL OPTICAL (VIDEO OUT) +12V (VIDEO IN) HDMI NETWORK S-Video RCA-type Video S-VIDEO VIDEO OUT AUDIO OUT Video in RCA-type Optical...
- Page 48 Connect to a stereo TV and stereo VCR • To determine your best connection, refer to Video Connection Options • This video connection method does not support HD video. For more information, see Connect an HDTV – Video Only VIP 1216 Set-top box POWER TO TV...
- Page 49 VIP 2262 – Option 2...
- Page 50 Connect to a home theatre receiver, TV, and VCR • To determine your best connection, refer to Video Connection Options • This video connection method does not support HD video. For more information, see Connect an HDTV – Video Only Set-top box POWER TO TV...
-
Page 51: Troubleshooting
Troubleshooting The below information should help you with troubleshooting issues with your MTS Ultimate TV service. If your problem is not resolved by this troubleshooting information, please call us, anytime, at 204-225-5687. General Troubleshooting Resetting the MTS Ultimate TV set-top box •... -
Page 52: Audio And Picture Troubleshooting
Program Guide has no channel or program information Occasionally, a delay occurs in the delivery of program Guide information. • If the delay is more than a few minutes, press the GUIDE button to display the program guide, and then wait at least two minutes before taking further action If cells in the program guide are labelled “No Information,”... - Page 53 There is no audio from the centre and/or surrounding speakers of a home theatre receiver connected to the MTS Ultimate TV set-top box • Not all Dolby Digital programs feature full 5.1 surround sound. In some cases the programs may only contain left and right stereo audio.
- Page 54 Increase/decrease set-top box volume Mute/unmute set-top box volume Setup Last button The LAST button can either show you a list of the last 5 channels you have watched (called the Recent Panel), or tune you immediately to the last channel you were watching. The LAST button is defaulted to show you the Recent Panel.
- Page 55 Program Guide and Menus are available but no video • Ensure the TV, the set-top box, and all other relevant pieces of equipment are plugged in, turned on, and properly connected • Ensure the set-top box power switch is turned on •...
- Page 56 Turning system sound eff ects on and off As you press buttons on your remote control, sound eff ects, such as beeps and clicks, are heard. You can turn these sound eff ects on and off as you choose. • Press MENU on the remote control. •...
-
Page 57: Guide Troubleshooting
Guide Troubleshooting Channels are missing in the Program Guide The program guide appears on-screen correctly, but some channels in the program guide are not showing. Check the Customize Channels Settings screen to determine if channels have been selected to not show in the guide. This feature aff... -
Page 58: Pvr Troubleshooting
PVR Troubleshooting Cannot record a program • Ensure the set-top box has PVR functionality and that you are subscribed to the MTS PVR service • Movies and programs within the Video on Demand service are copy-written material and cannot be recorded •... -
Page 59: Remote Troubleshooting
• Check that there is power to your set-top box. You will see a green light around the power button on the front panel • Check that your TV’s Input/Source is set to the type of cable that is connecting the MTS Ultimate TV set-top box to your TV set (i.e., Component or HDMI)
Need help?
Do you have a question about the Ultimate TV and is the answer not in the manual?
Questions and answers