Table of Contents
Advertisement
Quick Links
Advertisement
Table of Contents

Summary of Contents for IQ PBX600
-
Page 1: User Manual
User Manual Version 16... -
Page 2: Table Of Contents
IQ PBX 600 User Manual Table of Contents 1. Introduction ..................4 1.1 Features ................... 4 1.2 Hardware Specifications ..............5 1.2.1 Exterior Appearance ..............5 2. System set up..................6 2.1 Connection Drawing ................6 ... - Page 3 IQ PBX 600 User Manual 3.6 Network Settings ................88 3.6.1 LAN Settings ................88 3.6.2 WAN Settings ................90 3.6.3 Static Route ................91 3.6.4 Firewall ..................92 3.6.5 DHCP Server ................96 ...
-
Page 4: Introduction
IQ PBX 600 User Manual 1. Introduction IQPBX600 —IP-PBX for Small Businesses/Home Office IQPBX600 is a standalone embedded hybrid PBX for small businesses and remote branch offices of larger organizations (1-100 users per site). IQPBX600 also offers a hybrid solution (a combination of VoIP applications using legacy telecom equipment) alternative for enterprises who are not yet ready to migrate to a complete VoIP solution. -
Page 5: Hardware Specifications
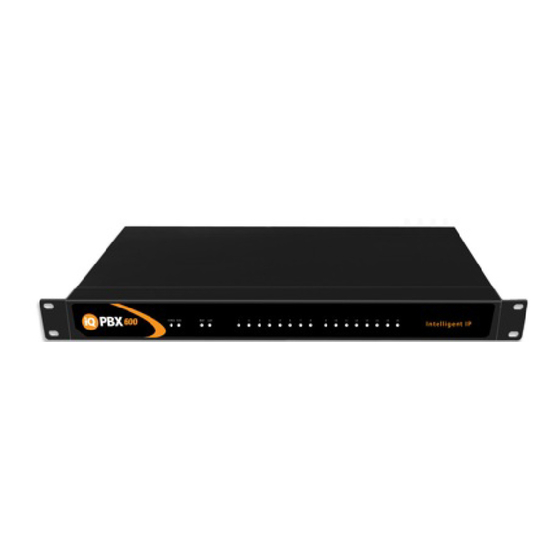
IQ PBX 600 User Manual 1.2 Hardware Specifications 1.2.1 Exterior Appearance A. IQPBX600 Front Panel Identifying Green LED: Indicates correct power is being supplied to the unit Green LED: Indicates the IQPBX600 Pro is fully functional. Green LED: Indicates stable WAN Port connection Green LED: Indicates stable LAN Port connection LED: Indicates presence of an FXO/GSM port. -
Page 6: System Set Up
IQ PBX 600 User Manual 2. System set up 2.1 Connection Drawing A. IQPBX600 Figure 2-1 www.yeastar.com Page 6... -
Page 7: Connecting Ethernet Cable
IQ PBX 600 User Manual B. IQPBX600 Rear Panel view Figure 2-2 2.2 Connecting Ethernet Cable IQPBX600 provides two 10/100M Ethernet ports with RJ45 interface and LED indicator. Plug Ethernet Cable into IQPBX600’s Ethernet port, and then connect the other end of the Ethernet Cable with a hub, switch, router, LAN or WAN. -
Page 8: Managing Iqpbx600
IQ PBX 600 User Manual 3. Managing IQPBX600 3.1 Administrator Login From your web browser, input the IP address of the IQPBX600 server. If this is the first time you are configuring IQPBX600, please use the default settings below (your PC should be in the same local network with... -
Page 9: Status Monitor
IQ PBX 600 User Manual 3.2 Status Monitor 3.2.1 Line Status Figure 3.2.1 IQPBX600 Status Description: Extensions: : Extension is unregistered : Extension is idle 3) : Extension is ringing 4) : Extension is busy in a call 5) : Extension is on hold... -
Page 10: Basic
IQ PBX 600 User Manual Status Idle: The port is idle. Busy: The port is in use. Disconnected: The port hasn’t connected the PSTN line. More detail message, please refer to the LED identifying of front panel. GSM Trunk: Status Idle: The port is idle. - Page 11 IQ PBX 600 User Manual Figure 3.3.1 3.3.1.1 Analog Extensions (FXS) Edit Analog Extensions On the administration page of FXS extensions, click ‘Edit’ on the extension that you want to edit, and modify the following information on the popup window 1) General ·Extension...
- Page 12 IQ PBX 600 User Manual ·Voicemail Access PIN # Voicemail Password for this extension, i.e. ‘1234’ . 3) Mail Setting ·Enable Send Voicemail Once enabled, the voicemail will be sent to the below email address as an attachment. ·Send Voicemail to Email Address This option defines whether or not a voicemails/Fax is sent to the Email address as an attachment.
- Page 13 IQ PBX 600 User Manual login to the IQPBX600 User Web interface by using their extension number and voicemail PIN # as the login and password respectively. ·DND Do not Disturb. ·Ring Out Check this option if you want to custom the ring time. Tone will stop over the time defined.
- Page 14 IQ PBX 600 User Manual Note: for example, if 500 want to monitor extension 501, we need to enable the 'allow being spied ' for 501, and choose the spy mode for extension 500. Then pick up 500 and dial “feature codes + 501” to start monitoring when 501 is in a call. Figure 3.3.1.1 3.3.1.2 VOIP Extension A VOIP extension is a SIP/IAX Account that allows an IP Phone or an IP Soft- Phone client to register on IQPBX600.
- Page 15 IQ PBX 600 User Manual 1) General ·Type Extension type: SIP,IAX or SIP/IAX. SIP – The extension sends and receives calls using the VoIP protocol SIP. IAX -The extension sends and receives calls using the VoIP protocol IAX. ·Extension The numbered extension, i.e. 1234, that will be associated with this particular User / Phone.
- Page 16 IQ PBX 600 User Manual Note: *4 is the default setting, it can be changed under Feature Codes -> General -> Call Pickup. 5) Follow me (Call Forwarding) Call forwarding for an extension can be configured here. The administrator can configure Follow Me option for this extension.
- Page 17 IQ PBX 600 User Manual Send check alive packets to IP phones ·SIP Transport This will be the transport method used by the extension. The options are UDP (default) or TCP or TLS. ·DTMF Mode – RFC2833, Info, Inband, Auto.
- Page 18 IQ PBX 600 User Manual www.yeastar.com Page 18...
- Page 19 IQ PBX 600 User Manual Figure 3.3.1.2 www.yeastar.com Page 19...
-
Page 20: Trunk
IQ PBX 600 User Manual 2. Add Bulk Extensions Go to Extensions VOIP Extensions Add Bulk Extensions. 1) Select the number of extensions that you would like to create. 2) Select the type of extension that you would like to create. - Page 21 IQ PBX 600 User Manual Figure 3.3.2 3.3.2.1 Analog Trunk (FXO) 1. Edit Analog Trunk (FXO) On the Trunk administration page, click ‘Edit’ on the selected trunk and modify its properties in the popup window: 1)General ·Trunk Name A unique label used to identify this trunk when listed in outbound rules, incoming rules, etc.
- Page 22 IQ PBX 600 User Manual be achieved if set to 6 or even 8. Remember, the higher the number, the more time will be required to release a channel. A higher setting lowers the probability that you will encounter random hang-ups.
- Page 23 IQ PBX 600 User Manual For Fxo trunks, this option forces IQPBX600 to clarify Caller ID incoming calls. Figure 3.3.2.1 3.3.2.2 GSM Trunk 1. Edit GSM Trunk 1)General ·Trunk Name A unique label used to identify this trunk when listed in outbound rules, incoming rules, etc.
- Page 24 IQ PBX 600 User Manual Figure 3.3.2.2 3.3.2.3 BRI Trunk 1. Edit BRI Trunk 1)General ·Trunk Name A unique label used to identify this trunk when listed in outbound rules, incoming rules, etc. Ex: 'BriTrunk1' ·Signaling Signaling method. BRI-CPE: ISDN BRI in TE mode and Point to Point.
- Page 25 IQ PBX 600 User Manual Sets the time in seconds between restart of unused channels . Some PBXs Do not like channel restarts. so set the interval to a very long interval e.g. 100000000 or 'never' to disable *entirely*. If you are in Israel, the following is...
- Page 26 IQ PBX 600 User Manual ·Codec You can choose alaw or ulaw codes. 2) CallerID Prefix ·International Prefix When there are international calls coming in via this BRI trunk, the International Prefix you have set here will be added before the CID. So you know this is an international call before you answer it.
- Page 27 IQ PBX 600 User Manual Figure 3.3.2.3 3.3.2.4 VOIP Trunk 1. Add SIP Trunk Input correct SIP information (provide by VOIP provider). Inaccurate information will prevent the trunk from registering. 1) General setting ·Type SIP – Identifies whether the trunk sends and receives calls using the VoIP protocol SIP ·Provider Name...
- Page 28 IQ PBX 600 User Manual ·Hostname/IP Service provider’s hostname or IP address.5060 is the standard port number used by SIP protocol. Do not change this part if it is not required. .Domain VoIP provider’s server domain name . ·Username Username of SIP account . Used for SIP trunk registration.
- Page 29 IQ PBX 600 User Manual ·Transport This will be the transport method used by the SIP Trunk. This method is given by the SIP trunk provider. The options are UDP (default) or TCP or TLS. ·Enable SRTP Define if SRTP is enabled for this trunk ·Qualify...
- Page 30 IQ PBX 600 User Manual Figure 3.3.2.4.1 2. Add IAX Trunk Input correct IAX information (provided by VOIP provider). Inaccurate information will prevent the trunk from registering. 1) General ·Type IAX – Identifies whether the trunk sends and receives calls by using the VoIP protocol IAX.
- Page 31 IQ PBX 600 User Manual ·Hostname/IP Service provider’s hostname or IP address. 4569 is the standard port number used by IAX protocol. Do not change this part if it is not required. ·Username Username of IAX account . Used for IAX trunk registration.
- Page 32 IQ PBX 600 User Manual Figure 3.3.3.4.2 3.3.2.5 Service Provider 1. Add Service Provider To Create the Service provider definition you need to complete the following VoIP fields. 1) General ·Type SIP or IAX SIP – Identifies whether the trunk sends and receives calls by using the VoIP protocol SIP.
- Page 33 IQ PBX 600 User Manual standard port number used by IAX protocol. Do not change this part if it is not required. ·Maximum Channels Controls the maximum number of outbound channels (simultaneous calls) that can be used on this trunk . Inbound calls are not counted against the maximum.
-
Page 34: Outbound Routes
IQ PBX 600 User Manual Figure 3.3.2.5 3.3.3 Outbound Routes Outbound routing defines how outgoing calls are processed through the trunks. www.yeastar.com Page 34... - Page 35 IQ PBX 600 User Manual Figure 3.3.3 3.3.3.1 New Outbound Route Click ‘New Outbound Route’ and fill in the corresponding information in the popup window. 1)General ·Route Name Name of this Outbound Route . Eg: 'Local' or 'Long Distance' etc.
- Page 36 IQ PBX 600 User Manual ·Strip digits from front Allows the user to specify the number of digits that will be stripped from the front of the phone number before the call is placed. For example, if users must press 0 before dialing a phone number, one digit should be stripped from the dial string before the call is placed.
-
Page 37: Phone Provisioning
IQ PBX 600 User Manual Figure 3.3.3.1 3.3.4 Phone Provisioning The Auto Provision sub menu provides users a method to Auto Provision IP Phone after the Express Setup process. Note: Auto Provision functions fully test with these models: Yealink (T12,T18,T20,T22,T26,T28,T32,T38,VP530,VP-2009) - Page 38 IQ PBX 600 User Manual When provisioning Yealink and Snom IP phone, IQPBX600 is not needed to be set as the only DHCP server any more. Figure 3.3.4 3.3.4.1 General Settings for Yealink In this page, you can configure it before provisioning Yealink IP phones,...
- Page 39 IQ PBX 600 User Manual Figure 3.3.4.1 www.yeastar.com Page 39...
- Page 40 IQ PBX 600 User Manual 3.3.4.2 Phone book You can add your contacts here and provision them to your IP phone. Figure 3.3.4.2 1) Add Contact ·Type There are three types: None, VIP and Deny list (Blacklist). ·Group There are 5 groups: None, Friends, Family, Work, Colleagues list.
- Page 41 IQ PBX 600 User Manual Input the first name of this contact. Only works with Snom phone. ·Family Name Input the family of this contact. Only works with Snom phone. ·Office Number Input the office number here ·Mobile Number Input the mobile number here ·Home Number...
- Page 42 IQ PBX 600 User Manual Figure 3.3.4.2.1 2) Upload Phonebook You can upload a phonebook before auto provision, which will be provisioned to the IP phone when using auto provision feature to configure your IP phones. The format of phonebook should be *.xml.
- Page 43 IQ PBX 600 User Manual 1. Add new phone via webpage Click ‘Add Phone’ and fill in the corresponding information in the popup window. 1) General · Enabled Choose yes or no to enable or disable this extension · MAC address Input the MAC address of IP phone ·Name...
- Page 44 IQ PBX 600 User Manual Figure 3.3.4.3 2) Audio codec In this section, we can design the allowed codec for IP phone Figure 3.3.4.4 3) Line keys settings www.yeastar.com Page 44...
- Page 45 IQ PBX 600 User Manual Configure the DSS keys/Function Keys Figure 3.3.4.5 3.3.4.3 Non configured phone In this section, IQPBX600 will scan all the supported IP phones and display here, we can click the 'MAC address' of IP phone and input the corresponding information in the popup window, like the picture shows below www.yeastar.com...
-
Page 46: Inbound Call Control
IQ PBX 600 User Manual Figure 3.3.4.6 3.3.4.4 Upload a file Click ‘Upload a file’ and choose the configure file of IP phone in the popup window. Note: the file format must be .cfg Please edit the configuration files in advance before uploading. - Page 47 IQ PBX 600 User Manual Figure 3.4.1 3.4.1.1 Create IVR Click ‘Create New IVR’. 1)General ·Number IQPBX600 treats IVR as an extension; you can dial this extension number to reach the IVR. ·Name A name for the IVR ·Prompt The prompt recording that will be played when this IVR is reached.
- Page 48 IQ PBX 600 User Manual No Action: Do nothing Connect to Extension: Connect the call to an extension. Connect to Voicemail: Connect the call to the voicemail of an extension Connect to Ring Group: Connect the call to a ring group.
-
Page 49: Queues
IQ PBX 600 User Manual Figure 3.4.1.1 3.4.2 Queues Call Queues give users (i.e. call centers) an efficient means to have their calls answered in the order they were received to deliver top tier customer service. Call queues allow calls to be sequenced to one or more agents. - Page 50 IQ PBX 600 User Manual ·Queue Name A name for the Queue. ·Queue Number Use this number to dial into the queue, or transfer callers to this number to put them into the queue. ·Queue Password You can require agents to enter a password before they can login to this queue.
- Page 51 IQ PBX 600 User Manual 4) Periodic Announcements ·Prompt Select a prompt file to play periodically. ·Frequency How often to announce a prompt to the caller. 5) Events If a caller presses the key while waiting in the queue, this setting selects which action should process the key press.
- Page 52 IQ PBX 600 User Manual Queue can ring them with a new call. The default is 30. Figure 3.4.2 www.yeastar.com Page 52...
-
Page 53: Custom Prompts
IQ PBX 600 User Manual 3.4.3 Custom Prompts 1. Record new Prompt The administrator can use this screen to record custom prompts by doing the following: 1)Click ‘Record New Custom Prompt’ 2) Input the desired file name on the popup window and choose an extension to call for recording (such as 500). - Page 54 IQ PBX 600 User Manual Figure 3.4.4 3.4.4.1 Create Ring Group Click ‘New Ring Group’ to enter into the Manage Ring Groups page 1)General ·Ring Group Name This option defines a name for this group, i.e. ‘Sales’. ‘Ring Group Name’ is a label to help you identify this group in the group list.
- Page 55 IQ PBX 600 User Manual ‘Selected’ box. 3) Destination If No Answer When all members on this group fail to answer the call, system will handle the call according to the selected destination. Figure 3.4.4.1 Note: the maximum Number of ring groups is 16. Each group may have upto 20 3.4.5...
- Page 56 IQ PBX 600 User Manual Figure 3.4.5 3.4.5.1 Create Inbound Route Click ‘New Inbound Route’ to enter to the Manage Inbound Routes page. When an incoming call arrives, the system will first check ‘fax detection’, then ‘Holidays’, and ‘Business Days’.
- Page 57 IQ PBX 600 User Manual For more information, please refer to Appendix G How to Use DID. ·Extension Define the extension for DID number. This field is only valid when you use BRI, SIP, SPS or SPX trunk for this inbound route. You can only input number and ‘-‘in this field, and the format can be xxx or xxx-xxx.
- Page 58 IQ PBX 600 User Manual 4) Business Days Define where the calls will be routed during Business Days. ·Office Days Select one defined business days office days. ·Office Hours Destination Configure where to route the incoming calls during office hours.
- Page 59 IQ PBX 600 User Manual Now if staff of A would like to make a call to a telephone or mobile phone in China from the extension of A but via the FXS line of B, that can be done by this configuration.
-
Page 60: Blacklist
IQ PBX 600 User Manual Figure 3.4.5.1 3.4.6 Blacklist Blacklist is used to block an incoming/outgoing call. If the number of incoming/outgoing call is registered in the number blacklist, the caller will hear the following prompt: “The number you have dialed is not in service. Please check the number and try again”. - Page 61 IQ PBX 600 User Manual Figure 3.4.6 3.4.6.1 Create Blacklist Click ‘New Blacklist’ to create a new number blacklist. Figure 3.4.6.1 ·Blacklist number Enter the number you would like to block. ·Type The number blocked for incoming or outgoing calls or both.
-
Page 62: Internal Settings
IQ PBX 600 User Manual 3.5 Internal Settings 3.5.1 Options 1) General ·Ring Timeout Number of seconds to ring a device before handling the call as per the extension’s Follow Me settings . Default value is 30s. .MAX call duration The absolute maximum amount of time permitted for a call. - Page 63 IQ PBX 600 User Manual before called party answers the call. · Distinctive Caller ID When incoming calls are routed from ring group/queue/IVR, the caller ID displays with the name of ring group/queue/IVR,for example 5503302 (ring group=default) Note: To display IVR's name, please press the key instead of the extension number directly.
-
Page 64: Business Hours
IQ PBX 600 User Manual Figure 3.5.1 3.5.2 Business Hours 1) General ·Enable or Disable Business Hours 2) Others ·Enable Office Closed Timing By dialing *81 (*81 is default) on an extension will force the office time closed for the server whatever the general setting is. -
Page 65: Feature Codes
IQ PBX 600 User Manual Figure 3.5.2 3.5.3 Feature Codes 1) General ·One Touch Record A user may initiate or stop call recording by dialing *1 during a call. (*1 is the default setting) ·Extension for Checking Voicemail Users can check their Voicemail by dialing *2 on their phone (*2 is the default setting). - Page 66 IQ PBX 600 User Manual ·Extension Pickup Users may pick up a specific extension’s incoming call by dialing *04+extension number on their phone (*04 is the default setting) ·Intercom Define the feature code that is used to dial an extension in intercom mode. For instance setting this value to *5 would allow you to initiate an intercom call with extension 501 by dialing *5501.
- Page 67 IQ PBX 600 User Manual Busy forward to Voicemail: Enabled No answer forward to Voicemail: Enabled Do not disturb: Disabled ·Enable Forward All Calls Users may enable always forward by calling *71 on their phone (*71 is the default setting) ·Disable Forward All Calls...
-
Page 68: Sip Settings
IQ PBX 600 User Manual ·Disable Do Not Disturb Users may disable do not disturb by calling *075 on their phone (*075 is the default setting) Figure 3.5.3 3.5.4 SIP Settings 1) General ·UDP Port Port use for sip registrations, Default is 5060. - Page 69 IQ PBX 600 User Manual Maximum duration (in seconds) of a SIP registration . Default is 3600 seconds. ·Min Registration/Subscription Time Minimum duration (in seconds) of a SIP registration . Default is 60 seconds. ·Default Incoming/Outgoing Registration Time Default Incoming/Outgoing Registration Time: Default duration (in seconds) of incoming/outgoing registration.
- Page 70 IQ PBX 600 User Manual ·STUN Address The STUN server allows clients to find out their public address, the type of NAT they are behind and the internet side port associated by the NAT with a particular local port. This information is used to set up UDP communication between the client and the VOIP provider and so establish a call.
- Page 71 IQ PBX 600 User Manual itself. Enabling this option causes the system to attempt to negotiate the endpoints to route packets to each other directly, bypassing the system. It is not always possible for the system to negotiate endpoint-to-endpoint media routing.
- Page 72 IQ PBX 600 User Manual to users by setting the value. 5) Advanced Settings ·From Field Where to get the caller ID in sip packet. ·To Field Where to get the DID in sip packet. ·180 Ringing It is set when the telecom provider needs. Usually it is not needed.
- Page 73 IQ PBX 600 User Manual Figure 3.5.4 www.yeastar.com Page 73...
-
Page 74: Iax Settings
IQ PBX 600 User Manual 3.5.5 IAX Settings 1) General ·Bind Port Port use for IAX2 registrations, Default is 4569. ·Bandwidth Low/medium/high with this option you can control which codec to be used. ·Min Registration Time Minimum duration (in seconds) of a IAX2 registration. Default is 60 seconds. -
Page 75: Voicemail Settings
IQ PBX 600 User Manual Note: If you would like to use G.729, please enter your license. Figure 3.5.5 3.5.6 Voicemail Settings 1) General Voicemail Settings a) Message Options ·Max Messages per Folder Set the maximum number of messages that can be stored in a single voicemail box. - Page 76 IQ PBX 600 User Manual ·Unavailable Prompt Greeting played when the extension called is Unavailable. Skip greeting: Do not play a greeting. Play Unavailable greeting: play the extension Unavailable greeting. ·Leave a Message Prompt Greeting when ask the caller to dial 5 to leave a message.
-
Page 77: Sms Settings
IQ PBX 600 User Manual SMTP Port: the default value is 25. ·Use SSL/TLS to send secure message to server If the server of sending email needs to authenticate the sender, you need to select the check box. Note: Must be selected for Gmail or exchange server. - Page 78 IQ PBX 600 User Manual 1) Enable SMS to Email If you enable this, as soon as the GSM trunks receive small messages, IQPBX600 will send the text of this message to the email addresses listed on the Email List.
- Page 79 IQ PBX 600 User Manual Note: 1. If you want to use “SMS to Email”, please configure POP3 setting. 2. If you configure the POP3 setting, IQPBX600 will download emails from the mail server regularly. Once downloaded, the emails will be deleted from the mail server.
-
Page 80: Disa
IQ PBX 600 User Manual Figure 3.5.7.2 3.5.8 DISA DISA (Direct Inward System Access) allows someone calling in from outside the telephone switch (PBX) to obtain an ‘internal’ system dial tone and make calls as if they were using one of the extensions attached to the telephone switch. To use DISA, a user calls a DISA number, which invokes the DISA application. - Page 81 IQ PBX 600 User Manual Figure 3.5.8.1 To add a new DISA application, click the ADD DISA button. Figure 3.5.8.2 1) General ·DISA Name Give this DISA application a name to help you identify it. ·PIN # The password for this DISA .
-
Page 82: Conferencing
IQ PBX 600 User Manual 2) Member Outbound Routes Used to set the outbound routes that can be accessed from this DISA . 3.5.9 Conferencing Conference Calls increase employee efficiency and productivity, and provide a more cost-effective way to hold meetings. Conference agents can dial * to access to the settings options and the admin can kick the last user out and can lock the conference room. - Page 83 IQ PBX 600 User Manual Figure 3.5.10.1 ·Paging Group Number Defines the numbered extension that may be dialed to reach this group. ·Duplex Paging is typically one way for announcements only. Checking this will make paging duplex, allowing all users in the group to talk and be heard by all.
-
Page 84: Dnis Settings
IQ PBX 600 User Manual 3.5.11 DNIS Settings DNIS (Dialed Number Identification Service) is a telephone service that identifies for the receiver of a call the number that the caller dialed. Note: 1. DID number is not available in PSTN/GSM/UMTS trunks 2. -
Page 85: Callback Settings
IQ PBX 600 User Manual to keep track of calls by particular users or sets of users. • PIN's entered are checked against those stored by the system. If an invalid PIN is entered, the PIN is requested again. • The system administrator can configure certain numbers or types of numbers to require entry of a PIN before you can continue making a call to such a number. - Page 86 IQ PBX 600 User Manual If you want to apply Callback function to all incoming numbers, please tick Allow All numbers. Follow the step to use this function. Step 1: Enable Callback. Inbound Routes – Choose “Yes” on” Enable Callback” to enable this function.
-
Page 87: Speed Dial Settings
IQ PBX 600 User Manual 9123456789 to its trunk when call to this number. You should configure 123456789 as the call back number and add 9 before the callback is placed. You can add ‘w’ for analog trunks for some delay too. -
Page 88: Music On Hold Prompts
IQ PBX 600 User Manual Figure 3.5.14 3.5.15 Music on Hold Prompts The administrator can upload on hold music as follows: 1) Click ‘Upload Music on Prompt ’ 2) Click ‘Browse’ to choose the desired audio file. 3) Click ‘Upload’ to upload the selected file. - Page 89 IQ PBX 600 User Manual ·Enable SSH This is the advance way to access the device, you can use the putty software to access the device. In the SSH access, you can do more advance setting and debug. · Port: the default is 8022, ·Hostname...
-
Page 90: Wan Settings
IQ PBX 600 User Manual Figure 3.6.1 3.6.2 WAN Settings Note: Only have WAN port’s hardware version support this functions. It supports three connection types: DHCP (obtain an IP automatically), PPPoE, and Static IP Address. ·DHCP .If your ISP says that you are connecting through DHCP or a dynamic IP address from your ISP, perform these steps: Step1: Select DHCP as the WAN Connection Type. -
Page 91: Static Route
IQ PBX 600 User Manual ·PPPoE If your DSL provider says that you are connecting through PPPoE or if you normally enter a user name and password to access the Internet, perform these steps: Step1: Select PPPoE as the WAN Connection Type. -
Page 92: Firewall
IQ PBX 600 User Manual ·Subnet Mask Specify the destination network portion. ·Gateway Which gateway IQPBX600 will go through when accessing the destination network. ·Metric The cost of a route is calculated by using what are called routing metric. Routing metrics are assigned to routes by routing protocols to provide measurable statistic which can be used to judge how useful (how low cost) a route is. - Page 93 IQ PBX 600 User Manual Figure 3.6.4 1) Enable Firewall Enable the firewall to protect the device. You should reboot the device to let the firewall run successfully. 2) Common Rules ·Name A name for this rule , e.g. ‘HTTP’.
- Page 94 IQ PBX 600 User Manual Ex:192.168.5.0/255.255.255.0 for IP from 192.168.5.0 to 192.168.5.255 . ·MAC Address The format of MAC Address is XX:XX:XX:XX:XX:XX, X means 0~9 or A~F in hex, the A~F are not case sensitive. ·Action Accept: Accept the access from remote hosts.
- Page 95 IQ PBX 600 User Manual Figure 3.6.4.2 4) IP Blacklist You can set some packets accept speed rules here. When a IP address which hasn’t been accepted in common rules sends packets faster than the allowed speed, it will be set as black IP address and blocked automatically.
-
Page 96: Dhcp Server
IQ PBX 600 User Manual Figure 3.6.4.4 5) Other Settings ·Disable Ping Enable this item, net ping from remote hosts will be dropped. ·Drop All When you enable ‘Drop All’ feature, system will drop all packets or connection from other hosts if there are no other rules defined. To avoid locking the devices, at least one ‘TCP’... -
Page 97: Vlan Settings
IQ PBX 600 User Manual 3.6.6 VLAN Settings A VLAN(Virtual LAN) is a logical local area network (or LAN) that extends beyond a single traditional LAN to a group of LAN segments, given specific configurations. 1) VLAN Over Lan ·NO.1 Click the NO.1 you can edit the first VLAN over Lan. - Page 98 IQ PBX 600 User Manual .The VLAN Number is a unique value you assign to each VLAN on a single device. ·VLAN IP Address Set the IP Address for IQPBX600 VLAN over Wan. ·VLAN Subnet Mask Set the Subnet Mask for IQPBX600 VLAN over Wan.
-
Page 99: Vpn Settings
IQ PBX 600 User Manual Figure 3.6.6 3.6.7 VPN Settings A virtual private network (VPN) is a method of computer networking--typically using the public internet--that allows users to privately share information between remote locations, or between a remote location and a business' home network. -
Page 100: System Settings
IQ PBX 600 User Manual ·Password User account’s password . ·Host Name Note: DDNS allows you to access your network using domain names instead of IP address. The service manages changing IP address and updates your domain information dynamically. You must sign up for service through dyndns.org, freedns.afraid.org, www.no-ip.com, www.zoneedit.com... -
Page 101: Password Settings
IQ PBX 600 User Manual Figure 3.7.1 3.7.2 Password Settings The default system password is ‘password’. To change the password, enter the new password and click update. The system will then prompt you re-login using your new password. Figure 3.7.2 3.7.3 Date and Time... -
Page 102: Backup And Restore
IQ PBX 600 User Manual ·Daylight Saving Time Set the mode to Automatic or disabled ·Automatically Synchronize With an Internet Time Server Input the NTP server so that IQPBX600 will update the time automatically ·Set Date & Time Manually Figure 3.7.3 3.7.4 Backup and Restore... -
Page 103: Firmware Update
IQ PBX 600 User Manual Figure 3.7.5 3.7.6 Firmware Update Upgrading of the firmware is possible through the Administrator web interface using a TFTP Server or an HTTP URL. Enter your TFTP Server IP address and firmware file location, then click start to update the firmware. -
Page 104: Reports
IQ PBX 600 User Manual 3.8 Reports 3.8.1 Call Logs The call Log captures all call details, including call time, caller number, callee number, call type, call duration, etc. An administrator can search and filter call data by filter the call logs by call date, caller/callee, trunk, duration, billing duration, status, communication type. -
Page 105: System Info
IQ PBX 600 User Manual Figure 3.8.2 3.8.3 System Info General: Information about hardware version , firmware version and system uptime. LAN: Information about hostname, MAC address, IP address, gateway, Primary DNS and Secondary DNS. Disk Usage: Disk usage information. -
Page 106: Access Mri
IQ PBX 600 User Manual 4. Access MRI MRI (IQPBX600 Recording Interface).Users may access MRI by logging into the MRI web interface with their username (extension number) and voicemail password. 4.1 Allow users to access MRI The extension’s ‘User Web Interface’ option must be checked before the associated user can log into MRI. - Page 107 IQ PBX 600 User Manual address using a web browser. If you are unsure of this address, please contact your network administrator. Figure 4-2 4.3 Voicemail Users can check, delete, move and download voicemail files here. Figure 4-3 www.yeastar.com Page 107...
- Page 108 IQ PBX 600 User Manual 4.4 Record Users can play, delete and download recorded files here. Figure 4-4 4.5 Voicemail Settings ·Voicemail password: new voicemail box password. ·Enter again to confirm: confirm new voicemail box password. ·Email Address: Email address use to receive the voicemail or Fax.
- Page 109 IQ PBX 600 User Manual Figure 4-5 4.6 Settings You can do some basic setting here. Such as call forwarding, DND, Mobile Extension Number. Figure 4-6 www.yeastar.com Page 109...
-
Page 110: Use Iqpbx600
IQ PBX 600 User Manual 5. Use IQPBX600 5.1 Make outbound call To make an outbound call, we need to add trunk first. There are five types of VoIP Trunk: ·Analog Trunk: FXO ports of IQPBX600, connected to a local PSTN. -
Page 111: Sample Routing Via Pstn Trunk
IQ PBX 600 User Manual 5.1.1 Sample Routing via PSTN Trunk Let’s route all inside extensions through an analog trunk by dialing 9. In Outbound Routes, add a new outbound route as below. Figure 5-1 As we can see from the outbound route of ‘pstnout’, all phone numbers starting with 9 will have their first digit stripped off (digit 9) and will be sent to the PSTN (port 1-2). -
Page 112: Sample Routing Via Voip Trunk
IQ PBX 600 User Manual Note: Setting number prefix to wild card and setting Strip to digits from the front will allow all calls to go through this outbound route. 5.1.2 Sample Routing via VoIP Trunk Let’s configure all inside extensions to dial ‘0’ through the VoIP Trunk. - Page 113 IQ PBX 600 User Manual 2. Add Outbound Routes As we can see from the Outbound Route of ‘voipout’, all phone numbers starting with 0 will have their first digit stripped off (digit 0) and will be sent to the SIP Trunk.
-
Page 114: Incoming Call
IQ PBX 600 User Manual 5.2 Incoming call 5.2.1 Sample Routing to an IVR Let’s configure an incoming call to route to the IVR. In the IVR itself, let’s configure digit 0 to route the call to extension 500, and digit 1 to route the call to extension 501. - Page 115 IQ PBX 600 User Manual Figure 5-4 2. Add Inbound Routes As we can see from the Inbound Route of ‘allin’, all incoming calls will be sent to the IVR. www.yeastar.com Page 115...
- Page 116 IQ PBX 600 User Manual Figure 5-5 www.yeastar.com Page 116...
-
Page 117: Appendix A Faq
IQ PBX 600 User Manual APPENDIX A FAQ Q1. How to Register SIP device? 1) Register SIP soft phone Download the x-lite softphone from Counterpath website www.counterpath.com After install the x-lite, right click the panel and select the SIP Account setting and then configure it. -
Page 118: Appendix B How To Configure Auto Backup
IQ PBX 600 User Manual doing this. Step 4: Login to the device with the username ‘admin’ and the password ‘password’, in order to begin reconfiguring the device. APPENDIX B How to Configure Auto backup Before Autobackup can be properly configured, an SMB share folder accessible from IQPBX600 must be set up on a Windows based machine. - Page 119 IQ PBX 600 User Manual status.txt file. Step 3 Configure Auto backup settings on IQPBX600 to Figure B-2 Figure B-2 Auto backup Setting Net-Disk Host/IP: Change this to the IP address of the computer where backup files will be stored.
-
Page 120: Appendix C How To Configure Nat Setting
IQ PBX 600 User Manual Figure B-3 Auto backup setting succeed APPENDIX C How to Configure NAT setting When IQPBX600 is behind a NAT(firewall),you need to configure NAT setting on IQPBX600 if you want to use a remote extension. Please follow section 1 or 2 below depending on your network configuration. - Page 121 IQ PBX 600 User Manual Figure C-1 Assuming that your router’s host address is nimans.3322.org, your local network is from 192.168.5.1-192.168.5.254, and the subnet Mask is 255.255.255.0, the IQPBX600 network settings should configured like Figure C-2 Figure C-2 IQPBX600 Network setting 2.
- Page 122 IQ PBX 600 User Manual Figure C-3 Next, you should configure the NAT settings according to Figure C-4 Figure C-4 External IP Address: The public IP address of IQPBX600 External Host: Leave this blank if no domain has been configured...
-
Page 123: Appendix D How To Use Auto Provision
IQ PBX 600 User Manual APPENDIX D How to Use Auto Provision Step1. Disable DHCP Server on your local network. E.g. Disable DHCP Server on eg: Linksys Router. Figure D-1 Step2. Enable DHCP Server on IQPBX600. Login IQPBX600 web interface, Network Settings DHCP Server Enable DHCP Server. - Page 124 IQ PBX 600 User Manual Figure D-2 Step3. Configure phones on IQPBX600 auto-provision page. 1. Login IQPBX600 web interface, Basic Phone Provisioning Configured Phone. Figure D-3 2. Fill in the phone detail message on the pop-up windows. Input IP Phone’s MAC address, configure Name, Call waiting, Line, Extension, Label, Line active for the phone.
- Page 125 IQ PBX 600 User Manual Figure D-4 Step4. Turn on the power and connect the network cable to IP Phone. Remark: The factory default setting of DHCP for IP Phone is enable, so you can skip this step to step 5.
-
Page 126: Appendix E How Do I Configure Distinctive Ring Tones
IQ PBX 600 User Manual APPENDIX E How Do I Configure Distinctive Ring Tones Step1: On your IP phone, navigate to the Phone settings web configuration page and find the Distinctive Ring Tone section. For each custom ring tone, enter the Internal Ringer Text (can be digits or text) to trigger the ring tone. - Page 127 IQ PBX 600 User Manual Figure E-2 Step3. Finish. www.yeastar.com Page 127...
-
Page 128: Appendix F How To Use Email To Sms
IQ PBX 600 User Manual APPENDIX F How to Use Email to How to use Email to SMS You need to send an email to the specified email address (you set in Email Settings. In this case, it is iqpbx@nimans.com).The content of this email will be sent to the number you want as message. - Page 129 IQ PBX 600 User Manual Figure F-2 3. Send message with PIN code and default GSM port. Format: 500:pincodenumber-phonenumber if the subject is "500:987-12345678", the text of this email(“Welcome to Nimans!”) will be sent to number "12345678" through the first available GSM trunk("987"...
-
Page 130: Appendix G How To Use Did
IQ PBX 600 User Manual APPENDIX G How to Use DID Direct inward dialing (DID), also called direct dial-in (DDI) in Europe and Oceania, is a feature offered by telephone companies for use with their customers' private branch exchange (PBX) systems. In DID service the... - Page 131 IQ PBX 600 User Manual [12345-9] : Any digit in the brackets (in this example, 1,2,3,4,5,6,7,8,9) The ‘.’ Character will match any remaining digits. For example, 9011. will match any phone number that starts with 9011, excluding 9011 itself. The ‘!’ will match none remaining digits, and causes the matching process to complete as soon as it can be determined that no other matches are possible.
- Page 132 IQ PBX 600 User Manual Figure G-2 Example 2: Step1: You set the DID number (6001-6099 in this example). Step2: You set the Extension (6001-6099 in this example). The configuration of this example means when the incoming call with DID number 6001 to 6099 will go to the destination 6001 to 6099(number 6001 to extension 6001, number 6002 to extension 6002).
- Page 133 IQ PBX 600 User Manual Figure G-3 www.yeastar.com Page 133...
-
Page 134: Appendix H How To Use Blf Key To Choose The Pstn Line
IQ PBX 600 User Manual APPENDIX H How to Use BLF Key to Choose the PSTN line. IQPBX600 allows you to choose the specific PSTN line to make outbound call by pressing the BLF key on the IP Phone. Follow the steps to do the configuration with your Yealink phone 1.
Need help?
Do you have a question about the PBX600 and is the answer not in the manual?
Questions and answers