Table of Contents
Advertisement
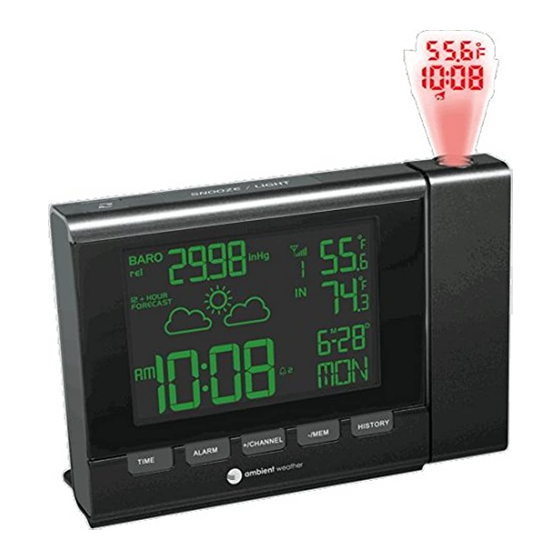
Ambient Weather RC-8401 ClearView Projection Radio
Controlled Alarm Clock with Barometer, Forecast, Indoor
Temperature and Color Changing Outdoor Temperature
Table of Contents
1.
Introduction ..................................................................................................................................... 2
2.
Warnings ......................................................................................................................................... 2
3.
Getting Started ................................................................................................................................ 3
3.1
Product Features ..................................................................................................................... 3
3.1.1
Display Clock ..................................................................................................................... 3
3.1.2
Wireless Transmitter........................................................................................................... 5
3.2
Parts List ................................................................................................................................. 5
3.3
Powering Up ........................................................................................................................... 5
3.3.1 Radio Controlled Clock (RCC) .............................................................................................. 6
3.4
Siting the Wireless Transmitter Outside ................................................................................. 6
4.
Clock Display .................................................................................................................................. 8
4.1
Normal Time Display Mode ................................................................................................... 8
4.2
Alarm Time Display Mode ..................................................................................................... 8
5.
Settings ............................................................................................................................................ 9
5.1
Time, Date, and Language Settings ........................................................................................ 9
5.1.1
Hour Offset ....................................................................................................................... 10
5.2
Alarm Settings ...................................................................................................................... 11
5.2.1
Using the Alarm and Snooze Functions ........................................................................... 11
5.3
Projector and Backlight ........................................................................................................ 12
5.3.1
Using the Projector and Backlight ................................................................................... 12
5.3.2
Projector Rotation ............................................................................................................ 12
5.3.3
Adjusting Projector Focus ................................................................................................ 12
5.4
Barometric Pressure Display and Settings ........................................................................... 13
5.4.1
Barometric Pressure Units of Measure ............................................................................. 13
5.4.2
Absolute Pressure vs. Relative Pressure........................................................................... 13
5.4.3
Relative Pressure Calibration ........................................................................................... 13
5.5
The Forecast Icon ................................................................................................................. 14
5.5.1
Principle of Forecasting based on Barometric Pressure ................................................... 14
5.5.2
Weather Forecast Initialization ......................................................................................... 14
5.6
Viewing Minimum and Maximum Records (Memory Mode) ............................................. 14
5.7
Viewing Historical Data (History Mode) ............................................................................. 14
5.8
Color Changing Feature ....................................................................................................... 15
5.8.1
Manual Color Preference ................................................................................................. 15
5.8.2
Outdoor Temperature Color ............................................................................................. 15
5.9
Low Temperature Notification ............................................................................................. 15
5.10
Back Light On/Off ................................................................................................................ 16
5.11
Back Light Brightness .......................................................................................................... 16
5.12
Wireless Sensor Display ....................................................................................................... 16
5.13
Wireless Sensor Low Battery Indictor .................................................................................. 16
Version 1.1
©Copyright 2016, Ambient LLC. All Rights Reserved.
User Manual
Page 1
Advertisement
Table of Contents

Subscribe to Our Youtube Channel
Related Manuals for Ambient Weather RC-8401


Summary of Contents for Ambient Weather RC-8401
-
Page 1: Table Of Contents
Ambient Weather RC-8401 ClearView Projection Radio Controlled Alarm Clock with Barometer, Forecast, Indoor Temperature and Color Changing Outdoor Temperature User Manual Table of Contents Introduction ............................. 2 Warnings ............................2 Getting Started ..........................3 Product Features ........................3 3.1.1 Display Clock ........................3 3.1.2... -
Page 2: Introduction
Warranty Information ....................... 20 1. Introduction Thank you for your purchase of the Ambient Weather RC-8401 ClearView Projection Radio Controlled Alarm Clock with Barometer, Forecast, Indoor Temperature and Color Changing Outdoor Temperature. The following user guide provides step by step instructions for installation, operation and troubleshooting. -
Page 3: Getting Started
3. Getting Started 3.1 Product Features 3.1.1 Display Clock Figure 1 Version 1.1 ©Copyright 2016, Ambient LLC. All Rights Reserved. Page 3... - Page 4 Description Description 1 REVERSE Button 12 BARO button - Press to reverse the projected time and - Press to change barometric pressure units temperature. of measure. 2 SNOOZE/LIGHT Button 13 SENSOR Button - Turn on the projector and backlight for 5 seconds.
-
Page 5: Wireless Transmitter
Description Description in memory. 9 HISTORY Button 20 BATTERY COMPARTMENT - In normal mode, press to view hourly - Accommodates 3 x AA batteries (alkaline historical data stored in memory. recommended). 10 °F/°C Button 21 FOCUS Knob - Select switch between °F and °C units of - Adjust the focus of the projected time and measure. -
Page 6: Radio Controlled Clock (Rcc)
transmitter FIRST, Display Clock SECOND) to avoid the Clock synchronization time out. The Transmitter: 1. Remove the battery door on the back of the transmitter and insert 2 new AA batteries, according to the polarity information marked on the battery compartment, and replace the battery door, as shown in Figure 2. - Page 7 Wireless signals are impacted by distance, interference (other wireless devices, wireless phones, wireless routers, TVs and computer monitors), and transmission barriers, such as walls. In general, wireless signals will not penetrate solid metal and earth (down a hill, for example). The following is a table of reception loss vs.
-
Page 8: Clock Display
4. Clock Display 4.1 Normal Time Display Mode No Description No Description Time Low battery indicator AM / PM Low Temperature Alert Weather Forecast Min/Max indicator History Mode indicator Wireless temperature (channels 1, 2 or 3) Rel / Abs Pressure Indoor temperature Barometer indictor Month and Day... -
Page 9: Settings
No Description No Description Alarm Time Alarm 2 On Alarm 1 On Figure 5 5. Settings 5.1 Time, Date, and Language Settings While in normal time mode, perform the following operations to set date, time and language: Version 1.1 ©Copyright 2016, Ambient LLC. All Rights Reserved. Page 9... -
Page 10: Hour Offset
Command Mode Settings [TIME] + 2 Enter Time and Date Settings Press [+/CHANNEL] to change between 12H and seconds 12 hour / 24 hour format 24H format. [TIME] Time Zone Press [+/CHANNEL] to change between Pacific (PST), Mountain (MST), Central (MST) and Eastern (EST) Standard Time [TIME] Hour... -
Page 11: Alarm Settings
Hours from Time Zone Cities 5 --- São Paulo, Brazil 6 AT: Azores Azores, Cape Verde Islands 7 WAT: West Africa 8 GMT: Greenwich Mean London, England WET: Western European 9 CET: Central European Paris, France 10 EET: Eastern European Athens, Greece 11 BT: Baghdad Moscow, Russia... -
Page 12: Projector And Backlight
ALARM button to silence the alarm. 5.3 Projector and Backlight 5.3.1 Using the Projector and Backlight Note: The projector and backlight are temporary when operating on batteries only, to save battery life. 1. When the clock is powered by the battery: Press the SNOOZE/LIGHT button to turn on the projector and backlight for 5 seconds or press and hold the SNOOZE/LIGHT button for 4 seconds to turn on the projection for 30 minutes. -
Page 13: Barometric Pressure Display And Settings
5.4 Barometric Pressure Display and Settings 5.4.1 Barometric Pressure Units of Measure In normal time mode, press the BARO button to change barometric units of measure (hPa / inHg / mmHg). 5.4.2 Absolute Pressure vs. Relative Pressure Press and hold the BARO button for 2 seconds to enter barometric mode, and press the +/CHANNEL button to switch between the relative and absolute pressure reading. -
Page 14: The Forecast Icon
5.5 The Forecast Icon 5.5.1 Principle of Forecasting based on Barometric Pressure The weather forecast or pressure tendency is based on the rate of change of barometric pressure. In general, when the pressure increases, the weather improves (sunny to partly cloudy) and when the pressure decreases, the weather degrades (cloudy to rain). -
Page 15: Color Changing Feature
If no button is pressed for 5 seconds, the display will return to the normal time mode. 5.8 Color Changing Feature This display has two color models for the LCD backlight based on the MANUAL/TEMP COLOR slide switch in the battery compartment: ... -
Page 16: Back Light On/Off
Figure 12 5.10 Back Light On/Off To turn the back light on or off, slide the LIGHT On/Off Switch. If the back light is off, press the SNOOZE/LIGHT button to temporarily turn it on. 5.11 Back Light Brightness To select the back light brightness, slide the L/H switch (low/high). 5.12 Wireless Sensor Display No Description... -
Page 17: Viewing The Wireless Sensor Channels
polarity. 5.14 Viewing the Wireless Sensor Channels In normal time mode, press the UP button to view wireless channels 1, 2 and 3. To automatically scroll through channels 1, 2 and 3, press and hold the UP button for 2 seconds (the beep will sound). -
Page 18: Power Consumption
Barometer 540 to 1100mb ± 8mb (540 to 969mb) 1hPa / 0.01inHg / (15.95 inHg to 32.48 @ 25 °C 0.1mmHg inHg) ± 5mb (970 to 1030mb) @ 25 °C Altitude Range: -2,300 ± 8mb (1031 to to 16,400’ (-700 to 1100mb) @ 25 °C 5000 meters) 6.2 Power Consumption... -
Page 19: Accessories
Problem Solution The wireless sensor communication has Make sure the transmitter is powered up and the been lost or is intermittent or will not sync LED is flashing about once per minute. For cold weather environments, install lithium batteries. If the transmitter is not flashing, replace the batteries. -
Page 20: Fcc Statement
responsibility for any incorrect readings and any consequences that occur should an inaccurate reading take place. This product is designed for use in the home only as indication of weather conditions. This product is not to be used for medical purposes or for public information. The specifications of this product may change without prior notice. - Page 21 Warranty service can only be performed by a Ambient, LLC. The original dated bill of sale must be presented upon request as proof of purchase to Ambient, LLC. Your Ambient, LLC warranty covers all defects in material and workmanship with the following specified exceptions: (1) damage caused by accident, unreasonable use or neglect (lack of reasonable and necessary maintenance);...
Need help?
Do you have a question about the RC-8401 and is the answer not in the manual?
Questions and answers
Is there a way to brighten the projected display
You cannot directly adjust the brightness of the projected display on the Ambient Weather RC-8401. The projection gets dimmer as the distance from the wall or ceiling increases.
This answer is automatically generated
how do i switch from 24 hour clock to a 12 hour clock
To switch the Ambient Weather RC-8401 from a 24-hour clock to a 12-hour clock, press the [+/CHANNEL] button while in the time settings mode to change between the 12-hour and 24-hour formats.
This answer is automatically generated