Table of Contents
Advertisement
Advertisement
Table of Contents

Related Manuals for Carbest 494822

Summary of Contents for Carbest 494822
- Page 1 494822 User Manual...
-
Page 2: Table Of Contents
TABLE OF CONTENTS Warning ....................38 Important Safety Precautions ..............39 Using the Remote Control ..............40 Installing the Batteries ................40 Antenna connection ................41 Power Connection ................. 41 Main unit description................42 Control Panel Button Function ...............42 TV terminal Connections ...............43 Remote Controller .................44 Select input source ................46 Channel menu ..................46 Picture Menu ..................49... -
Page 3: Warning
WARNING ACHTUNG GEFAHR EINES ELEKTRISCHEN SCHLAGS. NICHT ÖFFNEN! Caution: to reduce the risk of an electric shock, do not remove the cover (or back). there are no user serviceable parts inside. for any required service, please contact authorized service Personnel. The lightning flash symbol with an arrowhead inside a triangle alerts the user about an uninsulated dangerous voltage that may be of sufficient magnitude to constitute a risk of electric shock... -
Page 4: Important Safety Precautions
IMPORTANT SAFETY PRECAUTIONS Read these instructions. Keep these instructions. Heed all warnings. Follow all instructions. Do not use this apparatus near water Clean only with a dry cloth. Do not block any ventilation openings. Install in accordance with the manufacturer‘s instructions. Do not install near any heat sources such as radiators, heat registers, stoves, or other apparatus (including amplifiers) that produce heat. -
Page 5: Using The Remote Control
USING THE REMOTE CONTROL Use the remote control by pointing it towards the remote sensor windows of the set. Objects between the remote control and sensor window may prevent proper operation. Cautions regarding use of remote control Do not expose the remote control to shock. In addition, do not expose the remote control to liquids, and do not place in an area with high humidity. -
Page 6: Antenna Connection
ANTENNA CONNECTION INSTALL THE UNIT IN A ROOM WHERE DIRECT LIGHT WILL NOT FALL ON THE SCREEN. TOTAL DARKNESS OR REFLECTIONS ON THE SCREEN MAY CAUSE EYESTRAIN. SOFT AND INDIRECT LIGHTING IS RECOMMENDED FOR COMFORTABLE VIEWING. OPTIMAL RECEPTION OF COLOURS REQUIRES A GOOD SIGNAL AND WILL GENERALLY MEAN THAT AN EXTRA OUTDOOR ANTENNA MUST BE USED. -
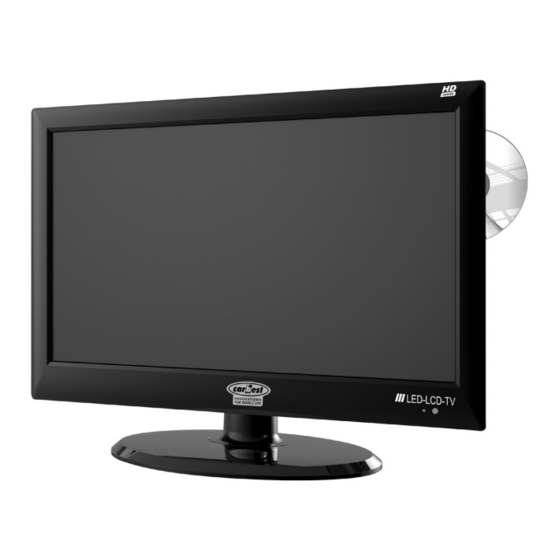
Page 7: Main Unit Description
MAIN UNIT DESCRIPTION Control Panel Button Function 1. POWER: TURNS THE LED TV ON AND INTO STANDBY MODE. 2. SOURCE: CHOOSES FROM DIFFERENT INPUT SIGNAL SOURCES. 3. MENU: PRESS ONCE TO DISPLAY THE OSD (ON SCREEN DISPLAY), PRESS AGAIN TO TURN THE OSD OFF. 4/5. -
Page 8: Tv Terminal Connections
MAIN UNIT DESCRIPTION TV Terminal Connections DC 12V: Input 12V DC power. VGA/PC AUDIO: Connection for a PC, or other AV equipment with VGA and line-in jacks. Scart: Connects to external equipment with SCART socket. The SCART interface offers RGB & AV signals with audio input/output between the TV and external video equipment. -
Page 9: Remote Controller
REMOTE CONTROLLER A POWER: Turns the LED TV on and into standby mode. B MUTE: Mutes and restores your LED TV sound. C SOURCE: Press SOURCE to display the source list: select the video equipment connected to the video inputs of your LED TV and press OK button to confirm. - Page 10 REMOTE CONTROLLER P DTV/RADIO: In DTV mode, press DTV/RADIO button to enter DTV or RADIO mode. (=p Freeze a multi-page changing on Teletext mode. Q PVR LIST (Index): In DTV mode, displays the executed PVR LIST and index. Displays the main index in Teletext mode. R TIME SHIFT: In DTV mode.
-
Page 11: Select Input Source
SELECT INPUT SOURCE Input Source Satellite Press Source button to display the input source list. • Press G / H or Source button to select the input • source you want to watch Press utton to enter the input source •... - Page 12 ATV Manual Tuning Press G / H button to select ATV Manual Tuning, then press Enter button to input password to enter sub-menu. (default password is “0000“) ATV Manual Tuning Current CH Colour System Sound System Fine-Tune 423,25 MHz Search Move Return Exit...
- Page 13 Programs Edit 1 AFD0, 16:9 2 AFD0, 3 AFD1, 16:9 4 AFD1, 5 AFD2, 16:9 6 AFD2, 7 AFD3, 16:9 8 AFD3, 9 AFD5 16:9 10 AFD5, 4:3 Delete Move Skip Select Back Signal Information Press G / H button to select Signal Information, then press enter button to display signal details, including Channel, Network Rowridge, Modulation, Quality and Strength.
-
Page 14: Picture Menu
PICTURE MENU Press menu button to display the main menu. Press F / E button to select Picture in the main menu; it will highlight the first option. Picture Mode Standard Contrast Brightness Colour Picture Tint Sharpness Colour Temp Normal Noise Reduction Middle Move... -
Page 15: Sound Menu
SOUND MENU Press menu button to display the main menu. Press F / E button to select Sound in the main menu; it will highlight the first option. Sound Mode Standard Treble Bass Sound Balance Auto Volume Level Digital Output AD Switch Move Return... -
Page 16: Time Menu
TIME MENU Press menu button to display the main menu. Press F / E button to select TIME in the main menu; it will highlight the second option. Clock 01/Jan 01:09 Time Zone GMT+1 Sleep Timer Time Auto Standby OSD Timer 15 S Move Return... -
Page 17: Lock Menu
LOCK MENU Press menu button to display the main menu. Press F / E button to select Lock in the main menu; it will highlight the first option. System Lock Set Password Channel Lock Lock Parental Guideance Key Lock Move Return Select Exit... -
Page 18: Setup Menu
SETUP MENU Press menu button to display the main menu. Press F / E button to select SETUP in the main menu; it will highlight the first option. Language English TT Language West Audio Language English Subtitle Lnaguage English Hearing Impaired PVR Filr System Setup Aspect Ratio... - Page 19 PVR File System Press G / H button to select PVR File System, then press enter button to enter sub-menu Select Disc Check PVR File System Start USB Disk Format Time Shift Size Speed Free Record Limit Enter Menu Aspect Ratio Press G / H button to select Aspect Ratio, then press enter button to enter sub-menu.
-
Page 20: Screen Menu
SCREEN MENU Press menu button to display the main menu. Press F / E button to select SCREEN in the main menu; it will highlight the first option. (Only available when inputting PC-RGB signal) Auto Adjust H-Offset V-Offset Screen Size Phase Position Reset Move... -
Page 21: Media Operation
MEDIA OPERATION NOTE: before operating Media menu, plug in USB device, then press Source button to set the Input Source to media. Press F / E button to select Media in the Source menu, then press enter button to enter. USB 2.0 Photo Music... -
Page 22: Music Menu
Press F / E button to select the file you want to watch in the file selecting menu, then press media button to display picture. When highlighting the option you select, the file information will appear on the right and picture will be previewed in the center. - Page 23 MOVIE SUB-MENU Return 200+200 Resolution: 800x336 Audio Track 1/1 DTS5.1.avi DVD.VOB Mp4/MP4 Subtitle - -/0 Program Size 122311 KByte Delete Current File Add Remove all Add Remove to playlist Full Screen Move Menu Exit Verlassen In the MOVIE sub-menu, the chosen movie and details are displayed in a preview frame. Press OK to add the selection to the playlist.
-
Page 24: Movie Menu
MOVIE MENU Press F / E button to select MOVIE in the main menu, then press enter button to enter. Press menu button to return to the previous menu and exit menu to quit. USB 2.0 Photo Music Movie Text Press F / E button to select drive disk you want to watch, then press enter button to enter. -
Page 25: Text Menu
TEXT MENU Press F / E button to select TEXT in the main menu, then press enter button to enter. Press menu button to return to the previous menu and exit menu to quit. USB 2.0 Photo Music Movie Text When highlighting the option you select, the file information will appear on the right and text will be previewed in the center. -
Page 26: Dvd Menu
DVD MENU BASIC OPERATION Turn the DVD function ON and OFF Turn on the LED TV and then press Source repeatedly to select DVD mode. Insert Disc to DVD Insert the disc in the disc slot (Data side of the disc has to face towards the front of the unit). - Page 27 SUPPORTING DVD FORMAT This product can play the following formats of DVD discs. Disc Type Disc Size Recorded Time Recorded Content Remarks (Diameter) 12 cm Single side: 120 mins. approx DVD format: Com- pressed digital Double side: 240 mins. approx audio and video Super VCD 12 cm...
- Page 28 DVD FUNCTIONS OPERATING INSTRUCTIONS Play (for DVD/Super VCD/CD/CD-G/HD-CD and Mp3/JPEG discs) For DVD disc, press button from root or title menu; while playing the DVD, you may play your favorite title directly with title selection by pressing the Title button. For Super VCD & VCD discs, while playing the disc, you may play your favorite tracks by numeric buttons.
- Page 29 6. INFO (for DVD/Super VCD/VCD/CD/CD-G/HD-CD and Mp3/JPEG discs) Press INFO button to activate the on screen roll-down menu for the current Title, Chapter, time and other information. For DVD discs, (2 pages). Press INFO button once to display first page as shown below: Disc Type Chapter -/-(Current/Full)
- Page 30 10. Repeat A-B (for DVD/Super VCD/VCD/CD/CD-G/HD-CD and Mp3 discs) When playing DVD, VCD, CD disc, press the A-B button to repeat a certain content. Press the A-B button at the starting point (A) and the ending point (B) to select the repeat part.
- Page 31 GENERAL SETUP PAGE: - - General Setup - - TV Display 16:9 OSD Lang Sceen Saver Last memory Go to General Setup Page If TV Display is selected, press the Navigator button to enter. Press the Navigator button to set the aspect ratio to 4:3/PS;...
- Page 32 AUDIO SETUP PAGE: - - Audio Setup Page - - - - Speeker Setup Page - - Downmix LT/RT Speeker Setup Stereo Dual Mono Dynamic Go to Audio Setup page Set Downmix Mode If Speaker Setup is selected, press the Navigator E button to enter. Press the Navigator G or H button to set the Speaker Setup.
- Page 33 PREFERENCE PAGE:: - - Preference Page - - - - Preference Page - - TV Type NTSC TV Type NTSC PAL Audio Audio AUTO Subtitle Subtitle NTSC Disc menu Dis menu Parantal Parantal Password Passwortd Standard Default Set TV Standard Go to Preference Page If TV Type is selected, press the Navigator button to enter.
-
Page 34: Troubleshooting
TROUBLESHOOTING Before contacting your local service dealer, please make sure you refer to the following guide. If the TV does not work normally after completing the following troubleshooting, please contact your local TV distributor or service center. No message is displayed on the front panel or the TV has no power. - Check the main power cable and make sure it is plugged into a suitable power outlet. -
Page 35: Specifications
SPECIFICATIONS Model 494822 Display Panel size 21,5 Features Aspect Ratio 16:9 Resolution 1920 x 1080 Contrast 1000:1 Brightness 250 cd/m Response Time 5 ms Viewing Angle 170/160 TV System Colour System PAL/SECAM Sound System Speaker 3W X2 Input TV + Antenna Input 5V... - Page 36 www.reimo.com...
Need help?
Do you have a question about the 494822 and is the answer not in the manual?
Questions and answers