
Related Manuals for Parkmate MCPK-43DVR


Summary of Contents for Parkmate MCPK-43DVR
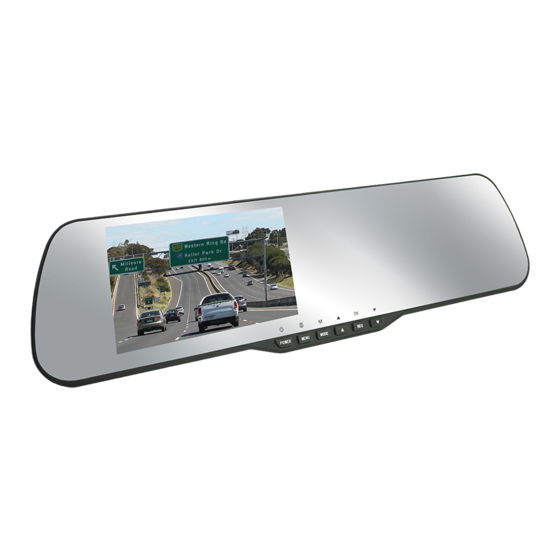
- Page 1 MCPK-43DVR USER MANUAL REAR VIEW MIRROR MONITOR BUILT-IN DASH CAM & REVERSE CAMERA PACK WITH...
- Page 3 • It is considered normal operation for the MCPK-43DVR Dash Cam to get warm during use. BATTERY WARNING • Always charge the Car Dash Cam using the provided charger. Improper charging of the MCPK-43DVR may result in failure of the internal battery.
-
Page 4: Table Of Contents
Playing back Video on PC ................................9 Initial Settings ...................................10 2.7.1 Formatting Inserted Micro SD Card ..........................10 2.7.2 Set the Date / Time .................................10 Using the MCPK-43DVR ................................11 2.8.1 Recording Video ................................11 2.8.2 Locked Recording ................................11 Reverse Camera ..................................11 2.10 Recording Screen ..................................12 Video mode ..................................... - Page 5 3.1.8 Date Stamp ..................................15 3.1.9 G Sensor ..................................16 3.2.0 Delay Power On................................16 3.2.1 Number Plate ..................................16 Photo Mode ....................................17 Photo Menu ....................................17 4.1.1 Capture Mode .................................17 4.1.2 Resolution ..................................17 4.1.3 Sequence ..................................18 4.1.4 Quality .....................................18 4.1.5 Sharpness ..................................18 4.1.6 White Balance .................................19 4.1.7 Colour .....................................19 4.1.8 ISO ....................................19 4.1.9 Exposure ..................................20...
-
Page 6: Introduction
1. INTRODUCTION Thank you for purchasing a Parkmate Mirror DVR with Integrated 1080P Dash Cam DVR & Reverse Camera. We are certain that our product will give you trouble free operation while providing you with a safety feature that enhances your driving experience. Our products, like most after-market safety enhanced devices, are designed to assist and aid the driver, not to replace the manual function of the person operating the vehicle. -
Page 7: Getting Started
4. When removing the memory card, be careful as the card may eject quickly. 5. Micro SD Card is not included INSTALLING THE MCPK-43DVR 1. Loop the rubber fasteners over the top fastener clips. 2. Put the Mirror DVR in position on the front face of your existing rear view mirror ensuring that the camera lens clears the edge of your rear view mirror. -
Page 8: Connecting The Reverse Camera
CONNECTING THE REVERSE CAMERA 2.3.1 INSTALLATION GUIIDE 1. Select a flat and centred location near the number plate lamp at the rear of the vehicle to mount camera. 2. Attach tape to the bracket of the camera to hold the camera in position while installing, and drill two Fig 2.3.1 small holes, one for the first screw, the second to run the reverse camera cable through. -
Page 9: Powering The Mirror Dvr On/Off
If the Mirror DVR is currently recording, please manually stop the recording by pressing the Rec/OK button. Press and hold the Power button on the front of the MCPK-43DVR. After powering off the device please wait for 10 seconds before powering the Mirror DVR on again. -
Page 10: Initial Settings
INITIAL SETTINGS Before using the MCPK-43DVR we recommend Formatting the Inserted Micro SD Card and Setting the Time and Date. 2.7.1 FORMATTING THE INSERTED MICRO SD CARD Formatting the Micro SD card will delete all information on the inserted Micro SD Card and prepare the card for use with the Mirror DVR. -
Page 11: Using The Mcpk-43Dvr
USING THE MCPK-43DVR 2.8.1 RECORDING VIDEO When the Mirror DVR is connected to your vehicles 12v power supply, the Mirror DVR will automatically power up and begin recording when you start your vehicle. During the start up the buttons will be unresponsive and the camera will take a moment to begin recording. -
Page 12: Recording Screen
2.10 RECORDING SCREEN Number Icon Item Description Video Mode Icon represents the currently selected mode Loop Recording Shows the duration of the loop clips Motion Detection The Motion Detection Icon will appear when Motion detection is activated Recording Indicator The Record Indicator will flash when the Mirror DVR is Recording Wide Dynamic Range The WDR icon will appear when the Wide Dynamic Range setting is active Locked Recording... -
Page 13: Video Mode
VIDEO MODE When the Mirror DVR is powered up the video screen will start by default. In this screen recording will automatically start and can be stopped by pressing the Button. To access the Video Menu, ensure that the Mirror DVR is not recording then press the button. -
Page 14: Loop Recording
3.1.3 LOOP RECORDING Loop recording allows you to set the duration that the camera will record before creating a new clip. To set the clip length please follow the instructions below. 1. Press the Button to stop the Mirror DVR from recording. 2. -
Page 15: Motion Detection
3.1.6 MOTION DETECTION Motion Detection is used to pause recording when no motion is detected in front of the camera, and to start recording when motion is detected again. To activate the Motion Detection setting follow the instructions below. 1. Press the Button to stop the Mirror DVR from recording. -
Page 16: G Sensor
3.1.9 G SENSOR The G Sensor defines the required force needed to trigger a Locked Recording. Once a Locked Recording is triggered in the case of an incident or impact the current recording will be automatically protected from being saved over by the normal loop recording. -
Page 17: Photo Mode
PHOTO MODE This screen is used to capture still images using your Clip on Mirror DVR. To access the Photo screen ensure that the camera is not recording and press the button. Photo mode also has a menu which is used to edit the photo settings. This menu can be accessed by pressing the in the Photo Screen. -
Page 18: Sequence
4.1.3 SEQUENCE When Sequence is activated, a sequence of 3 photos is taken when a photo is triggered. To activate or deactivate Sequence mode, follow the instructions below. 1. Enter the Photo screen. 2. Press the Button to enter the Photo Menu. 3. -
Page 19: White Balance
4.1.6 WHITE BALANCE The White Balance setting is used to manually adjust the settings used to counteract different light conditions. This setting is set to Auto by default. To change the White Balance setting follow the instructions below. 1. Enter the Photo screen. 2. -
Page 20: Exposure
4.1.9 EXPOSURE Exposure is used to manually control the light settings. To change the Exposure setting follow the instructions below. 1. Enter the Photo screen. 2. Press the Button to enter the Photo Menu. 3. Use the Buttons to navigate the Photo Menu and highlight the Exposure setting and press to select. -
Page 21: Date Stamp
4.2.2 DATE STAMP Date stamp is used to stamp your photos with the time and date that they are taken. To select your preferred time and date format follow the instructions below. 1. Enter the Photo screen. 2. Press the Button to enter the Photo Menu. -
Page 22: Key Beeps
KEY BEEPS The Key Beeps setting is used to mute the beep notification when a button is pressed. To change the Key Beep setting please follow the instructions below. 1. Press the Button to stop the Mirror DVR from recording. 2. -
Page 23: Tv Mode
TV MODE The TV Mode setting is used to change the video output between NTSC and PAL. To change the TV Mode setting please follow the instructions below. 1. Press the Button to stop the Mirror DVR from recording. 2. Press the Button to enter the Video or Menu. -
Page 24: Frequency
FREQUENCY The Frequency setting is used to set the cameras frequency. To adjust the frequency, follow the instructions below. 1. Press the Button to stop the Mirror DVR from recording. 2. Press the Button to enter the Video or Menu. 3. -
Page 25: Default Settings
DEFAULT SETTINGS Default Settings is used to revert the Mirror DVRs settings to their default settings. To reset the camera to restore the default settings, please follow the instructions below. 1. Ensure the Mirror DVR is not recording. 2. Press the Button to enter the Video or Menu. -
Page 26: Locking And Unlocking Photos And Videos
LOCKING AND UNLOCKING PHOTOS AND VIDEOS To Lock or Unlock photos or videos from being deleted, please follow the instructions below. 1. Navigate to the playback screen using the instructions in the section labelled Playback Screen 2. In the Playback Screen use the buttons to select the photo or video that you want to lock or unlock (if you want to lock or unlock all photos and videos select any Photo or Video). -
Page 27: Menu Tables
MENU TABLES 1080FHD 1920x1080 720P 1280x720 Resolution WVGA 848x480 VGA 640x480 3 Minutes Loop recording 1 Minute 5 Minutes 2 Minutes 10 Minutes +2.0 -1/3 +5/3 -2/3 +4/3 -1.0 Exposure +1.0 -4/3 +2/3 -5/3 +1/3 -2.0 +0.0 Motion Detection Micropohone Date Stamp High G Sensor... - Page 28 Single 55 Timer Anti-Shaking Capture Mode 2S Timer 10S Timer 2 Seconds Quick Review 12M 4032x3024 3M 2048x1536 5 Seconds 10M 3648x2736 2MHD 1920x1080 Date Resolution Date 8M 3264x2448 VGA 640x480 Date/Time 5M 2592x1944 1.3 1280x960 Sequence Fine Normal Quality Economy Strong Normal...
- Page 29 Date / Time Set Time & Date Key Beeps English Chinese S French Chinese T Spanish Russian Language Portuguese Japanese Dutch Korean Italian TV Mode NTSC 1 Minute 5 Minutes Screen Saver 3 Minutes Frequency 50 Hz 60Hz Format Cancel Default Setting Cancel Version...
-
Page 30: Warranty
The retailer will contact you when the product is ready for collection. All costs involved in claiming this warranty, including the cost of the retailer sending the product to Directed, will be borne by you. Directed Electronics: 44 Translink Drive, Keilor Park Victoria Australia 3042 Ph: +61 03 8331 4800 Email: service@parkmate.com.au... - Page 32 www.parkmatehd.co.nz...
Need help?
Do you have a question about the MCPK-43DVR and is the answer not in the manual?
Questions and answers