Table of Contents
Advertisement
Advertisement
Table of Contents

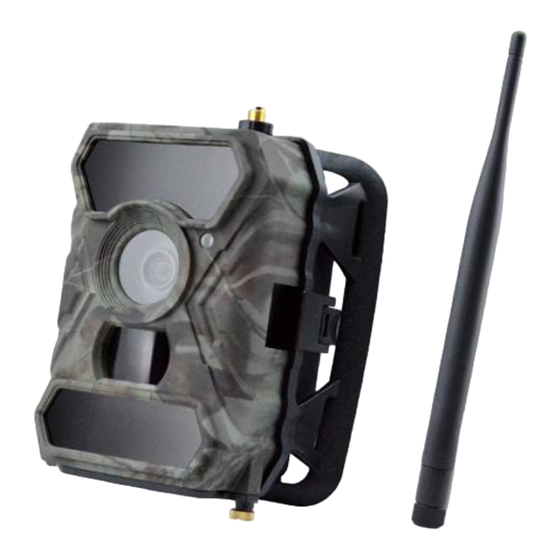
Summary of Contents for Moondyne ghost eye
- Page 1 3GExtreme Trail Camera Instruction Manual...
-
Page 2: Table Of Contents
Contents Introduction......................- 1 - 1.1 Full Functionality Introduction ................- 1 - 1.2 Application ....................... - 1 - 1.3 Power Supply......................- 1 to 2 - 1.4 SD Card Selection ..................... - 2 - 1.5 USB Connection....................- 2 - 1.6 Key Features ..................... -
Page 3: Introduction
1. Introduction Thank you for choosing a Moondyne 3GExtreme Trail Camera. Our cameras have been developed for Australian conditions and have been tested in some of the most demanding conditions Australia has to offer. We are confident that you will be happy with your purchase and we encourage any feedback you have that will help to continually improve our products. -
Page 4: Sd Card Selection
Test Condition: LCD screen off. M ode: “Power On” _PIR intelligent automatically monitoring 8 x AA Alkaline Batteries Photos shot per day Working time Video clips shot per day Working time IR LEDs On M ax.Range 100 pics 36 days Balanced 100 pics 31 days... -
Page 5: Key Features
1.6 Key Features 0.4s Trigger speed 52 Field of view and 70 PIR angle Max 12mp / 1080P Programmable 5/8/12 Megapixel high-quality resolution 56pcs (Black Flash) Invisible LEDs offer 20 metres of real night vision distance ... -
Page 6: Figure 2: Bottom View Of Camera
2.2 Figure 2: Bottom View of Camera Push slightly to open this cover DC in SD Card Slot TV Out USB Port Battery Slot - 4 -... -
Page 7: Figure 3: Internal, Side And Back View Of Camera
2.3 Figure 3: Internal, Side and Back View of Camera IP54 Waterproof Seal SIM Card Slot. Chip Part Face Down Battery Case - 5 -... -
Page 8: Function Keys & Other Details
2.4 Function Keys & Other Details A. Switch Buttons Camera/Video Switch Cellular Switch Power Switch IR LEDs Group Switch 1) Switch ON, wait 2 seconds then press “OK” once to wake up camera LCD screen and enter Test/Function Mode Power Switch 2) After 60sec of no input, camera will automatically revert to PIR Auto Test and setup Mode or Press and hold “OK”... -
Page 9: Quick Start
3. Quick Start 3.1 How to Start the Camera (1) Remove the rear battery pack and insert batteries (4 into battery pack and 4 into camera) (2) Insert SD card (8gb – 32gb) (3) Switch power switch to “ON” The red indicator light on front of the camera will flash 5 times and is then ready for use. -
Page 10: Operation List
4. Operation List 4.1 Video/Photo Playback (1) Switch the power switch to “ON”, Press “OK” once to enter test mode. When the logo screen changes to the test screen, press ↑ arrow button to enter playback. Press ← and → for selection, “OK”... -
Page 11: Operation Menu
4.5 Operation Menu Enter Test Mode: Press “M” once to enter camera setting menu. Navigate the settings interface by pressing ←, ↑, →, or ↓, press “OK” for selection, “M” to exit to previous page, and “M” to switch alpha/ digits/ symbols. Settings Programmable Options Select “ON”, press “OK”, to set 4 numbers / letters for ID of camera. - Page 12 Programmable Options Settings High, Medium and Low Sensitivity Higher sensitivity is; 1) More sensitive to movements by smaller subjects 2) Longer detection distance 3) Easier for sensor to detect the difference between body heat and outdoor temperature In high temperature environments (>35 c) the difference in temperature between the body heat of subjects and the environment is more difficult to distinguish by the camera.
- Page 13 Our cameras are pre-set to work on Telstra NextG – 3G – 850MHz – Metropolitan and regional network within Australia, due to its greater coverage in regional areas. Please ensure you use a compatible SIM card when using the MMS/SMTP functions. 850/1900MHz Australia: Press “OK”.
- Page 14 Max Num/Day Default: unlimited Optional: 1~99 EXAMPLE: User set 50, then the camera will only send the first 50 pictures each day. All the rest of the photos will be stored on your SD card in the camera SMS Ctrl As some settings can be changed remotely through the app, these settings determine when the camera accepts those commands New settings are accepted next time the camera is triggered by the...
-
Page 15: Specification
5. Specification Image Sensor 5 Mega Pixels Color CMOS Effective Pixels 2560x1920 Day/Night Mode IR Flash Range IR LEDs Top: 25 LED, Bottom: 31LED Memory Supports SD Card (8MB – 32 GB) Lens F=3.0; FOV=52°; Auto IR-Cut (at night) LCD Screen 2”... -
Page 16: Trouble Shooting
6. Trouble Shooting 6.1 Photos Do Not Capture Subject of Interest (1) Check the “Sensor Level” (PIR sensitivity) parameter setting. For warm environmental conditions, set the sensor level to “High” and for cold weather use, set the sensor for “Low”. (2) Try to set your camera up in an area where heat sources are not in the camera’s field of view. -
Page 17: Warranty
Please include a contact name and number, and a brief description of your issue. Postage of all Moondyne products will be at the customer’s expense. There will also be a charge for repairs not covered by the Warranty, for which you will be notified of the amount prior to any work being started. - Page 18 Distributed by Aussie Outback Supplies Pty Ltd www.aussieoutbacksupplies.com...
Need help?
Do you have a question about the ghost eye and is the answer not in the manual?
Questions and answers