Fantech RVF 4XL Installation Manual
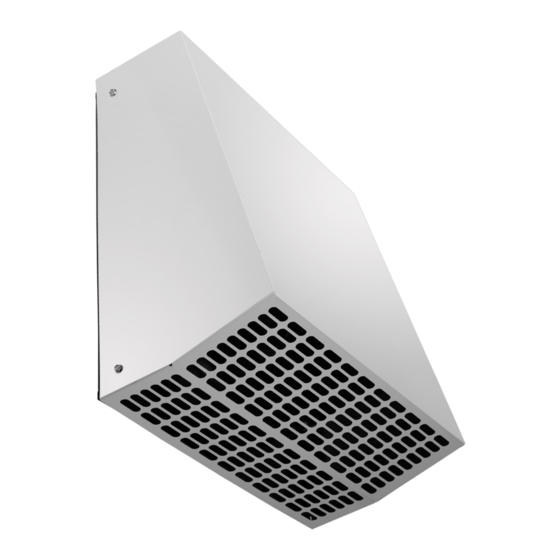
Exterior-mount fan
rvf model
Hide thumbs
Also See for RVF 4XL:
- Installation instructions manual (8 pages) ,
- Installation instructions manual (8 pages)
Table of Contents
Advertisement
Available languages
Available languages
Installation Manual
Item #: 401452
Rev Date: 2016-06-10
Manuel d'installation
Manual de Instalación
RVF Model
Exterior-Mount Fan
Ventilateur à montage extérieur
Ventilador a mataje exterior
United States
10048 Industrial Blvd., Lenexa, KS, 66215
Tel.: 800.747.1762 • Fax: 800.487.9915
Canada
50 Kanalflakt Way, Bouctouche, NB, E4S 3M5
Tel.: 800.565.3548 • Fax: 877.747.8116
Advertisement
Table of Contents

Related Manuals for Fantech RVF 4XL


Summary of Contents for Fantech RVF 4XL
- Page 1 Installation Manual Item #: 401452 Rev Date: 2016-06-10 Manuel d'installation Manual de Instalación RVF Model Exterior-Mount Fan Ventilateur à montage extérieur Ventilador a mataje exterior United States 10048 Industrial Blvd., Lenexa, KS, 66215 Tel.: 800.747.1762 • Fax: 800.487.9915 Canada 50 Kanalflakt Way, Bouctouche, NB, E4S 3M5 Tel.: 800.565.3548 •...
- Page 2 10 1 / 4 2 3 / 4 5 1 / 8 5 1 / 4 5 1 / 4 RVF 4XL 10 1 / 4 2 3 / 4 5 1 / 8 5 3 / 4 5 7 / 8...
- Page 3 Dimensions - Dimensions- Dimensiones Model/Modèle/Modelo 14 1 / 4 4 7 / 8 5 5 / 8 6 1 / 2 7 13 / 16 2 1 / 2 RVF 6XL-EC 14 1 / 4 4 7 / 8 5 5 / 8 6 1 / 2 7 13 / 16 2 1 / 2...
- Page 4 WARNINGS AVERTISSEMENTS ADVERTENCIAS Ne pas brancher la source d'énergie avant que Do not connect power supply until fan is completely No conecta la alimentación eléctrica hasta tanto l'installation du ventilateur soit complète. S'assurer installed. Make sure electrical service to the fan is quede el ventilador totalmente instalado.
-
Page 5: Fan Installation
Fan installation Step 1 Optional Standard Fange When selecting the fan mounting location, the following criteria should be considered: a) type of application; b) proximity to fresh air intakes; c) sound created by fan operation. Discharge a) For dryer boosting applications, fan must be mounted a minimum of 12 linear feet from the Cover dryer outlet. -
Page 6: Wiring Instructions
Wiring Instructions Step 1. Step 2. ‘L’ for line voltage (black wire), ‘N’ for neutral Remove the screws securing the terminal box A 3/8-inch romex cable clamp (not supplied) is (white wire), and GND for ground (green wire). cover plate. Depending on the model, the needed to secure the incoming power supply Firmly secure each incoming wire to the proper wiring compartment is either located on the... - Page 7 Figure 6 – Models: RVF4XL-EC, RVF6XL-EC, RVF8XL-EC, RVF10-EC BLUE (LOW VOLTAGE - GND) YEL (LOW VOLATAGE 0 -10 V RED (LOW VOLTAGE +10V) WHITE (LOW VOLTAGE - TACH) GRN/YELLOW (GROUND) BLACK WIRE BLUE WIRE Alternate Control Options: Products Containing EC Motors Connection to Building Management System External Motor Speed Controller MTP10 - Potentiometer...
-
Page 8: Troubleshooting
For applications such as multi bathroom exhaust where multi location switching is desired, refer to figure 8 for proper wiring. Neutral (White) 115V Supply Motor Line SPST Switch (Black) SPST Switch SPST Switch Figure 9 Troubleshooting If fan fails to operate, please check the following: 1. -
Page 9: Installation Du Ventilateur
Installation du ventilateur Étape 1 Bride standard en option Pour choisir l’emplacement du ventilateur, considérer les points suivants: a) le type d’application; b) la proximité des sources d’air frais; c) la propagation du bruit. Vis de montage de la bouche a) Pour agir comme appoint d’une sécheuse, le ventilateur DOIT être installé... - Page 10 Instructions pour le raccordement Étape 1: Étape 2. indiqués ci-dessous et sont étiquetés «L» pour Retirer les vis de fixation de la plaque de Une pince à câble de 3/8 pouce romex la tension de ligne (fil noir), «N» pour neutre (fil couvercle de la boîte à...
- Page 11 Figure 6 – Modèles: RVF4XL-EC, RVF6XL-EC, RVF8XL-EC, RVF10-EC BLEU (BASSE TENSION - GND) Basse tension – Côté de raccordement du moteur JAUNE (BASSE TENSION 0 -10 V Haute tension – ROUGE (BASSE Côté de raccordement du moteur TENSION +10V) BLANC (BASSE TENSION - TACH) VERT/JAUNE (GROUND)
-
Page 12: Dépannage
Pour des applications telles l'évacuation de plusieurs salles de bain ou à avec interrupteur dans multiples emplacement est désirée, reportez-vous à la figure 8 pour le raccordement approprié. Neutre (Blanc) 115V Approvisionnement Moteur Ligne (Noir) Interrupteur SPST Interrupteur SPST Interrupteur SPST Figure 9 Dépannage Si le ventilateur cesse de fonctionner, vérifier ce que suit:... - Page 13 Instalacion del ventilador Paso 1 Optional: Pestana estandar Al seleccionar la ubicación del ventilador, se debe considerar lo siguiente: a) tipo de aplicación, b) proximidad a entradas de aire fresco; c) el ruido del ventilador. Tornillos de a)Para aumentar el rendimiento de una secadora, hay que montar el ventilador a un minimo de Collarin de montaje - 366 cm de la salida de la secadora.
-
Page 14: Instrucciones De Cableado
Instrucciones de cableado Paso 1: Paso 2. indicadas y etiquetadas a continuación. L para Remueva los tornillos que sujetan la tapa de Una abrazadera de cable romex de 3/8 línea de voltaje (cable negro). N para neutro la caja terminal. Dependiendo del modelo, el pulgadas (no incluida) es necesaria para (cable blanco) y GND para tierra (cable verde). - Page 15 Figura 6 – Modelos: RVF4XL-EC, RVF6XL-EC, RVF8XL-EC, RVF10-EC AZUL (BAJO VOLTAJE - GND) Bajo voltaje – lado de conexión del motor AMARILLO (BAJO VOLTAJE 0 -10 V Alto voltaje – ROJO (BAJO lado de conexión del motor VOLTAJE +10V) BLANCO (BAJO VOLATJE- TACH) VERDE/AMARILLO (GROUND)
-
Page 16: Instrucciones De Mantenimiento
Para aplicaciones como multi extractor de baño donde se desea una conmutación de multi posición, refiérase a la figura 8 para el cableado apropiado. Neutro (Blanco) 115V Motor Lignea (Negro) Conmutador SPST Conmutador SPST Figure 9 Análisi de Fallas Si el ventilador deja de funcionar, favor comprobar lo siguiente: 1. -
Page 17: Warranty
URING ENTIRE WARRANTY PERIOD: END USER, AS CREDIT TO DISTRIBUTOR’S ACCOUNT WILL BE Fantech will repair or replace any part which has a factory defect in PENDING INSPECTION AND VERIFICATION OF ACTUAL DEFECT BY workmanship or material. Product may need to be returned to the FANTECH. -
Page 18: Garantie
DISTRIBUTEUR NE DOIT PAS REMPLACER SANS FRAIS POUR Limites de garanties et de responsabilités Cette garantie ne s’applique à aucun produit de Fantech ou à aucune des dommages dut à la négligence ou a des conseils incorrects ou pièce détachée dont la défectuosité relève d’une erreur d’installation ou autres causes, Fantech ne pourra être tenu pour responsable des... - Page 19 Es posible que el producto deba ser DISTRIBUIDOR ESTARÁ A LA ESPERA DE INSPECCIÓN Y VERIFICACIÓN devuelto a la fabrica Fantech, juntamente con una copia de la constancia DEL DEFECTO REAL POR FANTECH.
- Page 20 Fantech reserves the right to make technical changes. Fantech se réserve le droit de faire des changements Fantech se reserva el derecho de hacer modificaciones For updated documentation please refer to www.fantech.net techniques. Pour de la documentation à jour, s'il vous plaît se técnicas en cualquier momento.
Need help?
Do you have a question about the RVF 4XL and is the answer not in the manual?
Questions and answers
Is their an in line booster that generates power when triggered to the RVF 4 XL
No, the Fantech RVF 4XL does not have an in-line booster that generates power when triggered.
This answer is automatically generated