
Summary of Contents for MBIT TECHNOLOGIES bb100
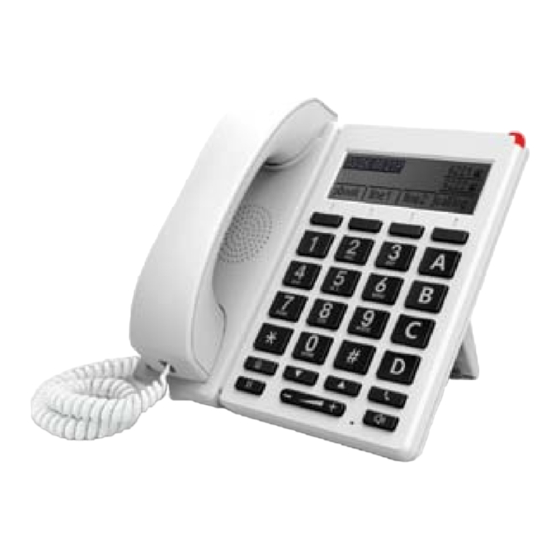
- Page 1 Wireless Big Button IP Phone (bb100) The Intelligent Communication Device for Next Generation Network User Manual MBIT Technologies www.mbit.com.au...
-
Page 2: Table Of Contents
Table of Contents 1 INTRODUCTION 1.1 Thanks for Purchasing bb100 1.2 Package Contents 2 INSTALLING 2.1 Assembling the Phone and Connecting to the Network 2.2 Mounting the Phone to the Wall 2.3 Turning on the Phone 2.4 Connect to the Internet 2.4.1 Via Wired... - Page 3 7.6.1.2 Audio Configuration 7.6.1.3 Supplementary Services Subscription 7.6.1.4 Advanced 7.6.2 Line 2 7.6.3 SIP Settings 7.6.3.1 SIP Parameters 7.6.3.2 NAT Traversal 7.6.4 VoIP QoS 7.7 Phone 7.7.1 Preference 7.7.1.1 Preference 7.7.1.2 Regional 7.7.1.3 Call Forward 7.7.1.4 Miscellaneous MBIT Technologies www.mbit.com.au...
- Page 4 8.2 Long Time Stop at “Initialising Network” 8.3 No Dial Tone 8.4 Can not Make a Call 8.5 Can not Receive Any Phone Call 8.6 No Voice During an Active Call 8.7 Can not Connect to the Configuration Website 8.8 Forget the Password MBIT Technologies www.mbit.com.au...
-
Page 5: Introduction
INTRODUCTION 1.1 Thanks for Purchasing bb100 Thank you for purchasing bb100. The bb100 which has 4 lines is a full-featured VoIP (Voice over Internet Protocol) phone that provides voice communication over an IP network. This phone functions not only much like a traditional phone, allowing to place and receive calls and enjoy other features that traditional phone has, but also it own many data services which you could not expect from traditional telephone. -
Page 6: Installing
3) The LCD will firstly display “Welcome” and all of the lights on the phone will flash. 4) Next, the LCD display “Initialising Network” . 5) After the sequence, the phone will display date & time, lines status for the phone, and bb100 is started normally. -
Page 7: Via Wireless
, and then select 13 Wireless using the UP and DOWN button. Step 1: Press the button Step 2: Choose 2 Wireless Connection and you can view the wireless then bb100 can connect to. Step 3: Highlight one network using the UP and DOWN button, and press the softkey button under link to connect. - Page 8 Step 4: If the Wi-Fi need authentication, choose the authentication and fill in the password, then choose the OK button to connection Step 5: If the AP have connected, then connection status will change like following picture and the icon of wireless will display linked. MBIT Technologies www.mbit.com.au...
-
Page 9: Get Familiar With Bb100
GET FAMILIAR WITH BB100 3.1 Front Panel Part Name Description of Function Part Name Description of Function Handset top For the placement of handset Soft keys These keys are used as soft keys. cradle (Receiver end) These can be used for item... -
Page 10: Rear Panel
Softkey Buttons You can use the softkey button to highlight the item displayed on the LCD screen and then configuration. One button directs to one softkey function, the blue line in the left picture displays the corresponding relationship. MBIT Technologies www.mbit.com.au... -
Page 11: Menu
User can use MENU, soft key and button to browse, modify and configuration the phonebook, multi-functional keys, network, accounts, factory default and so on. 4.1 Items The table below lists Menu items which bb100 included: Main menu Menu Items Submenu Items... - Page 12 Priority. 14 Wireless 14.1 Wireless Settings 14.1.1 WiFi Connection Choose the connection type from Static and DHCP Type 14.1.2 Current IP To view the current Internet port IP address, or to change the Internet port IP address. MBIT Technologies www.mbit.com.au...
-
Page 13: How To Configuration From Menu
To view and change the contrast of LCD. 21Login/Logout Press it to logout LCD. bb100 will memory the password if user has input the password when access to 9Accounts and bb100 will not request the password if user access to it again. -
Page 14: Using Basic Phone Function
5.2.3 Dialing from Phonebook Adding a phonebook: Below are the steps to add a phonebook in menu, User can also add phonebooks from you PC using bb100 Web Interface: Step 1: Press button access to the menu items, and use the softkey button to choose 1. -
Page 15: Dialing From Call History
5.2.5 Using Speed Dial Adding a speed dial: Below are the steps to add a speed dial from menu, User can also set speed dial from you PC using bb100 Web Interface. button access to the menu items, and use the up and down button to choose Step 1: Press 2. -
Page 16: Adjusting Call Volume
If user added a black list, bb100 will forbid the phone number incoming. Adding a black list: There are two ways to add black list, one is from menu, and the other is from your PC to use bb100’s webpage. -
Page 17: Placing A Call On Hold
The first call is placed on hold and you will hear a dial tone. Step 2: Now dial the second person’s telephone number with immediately ending char “#” , bb100 will transfer phone automatically and you will be disconnected from the call. -
Page 18: Forwarding Calls
To end a headset call, press the headset button. 5.12 Viewing and Returning Missed Calls The LCD screen on your IP phone will notify you like the following picture if a call came in that was unanswered. MBIT Technologies www.mbit.com.au... -
Page 19: Text Message
Step 4: Press the ok softkey button to input receivers’ phone number. Note: bb100 support group mails, user can send one message to 10 friends or family one a time; Press the ok softkey button to access to configuration the next receiver’s phone number;... -
Page 20: Reading Message
5.14 DND (Do Not Disturb) Use the Do Not Disturb feature to prevent incoming calls from ringing your phone. To enable Do Not Disturb, use the softkey under the Not disturb. MBIT Technologies www.mbit.com.au... -
Page 21: Using Advanced Phone Functions
In addition, if you have configured the pickup code in BLF, you can press the same multi-functional button to pick up a ringing call at his extension. The example below describes the steps to configuration the pickup in BLF from Webpage, user can also configuration from MENU. MBIT Technologies www.mbit.com.au... -
Page 22: Shortcut Key
Press the Exp Key 1, then the LCD will display the phonebook item immediately, and user can configuration it, the steps are same as configuration from menu. Press the next Exp Keys, and the LCD will display the corresponding item immediately, and user can also configuration it. MBIT Technologies www.mbit.com.au... -
Page 23: Pickup
This transfers the parked call back to the person who originally parked the call. The example below describes the steps to configuration the call park from Webpage, user can also configuration from MENU. Adding Call Park: Step 1: View the parking settings in server, below is an example in TrixBox MBIT Technologies www.mbit.com.au... -
Page 24: Msg
Voice Mail service must be available on your network to use this feature. 6.6.1 Enable and configuration MSG There are two ways to enable MSG, one is from menu, and the other is from your PC to use bb100’s webpage. -
Page 25: Using Msg
Step 1: Press the button. Step 2: Scroll to 16 Reboot; press the select softkey button to access to reboot item. Step 3: Then a notice “Confirm System Reboot” will appear, press the ok softkey button to confirm rebooting. MBIT Technologies www.mbit.com.au... -
Page 26: Factory Default
Please REBOOT to make the changes effective! will appear, and then press Reboot button to reboot bb100. Note: If you choose factory default, you will return the phone to the original factory settings and will erase all current settings, including the directory and call logs. -
Page 27: Configuration
7 CONFIGURATION 7.1 Web-based Configuration This section will show you how to configure your bb100 using the web-based configuration interface. The default network settings are the following: Default Internet Connection Type: DHCP Default PC Port Connection Type: Bridge Default user name of admin mode: admin... -
Page 28: Status
Press it to reboot bb100 7.4 Status 7.4.1 Basic This webpage displays the basic status of your bb100, including the information about product information, SIP account status, network status, VPN status, PC port status and system status. Click Refresh button to refresh the status. -
Page 29: Lan Host
7.4.2 LAN Host This page displays the status about the cliend which connected to the bb100’s LAN port 7.4.3 Syslog This page displays the log of system. User can press Clear button to clear all information, Click Refresh button to refresh syslog. -
Page 30: Internet Port (Wan)
Choose DNS type from Manual and Automatic • In Manual: user should set the Primary DNS and Second DNS manually • In Automatic: IP Phone will get the Primary DNS and Second DNS from DHCP Server automatically MBIT Technologies www.mbit.com.au... -
Page 31: Lan
IP address. (The default is 192.168.1.1) Local Subnet Enter the subnet mask to Mask determine the size of the network (default is 255.255.255.0/24) Local DHCP If or not enable Local DHCP Server Server MBIT Technologies www.mbit.com.au... -
Page 32: Mac Clone
MAC address. So you may not pass the provider’s authentication when you use a new bb100. In this case, you can use MAC Clone to copy your PC’s MAC address to bb100’s Internet port. MAC is an important parameter for network equipments, so you should make sure that the MAC is right, in order to prevent to make bb100 unusable. -
Page 33: Vpn
Route 7.5.5 DMZ bb100 provides a facility DMZ Host that maps ALL unsolicited data on any protocol to a single host in the LAN. Regular web surfing and other such Internet activities from other clients will continue to work without inappropriate interruption. DMZ Host allows a defined internal user to be totally exposed to the Internet, which usually helps some special applications such as Netmeeting or Internet Games etc. -
Page 34: Wireless
Choose DNS type from Manual and Automatic • In Manual: user should set the Primary DNS and Second DNS manually. • In Automatic: IP Phone will get the Primary DNS and Second DNS from DHCP Server automatically. MBIT Technologies www.mbit.com.au... -
Page 35: Wireless Connection
DDNS is enabled and select a Provider DDNS service provider Account Enter the DDNS service account Password Enter the DDNS service account password DDNS URL Enter the DDNS domain name or IP address Status See if DDNS is successfully upgraded MBIT Technologies www.mbit.com.au... -
Page 36: Routing
Domain Name The domain of SIP Server SIP Server The IP address of SIP Server SIP Port The port which SIP Server supports for VOIP service, default is 5060 Outbound Proxy Outbound Proxy IP or domain name MBIT Technologies www.mbit.com.au... -
Page 37: Audio Configuration
G.711U, G.711A, G.722, G.729, G.723 G.723 Coding Choose the speed of G.723 Speed from 5.3kbps and 6.3kbps Packet Cycle The RTP packet cycle time Silence Supp If or not enable silence Echo Cancel If or not enable echo cancel MBIT Technologies www.mbit.com.au... -
Page 38: Supplementary Services Subscription
Cancel Message When you set enable, an Enable unregistered message will be sent before registration, while you set disable, unregistered message will not be sent before registration. You should set the option for different Proxy. MBIT Technologies www.mbit.com.au... -
Page 39: Line
7.6.3.1 SIP Parameters 7.6.3.2 NAT Traversal Field Name Description NAT Traversal If or not enable NAT. bb100 supports STUN traversal, choose “STUN” in the “NAT Traversal Mode” if you want traverse NAT/Firewall. STUN Server IP STUN server IP address, default is stun.fwdnet.net... -
Page 40: Voip Qos
Choose tone type form China, US, Hong Kong and KR. Min Jitter Delay The Min value of bb100’s (ms) jitter delay, bb100’s jitter is an adaptive jitter mechanism. Max Jitter Delay The Max value of bb100’s (ms) jitter delay, bb100’s jitter is an adaptive jitter mechanism. -
Page 41: Call Forward
7.7.1.4 Miscellaneous Field Name Description Auto Answer If or not enable auto answer. If enable, bb100 will auto answer all incoming call immediately. Dial Time Out How long bb100 to sound dial out tone when bb100 dialing number. - Page 42 Adding Call Pickup: Step 1: Choose one Exp Key to configuration Step 2: Select the call pickup from the drop down list Step 3: Choose the Line from line1, line2. Step 4: Fill the phone number in Expansion MBIT Technologies www.mbit.com.au...
-
Page 43: Dial Plan
Dial Plan Syntactic Action Choose the dial plan mode from Deny and Dial Out. Deny means bb100 will reject the matched number, while Dial Out means bb100 allow dial out the matched number. Move Up Press it to move up. - Page 44 Step 5:Press OK button to end configuration. Step 6: Press Save Settings button to save changes. Deleting one dial plan: Step 1: Enable Dial plan Step 2: Choose one dial plan Step 3: Click Delete button to delete the dial plan MBIT Technologies www.mbit.com.au...
-
Page 45: Dial Plan Syntactic
“9” , stop tone until inputting “1” “9,8,010x”: make outside dial tone after inputting “9” , stop tone until inputting “0” Set the delayed time. For example: “<9:111>T2”: bb100 will dial out the matched number “111” after 2 seconds. MBIT Technologies www.mbit.com.au... -
Page 46: Example
Using line 2, if user dials 2622 or 26222 or 262222 or 2622222 or 2622222, bb100 will call 5622 or 56222 or 562222 or 5622222 or 56222222 immediately. And bb100 will make outside dial tone after inputting “2” or “3” , stop tone until inputting “6” . 5. Example 5 Using line 1, if user dials 777x8, bb100 will reject the phone number out. - Page 47 Step 1: Choose one phone book Step 2: Click Delete button to delete the phone book Move one phone book to Black list: Step 1: Choose one phone book Step 2: Click Move to blacklist button to delete the phone book MBIT Technologies www.mbit.com.au...
-
Page 48: Black List
Step 2: Click Delete button to delete the black list Moving one Black List to phonebook: Step 1: Choose one black list Step 2: Click Move to Phonebook button to move the black list to the phonebook MBIT Technologies www.mbit.com.au... -
Page 49: Call Log
7.7.5 Call Log To view the call log information such as redial list (incoming call), answered call and missed call. 7.7.5.1 Redial List 7.7.5.2 Answered Calls 7.7.5.3 Missed Call MBIT Technologies www.mbit.com.au... -
Page 50: Administration
7.8 Administration Use can manage the bb100 in these six webpage; you can configuration the Time/Date, password, web access, system log and so on. 7.8.1 Management You can configuration the value of Time/Date, password, web access, and system log and so on. -
Page 51: Password Reset
Change the password of admin mode: Steps: Step 1: Choose the admin from the drop-down list. Step 2: Input original password, default setting is null. Step 3: Input a new password twice time in New Password and Confirm Password. MBIT Technologies www.mbit.com.au... -
Page 52: Web Access
Picture 1 Field Name Description SysLog Server Set the SysLog Server IP address or domain name for bb100. Log Level Choose log level from None/ Error/Warn/INFO/Debug. The priority changes from left to right, left is the lowest, right is the highest; the higher priority, the more information in syslog. -
Page 53: Factory Defaults
Step 4. User can view syslog in syslog server, and you can also view the syslog in Status/ Syslog webpage. 7.8.1.5 Factory Defaults Description Press Factory Default button to set bb100 default. 7.8.2 Firmware Upgrade Description Steps: Step 1: Choose a upgrade file type from Upgrade... -
Page 54: Provision
7.8.3 Provision 1) Provisioning allow bb100 auto-upgrading or auto-configuring 2) bb100 supports 3 ways to provision: TFTP, HTTP and HTTPS. • Before testing or using TFTP, user should have tftp server and upgrading file and configuring file. • Before testing or using HTTP, user should have http server and upgrading file and configuring file. -
Page 55: Snmp
Field Name Description Upgrade Enable If or not enable firmware upgrade via provision. Upgrade Error If the last upgrade fails, bb100 Retry Delay(sec) will try upgrading again after “Upgrade Error Retry Delay” period, default is 3600s. Upgrade Rule URL of upgrade file 7.8.4 SNMP... -
Page 56: Tr069
If or not enable TR069 CWMP If or not enable TR069 ACS URL The URL of TR069 server User Name The bb100’s user name for connecting to TR069 server Password The bb100’s password for connecting to TR069 server Periodic Inform... -
Page 57: Operation Mode
7.8.7 Operation Mode Choose the Operation Mode as Basic Mode or Advance Mode. MBIT Technologies www.mbit.com.au... -
Page 58: Trouble Shooting
Solution: Check if the Ethernet cable is properly connected. Check if the DHCP server is working normally. Check if the connection between the DHCP Server and bb100 is properly connected. 8.3 No Dial Tone Solution: Check if the handset cord is properly connected. -
Page 59: Can Not Connect To The Configuration Website
Factory default: press OK by using the corresponding softkey button. If you choose factory default, you will return the phone to the original factory settings and will erase ALL current settings, including the directory and call logs. MBIT Technologies www.mbit.com.au...
Need help?
Do you have a question about the bb100 and is the answer not in the manual?
Questions and answers