
Summary of Contents for Zacuto Gratical HD
- Page 1 Bright. Sharp. Brilliant. The Gratical HD Micro-OLED Electronic Viewfinder Full Digital Manual...
-
Page 2: Table Of Contents
Table of Contents Gratical Features ......................... 3 Included Components ........................ 4 Battery Usage ..........................4 Power Sources..........................4 HDSDI & HDMI Connections ...................... 5 Operating Lens Door ........................5 Removing/ Installing Lens Protection ..................6 Operating Menus ........................7 Display Calibration ........................8 LUTs ............................... -
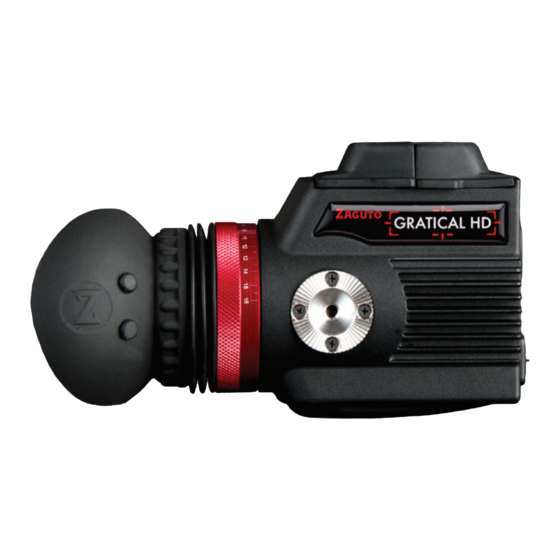
Page 3: Gratical Features
Gratical Features 1. Power Button 9. Function Buttons 2. USB Port 10. Joystick 3. HDSDI Out 11. Battery Release Button 4. HDSDI In 12. LP-E6 Battery 5. HDMI Out 13. HDMI Covers 6. HDMI In 14. HDSDI Covers 7. Focusing Ring 15. -
Page 4: Included Components
Included Components 3 AC Plug Adapters Li-ion Battery Charger Li-ion Battery LP-E6 Pack Battery Usage To ensure full runtime charge your battery before first use. Note: Only use LP-E6 type batteries with the Gratical. Doing otherwise may damage the unit. Insert the battery into the left side compartment of the Gratical. -
Page 5: Hdsdi & Hdmi Connections
HDSDI and HDMI Connections The Gratical HD includes two HDMI and two HDSDI ports with cross conversion from HDMI to HDSDI. Weather resistant covers prevent moisture or debris from getting in open ports. Opening Eyecup Lens Door Hands Free Position your head next to the lens door tab. -
Page 6: Removing/ Installing Lens Protection
Removing & Installing Level 1 Fog Protection Level 1 Fog Protection Anti-Fog Coated Diopter offers a mild fog protection. Good for average conditions, comes pre-installed. 1. To replace the diopter, remove three Phillips screws and remove the diopter 2. Install new diopter and tighten 3 Phillips screws back into place. Lens Lip Anti Fog Shield Level 2... -
Page 7: Operating Menus
Operating Menus MAIN MENU DISPLAY CALIBRATION LUTS COLOR BARS Current Selection SCOPES OVERLAYS (In Red) METERS PIXEL TO PIXEL (ZOOM) DSLR SCALING [Auto/Playback] Current Setting ANAMORPHIC DE-SQUEEZE [NORMAL] FRAME STORE FUNCTION BUTTONS USER FEATURES LOCK BUTTONS Sub-Menu UPDATE ABOUT Indicator Time-code Battery Meter Audio Meter... -
Page 8: Display Calibration
Display Calibration DISPLAY CALIBRATION BRIGHTNESS CONTRAST SATURATION GREEN BLUE 1.00 GAMMA RESTORE DEFAULT IMAGE FLIP SELECT PRESET STORE PRESET Use these settings to adjust the calibration of the Micro OLED Display. BRIGHTNESS: [-100 to 100] CONTRAST: [-100 to 100] RED: [-100 to 100] GREEN: [-100 to 100]... -
Page 9: Luts
LUTs LUTS IMPORT CUSTOM LUT CREATE CUSTOM LUT EXPORT CUSTOM LUT SELECT PRESET EVF LUT SELECT CUSTOM EVF LUT (off) SELECT PRESET SDI OUT LUT SELECT CUSTOM SDI OUT LUT (off) PREVIOUS MENU Import Custom LUT • To import a custom LUT, insert a USB stick into the Gratical and select import custom LUT from the LUT menu. -
Page 10: Color Bars
Color Bars COLOR BARS SMPTE HD MACBETH BLUE ONLY MONOCHROME PREVIOUS MENU • The SMPTE HD, MACBETH, and BLUE ONLY features can be used to calibrate your Gratical. COLOR BARS COLOR BARS SMPTE HD SMPTE HD MACBETH MACBETH BLUE ONLY BLUE ONLY MONOCHROME PREVIOUS MENU... -
Page 11: Scopes
Scopes Histogram Waveform Vectorscope The Gratical offers three different scopes: Histogram, Waveform, and Vectorscope. Histogram • (Luminance): The luma Histogram shows all luminance values in the image, from black to white. • (RGB):The RGB Histogram shows histogram analyses for each color, Red, Green, Blue. -
Page 12: Scopes Settings
Scope Settings • TOGGLE SCOPES: Select to toggle scopes ON/OFF. All scopes off defaults image to the center. • WAVEFORM/VECTORSCOPE: Select to toggle waveform or Vectorscope. Only one can be active at a time. SCOPES TOGGLE SCOPES HISTOGRAM TYPE LUMA HISTOGRAM SCALE LINEAR WAVEFORM... -
Page 13: Overlays
Overlays Note that all overlay features can only see pre LUT applied image. When using a LUT, these features will work off the original, non LUT image. OVERLAYS FALSE COLOR FOCUS ASSIST FOCUS ASSIST (ZEBRA) FRAME LINE NONE TIME CODE RECORD LIGHT RECORD LIGHT TYPE MENU SETTINGS... -
Page 14: Focus Assist (Red Line)
Focus Assist FOCUS ASSIST (Red-Line) RED-LINE ENABLE COLOR LEVEL • Select RED-LINE ENABLE to PEAKING ENABLE LEVEL see feature ON/OFF. • Select COLOR to change the color of the focus assist lines. • Select LEVEL to change the intensity of the focus assist lines. -
Page 15: Frame Line
Frame Line FRAME LINE 1.33:1 (4x3) SDTV 1.66:1 (15x9) European Theatrical • Select to choose the frame 1.78:1 (16x9) HDTV 1.85:1 American Theatrical lines and/or action safe lines you 2.40:1 Anamorphic Theatrical 2.66:1 Cinemascope wish to overlay on the image. CENTER CROSS 3x3 GRID Time Code... -
Page 16: Meters
Menu Settings • MENU LOCATION: Select to move the menu to one of six locations. • MENU TRANSPARENCY: Select to set the menu transparency, 1-5 Meters METERS (Audio & Battery) AUDIO METERS BATTERY LEVEL • AUDIO METERS: Select PREVIOUS MENU to toggle the Audio Meters ON/OFF. -
Page 17: Pixel To Pixel
Pixel to Pixel PIXEL TO PIXEL (ZOOM) ENABLE • Select ENABLE to see feature CENTER PAN RATE On/Off. While ON, use the joystick to scroll around the image. • Select CENTER to re-center the picture while zoomed in. • Select PAN to change the number of pixels at which you will scroll while zoomed in. -
Page 18: Anamorphic
Anamorphic • Select the anamorphic ANAMORPHIC CORRECTION de-squeeze factor NORMAL 1.33x corresponding to your lens. 1.5x 2x ** 2x(4:3) Frame Store FRAME STORE STORE NUMBER • Toggle Show ON/OFF to SHOW display the stored frame in SHOW STYLE OPAQUE CAPTURE the selected memory bank. -
Page 19: Function Buttons
Function Buttons FUNCTION BUTTONS CURRENT SETTINGS • The Gratical has eight function F1 TOGGLE EVF SCOPES buttons that can be assigned by F2 FALSE COLOR F3 EXPOSURE ASSIST the user. These include the four F4 PIXEL TO PIXEL buttons (F1, F2, F3, F4) and the UP FOCUS ASSIST DN BATTERY LEVEL four directions of the joystick... -
Page 20: Update
USB thumb drive to FAT32 on a PC, MD-DOS on a Mac. • Download the firmware update from www.zacuto.com. • Insert your USB drive into the Gratical’s USB port, select UPDATE from the menu and select USB DRIVE. Select START UPDATE and follow the on screen instructions. -
Page 21: Precautions
• To report bugs, features, and ideas please contact zacuto. Limited Warranty Zacuto USA electronic devices come with a limited one year hardware warranty. The limited hardware warranty covers defects in workmanship and materials of our products for up to one year. This warranty does not cover any damage to...
Need help?
Do you have a question about the Gratical HD and is the answer not in the manual?
Questions and answers