Table of Contents
Advertisement
Advertisement
Table of Contents

Summary of Contents for G-Technology G-RACK 12
- Page 2 Copyrights...
- Page 3 Copyrights Copyrights G-Technology and G-RACK 12 are registered trademarks of Western Digital Corporation or its affiliates in the United States and/or other countries. Apple, Mac, Final Cut Pro, FireWire, MacBook Pro, Time Machine and the Mac logo are trademarks of Apple, Inc., registered in the U.S. and other countries.
- Page 4 Introduction...
- Page 5 Features and compatibility are balanced so you get to provide a high speed solution that will work in most modern network environments. When you install the G-RACK 12 you will get a fully operational storage system ready to use on your network.
- Page 6 Introduction About G-RACK12 The G-RACK 12 Network-Attached Storage (NAS) delivers the ultimate in high-performance, centralized storage for small-to-medium size post-production houses, ad agencies, TV/broadcast studios and in-house creative departments that use Avid Media Composer®, Final Cut Pro X®, or Adobe Premiere® software.
-
Page 7: Safety Notice
5. Do NOT place any objects on the G-RACK 12 during normal system operations to avoid overheat. 6. Use the flat head screws in the product package to lock the hard disk drives in the G-RACK 12 when installing the hard drives for proper operation. -
Page 8: System Requirements
Introduction System Requirements Any computer that will be used to access your the G-RACK 12 must meet these requirements to ensure the best use experience: Software • A Microsoft® Windows® or Apple Macintosh computer running one of these operating systems: •... -
Page 9: Getting Started
Getting Started... - Page 10 What’s in the Box You should inspect the box in which the G-RACK 12 was shipped and note if it was damaged in any way. If the unit itself shows damage you should file a damage claim with the carrier who delivered it.
- Page 11 Getting Started Box Contents The G-RACK 12 server including 12 bays with internal hard drives • (2) Power cords • (2) Bezel locking Keys • Front bezel • Rack rail kit • Rail kit adapter • Hardware QSG • Software QSG •...
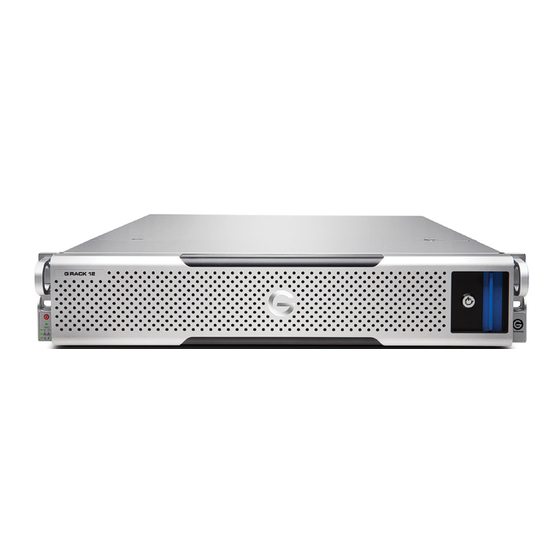
- Page 12 Getting Started Front View Rear View p. 12...
- Page 13 G-RACK 12 Installation Preparing for Setup The box the G-RACK 12 was shipped in should include two sets of rail assemblies, two rail mounting brackets and the mounting screws you will need to install the system into the rack. Follow the steps in the order given to complete the installation process in a minimum amount of time.
- Page 14 Getting Started Rack Mounting Considerations Ambient Operating Temperature If installed in a closed or multi-unit rack assembly, the ambient operating temperature of the rack environment may be greater than the ambient temperature of the room. The consideration should be given to installing the equipment in an environment compatible with the manufacturer’s maximum rated ambient temperature (TMRA).
- Page 15 Installing the Inner Rail Extension The G-RACK 12 chassis includes a set of inner rails in two sections: inner rails and inner rail extensions. The inner rails are pre-attached to the chassis, and do not interfere with normal use of the chassis if you decide not to use a server rack.
- Page 16 Getting Started Figure 2-1. Separating the Rack Rails Slide rail mounted equipment is not to be used as a shelf or a work space. Stability hazard. The rack stabilizing mechanism must be in place, or the rack must be bolted to the floor before you slide the unit out for servicing.
- Page 17 Figure 2-2. Assembling the Outer Rails Outer Rack Rails Outer rails attach to the rack and hold the chassis in place. The outer rails for the G-RACK 12 chassis extend between 30 inches and 33 inches. Installing the Outer Rails to the Rack 1.
- Page 18 Getting Started Figure 2-3. Installing the Rack Rails Installing the Chassis into a Rack 1. Extend the outer rails as illustrated above. 2. Align the inner rails of the chassis with the outer rails on the rack. 3. Slide the inner rails into the outer rails, keeping the pressure even on both sides. When the chassis has been pushed completely into the rack, it should click into the locked position.
- Page 19 Getting Started Physically Connecting G-RACK 12 1. Plug in 2 power cords to back of the G-RACK 12 2. Plug in the Ethernet cable 3. LEDs will flash green on ethernet port. 4. Press power button p. 19...
- Page 20 Connecting G-RACK 12 to Your Network When first powered on, during the initial boot sequence, the G-RACK 12 will wait to be assigned an IP address via DHCP. If it does not receive a DHCP assigned IP address, by default, it will have a self- assigned IP address of 172.16.12.12.
- Page 21 If not using DHCP, you can plug your primary network cable into [ETH1]. The default IP Address is 172.16.12.12. You can connect to the G-RACK 12 with this static IP address and with the G-RACK 12 Administration Tool you can change the IP address to what works best for you.
- Page 22 Getting Started 7. Save your settings For Windows: 1. Open Network 2. Go to Sharing > Change adapter settings and choose your connected network 3. View Properties. 4. Click Internet Protocol Version 4 and 5. Click Properties p. 22...
- Page 23 THE FURTHER PROCEDURES SHOULD BE COMPLETED ON ANOTHER NETWORKED CLIENT COMPUTER WITH A WEB BROWSER Access the G-RACK 12 by using a supported web browser and use the IP address of the device ( Listed in Bonjour or using Static IP from above)
- Page 24 THE FURTHER PROCEDURES SHOULD BE COMPLETED ON ANOTHER NETWORKED CLIENT COMPUTER WITH A WEB BROWSER Access the G-RACK 12 by using a supported web browser and use the IP address of the device ( Listed in Bonjour browser or using Static IP from previous chapter) The G-RACK 12 has a setup Wizard that allows you to quickly step through the basic procedures of the device settings for the first use and to configure it for your environment.
- Page 25 Theme is a set of pre-configured parameters, that are most likely to suit to desired working environment. You can skip Wizard by pressing Skip To Storage Setup button Using the G-RACK 12 Administrative Tool you are free to reconfigure the G-RACK 12 later. p. 25...
- Page 26 Getting Started STEP 4. Web Admin Password. Set your G-RACK 12 Admin password here. Login user name will remain “admin”. Please note that password is case sensitive. Min length is 5 characters. If you don’t change the password at this step, it will remain as default. You can reset it later using Web Administrator Password p.
- Page 27 Getting Started STEP 5. Email Notification Enable this option to receive notifications from the G-RACK 12 on drives and system health. It is possible to set email notifications later using Monitoring Settings menu. An email account for the G-RACK 12 is to be created prior to enabling this option.
- Page 28 Getting Started To choose additional notification alerts, go to Notifications in the G-RACK 12 Administration Tool. STEP 6. Create User Accounts Set up at least one user to continue. User names are lower case only without length limits. Passwords allow both lower and upper cases ( case-sensitive) with the minimal length of 5 characters.
- Page 29 Getting Started STEP 8. Customize the G-RACK 12 Shares and Targets settings. Enable network protocols to used for each Share (workspace) and Targets. STEP 9. The G-RACK 12 Build Summary. This step is informational. Review the configuration settings to be applied to your G-RACK12.
- Page 30 Getting Started STEP 10. Welcome to the G-RACK 12 Administrative tool Once you are done with primary settings, you will see the Dashboard p. 30...
- Page 31 Getting Started All settings can be changed manually in the G-RACK 12 Administrative Tool at any time. p. 31...
- Page 32 Administrative Tool...
- Page 33 Administrative Tool To access the Web user interface, open a web browser, type in the IP address of your G-RACK 12 and log in. Dashboard You are here The G-RACK 12 Dashboard provides a quick overview of performance metrics and health statuses in the form of widgets.
- Page 34 G-RACK 12. Dashboard will not show that a user is ‘logged into’ the G-RACK 12 server if the user logged in as user ‘ anonymous’ to the FTP service. This also applies to users who use the SMB/CIFS service if ‘guests allowed’...
- Page 35 Click the widget title to see more information under Services section. Workspace Status The widget displays the workspaces created on the G-RACK 12 . means at least one service is enabled for this particular workspace. means no service is enabled for this particular workspace.
- Page 36 Administrative Tool Workspaces You are here Add/Edit Workspace To create a Workspace, there should be a RAID already created. Click the Add button to create a new Workspace The following table describes the labels on the screen: Name Input the name of the Workspace Device Select RAID array, which will contain the volume.
- Page 37 Administrative Tool Compress files Compress files on-the-fly using Zlib algorithm. NOTE: It is not recommended to enable Zlib option, if the volume will be used to work with video files. Permissions The file level access of the shared folder path Comment Add notes on the Workspace here Click the Permissions button to set users and groups access permission for the Workspace.
-
Page 38: Advanced Options
Administrative Tool Directory Choose a workspace to set permission to User/group permissions Decide on permission to be granted to a partic- ular user or group for the workspace and toggle the button on. Advanced options Advanced options can be found by clicking the arrow at the bottom of the dialog window. The options allow specific access rights to individual users and groups to be assigned. - Page 39 Administrative Tool The following table describes the labels on the screen: Device Name of the related physical disk Volume’s name Name of the volume Snapshots’s path The relative path according to root of the se- lected file system Read only Toggle to make the snapshot read-only Quotas This option is used to limit the amount of disk storage space that is allowed for a workspace.
- Page 40 Administrative Tool Quota information The table lists all created workspaces, space already used and their quota Select the workspace to set a quota limit and click the Edit Quota Limits button. NOTE: It is not possible to set the quota limit less than the already used space. Mount Click the Mount button to mount a workspace.
- Page 41 Administrative Tool Delete Workspace To delete a workspace highlight the workspace and click Delete button. p. 41...
- Page 42 You are here Physical Disks This information page displays all the hard drives of the G-RACK 12. It shows the drive slot number, system name of the drive, vendor, model, serial number and disk capacity. For best practice we recommend using all disks of the same capacity and the same vendor.
- Page 43 Administrative Tool The following table describes the labels on the screen: Spindown time Directly connected with Advanced Power Management level chosen. Sets the idle time for the drive after which the spindle will stop spinning. Write cache Enables write-cache. This option is effective only if the hard drive supports it.
-
Page 44: Device Properties
Administrative Tool Scan for new drives Use this option to force the system to scan for new drives. The system automatically scans for new drives every minute. S.M.A.R.T. S.M.A.R.T. stands for “Self-Monitoring, Analysis and Reporting Technology”. This is the system on a hard drive used to monitor and report on the health of the drive. -
Page 45: Device Information
Administrative Tool To allow S.M.A.R.T. monitoring system wide, select all the drives, then click the Edit button. Toggle the button and save. S.M.A.R.T. information dialog provides a set of reports. The screens below display the information about the physical drive health. NOTE: The available S.M.A.R.T. - Page 46 Administrative Tool The following table describes the labels on the screen: Identification number to mark a hard drive at- tribute. This is a standard across all S.M.A.R.T. enabled storage devices. However it depends on the storage vendor which attributes it will allow S.M.A.R.T.
- Page 47 Administrative Tool Flags Indicates the main purpose of the attribute. An attribute can be critical (able to predict failure) or statistical one ( does not directly affect condi- tion) • P - pre-failure • O - online • S - performance •...
- Page 48 Administrative Tool Extended information from smartctl utility p. 48...
- Page 49 Administrative Tool History Scheduled Tests Add/ Edit scheduled test For each of the devices you can schedule a particular test from the list. The test will run at a pre- determined time and date. Click the plus button to add a scheduled test. The following table describes the labels on the screen: Enable Enables the scheduled test to run...
- Page 50 Administrative Tool Type Choose type of test. Short self-test The goal of the short test is the rapid identi- fication of a defective hard drive. Therefore, a maximum run time for the short test is 2 min. The test checks the disk by dividing it into three different segments.
- Page 51 Administrative Tool Hour Set the time when the test will be performed. Asterisk means “every hour” Day of month Set the day when the test will be performed. Asterisk means “every day” Month Set the month when the test will be performed. Asterisk means “every month”...
- Page 52 Administrative Tool The following table describes the labels on the screen: Enable Toggle on to enable S.M.A.R.T. monitoring for the physical disks Check interval Sets the interval between disk checks to N sec- onds. p. 52...
- Page 53 Administrative Tool Power mode Prevent a disk from being spun-up when it is periodically polled. • Never - Poll (check) the device regardless of its power mode. This may cause a disk which is spun-down to be spun-up when it is checked.
- Page 54 Administrative Tool RAID This menu is used to set RAID configuration and format the data drives. The status is displayed in the Dashboard and can be one of the following: • Good - normal state. everything is ok • Unmounted - filesystem unmounted, not in use •...
- Page 55 Administrative Tool Create RAID device Use this menu to create a new data RAID device The following table describes the labels on the screen: Name Input a name for new RAID Level Choose RAID level from the list - 5 or 6. Please refer to Appendix for additional information.
- Page 56 Administrative Tool Grow RAID device Select devices to be added to the RAID device. The list will display unassigned physical drives. Remember to perform balance on any modification of RAID structure. The following table describes the labels on the screen: Name The name of the RAID Level...
- Page 57 Administrative Tool The following table describes the labels on the screen: Name The name of the RAID Level The level of the RAID Devices Choose the physical disk to be removed from the RAID NOTE: The minimal number of drives for different RAID levels is: •...
- Page 58 Administrative Tool Balance While the RAID is being balanced, its status in the field State will be “balancing”. Balance operation may take a significant amount of time. Balancing may have impact on the RAID performance but does not block any regular operations. Array details The menu will call the array information window Mount...
- Page 59 Advanced menu button. Simple menu displays only Network, Services, NFS, SMB/CIFS, AFP and iSCSI SCST. Advanced menu also includes FTP, Rsync and SSH. Network General Here you can set the G-RACK 12 host and domain information. p. 59...
- Page 60 Administrative Tool The following table describes the labels on the screen: Hostname Label that identifies the system to the network Domain Name DNS domain where the G-RACK 12 hostname should be registered p. 60...
- Page 61 Administrative Tool Interfaces Add/Edit Ethernet The menu is used to configure and add network interfaces. Both ipv4 and ipv6 are configurable using this menu. To configure a particular interface highlight, that interface and select the edit button. p. 61...
- Page 62 Administrative Tool Set configuration for each network interface. The following table describes the labels on the screen: Name Type in the name if( active) Comment Add text to remind you what the inteface is con- nected to IPv4 For IP version 4 protocol setup Method Static - you manually enter an ip address of your choosing, netmask and gateway...
- Page 63 Administrative Tool Media Transfer Unit - the size of the packet pay- load for the this interface Wake-on-LAN Toggle to enable Wake-on-Lan if packets arrive at this interface Options Additional device settings, e.g. ‘autoneg off speed 100 duplex full’ . See manual page for more details.
- Page 64 How to Port Bond 4 ports: 1. Login to admin tool after G-RACK 12 has been setup and configured with one of the primary Ethernet ports (eth0 or eth1) I am using DHCP eth0 port to login as.
- Page 65 Administrative Tool MII monitoring frequency Specifies the MII link monitoring frequency in milliseconds Down delay Specifies the time, in milliseconds, to wait before enabling a slave after a link recovery has been detected Up delay Specifies the time, i n milliseconds, to wait before enabling a slave after a link recovery has been detected IPv4...
- Page 66 Administrative Tool Media Transfer Unit - the size of the packet pay- load for the this interface Wake-on-LAN Toggle to enable Wake-on-LAN if packets arrive at this interface Options Additional device settings, e.g. ‘autoneg off speed 100 duplex full’ . See manual page for more details •...
- Page 67 The service allows the tool that probes each TCP/UDP port to see if there is a service listening. Then the tool will know that the service is available to connect to the G-RACK 12. If the advertising of service of each port is turned on, the port can be scanned .
- Page 68 Administrative Tool Firewall Firewall Filters the network traffic based on specific ruled, added by the administrator . Add/Edit By adding custom rules , it is possible to allow or block access based on the service or application, source or destination IP addresses, time of the day. its also possible to choose to log traffic that matches or does not match the defined rule.
- Page 69 Administrative Tool The following table describes the labels on the screen: Family For IPv4 Direction Choose the direction of the traffic to filter Action This specifies what to do if the packet matches Source Source address can be either a network IP ad- dress (with/mask), an IP range or a plain IP ad- dress.
- Page 70 Administrative Tool Services Overview The menu shows network services enabled and successfully running. The menu shows additional information on SSH status, currently logged in users and established connections. p. 70...
- Page 71 Administrative Tool SMB/CIFS The menu shows additional information on SMB/CIFS status, currently logged in users and established connections. The menu shows additional information on its status, currently logged in users and established connections. p. 71...
- Page 72 Otherwise disable the option to prevent unnecessary CPU overhead. Shares Share is a way a user will connect to the G-RACK 12 to transfer files. We are sharing a workspace. Need set NFS protocol to reach the workspace. i.e. to share a workspace.
- Page 73 If you leave it blank then any computer that can negotiate traffic to the IP address of the G-RACK 12 will have access to the NFS share. You will only want to use this in networks where outside traffic is limited by other means such as a secure firewall.
- Page 74 Administrative Tool Privilege This is a dropdown box that has two options that are fairly clear. 1) Read-only which means you will be able read and copy the files on this NFS share but you will not be able to edit them and 2) Read-Write that gives you privileges to read, edit, copy, and delete the files available on this NFS share.
- Page 75 Administrative Tool Settings Use this menu to enable the service The following table describes the labels on the screen: Enable Turns on the service protocol Number of servers Specifies how many server threads to create. The number of users that can connect to the server at one time.
- Page 76 Administrative Tool enable read/write/execute for Others in the ACL options. (This can be set for child folders only) Use these steps to mount and allow users to write to the share. 1. Go through Wizard > Media > Both setup and enable NFS protocol 2.
- Page 77 Administrative Tool SMB/CIFS Workspaces Add a workspace that will connect via SMB/CIFS service p. 77...
- Page 78 Administrative Tool The following table describes the labels on the screen: Enable Toggle on to enable the service Workspace folder The location of the files to share. Name The name of the share. Comment This is a text field that is seen next to a share when a client queries the server.
- Page 79 Administrative Tool Recycle bin Enable recycle bin. This will create a recycle bin on the share. Files that are larger than the specified number of bytes will not be put into the recycle bin. Set to 0 for unrestricted file size. Files in the recycle bin will be deleted automati- cally after the specified number of days.
- Page 80 Administrative Tool Audit Audit file operations. NOTE: Connecting a shared workspace through SMB protocol, the username is case sensitive. p. 80...
- Page 81 Administrative Tool Settings Use this menu to enable the service The following table describes the labels on the screen: Enable Toggle on to enable the service Workgroup The workgroup the server will appear to be in when queried by clients. Description The NT description field.
- Page 82 Administrative Tool AFP (Apple Filling Protocol) The G-RACK 12 supports Apple Filling Service for connectivity with Mac OS computers. If you need to use AFP service enable it here otherwise leave it disabled to reduce CPU resource overhead. Workspaces Add a workspace that will connect via AFPservice...
- Page 83 Administrative Tool Use dots Don’t do :hex translation for dot files. When this option gets set, certain file names become illegal. These are .Parent and anything that starts with .Apple. Hide dot files Make dot files invisible. Forces filename restrictions This forces filenames to be restricted to the character set used by Windows.
- Page 84 Administrative Tool SSL/TLS Use this tab to enable SSL/TLS encryption for FTP connections. You may also want to restrict FTP ovel SSL/TLS connections to establish only certain SSL certificates. The following table describes the labels on the screen: Enable Enable SSL/TLS connections Certificate The SSL certificate.
- Page 85 Administrative Tool Ban List The tab allows further hardening of FTP server security. Here you can limit users for various criteria, like maximum amount of simultaneous connections or maximum duration of the client-server session. The following table describes the labels on the screen: Event This rule is triggered whenever the selected event directive occurs.
- Page 86 Administrative Tool Shares Add a workspace that will connect via FTP service The following table describes the labels on the screen: Shared workspace The location of the files to share. Comment Optional comment text box p. 86...
- Page 87 Administrative Tool Settings Use this menu to enable the FTP service The following table describes the labels on the screen: Enable Toggle on to enable the service Port Specify the port to be used Max. clients Set the maximum number of simultaneous clients that can connect to the FTP server Max.connections per host Maximum number of connections per IP (0 =...
- Page 88 Administrative Tool Timeout Maximum idle time in seconds. Setting idle timeout to 0 disables the idle timer completely (clients can stay connected for ever, without sending data). Anonymous FTP Enable anonymous FTP Welcome message The welcome message which will be displayed to the user when they initially login.
- Page 89 Administrative Tool Enable FXP protoco. FXP allows transfers be- tween two remote FTP servers without any file data going to the client asking for the transfer. Note: In order to use FXP (File Exchange Proto- col) for server-to-server data transfer, make sure to change the port from 21 to some other port.
- Page 90 Administrative Tool Rsync Rsync is a tool for copying and backing up data from one location( the source) to another( the destination). It is efficient because it only transfers files which are different between the source and destination directories. Jobs To add a new rsync task press the Add button.
- Page 91 Administrative Tool Enable Toggle the button to enable RSync Type Choose the type: Local - synchronizes two local directories Remote - synchronizes a local directory to a remote one. Obtain SSH access to perform this. The remote system is to have synchronizing enabled Mode This option will be available if “remote”...
- Page 92 Administrative Tool Comment Optional comment text box p. 92...
- Page 93 Administrative Tool Rsync and iSCSI It is possible to rsync one iSCSI target to another G-RACK 12. Unfortunately, there is no native way to access it from the G-RACK 12 Administration GUI and initiators will not recognize it. In order to access the duplicate iSCSI target on the second G-RACK 12 you will need to do the following hack: •...
- Page 94 Administrative Tool Server Settings Use this menu to enable rsync utility and set the port The following table describes the labels on the screen: Enable Toggle on to enable Port Choose the port. Default :873 p. 94...
- Page 95 Administrative Tool Modules Use this mvenu to set a folder to be shared. The following table describes the labels on the screen: Enable Toggle the button to enable Shared folder The location of the files to share. Name The name of the share User This option specifies the user name that file transfers to and from that module should take...
- Page 96 Administrative Tool Read only Set read only If this option is set, then any attempted uploads will fail. Write only Set write only. If this option is set, then any attempted downloads will fail. List Enable module listing This option determines if this module should be listed when the client asks for a listing of availa- ble modules.
- Page 97 On the client side it requires an iSCSI “initiator“ . The connection between the G-RACK 12 server and the iSCSI initiator is set via the normal Ethernet infrastructure (Network switch). The client then detects the storage of the G-RACK 12 server as an own local hard disk drive.
- Page 98 Administrative Tool Targets Under configured iSCSI targets you can see all existing targets on the server and their corresponding status. Click the Add button to create a new iSCSI target. Also you can configure CHAP Authentication for this iSCSI Target The following table describes the labels on the screen: Name The name of target.
- Page 99 Administrative Tool MaxConnections The maximum number of connections that can be requested or are acceptable. The result func- tion is Min. MaxRecvDataSegmentLenght The maximum amount of data that the target can receive in any iSCSI PDU. This is a connec- tion- and direction- specific parameter.
- Page 100 Administrative Tool MaxOutstandingR2T The maximum number of outstanding R2Ts. The responder’s value is used. The result function is Min. DataPDUInOrder No indicates that the data PDUs within a sequ- ence can be in any order. Yes indicates that the data PDUs within a sequence have to be at con- tinuously increasing addresses and that overlays are forbidden.
- Page 101 Administrative Tool RspTimeout defines the maximum time in seconds a com- mand can wait for response from initiator, otherwise the corresponding connection will be closed. Default is 90 seconds. NopInterval defines interval between NOP-In requests, which the target will send on idle connections to check if the initiator is still alive.
- Page 102 Administrative Tool Access Control You are here Access Control menu is used to create and manage user and groups accounts. Access rules can be created and edited in the Permissions menu under Workspaces.X Users Add/Edit user Use this menu to create new users’ account and to assign them to groups. To create new or to editing the existing one user account click the Add button, then fill out the required fields.
-
Page 103: Import Users
When entering users to import do not use <>. To skip a field so not enter any text put semi-colon separator, e.g. “john;;john smith;;grack12;PLM;false”. A uid was not set and is not mandatory here because the G-RACK 12 will set the next user id in the line for them. - Page 104 Administrative Tool Refresh The Refresh button will refresh the users list or updated information. NOTE: Newly created users will appear automatically. Refresh button will display any new or updated information about the already existing users. It may take a few minutes to update the information. Group A user group is a collection of users with the same access right to the files or folders.
- Page 105 Administrative Tool Import groups To create multiple groups , use “Import” option. NOTE: The manually assigned uid’s must start off at 1000 or higher, otherwise they will not appear in the list. Delete Hightlight the desired group and press the Delete button. Confirm in the dialogue window. NOTE: Deleting a group will not affect user data.
-
Page 106: Active Directory
By joining the G-RACK 12 to the Active Directory, all the user accounts of the Active Directory server will be imported to the G-RACK 12 automatically. - Page 107 The status will be displayed Users local to the G-RACK 12 system that have the same name as imported ADS domain users will cause some conflicts. Users will merge as one and display as being part of both local and domain groups.
- Page 108 Administrative Tool System You are here General Settings Web Administration Use this menu to set general system settings The following table describes the labels on the screen: Port Specify the port Session timeout The session timeout time in minutes. Set to 0 to disable automatic logout.
- Page 109 Administrative Tool Example error message: p. 109...
- Page 110 Web Administrator Password Set the administrator’s password. NOTE: Make sure to remember the password. If the admin password is lost, contact G-Technology support center for the assistance. NOTE: For security purposes the system will block the login form after 3 incorrect password attempts for 3 minutes.
- Page 111 Adjust the date, time, and time zone according to the location of the NAS. If the settings are incorrect, the following problems may occur: • When using a web browser to connect to the G-RACK 12 or save a file, the display time of the action will be incorrect. •...
- Page 112 NOTE: When connected to Active Directory domain and there is an alteration of the date and time between the G-RACK 12 server and Domain servers you can cause errors. Time must be in sync. If you encounter an issue where the LDAP server is not found and domain users cannot mount AFP shares, this may be the issue p.
- Page 113 1. Find out which disk has failed, for this click „Details” button. It will say „device1” or „device 2”. ID1 - on the left. ID 2 on the right - when you are facing the G-RACK 12. Also the LED of the tray with the failed disk will go red 2.
- Page 114 Monitoring Performance statistics Performance statistics refer to values of various data of the G-RACK 12 system at different points of time. The performance statistics are presented in form of charts and can be viewed under System information menu. The performance statistics directly shows users the performance of the G-RACK 12 from multiple angles.
- Page 115 Administrative Tool Notifications You can limit which events are sent as notification alerts to the email. Select the information you want emailed to the your address. The items checked will be sent when necessary. Settings Use this dialog to set SMTP server which is used to send emails from the notification service. Yu can use either external public SMTP like smtp.gmail.com, or private SMTP in your local corporate network.
- Page 116 Enter the secondary email to send to notificati- Now no matter if you are out at work or away from home you will still be notified of the status and the condition of your G-RACK 12 right away. p. 116...
- Page 117 Administrative Tool Certificates Certificates are needed for secure, encrypted communication over networks. On the G-RACK 12 you need them for SSH and a secure connection to the web administration interface (see General Settings). SSH (Secure Socket Shell) is a network protocol that provides administrators with a secure way to access a remote computer.
- Page 118 Administrative Tool SSL is a cryptographic protocol for communication security and data confidentiality over the Internet. To use SSL, you will need a certificate and a key. These are available from web hosting services and many private privacy providers. To create a new SSL certificate click Add button and choose Create in the drop down menu. This dialog will create a self-signed certificate.
- Page 119 Administrative Tool Scheduled Jobs Add/ Edit scheduled job Use this dialog to add a cron job which is a rule for the cron daemon. Cron is intended to run arbitrary commands on a periodical basis. The following table describes the labels on the screen: Enable Toggle on to enable Time of execution...
- Page 120 Administrative Tool Comment Add an optional text here Execute cron job The Run button starts the job immediately. Delete sheduled Job Click the Delete button to delete the test. p. 120...
- Page 121 Administrative Tool System Information Under this tab you find the most important information about the G-RACK 12 server. • Server name • Version • Time • Hardware information Raid status • CPU usage • System memory • Network info with current transfer rate Overview General information summary about the system.
- Page 122 Administrative Tool Process This is an informational menu. The Process tab all running processes sorted by CPU consumption. This info may be helpful if you are trying to figure out why the performance is suboptimal or if the process for the corresponding service is actually running. Here you can also find out which processes consume large amount of memory.
- Page 123 1. View the real-time performance and historical performance of the device 2. Download log files 3. Analyze performance statistics files 4. Adjust the G-RACK 12 system based on the analysis result to resolve the performance problem. CPU usage Load average...
- Page 124 Administrative Tool Memory usage Network interfaces p. 124...
- Page 125 Administrative Tool Report The Report tab contains essential information about the G-RACK 12 which may be helpful for investigation of possible issues. Please attach this information to any request to the G-Technology support. Logs Log files help troubleshooting in case of problems. Especially when contacting technical support it is very important to create and send support log files as well.
- Page 126 If a tough or critical problem persist in routine maintenance or troubleshooting, contact G-Technology for technical support. After analyzing log information, technical support engineers will provide guidance for you to handle the fault.
- Page 127 Administrative Tool Update Manager Updates Update manager is a utility that oversees the installation of updates for the G-RACK 12 existing software. Once an update is available, you will see a notice in the menu and [plus button] will be active.
- Page 128 Administrative Tool Snapshots Take snapshot Should you experience any troubles after an update or due to other circumstances, snapshots will help you to roll the operating system back. NOTE: Snapshots of OS RAID are read-only. To take snapshot click the Take snapshot button. The snapshots will be displayed in the list.
- Page 129 To perform factory reset, click the system menu and choose Shutdown This option will shutdown the G-RACK 12 server unit only. To perform a full shutdown it is required to press the power button on the front panel of the expansion chassis(es).
-
Page 130: Hardware Description
Hardware Description... - Page 131 This section will cover the hardware and configuration for the G-RACK 12. Server unit Overview The G-RACK 12 is 19” rack mount NAS server chassis with integrated dual processor server board. The server comes pre-installed with NAS OS and all required hardware for operation.
-
Page 132: Serverboard Features
Hardware Description Serverboard Features The G-RACK 12 is built around a dual processor server board based on the Intel C612 chipset. Below are the main features of the unit. Intel C612 Chipset: System Block Diagram p. 132... - Page 133 PCI Expansion Slots The G-RACK 12 has six PCI-Express 3.0 x8 slots (CPU1 Slots 1-3 and CPU2 Slots 5-7) and one PCI- Express 3.0 x16 slot (CPU2 Slot4). While these slots are in the system they are not available to the customer for adding devices.
- Page 134 Graphics are provided by an on board ASpeed AST 2400 BMC, which supports IPMI. Server Chassis Features The G-RACK 12 is a 2U form factor chassis designed to be used in a storage configuration. The following is a general outline of the main features of the G-RACK 12 chassis.
- Page 135 Hardware Description Cooling System The G-RACK 12 chassis includes three 8-cm hot-plug system cooling fans located in the middle section of the chassis. An air shroud channels the air flow from the system fans to efficiently cool the processor area of the system. Each power supply module also includes a cooling fan.
-
Page 136: System Interface Overview
Hardware Description System Interface Overview There are several LEDs on the control panel as well as others on the drive carriers to keep you constantly informed of the overall status of the system as well as the activity and health of specific components. - Page 137 Hardware Description Control Panel LEDs The control panel located on the front of the chassis has several LEDs. These LEDs provide you with critical information related to different parts of the system. This section explains what each LED indicates when illuminated and any corrective action you may need to take. Power Fail Indicates a power supply module has failed.
- Page 138 Hardware Description NIC2 Indicates network activity on the LAN2 port when active. On the G-RACK 12, this LED indicates hard drive activity for any drive in the system. Each drive carrier also has an LED for individual activity. Power Indicates power is being supplied to the system’s power supply units. This LED should normally be illuminated when the system is operating and powered on.
-
Page 139: Activity Led
Hardware Description Drive Carrier LEDs The chassis includes externally accessible SATA drives. Each drive carrier displays two status LEDs on the front of the carrier. LED Color State Status Blue Solid On SATA drive installed Activity LED Blue Blinking I/O activity Solid On Failed drive for SATA with RSTe support... - Page 140 This chapter covers the steps required to install components and perform maintenance on the G-RACK 12 chassis. For component installation, follow the steps in the order given to eliminate the most common problems encountered. If some steps are unnecessary, skip ahead to the step that follows.
- Page 141 Hardware Description Precautions • Use a grounded wrist strap designed to prevent static discharge. Touch a grounded metal object before removing any board from its antistatic bag. • Handle a board by its edges only; do not touch its components, peripheral chips, memory modules or gold contacts.
- Page 142 Hardware Description JBOD Expansion Ports Checking the Airflow • Make sure there are no objects to obstruct airflow in and out of the server. In addition, make sure the front bezel’s filter is replaced periodically. • Do not operate the server without drives or drive carriers in the drive bays. Use only recommended server parts.
-
Page 143: Rack Installation
Hardware Description Rack Installation This chapter provides instructions for preparing and mounting your chassis in a rack. Installing the System into a Rack This section provides information on installing the chassis into a rack unit with the rails provided. There are a variety of rack units on the market, which may mean that the assembly procedure will differ slightly from the instructions provided. - Page 144 Failure to stabilize the rack can cause the rack to tip over. NOTE: Do not use a two post „telco” type racks as they will not support the G-RACK 12’s weight. Sliding the Chassis onto the Rack Rails...
-
Page 145: Drive Bay Installation/Removal
2. Secure the drive to the carrier with screws, as shown in Figure 6-6. Caution: Enterprise level hard disk drives are recommended for use in the G-RACK 12. Removing a Hard Drive Carrier p. 145... - Page 146 Hardware Description Mounting a Drive in a Carrier Caution: Regardless of how many hard drives are installed, all drive carriers must remain in the drive bays to maintain proper airflow. p. 146...
- Page 147 Hardware Description Chassis Setup and Maintenance This chapter covers the steps required to install components and perform maintenance on the chassis. The only tool required is a Phillips screwdriver. Note and heed the warnings and precautions listed in the setup instructions. ESD Safety Guidelines Electrostatic Discharge (ESD) can damage electronic components.
- Page 148 Hardware Description 2. After the system has completely shut-down, carefully grasp the head of the power cord and gently pull it out of the back of the power supply. Remove the cords from both power supply modules. 3. Disconnect the cord from the power strip or wall outlet. Removing the Chassis Cover Removing the Chassis Cover 1.
- Page 149 Removing the Chassis Cover Installing Hard Drives The G-RACK 12 chassis supports twelve hot-swappable 3.5” hard drives, which may be removed without powering-down the system. The drives are mounted in drive carriers to simplify their installation and removal from the chassis. These carriers also help promote proper airflow for the drive bays.
- Page 150 Hardware Description The drive carriers also support an optional a 2.5” hard drive cage, which holds up to two additional 2.5” hard drives. (Instructions on the following pages.) Removing a 3.5” Hard Drive Carrier Removing a Hard Drive Carrier Removing Hard Drive Carriers 1.
- Page 151 Hardware Description Installing 3.5” Hard Drives Caution: Except for short periods of time (swapping hard drives), do not operate the server with the hard drive bays empty. Note: Your operating system must have RAID support to enable the hot-swap capability of the drives.
- Page 152 Hardware Description Installing a Hard Disk Drive 1. Remove the two screws connecting the dummy drive to the carrier. 2. Remove the dummy drive from the carrier. 3. Place the hard drive carrier on a fat, stable surface such as a desk, table, or work bench. 4.
- Page 153 Hardware Description Hard Drive Backplane The hard drives plug into a backplane that provides power, drive ID and bus termination. The supplied RAID controller provides hot-swap capability with SAS/SATA drive state indication. The backplane is already pre-configured, so no jumper or switch configurations are required. Caution: Use care when working around the backplane.
- Page 154 Hardware Description System Fans Three 8-cm hot-swap fans provide the cooling for the system. It is very important that the chassis top cover is properly installed and making a good seal in order for the cooling air to circulate properly through the chassis and cool the components. System Fan Failure Fan speed is controlled by system temperature via IPMI.
- Page 155 Replacement units can be procured by contacting support. Contact information is found on our website www.g-technology.com on our support page. Removing/Replacing the Power Supply You do not need to shut down the system to replace a power supply unit. The backup power supply module will keep the system up and running while you replace the failed hot-swap unit.
- Page 156 Hardware Description G-Technology. 1. First unplug the AC power cord from the failed power supply module. 2. Depress the locking tab on the power supply module. 3. Use the handle to pull it straight out with the rounded handle. Installing a New Power Supply 1.
- Page 157 Hardware Description Power Distributor Chassis that are 2U or more in height require a power distributor. The power distributor provides fail over and power supply redundancy Changing the Power Distributor 1. Power down the server, lay the chassis on a flat, stable surface and remove the chassis cover. 2.
-
Page 158: Overheat Temperature Setting
Hardware Description System Interface Overheating There are several possible responses if the system overheats. Overheat Temperature Setting The unit comes with temperature sensors set for the optimal safe operating range. Responses If the server overheats • Use the LEDs to determine the nature of the overheating condition. •... - Page 159 Use Cases/Tutorials...
- Page 160 Use Cases/Tutorials System Information and system settings How-to a data RAID volume To create a RAID volume you need to be logged in as admin and follow these steps. 1. Navigate to the storage menu, select the RAID screen. 2. Click plus (+) button to start the process of adding a RAID volume. 3.
- Page 161 Use Cases/Tutorials How do I see which services are running? 1. To see which services are active on your G-RACK 12 navigate to the Dashboard. You will see a section labeled „Service Status”. 2. For more details click the „Service Status” title and it will link you to the services page for more...
- Page 162 (Example: http://192.168.10.200) The default user name is „admin” and the password is „gtech”. If you have changed the admin password and forgotten it , you are not able to login. You will be required to contact G-Technology Support.
- Page 163 Additionally, the dashboard will show you the Filesystem Status How is a self-signed certificate used in the G-RACK 12 system? SSL certificates allow you to SSL encryption on the G-RACK 12. The addition of a SSL certificate allows for https access to the Administration pages for the unit.
- Page 164 Use Cases/Tutorials How to shrink your data RAID to fewer physical disks. To shrink your data RAID set use the RAID menu and press the Shrink button. Note the minimal number of drives for your selected RAID set. Important: Remember to balance the RAID device after shrinking by pressing the balance button on the RAID menu.
- Page 165 Use Cases/Tutorials 4. If you have an available drive- it will be shown. 5. Select it and save. How to check the consistency of the file system and fix it. You can have email notifications setup to email you for early warnings 1.
- Page 166 Use Cases/Tutorials 6. Select your volume and edit quota limit NOTE: Don’t set quota smaller the space already in use. NOTE: A volume must be greater than 1TB to have a quota set. How to wipe you data disks. IMPORTANT: This feature can (as designed) cause data loss. Using it without understanding the implications can be catastrophic.
- Page 167 Use Cases/Tutorials Network services How to setup a network (IPV4 and IPV6). Configuring New and Editing Existing Connections. 1. To set up a network connection navigate to the Connect menu. 2. Press the Network option. 3. You will be presented with 4 tabs. (General, Interfaces, Service Discovery, and Firewall) 4.
- Page 168 Use Cases/Tutorials 7. Press save. The values will change quickly on the system. It make take a moment before equipment on your network notices the change. p. 168...
- Page 169 Jumbo Frames on the client. In order for Jumbo Frames above 1500k packet length to/from G-RACK 12 it is imperative that all hardware components (G-RACK 12, Switch, All clients) must be made ready to receive larger packet sizes. This includes the NIC. ATTO offers a Configuration Tool. Once logged in, navigate to the NIC FF-NT12 and click the Advanced Tab.
- Page 170 Use Cases/Tutorials team for assistance. ATTO says: A FastFrame aggregate group derives most of its operational settings, such as Offloads and jumbo packets, automatically, based on the settings of the network adapters in the group. Therefore, in order for a feature to be in effect for a group, that feature must be set identically on each member adapter.
- Page 171 Use Cases/Tutorials 5. Click Save button NOTE: Service Discovery concerns the process of searching for service providers according to certain criteria. Therefore, further service usage is a separate issue. This option does not enable the service. You have to do that in the Settings tab of each individual protocol under the Connect menu. Make sure you press „Advanced”...
- Page 172 Use Cases/Tutorials How to protect your G-RACK 12 from (unwanted) network traffic. Use the Firewall configuration to screen unwanted traffic. The G-RACK 12 has a built-in network firewall in the OS that filters traffic between the server and incoming network traffic.
- Page 173 How to run arbitrary commands on a scheduled basis. There are many times when you want a command to be executed on a schedule. The G-RACK 12 has a built-in CRON function that allows you to set a schedule for commands to run on the server.
- Page 174 RSync module is now setup How to setup a Push RSync job To setup a remote RSync job to copy a local workspace to a remote location ( 2nd G-RACK 12 or a different server or client computer ) 1. Navigate to Connect > RSync 2.
- Page 175 This Job will now execute at the specified time or you can manually start the job. How to setup a Pull RSync job To setup a remote RSync job to copy a remote directory/folder on a different G-RACK 12, a module must be setup, follow steps above to create Module on the remote G-RACK 12.
- Page 176 3. Click permissions 4. Assign permissions 5. Apply and save How to keep G-RACK 12 software up to date. Registered users will receive emails when new updates are available. Or you can manually check: 1. Navigate to System>Update Manager. 2. Press the Check button.
- Page 177 How to transfer the data from a local computer to the G-RACK 12 storage space? Once you have configured a share on the G-RACK 12 it is simply a matter of attaching the share to your local computer and using normal OS tools (File Manager, Finder, Copy, FTP) to copy or move the files on to the G-RACK 12.
- Page 178 Use Cases/Tutorials volume is bigger than the original one. Make sure you have backup if you need to move data to a new LUN. How to get more storage space if I have run out of storage space for the volume that is associated with all of my iSCSI target.
- Page 179 Use Cases/Tutorials What are steps to set up the G-RACK 12 (Walk through)? • Enter in the IP address of the G-RACK 12. If you are unsure of the IP address see the section “Finding the server IP address”. •...
- Page 180 Use Cases/Tutorials p. 180...
- Page 181 Use Cases/Tutorials • You will be presented with the option of selecting a theme. • There are three options you can take here. 1. Media & Entertainment Theme 2. General Theme 3. Skip Theme Selection p. 181...
- Page 182 Use Cases/Tutorials New password for admin is required after your selection. Follow these password word rules for setting a password: • Minimum number of characters is 5 • A-Z, a-z, 0-9, (!, @, #, $, %, ^, &, *) • The password will need to be confirmed and must match both entries.
- Page 183 Use Cases/Tutorials Once you have entered a new password you are presented with the option of allowing the G-RACK 12 to email you when there are system events. p. 183...
- Page 184 Use Cases/Tutorials You need to click the enable slider to activate this option. p. 184...
- Page 185 Use Cases/Tutorials If you choose to activate email notifications then you must complete the email fields as seeing in this example. p. 185...
- Page 186 Use Cases/Tutorials The next configuration option is Creating User Accounts. • When you get to this screen use the plus (+) symbol to add a new user to the server. • You have the option of giving each user their own Workspace (storage area) or allowing all users to share a Workspace.
- Page 187 Use Cases/Tutorials • If the server is established to share common files then you will want a single Workspace. • If the server is established to create storage for each user to have their files on then you will want to select the “Create Workspace for each user.
- Page 188 Use Cases/Tutorials Now that you have users saved you can continue on to selecting the type of storage to which you want your users to have access. There are three options. • iSCSI Media Only - Your system should support large file-format video editing at a block level (fastest data rates).
- Page 189 Use Cases/Tutorials For the purpose of this walk through we have selected both iSCSI and Project Shares. You will need to select what percentage of storage to reserve for each storage type. p. 189...
- Page 190 Use Cases/Tutorials File share Workspaces can be accessed using various protocols. You can turn on and off each type on this next screen. If you are unsure which to use then leave them all on until you can determine which are best for your network and users.
- Page 191 Use Cases/Tutorials Lastly, a review is presented before the shares are created. p. 191...
- Page 192 Use Cases/Tutorials Once you confirm the process starts. p. 192...
- Page 193 Use Cases/Tutorials The next screen you see is the G-RACK 12 Dashboard. Follow the other use cases for more detail on the dashboard. p. 193...
- Page 194 How do I reset the G-RACK 12 to factory default? Resetting the G-RACK 12 to factory defaults settings will erase the data and settings for the server. From the dashboard click the three line drop down on the upper right of the screen.
- Page 195 Are the hard drives in the G-RACK 12 hot-swappable? Yes. In case of a drive failure, users can run G-RACK 12 in the degraded state (meaning one drive failed) and replace the failed drive with a new one. It is important to replace a failed drive with an approved replacement drive to keep all the data intact and safe.
- Page 196 • Inability to power up. • Reports of drives missing that are clearly in the server. • Troubles with the G-RACK 12 software. • Failure to boot. • Unexpected data loss. How do I know how full my server is with data? The best way to see exactly how much room you have left on the server is to view the dashboard.
- Page 197 Moving data from one NAS device to another is a simple file copy process. • Connect your old NAS to a client computer on the same network as the G-RACK 12. • Adjust your settings and connect G-RACK to your client computer such that the client computer sees both the previous NAS device and the G-RACK 12.
- Page 198 Use Cases/Tutorials If you like you can import an SSL certificate generated outside the G-RACK 12 or you use a generated certificate by filling in all the fields and pressing “Save” p. 198...
- Page 199 How to choose the right HDD for my G-RACK 12 ? • We recommend using HGST drives with your G-RACK 12. HGST drives are properly tested and certified to be completely compatible with your server. •...
- Page 200 Use Cases/Tutorials How to enable HTTPS and create a certificate signing request on the G-RACK 12? HTTPS is generally desired and used for encrypted and secure communication. This option is available once you have created or imported a SSL certificate. Steps on how to do this are included elsewhere in this document.
- Page 201 • Check the system status(es) of the G-RACK 12. If the CPU or memory are very busy this is an indicator of why the system seems slow. Normally, this is a transient condition and once the user(s) or process that needs extra RAM or CPU completes the transfers will speed right back up.
- Page 202 Use Cases/Tutorials What make and model of CPU does the G-RACK 12 have? The G-RACK 12 comes equipped with Intel Xeon E5-2600 (V3) CPUs. More detail can be found online: http://ark.intel.com/products/family/78583/Intel-Xeon-Processor-E5-v3-Family#@All How do I create a new RAID device? •...
- Page 203 • You can allow guest access via anonymous FTP - for this you need the user just needs to know the IP address of the G-RACK 12 server. NOTE: you will not see these users in the Dashboard • For more secure connections you can have the users access using userid and password as well as SSL connections to make sure all data is encrypted over the wire.
- Page 204 Use Cases/Tutorials How to access an AFP shared workspace? On OSX all you need to do is open your finder and look for the “Shared” connections on the left hand side. p. 204...
- Page 205 Use Cases/Tutorials How to access an SMB shared workspace? Open Windows explorer. Locate the name of the G-RACK 12 server and click on it. How to access an NFS shared workspace? Mounting a NFS share on Windows can be seeing here: https://technet.microsoft.com/en-us/library/cc754350.aspx...
- Page 206 If you are fully at capacity the best option is to purchase a G-RACK Expansion Chassis. This unit will connect to your G-RACK 12 and add 12 more available drive slots for expanding storage. Contact your reseller for more information.
- Page 207 Use Cases/Tutorials Local RSync Config To setup a local RSync job to copy an existing workspace to a new destination on the GRack: • Navigate to Connect > Rsync • Click + icon to add a new job • Choose job type as Local •...
- Page 208 This Job will now execute at the specified time or you can manually start the job. Pull RSync Config To setup a remote RSync job to copy a remote directory/folder on a different G-RACK 12, a module must be setup, follow steps above to create Module on the remote G-RACK 12.
- Page 209 Also would require use of CLI. How to track users and their activity ? To track users connected to the G-RACK 12 refer to the Connected users widget of the Dashboard. It will display a list of all users.
- Page 210 Use Cases/Tutorials G-RACK 12 RAID Guide Overview Traditionally, the mass storage devices are based on mechanical hard drives (HD). Although SSDs are coming, classical HDs remain the preferred solution for computers ranging from notebook to servers. HDs provide a huge amount of space at a small cost, though at the same time they are not very reliable for data storage and backups.
- Page 211 Use Cases/Tutorials Maximum level of data protection: Usable storage space Applications in which identical data is writ- is 50% of total avail- data security is para- RAID 1 Mirroring ten to multiple drives able space mount High sustained data transfer rate. No Data striped in bytes performance deg- Performance- driven...
- Page 212 Use Cases/Tutorials Creating and managing a RAID array How to create a new RAID array To create a RAID volume you need to be logged in as admin and follow these steps. 1. Navigate to the Storage menu, select the RAID 2.
- Page 213 Use Cases/Tutorials 5. Confirm you want to create the RAID volume 6. Once the RAID volume is created you will be mounted automatically. The selected RAID is highlighted, the Mount button is inactive. How to grow a RAID array There are times when you want the size of your RAID array to be larger. Here are the steps to grow your RAID.
- Page 214 Use Cases/Tutorials 3. Select drives to be added to the RAID from the list of the available drives. 4. Confirm your choice and press Save 5. Important: Remember to balance the RAID array after growing. Highlight the RAID array and press the Balance button.
- Page 215 Use Cases/Tutorials 6. The RAID is ready p. 215...
- Page 216 Use Cases/Tutorials How to shrink a RAID array There may be times when you want to reduce the number of drives in a RAID array. By following these steps you can shrink your RAID array. 1) To shrink your data RAID array use the RAID menu and press the Shrink button. Note the minimal number of drives for your selected RAID set.
- Page 217 Use Cases/Tutorials Setting a Hot Spare Setting a Hot Spare will allow your RAID array to be ready for a drive failure. How to assign a new disk as a Hot Spare NOTE: Hot spare icon is only active after selecting a RAID 1.
- Page 218 Use Cases/Tutorials My newly inserted drive is not showing in the hot spare list. Your drive probably has existing data, You can still use this physical disks as a hot spare. To do this 1. Navigate Storage>Physical Disks 2. Select the new hot spare disk. 3.
- Page 219 2. Pull out the failed drive 3. Pull in a brand new one 4. Go to the G-RACK 12 Administrative tool, click on the Storage tab and then the RAID tab 5. Select the degraded RAID array 6. Click the Hot Spare button 7.
- Page 220 Use Cases/Tutorials The status of the RAID array will change to “rebuilding ” The status of the RAID array will change to “balancing” NOTE: “Balance” passes all data in the filesystem through the allocator again. It is primarily intended to rebalance the data in the filesystem across the devices when a device is added or removed. A balance will regenerate missing copies for the redundant RAID levels, if a device has failed.
- Page 221 iSCSI Essentials...
- Page 222 iSCSI Essentials Overview In a world where Internet Protocol (IP) dominates local and wide area networks, and data storage requirements grow unabated, it seems inevitable that these two forces converge. The Internet Small Computer Systems Interface (iSCSI) protocol unites storage and IP networking. iSCSI enables the transport of block-level storage traffic over IP networks.
- Page 223 SCSI devices for a computer by speaking the iSCSI protocol. Software initiators are available for most popular operating systems and are the most common method of deploying iSCSI. How to create an iSCSI target and LUNs on the G-RACK 12? iSCSI Target Creation Navigate to the iSCSI SCST under the Connect menu You will be brought to the iSCSI Settings page where you must first enable the iSCSI service by switching the enable toggle to On (green) and pressing the Save button.
- Page 224 Workspace, access credentials like username / password assignments (known by iSCSI initiators as username & secret) as well as a multitude of performance and initiator parameters. G-RACK 12’s default advanced parameter configuration has already been maximized for performance but if your network or administrator choose to personalize the advanced parameters for iSCSI targets you will find those attributes here.
- Page 225 Volumes much like a partition for a Directly Attached Storage device (DAS). However, you should know that once a G-RACK 12 iSCSI target has been initialized by a client computer you will not be able to grow a LUN without wiping out all of your data. So plan accordingly and always make backups of your files.
- Page 226 iSCSI Essentials From the Manage LUNs list page you have the option to add a new LUN to your iSCSI target or edit any of the current LUNs. For this instance we will discuss the Edit LUN function. Highlight the auto- generated LUN (id=0) and press the Edit LUN button.
- Page 227 Warning NOT to delete LUN id0 without creating a new LUN with id0. Add LUNs LUN’s correspond to Volumes that are mounted on your desktop. The G-RACK 12 has made adding additional LUNs simple. Navigate to the iSCSI SCST under the Connect menu and select the Targets tab.
- Page 228 iSCSI Essentials Links and references https://en.wikipedia.org/wiki/ISCSI p. 228...
- Page 229 Xtarget including support for mounting multiple iSCSI targets, scanning for newly-created iSCSI targets on your G-RACK 12 as well as allowing your iSCSI target to persist after a system restart. To learn learn more about the full functionality of GlobalSAN iSCSI initiator & Xtarget and how to use the application please view the PDF guide in Applications >...
- Page 230 iSCSI Essentials SANmp Administrator & Client tools Two workstations attempting to mount and write to the same iSCSI target will cause data loss. SANmp is an additional layer of protection for your iSCSI targets. With the SANmp Administrator tool managing your iSCSI targets, you will not run into ownership and permissions conflicts. SANmp Administrator application achieves iSCSI target management by scanning your GRACK- 12 and other workstations on the network to make sure no other workstation already has a particular iSCSI target mounted.
- Page 231 iSCSI Essentials In order for SANmp Administrator tool to manage an iSCSI target you must first initialize one via GlobalSAN iSCSI initiator tool (view the PDF guide in Applications > GlobalSAN folder after installation.) Once you have initialized and then formatted your disk you can launch and login. When prompted to enter a password, use the default password: adminpw111 (which can be changed later on if you wish).
- Page 232 iSCSI Essentials SANmp Client tool: Now that you have at least two SANmp users you will want to be able to use the SANmp- manager iSCSI target. Add another dongle to another workstation that is on your network and install GlobalSAN iSCSI initiator &...
- Page 233 iSCSI Essentials • In order for a SANmp client to simultaneously see iSCSI targets that will not be managed by the SANmp Admin tool you must select Preferences > Allow Unconverted SAN volumes (which allows both SANmp-managed disk and non-SANmp-managed disks to be mounted at the same time) will not take hold when the user is prompted to restart her workstation.
-
Page 234: Troubleshooting
Troubleshooting... - Page 235 3. Is there any sound coming from the unit at all? If not it may be a faulty power supply. Since the G-RACK 12 has dual power supplies would mean that both failed at the same time. This normally would only happen if the unit was not plugged into a surge protected power source.
- Page 236 DHCP/Network 1. Power failures, reboots of the G-RACK 12 or the DHCP server can cause the IP address to change. If this happens then any number of problems can appear. Mostly the iSCSI connections will not work.
- Page 237 2. 2. ID1 - on the left. ID 2 on the right - when you are facing the G-RACK 12. 3. Pull out the failed drive. Be careful to remove the failed drive and not the other drive.
- Page 238 Troubleshooting volume when I attempt a relink? Adobe Premiere Pro has already set a path to where your media lives. It keeps this path in a cached file with your project. If you have to attempt a relink know that the application session will remember both the old and the new paths and will present to you both.
- Page 239 4. Your “Portal/Group” will now populate the Target/Portal window. Toggle down the selection icon next to your G-RACK 12’s IP and choose which target you would like to initialize. The Ethernet ports will populate the Connections window on the right. Select the top option and press connect.
- Page 240 GlobalSAN recommends setting HeaderDigest and DataDigest default setting to CRC32C for more protection against data loss. These settings are available in iSCSI target creation page for G-RACK 12 Administration Tool. Once you have modified the settings to include both the CRC32C Header and Data Digest, the GlobalSAN iSCSI Initiator does not throw the error.
- Page 241 The term “bare metal recovery” comes from the idea that you are restoring a device to working order after a catastrophic failure. While the process will get your G-RACK 12 in working order it does not restore data that was on the drives. For that you will have to run your backup/restore software against the backups you were taking all along.
- Page 242 Troubleshooting Powering Up. When you first power up the unit look at the monitor for a sign that the USB key is booting the recovery software. If you get no change or you get an error message that you can›t boot there is an excellent change the BIOS is not set to boot of the USB key.
- Page 243 Troubleshooting 2. Using your keyboard scroll down to the second option “Install (RAID1)” and press Enter. 3. Immediately, the install process starts. p. 243...
- Page 244 Troubleshooting 4. As it progresses you will see the update bar change. 5. If you see this screen you have successfully installed the software. The server is ready to reboot. Remove the USB key from the back of the unit and press Enter. p.
- Page 245 IP address you can enter in your URL bar. 9. Normal operation can resume. If you have an available backup of the configuration files and data you can now follow the process in the User’s Guide to reload the data on to the G-RACK 12. p. 245...
- Page 246 Troubleshooting iSCSI - Improper dismounts cause permissions issues When Client One disconnects via iSCSI initiator before ejecting the volume properly the target may get to a state where the next client has to either: Authenticate each transaction or Go into the client side permissions and amend the ‘everyone = W/R’ option in order to use an application that requires constant transactions (FCPX etc).
- Page 247 F.A.Q.
-
Page 248: Installation
G-RACK 12 server will not be beyond your capabilities. You need to be able to lift 50lbs (you may want help) and know your way around screws, bolts, nuts and power connectors. - Page 249 Troubleshooting Security - For Security purposes you will want to select a rack that allows for locking the front and rear of the cabinet. Otherwise you should place the rack in a location that provides physical security to the area. Safety •...
- Page 250 Troubleshooting Power Supply. • Standard computer power cords are supplied with the unit. • What power supply is in the unit? features a redundant, hot-plug 920W power supply composed of two separate power modules. This power redundancy feature allows you to replace a failed power supply without shutting down the system.
- Page 251 ACLS & Permissions on the G-RACK 12 When using ACLs on the G-RACK 12 be aware that the OS on the server allows for user permissions to override group ACLs. While this is not how you may expect them to work on Windows Servers it is the chosen method for this device.
- Page 252 Troubleshooting workspace, all files added to workspace should have same permissions. There is a known conflict between the two methods that cause this to not work. Permissions Not Inherited From Client Computer A file on a client computer has rw-r--r-- unix permissions, when added into shared workspace through NFS the permissions follow.
- Page 253 Troubleshooting Missing Storage Space on NAS shares If you have gotten to this trouble shooting section then you may be thinking you only have half the space available that you purchased. Good news is the space you can’t find is not missing. Immediately after wizard setup, if you picked both NAS and iSCSI then the RAID volume for NAS shows as half the space being already used.
-
Page 254: Raid Information
F.A.Q. • If you get these you will want to check cable connections. • 1 beep per device: • Refresh 1 beep for each USB device detected • IPMI Error Codes • One Continuous beep System OH System overheat. • In the overheat condition you will want to supply additional air conditioning, unblock fans, and/or return server cover to unit. - Page 255 RAID set intact. When you remove a drive from a RAID set it take a period of time to “re-sync” the RAID. Replacing more than one drive at a time could cause a loss of data. The G-RACK 12 chassis supports twelve hot-swappable 3.5”...
- Page 256 F.A.Q. G-RACK 12 BTRfs Backgrounder What is BTRfs? B-tree file system. Pronounced as “butter F S”, “better F S”, “b-tree F S”, or simply by spelling it out. How long has it been around? Initially designed at Oracle Corporation for use in Linux. The development of BTRfs began in 2007.
- Page 257 F.A.Q. • Copy on Write Logging Data and metadata in BTRfs are protected with copy on write logging (COW). Once the transaction that allocated the space on disk has committed, any new writes to that logical address in the file or btree will go to a newly allocated block, and block pointers in the btrees and super blocks will be updated to reflect the new location.
- Page 258 F.A.Q. Comparison of features between the most popular file system ext4. BTRfs vs ext4 ext4 and BTRfs are modern file system types which can be used with a Linux operating system. ext4 advantages ext4 is the default for major Linux distributions such as Ubuntu. ext4 is in use by a very large number of Linux users and has proven to be useable.
- Page 259 F.A.Q. Like: • Performance - it›s usually good, and it generally «does the right thing» with ssds. • It doesn›t eat RAM the way zfs does. • Subvolumes make volume management and snapshot management easy. • Can de-fragment (unlike zfs) •...
- Page 260 F.A.Q. large ones, extremely slow, and also there’s no internal protection mechanism as one disk is seen as a single entity by the filesystem itself. BTRfs instead uses “chunks”. Each disk, regardless its size, is divided into pieces (the chunks) that are either 1 GiB in size (for data) or 256 MiB (for metadata).
- Page 261 62 seconds to be completed on BTRfs, and the limit was the CPU and Memory of the test system, while both XFS and EXT4 were able to use only around 25% of the available CPU because they were quickly IO bound. The main BTRfs features available the G-RACK 12 include: • Extent based file storage •...
- Page 262 F.A.Q. Active Directory Disabled When the Administrator toggles on and off Active Directory security, domain users/groups in workspace permissions the domain users/groups disappear within Access Control but their gid/ uid or names still show in workspace permissions. Steps to recreate: 1.
- Page 263 F.A.Q. iSCSI Connection Issues SNS support: It is possible with two or more computers attached to an iSCSI LUB you make encounter stability issues if you are disconnecting and then reconnecting an initiator, If the problem of connecting is not happening on the computer you are doing the disconnect and reconnect on then, it is possible the problem lies with the second computer.
- Page 264 F.A.Q. High CPU Usage During Filesystem Check You will notice when you run a filesystem check RAID that overall performance drops. This is to be expected. The process of checking a filesystem is one of the most math-intensive tasks a storage server can be asked to do.
- Page 265 What that means is that by default is it does not work well with data over some network connections like AFP and SMB/CIFS. G-RACK 12 provides two methods of connection that do work well and provides the speed needed to allow Macs to connect to the server in a manner that makes FCPX happy and not slow down the video editing process.
- Page 266 F.A.Q. If you have selected NFS you will want to become familiar with the settings and parameters available on the G-RACK 12 server. For NFS in Settings change the Number of Servers from 8 to 16. Alter the Advanced Options field: no_subtree_check,insecure,async NOTE: Change Add Workspace window the admin has to change privileges from ‘Read only’...
- Page 267 If you have selected iSCSI as your method of connecting. Please review the G-RACK 12 iSCSI Essentials to get the optimal speed for your connections. Understand that OS X does not come with native support for iSCSI. There are some good iSCSI...
- Page 268 F.A.Q. initiator products on the market that allows OS X to support iSCSI but they do require a purchase. To download GlobalSAN iSCSI initiator & Xtarget (this document will not cover Xtarget) start by creating an account with SNS. If you wish to bypass the limited-but-free trial version you can setup an account and request the required Permanent keys.
- Page 269 F.A.Q. FCPX/NFS G-RACK 12 Workflow Overview G-RACK 12 excels in the shared environment. Utilizing this dual-share / dual-protocol workflow, Final Cut Pro X can once again enjoy the benefits of network connectivity and performance in a shared workflow. The high-level overview •...
- Page 270 F.A.Q. The editing client(s) creates and edits from a Library bundle on an NFS share. The key factor for the Library bundle is that it links to select the “Leave Files in Place” option during the FCPX > Import operation for the media on the SMB share during import. This allows for media and project files to live in different locations.
- Page 271 Library bundle can be created. NFS protocol allows for multiple Macintosh clients to write to and read from the same network share. G-RACK 12 has not introduced bin-sharing yet. However, the ability to share FCPX Project assets, link on-the-fly newly added files on the SMB share to the Library and read the same files simultaneously from multiple clients on the network will lead to higher productivity.
-
Page 272: Technical Support And Warranty
Technical Support & Warranty... - Page 273 Technical Support & Warranty Technical Support Thank you for purchasing G-RACK 12. If you have any comments or questions about this manual or the product, please let us know! G-Technology appreciates and values its customers. We strive to give you the finest service and support.
- Page 274 Technical Support & Warranty Warranty Limited Warranty HGST, a Western Digital Company (“HGST”) including G-Technology for External Hard Disk Drives What does this limited warranty cover? This limited warranty applies to new HGST products purchased from an authorized HGST dealer by the original purchaser for normal use and not for resale.
- Page 275 RIGHTS THAT VARY FROM JURISDICTION TO JURISDICTION. Capacity Definition and Disclaimer For G-Technology products 1TB or greater: 1 gigabyte (GB) is equal to 1 billion bytes and 1 terabyte (TB) equals 1,000 GB (1 trillion bytes). Accessible capacity will vary from the stated capacity due to formatting and partitioning of the hard drive, the computer’s operating system, and other...
-
Page 276: Important - Read Carefully
Technical Support & Warranty End User License Agreement IMPORTANT - READ CAREFULLY. This License Agreement (this “Agreement”) is a legal contract between HGST, Inc., its subsidiaries and affiliates (collectively, “HGST”), and you and governs your use of this software and any associated online or electronic documentation made available to you by HGST (this software, firmware, and documentation, and any applicable updates provided by HGST, collectively, the “Software”) in connection with HGST hardware devices and products, including without limitation HGST storage... - Page 277 Technical Support & Warranty 2. RESERVATION OF RIGHTS You acknowledge that the Software is protected by copyrights and other intellectual property and proprietary rights. HGST and its third-party licensors (“Licensors”) reserve all of these rights with respect to the Software, except for the license expressly granted to you in Section 1. Except for the express license granted to you in Section 1, no right, title, interest or license in or to the Software, whether by implication, estoppel or otherwise, is granted, assigned or transferred to you.
-
Page 278: Registration Information
Technical Support & Warranty 5. REGISTRATION INFORMATION As part of any Software registration process, HGST may request registration-related information, including your name and e-mail address. By providing this information, you consent to its collection and use by HGST to provide non-promotional communications, including notices of Update availability, product recalls, or safety concerns. -
Page 279: Limitation On Liability
Technical Support & Warranty DOWNLOADED OR OTHERWISE OBTAINED THROUGH THE USE OF the SOFTWARE IS DONE AT YOUR OWN DISCRETION AND RISK AND THAT YOU SHALL BE SOLELY RESPONSIBLE FOR ANY DAMAGE TO YOUR COMPUTER, DEVICE, SYSTEM OR NETWORK, INCLUDING ANY LOSS OR CORRUPTION OF DATA. -
Page 280: U.s. Government Restricted Rights
Technical Support & Warranty CONSEQUENTIAL OR INCIDENTAL DAMAGES, THE ABOVE LIMITATION MAY NOT APPLY TO YOU. IN NO EVENT SHALL HGST’S TOTAL LIABILITY TO YOU FOR ALL DAMAGES IN CONNECTION WITH this Agreement, THE SOFTWARE EXCEED $25. THE FOREGOING LIMITATIONS, EXCLUSIONS AND DISCLAIMERS SHALL APPLY TO THE MAXIMUM EXTENT PERMITTED BY APPLICABLE LAW, EVEN IF ANY REMEDY FAILS ITS ESSENTIAL PURPOSE. - Page 281 Technical Support & Warranty subject to indemnification by you, in which event you will cooperate with HGST in asserting any available defenses. 12. TERMINATION Without prejudice to any other HGST rights, HGST shall have the right to immediately terminate this Agreement with or without notice to you if HGST deems that you fail to comply with your obligations under this Agreement.
- Page 282 Technical Support & Warranty you hereby expressly consent to personal jurisdiction in such courts and waive all venue, jurisdiction and choice of law challenges or defenses. 18. UNITED NATIONS CONVENTION ON CONTRACTS FOR THE SALE OF INTERNATIONAL SALE OF GOODS This Agreement shall not be governed by the United Nations Convention on Contracts for the International Sale of Goods.
- Page 283 Glossary...
- Page 284 Ethernet - A standard method of connecting computers to a Local Area Network (LAN). Event - A problem or change in setting on the G-RACK 12 server. A change in the server’s name or the failure of a disk drive are both server events.
- Page 285 HTTP, but may affect the responsiveness of the user interface. All traffic between the managing computer and the G-RACK 12 server is encrypted. Interface - A hardware or software protocol to manage the exchange of data between a device and a computer;...
- Page 286 Internet, is remote access. Remote access can also refer to shutting down or resetting the server using G-RACK 12 Administrative Tool instead of physically pressing the Power button. See also local access.
- Page 287 Not all physical disks have SMART support. Server - A computer or device on a network that manages resources. The G-RACK 12 server is a file server, a storage appliance that’s dedicated to storing files.
- Page 288 Glossary User - In G-RACK 12 Administrative Tool, a person who can save, back up, and share files using the G-RACK 12 server, but who can’t modify user account, group account, share, or server settings. User account - An account, with a user name and password, that a person uses to access the G- RACK 12 server.
- Page 289 Appendices...
- Page 290 Appendices Appendix. Technical specification chassis Key Features • 2U Storage JBOD Chassis with capacity 12 x 3.5” hot-swappable HDDs bays • Single Expander Backplane Boards support SAS3/2 or SATA3 HDDs with 12Gb/s throughput • 4 x Mini-SAS HD ports for Internal / External Cascading Expander Combination for high performance, high availability or high redundancy requirements •...
- Page 291 appendices Appendix. BIOS POST Error Codes During the POST (Power-On Self-Test) routines, which are performed upon each system boot, errors may occur. Non-fatal errors are those which, in most cases, allow the system to continue to boot. These error messages normally appear on the screen. Fatal errors will not allow the system to continue with bootup.
- Page 292 Appendices Appendix. Chassis Power Supply Specifications ESD Safety Guidelines Electrostatic Discharge (ESD) can damage electronic components. To prevent damage to your system, it is important to handle it very carefully. he following measures are generally sufficient to protect your equipment from ESD. •...
-
Page 293: Installation Instructions
The following statements are industry standard warnings, provided to warn the user of situations which have the potential for bodily injury. Should you have questions or experience difficulty, contact G-Technology’s Technical Support department for assistance. Only certified technicians should attempt to install or configure components. - Page 294 Appendices Redundant Power Supplies This unit might have more than one power supply connection. All connections must be removed to de-energize the unit. Backplane Voltage Hazardous voltage or energy is present on the backplane when the system is operating. Use caution when servicing.
- Page 295 appendices Appendix. RAID levels explained RAID stands for “Redundant Array of Independent Disks” and was first used in 1988. RAID technology was developed to improve data protection and performance, while storing large amounts of data. It allows to group multiple physical disks into a logical drive and apply one the existing RAID levels. Depending on the RAID level selected, performance, redundancy, storage capacity and reliability of the logical drive will differ.
- Page 296 Appendices High sustained data transfer rate. No Data striped in performance deg- Performance- driven, blocks across multi- radation after drive Lower performance single or multi- ple drives. Dedicated failure. with small, random threaded applica- RAID 4 parity drive Redundancy. requests tions High read perfor- mance, medium...
Need help?
Do you have a question about the G-RACK 12 and is the answer not in the manual?
Questions and answers