Table of Contents
Advertisement
Quick Links
Advertisement
Table of Contents

Summary of Contents for voptech VPX-20
- Page 1 VPX IP PBX User Manual...
-
Page 2: Table Of Contents
EATURES ..............................3 1.3 M ODULES ..........................4 1.4 H ARDWARE NTERFACES 1.4.1 VPX-20............................4 1.4.2 VPX-50............................6 1.4.3 VPX-60............................8 1.4.4 VPX-100............................9 1.4.5 Model Comparison Table......................10 1.4.6 Environmental Requirements....................10 1.4.7 Packing List..........................11 CHAPTER 2 GETTING STARTED......................12 .......................... - Page 3 CHAPTER 3 ADVANCED........................42 ..............................42 3.1 O PTIONS ............................... 44 3.2 V OICEMAIL ............................45 3.3 SMTP S ETTINGS ............................46 3.4 E MAIL TO ............................47 3.5 M USIC ETTINGS 3.6 DISA...............................48 ............................. 49 3.7 F OLLOW ............................50 3.8 C ORWARD ..........................51...
- Page 4 ..............................76 7.6 B ACKUP ............................77 7.7 R & R ESET EBOOT ..............................78 7.8 U PGRADE 7.8.1 WEB Upgrade..........................78 7.8.2 TFTP Upgrade........................... 78 CHAPTER 8 OPERATING INSTRUCTIONS..................80 ....................80 8.1 H VPX-50 OW TO CONNECT IN THE ETWORK ..............80 8.2 H...
-
Page 5: Safety Notice
Safety Notice Please read the following safety notices before installing or using this IP PBX. They are crucial for safe and reliable operation of the device. Failure to follow the instructions contained in this document may result in damage to your PBX and void the manufacturer’s warranty. Please use the external power supply which is included in the package. -
Page 6: Chapter 1 Brief Introduction
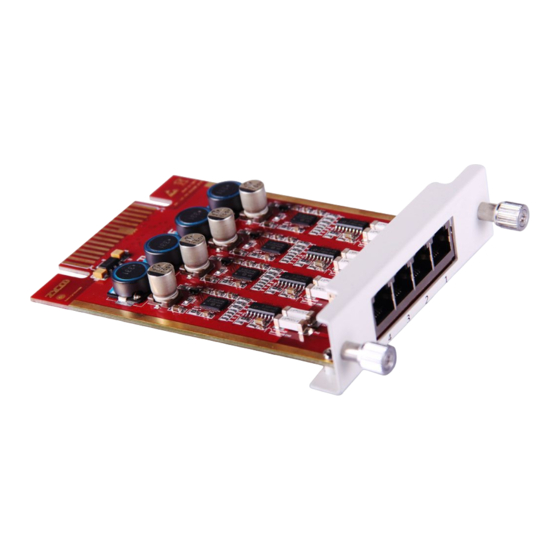
VPX Series IP PBXs come in four sizes: 20 / 50 / 60 / 100. Each model will be introduced in detail below: VPX-20 is configured with 2 analog ports: VPX-20 VPX-50 consists of two main parts:50 Host and Modules. There are 2 slots in the system and... -
Page 7: Main Features
and the modules can be utilized as in the diagram below: 100 Slot Slot 1 Slot 2 100 Module 4FXS 4FXO 2FXOS 2GSM 4GSM 1PRI 4BRI 1.2 Main Features SIP/ IAX Extension Registration Video Call USB Mobile Hard Disk Record (Scalable) IP Phone Provisioning (Grandstream /Yealink/Fanvil IP Phone) Call Record /Ring Group Record/ Call Queue Record Web-based Administration and configuration... -
Page 8: Modules
Ring Group Conference Bridge (Three Conferences) Music On Hold DISA (Direct Inward System Access) /Paging And Intercom Call Detail Record IP Phone Feature Code BLF(Busy Lamp Field) Static /DHCP /PPPoE Network Access DHCP Server System Backup T.38 Pass-through Audio Codec: G.722/ G.711-Ulaw/ G.711-Alaw/ G.726/ G.729/ GSM/ SPEEX Video Codec: H.261/ H.263 / H.263+ / H.264 VPN Server (L2TP / PPTP / OpenVPN, up to 10 connections for VPN clients) VPN Client (L2TP / PPTP / OpenVPN / N2N) -
Page 9: Hardware Interfaces
4GSM Module 4BRI Module 1E1/T1 Module 32 EC Module 1.4 Hardware Interfaces 1.4.1 VPX-20 VPX-20 Front Panel VPX-20 Rear Panel... -
Page 10: Vpx-50
Indication Function Status Explaination Power On Power Status Power Off Blink System Works System Status System Fails WAN or LAN Data Status Blink Data Transport Module not running GSM or UMTS(3G) Status 64ms On/800ms Off Module doesn’t find network 64ms On/3000ms Off Module finds network Channel Loading Success Blink... - Page 11 VPX-50 Rear Panel 1 * Reset Button 1 * Power Interface (DC 12V 2A) 1 * Ethernet Interface (10/100Mbps) 1 * Console Interface 1 * USB Interface Slot 1 for Analog/GSM/PRI/BRI Module Cards Slot 2 for Analog/GSM Module Cards Only Indication Function Status...
-
Page 12: Vpx-60
1.4.3 VPX-60 VPX-60 Front Panel VPX-60 Rear Panel 1 * Power Interface 1 * Power Switch 2 * Ethernet Interfaces (10/100/1000Mbps) 1 * VGA Interface 2 * Audio Interfaces 2 * USB Interfaces 1 * Hardware Echo Cancellation Interfaces (onboard) 1 * UMTS Interface for 3G Data (onboard) 24 * Analog Ports (FXO/FXS) 60 LED Indication... -
Page 13: Vpx-100
No Data Transport Green Channel Loading Success Channel Loading Failure 1-24 SLOTS SLOT 1-24 Status Channel Loading Success Channel Loading Failure 1.4.4 VPX-100 VPX-100 Front Panel VPX-100 Rear Panel 1 * Reset Button 1 * Power Interface 1 * Power Switch 2 * Ethernet Interfaces (10/100 Mbps) 1 * VGA Interface 2 * USB Interfaces... -
Page 14: Model Comparison Table
No signal Disconnected/ Alarm Green Connected/ No Alarm TE Mode (Only for Green NT Mode Slot 2) Module Loading Failure 1.4.5 Model Comparison Table Items VPX-20 VPX-50 VPX-60 VPX-100 System Concurrent Calls Capacity Extension Users Voicemail 21,000 mins 21,000 mins... -
Page 15: Environmental Requirements
1 piece Quick Installation Guide 1 piece Warranty Card 1 piece Notice: 1) VOPTECH Module cards will only function in VPX IP PBX from VOPTECH; 2) Module cards for VPX-50/100 will be packed separately but contained in the same package. -
Page 16: Chapter 2 Getting Started
What kind of IP Phones can be used with this device? FXS Interface: Analog Phone or fax machine SIP Extension: CooFone Series and ZP Series IP Phones provided by VOPTECH (D30/ D30P/ D60) Any standard SIP Phone based on SIP/ IAX2 protocol (eg: CISCO, Grandstream, Yealink, Polycom, Siemens, Snom,etc.) - Page 17 Input username and password, press the “Login” button and you will see the configuration interface below. Default username: admin and password: admin Notice Please use IE(7.0 or higher version), Chrome, Firefox web browser. If you do not see the interface above after inputting default IP and port number, please check whether your computer IP address is in the same segment with your IP PBX.
-
Page 18: Basic Configuration
System Menu System Menu includes the following sub menu: Home Display device information Operator Extension / Trunk / Channel Status Basic Basic configuration on extension, trunks, etc. Inbound Control Configuration of Inbound Route, IVR and Black List, etc. Advanced Configuration of extension's default information, Conference Call, Call Transfer, Function Key, etc. - Page 19 Extension Settings:...
- Page 20 Item Explanation SIP/IAX2 Choose extension protocol. Name Extension Name (English Character Only), e.g.: Tom. Extension Extension Number connected to the phone, e.g.: 888. Password Same password as voicemail. (4-16 digits, e.g.:123456) Outbound CID Override the caller ID when dialing out with a trunk. Dial Plan Please choose the Dial Plan which is defined in the menu “Outbound Routes”.
-
Page 21: Time Based Rules
Click【Upload/Download Extensions】to batch add extensions as below: Download the extension template from the【Download Extensions Template】, open the template using an editor or application like Microsoft Excel and carefully add extension information based on the template format and save. Select the extension file to upload from【Upload Extensions】 Download current extensions information from【Download Extensions(.csv)】... -
Page 22: Outbound Call
New Time Rule: Item Explanation Rule Name Define the name for this Time Rule. Time&Date Conditions Set parameters for Time/Day/ Date/ Month. Destination Select destination if time matches or does not match the conditions set. For example for BusinessHours, “if time matches”, select operator extension during BusinessHours. - Page 23 VoIP Trunks Click【VoIP Trunk】->【New VoIP Trunk】: VoIP Trunks Reference: Item Explanation Description Description of SIP trunk. Protocol Select protocol for outbound route, SIP or IAX2. Host Set host address (provided by VoIP Provider). Maximum Channels Set maximum channels for simultaneous call. (Only for outbound call; “0” = no limitation). Prefix The prefix will be added in front of your dialed number automatically when the trunk is in use.
- Page 24 Click【FXO/GSM Trunk】->【New FXO/GSM Trunk】: FXO/GSM Trunk Reference: Item Explanation Description Description for this trunk. Lines Check one or more channels (FXO or GSM) to be included in this trunk group Prefix The prefix will be added to the dialed number automatically when this trunk is in use. Advanced Options Advanced Options for this trunk, e.g.: Call Method, Busy Detection, etc.
-
Page 25: Outbound Routes
2.3.2 Outbound Routes Outbound Routes are used to define which trunk groups are used by a specific extension when placing outbound calls. If you don't allow an extension user to place external calls, please ignore this part. Please configure on this page: 【Basic】->【Outbound Routes】 You can configure the basic match pattern of outbound routes and create different dial plan on this page. - Page 26 You can create one or more DialRules for DialPlans from this page: Reference: Item Explanation Rule Name Define the name for the dial rule. Pin Set Input this Pin when you use this dial rule. Call Duration Limit Set the duration limit for a call, beyond which the call will be auto hung up Time Rule Set the time interval for this DialRule, beyond which the call based on this DialRule won’t work...
-
Page 27: Inbound Call
2.4 Inbound Call 2.4.1 Inbound Routes Click【Inbound Control】->【Inbound Routes】 General Distinctive Ring Tone : mapping the custom ring tone file, e.g.: Set distinctive ring tone as “External”, the phone will play this ring tone when receiving the call. Note: The phone must support such feature as well. Select all calls coming in on a specific port (FXO/GSM/VOIP) and select which destination (Extension User, IVR, Queue, Conference Bridge, IVR, etc) should answer those calls. - Page 28 Port Select the trunk group port Label Set a label for this port. Incoming calls from this port will display the specified label. Destination Incoming calls will be answered by the specified destination (extension user, call queue, conference bridge, or IVR) Number DIDs If you want to select the destination of inbound calls on PRI/BRI or VoIP Trunks based on the incoming DNIS (dialed number or DID).
-
Page 29: Ivr
DOD Number Set the DOD (direct outbound dial) number, and use it to match the Caller ID. Destination Outbound calls will access directly to this destination (user extension, queue, conference bridge, or IVR) 2.4.2 IVR IVR (Interactive Voice Response) or Automated Attendant will allow callers to select from a specific set of options by pressing the selected digit on their telephone dial pad. - Page 30 Item Explanation Name Enter a descriptive name for the IVR Extension Enter a unique extension or IVR number. This number is used to access the IVR from an internal extension Custom Click “Custom” to choose a DialPlan for IVR Please Select Select the IVR prompt that will provide the caller with instructions on what options are available.
-
Page 31: Ivr Prompts
IVR Prompts 【IVR Prompts】 Click【IVR Prompts】----【New Voice】to create new IVR prompt: File Name Define a name for this voice file. Format Select the voice format,GSM/WAV(16bit) supported only. Extension used for recording: Select the extension which is used for recording the IVR prompt. -
Page 32: Ring Groups
Upload IVR prompt 【Upload IVR prompt】 Notice: VPX supports custom audio file with wav,gsm,ulaw,alaw format. Recordings must be smaller than 15MB. 2.4.4 Ring Groups A Ring Group (sometimes called a Hunt Group) is a way to ring a collection of extensions by dialing a single extension number. -
Page 33: Blacklist
Name Define a name for the Ring Group Strategy Select “Ring All” or “Ring in order” Ring Group Members Select the Ring Group Member from “the Available Channels”, click to add. If not answered You can choose to forward the call to extension, voicemail ring group, IVR or hang up if not answered. -
Page 34: Do Not Disturb
Reference: Item Explanation When the registered extension user inputs *75 + blacklist number, this number will be added in the list of Blacklist Number. *075 When the registered extension user inputs *075+blacklist number, this number will be deleted in the list of Blacklist Number. 2.4.6 Do Not Disturb The administrator can config DND for extensions on this page: Click【Inbound Control】->【Do Not Disturb】:... -
Page 35: During A Call
Reference: Item Explanation Input function key *8 to pick up the registered extension which is in the ring at random. This can be defined in 【Feature Codes】 Input function key ** and define another extension to pick up. This can be defined in 【Feature Codes】. -
Page 36: Call Transfer
can be parked for 2.5.2 Call Transfer This feature allows an incoming call that is answered on one extension to be sent to another user’s extension. Refer to the diagram as below: Reference: Item Explanation Blind Transfer Default is #. Define in 【Feature Codes】 Attended Transfer Default is *2. -
Page 37: User Extension Settings
2.6 User Extension Settings 2.6.1 Follow Me Settings This feature allows a call to an extension to be automatically forward to one or more internal extensions or external phone numbers. To allow the user to configure these settings, first the user must be allowed access to the User Web Portal. -
Page 38: Call Forward
2.6.3 Call Forward This feature allows calls to an extension to be automatically forwarded to a specific internal extensions or external phone number. To configure this setting, please see below: Click【Call Forward】: Reference Item Explanation Always All incoming calls will be forwarded. Status Busy Forward when extension is busy. - Page 39 Please enable【Voicemail】before configuration, and configure【VM Password】and【Email】 . If incoming calls are not answered, when the default ring time is over, the system will play: “please leave your message and press the “#”key ”. Then voicemail will be sent to the specified mailbox by email.
-
Page 40: Call Center (Call Queues)
To Listen to the message using the users desk phone Notice: Proper Email address is necessary to receive voicemail via email. You must configure the SMTP and Email template. For detail settings, please see the detail configuration guide【Voicemail】in Chapter 3. 2.7 Call Center (Call Queues) Create Agent To allow a user to be considered an agent in a Call Center queue, please check the “Agent”... - Page 41 Step2: Click【Inbound Control】->【Call Queues】 Reference...
- Page 42 Item Explanation Queue Number Define an extension number to identify the queue. Label Define the label for the queue. Ring Strategy RingAll--Ring all available agents until one answers( default) RoundRobin – Starting with the first agent, ring the extension of each agent in turn until the call is answered.
-
Page 43: Conference Bridge
Item Explanation Agent TimeOut(sec) Specify the number of seconds to rin an agent’s extension before sending the call to the next Agent (based on Ring Strategy). Auto Pause If an Agent’s extension rings and the Agent fails to answer the call, automatically pause that agent so the stop receiving calls from the queue. - Page 44 Reference: Item Explanation Conference Number The number that internal callers use to access the conference room, the default number is “900”. Conference Password Password for users to access the conference, e.g.:"1234". Administrator Password Password for administrator to access the conference. Conference DialPlan Use this dialplan to invite other participants.
- Page 45 To join a conference, refer to the diagram as below: While in a conference, the administrator can invite new guest (extension user or external number) into the conference. (Default password for admin is 2345) As an administrator, to invite a new guest to the conference, refer to the diagram as below:...
-
Page 46: Chapter 3 Advanced
Chapter 3 Advanced 3.1 Options General Default settings for local extension and new extension. Click【Advanced】->【Options】->【General】: Reference Item Explanation Operator Extension Set extension number for Operator. Global RingTime Set Set RingTime for every extension. Enable Transfer Check to enable Transfer. Enable Music On Ringback Check to enable Music On Ringback. - Page 47 Global Analog Settings Click【Advance】->【Options】->【Global Analog Settings】 : Reference: Item Explanation Caller ID Detection Enable/Disable Caller ID Detection Caller ID Signaling Select the mode of Caller ID Signaling. Caller ID Start Ring--Caller ID start before ring. Polarity--Caller ID start when polarity reversal starts. CID Buffer Length Default CID Buffer Length Opermode...
-
Page 48: Voicemail
3.2 Voicemail Click【Advanced】->【Voicemail】->【General】 : Reference Item Explanation MaxGreeting Time(sec) Maximum recording length for voicemail greetings Dial "0" for Operator Select this option to allow callers to press Dial "0" to transfer out of voicemail to the Operator. Message Format Save the voice message as this format, WAV(16-bit) or Raw GSM. Maximum Messages Maximum voicemail messages to be allowed to leave. -
Page 49: Smtp Settings
Click【Advance】->【Voicemail】->【Email Settings】 Reference: Item Explanation Attach voicemail to Email The voicemail will be sent as attachment to the user’s Email. Sender Name The sender’s name will be displayed when you receive the Email. From Mailbox to send email Subject Subject of the Email. Message Input the Email template. -
Page 50: Email To Fax
Reference Item Explanation SMTP Server You must set SMTP Server address or domain connected to the VPX IP PBX, which is used for sending the voice message to Email. Port Port number for SMTP server. Default is 25, and it will be changed to 465 when you enable SSL/TLS. -
Page 51: Music Settings
Click【Advanced】->【Email to Fax】 Check “Enable”, input username, password and IMAP Server(server format: imap.XX.com), select the DialPlan, then “Save” and “Activate”. Practical Case: To Send a fax to telephone number 85337096: In DialPlan 1, there is prefix “9” before the telephone number; you need input the 【 Access Code】 : 985337096 and make this the subject when sending Email. -
Page 52: Disa
【Music Management】 Item Explanation Select Music Directory Select which Music Directory you wish to load. File Display music name under the music file, you can delete it. Select Music Directory Select the file where you want to save your uploaded music. Please choose file to upload Select the music you want to upload. -
Page 53: Follow Me
Reference Item Explanation Name Define a name for DISA. PIN Set User will be prompted to input this number when PIN Authentication is needed. Record in CDR Check to record. Response Timeout(sec) The maximum time for waiting before hanging up if the dialed number is incomplete or invalid. -
Page 54: Call Forward
Select an extension, set the ring duration, and add the numbers in the Follow Me List; 【Save】 and 【Activate】. List Format: Extension Number, Ring Duration E.g.: 806,30 808,20 806 rings, after 30 seconds, the call is going to 808 【Follow Me Options】 3.8 Call Forward The administrator can config the Call Forward on this page: Click【Advanced】->【Call Forward】:... -
Page 55: Paging And Intercom
3.9 Paging and Intercom This feature allows setting up a Paging group so when the Paging extension is dialed, the listed extensions allow the caller to speak through the speaker phone. The extensions in the Paging group must use phones that support this feature. If the Duplex option is selected, and the listed extensions use phones that support Duplex, then all the phones in the paging group will be able to have two-way conversations. -
Page 56: Pin Sets
Reference: Item Explanation Paging Extension Define an extension for this Paging Group. Description Define a name for this Paging Group. Paging Group Members Selected devices in this Paging Group. Device List Select device(s) here to Paging Group. Paging is typically one way for announcements only. Checking this will make the paging Duplex duplex, allowing all phones in the paging group to be able to talk and be heard by all. -
Page 57: Call Recording
PIN Set Name Define the name for this PIN Set. PIN List Define PIN codes in this list. 3.11 Call Recording This feature allows an administrator to enable Call Recording to record incoming and/or outgoing calls related to the specified extension. Please configure as below: Click【Advanced】->【Call Recording】->【New Call Recording】:... -
Page 58: Speed Dial
Reference: Item Explanation Extension Define an extension for recording. Call Recording Time Set the time to record. Inbound Record Check to record inbound calls. Outbound Record Check to record outbound calls. 3.12 Speed Dial This feature allows setting up system wide speed dial numbers that translate a feature code (*99) plus a two-digit code (00-99) into an external phone number. -
Page 59: Callback
Check “Enable” and “Save” to make this function activate. Click【New Smart DID Rule】to display the following diagram: Input the pattern and define how many digits need to be stripped or prepend, then click “Save”--“Activate”. 3.14 Callback This feature allows an external caller to place an inbound call to the CooVpx IP PBX. inbound call will be disconnected and subsequently the PBX will place an outbound call back to this number and forwarded to defined destination after the call is connected. -
Page 60: Phone Book
Click【New Callback Number】to add callback number. Input callback number and define the destination. 3.15 Phone Book When incoming call Caller ID matches the number in the phone book, the name of matched number will be displayed. Please configure as below. Click【Advanced】->【Phone Book】: Reference: Item... -
Page 61: Feature Codes
3.16 Feature Codes Click【 Advanced】 ->【 Feature Codes】 to see the following diagram, and you can define the code for each feature. Reference: Item Explanation Extension to Dial for Parking Calls Define an extension for parking calls. Extension Range to Park Calls Define the extension range for parking calls. - Page 62 ringing extension are in the same pickup group and call group. Pickup Specified Extension This feature code allows a caller to Pickup a call ringing on the specified extension. Default: Dial**+extension number to pickup the specified extension. Blind Transfer To Allow unattended or blind transfer while on a call based on the following steps: 1.
-
Page 63: Ip Phone Provisioning
Create Conference During the call, you can dial *0 to forward to the conference with the callee. Return to conference with participant In conference, the administrator can dial “0” to invite people into the conference. After pressing “0”, you will get dialtone, and you can dial to invite the participant;... - Page 64 Enable Phone Provisioning in【Basic】, select the IP Phone manufacture, input MAC of the phone, and select the extension for provisioning. Notice VPX IP PBX supports IP Phones from VOPTECH / Yealink / Grandstream now.
-
Page 65: Chapter 4 Network Settings
Chapter 4 Network Settings 4.1 Network You can configure the WAN Port, and define the Virtual Interface. Click【Network Settings】->【Network】->【IPv4 Settings】: Reference Item Explanation IP Assign Static/ DHCP/PPPoE supported. Virtual Interface Define the virtual interface for WAN Port. Click【Network Settings】->【Network】->【IPv6 Settings】... -
Page 66: Static Routing
IPv6 Reference: Item Explanation Enable Enable IPv6, define the IPv6 address, gateway, and DNS. Click【Network Settings】->【Network】->【VLAN Settings】: VLAN Reference: Item Explanation Enable Enable VLAN, define the VLAN address and VLAN ID. 4.2 Static Routing Click【Network Settings】->【Static Routing】:... -
Page 67: Vpn Server
Item Explanation Destination Set destination network for static routing. Subnet Mask Set subnet mask of the destination network. Gateway Define the gateway accessing the destination network. Click【 Network Settings】 ->【 Static Routing】 ->【 Routing Table】 , the current routing information will be displayed as below: 4.3 VPN Server VPX IP PBX supports three kinds of VPN servers: L2TP/PPTP/OpenVPN. - Page 68 Reference: Item Explanation VPN Server Mode Three kinds of VPN servers L2TP/PPTP/OpenVPN supported(Only one mode can be enabled simultaneously) Enable Enable/Disable VPN Server When the mode is L2TP or PPTP VPN server, click【Network Settings】->【VPN Server】-> 【VPN Users Management】 : This page is used for management of VPN username and password. When the mode is OpenVPN server, click【Network Settings】->【VPN Server】->【OpenVPN Certificate Download】...
-
Page 69: Vpn Client
This page is used for management of OpenVPN certificate file. 4.4 VPN Client VPX IP PBX supports four kinds of VPN Clients: L2TP /PPTP /OpenVPN /N2N Click【Network Settings】->【VPN Client】 : Reference: Item Explanation VPN Client Four kinds of VPN Clients supported: L2TP/PPTP/OpenVPN/N2N(Only one mode can be enabled simultaneously)... -
Page 70: Ddns Settings
Click【Network Settings】->【DHCP Server】->【DHCP Client List】: This page is used to display DHCP Client address and related information. When DHCP Server distributes address, the Client’s MAC address is associated with the IP address, and then the device will get the same IP address every time. Click【Network Settings】->【DHCP Server】->【Static MAC】->【New Static MAC】: 4.6 DDNS Settings After setting DDNS (Dynamic Domain Network Server), VPX IP PBX settings will be visited... -
Page 71: Snmp V 2 Settings
4.7 SNMPv2 Settings SNMP(Simple Network Management Protocol): Used for remote management. Click【Network Settings】->【SNMPv2 Settings】 : Reference Item Explanation Enable Enable “Read Only” of SNMP RO Community Define the name of RO Community of SNMP RO Network Define network of RO 4.8 Trouble Shooting You can ping other network device through VPX IP PBX and track network routing by command "Traceroute"... -
Page 72: Chapter 5 Security
Chapter 5 Security 5.1 Firewall Click【Security】->【Firewall】 Iptables Command: Check iptables list iptables -L -n Clear iptables list iptables -F Deny an IP(192.168.0.3) iptables -A INPUT -s 192.168.0.3 -j DROP Deny every IP to access 80 port iptables -A INPUT -p tcp --dport 80 -j DROP Deny IP(192.168.0.3)to access 80 port iptables -A INPUT -s 192.168.0.3 -p tcp --dport 80-j DROP... -
Page 73: Sip Allowed Address
Enable FTP to allow uploading files to system through FTP. 5.3 SIP Allowed Address Define an allowed address, from which every SIP request will never be filtered or refused. Click【Security】->【SIP Allowed Address】:... -
Page 74: Chapter 6 Report
Chapter 6 Report 6.1 Register Status Check status of all kinds of users & trunks. 6.2 Record List Check recordings of specified extension or conference here, or delete the recording file. 【Record List】: 【Conference】: 【One Touch Recording】... -
Page 75: Call Logs
6.3 Call Logs Check call logs by caller ID or callee ID. Click【Report】->【Call Logs】: Notice Duration in the call logs is not real charged duration. If you need billing, PSTN must support polarity reversal function, and meanwhile, you must configure relevance parameters of polarity reversal in trunk configuration for the VPX IP PBX. -
Page 77: Chapter 7 System
Chapter 7 System 7.1 Hot Standby (For 100 only) The function will working between the two VPX-100 devices. When the primary server faults, the slave server will replace it. Item Explanation Enable Enable ‘Hot Standby’ function. Hot Standby Mode Set the local server hot standby mode. Local Hostname Set the local server host name. -
Page 78: Time Settings
Remote Link Timeout Set the remote link timeout(sec) Set the administrator email, if the primary server faults Administrator Email will send email to administrator. Set the administrator phone number, if the primary Administrator Phone Number server faults will call administrator 7.2 Time Settings Time settings for VPX system. -
Page 79: Module Settings (Support For 50/100)
7.3 Module Settings (Support for 50/100) When use the module except FXO/FXS/GSM. You need to set the module parameters with the page. Click【System】->【Module Settings】: Module Type: Select the module type FXS/FXO/GSM module Default type. You don’t need set anything for ... -
Page 80: Data Storage
Set the BRI NT or TE mode for each port. 7.4 Data Storage When you need mass storage of recording files, voicemails, call logs, etc, you can upload these files to FTP server through FTP Data Storage based on the specified time frequency Click【System】->【Data Storage】: Reference Item... -
Page 81: Management
Forcibly upload when the flash Forcibly upload data when flash storage is over the percentage value. storage is over Check from【Data Storage Log】: Click【Refresh】to refresh data storage log. Click【clear】to clear data storage log. 7.5 Management 【Management】 is used for modify password of VPX system, and the settings of system voice. Click 【System】->【Management】: 7.6 Backup Click【System】->【Backup】... -
Page 82: Reset & Reboot
Reference: Item Explanation Take a Backup Take a backup of the current system configuration. Restore Restore system to the specified backup configuration. Delete Delete specified backup file. Click the download button “ ” to download the specified backup file and manage locally. Click【Upload Backup File】to upload the backup file here. -
Page 83: Upgrade
Click【Factory Defaults】to reset the system to factory defaults. Click【Reboot】to reboot the system. 7.8 Upgrade 7.8.1 WEB Upgrade Click【System】->【Upgrade】->【WEB Upgrade】: Click【Browse】to select the firmware file, then click【Upload】to upload the selected firmware to system and finish the upgrading automatically. If check【Restore Default Set】, the system will clear all the configuration and reset to factory default. - Page 84 Reference: Item Explanation Restore Default Set System will restore to factory defaults after checking this option. Enter The Package Name Enter the package name for upgrading. TFTP Server IP address Enter your TFTP server IP address.
-
Page 85: Chapter 8 Operating Instructions
Chapter 8 Operating Instructions (Take VPX-50 as example) 8.1 How to connect VPX-50 in the Network If your office accesses the public network through router, you can put the VPX IP PBX behind the router. You should connect the WAN port of the IP PBX to the LAN port of the router. 8.2 How to combine two sets VPX IP PBX in the same network We start to combine two IP PBXs in the same network and then try to expand to different network. - Page 86 Register 50-B IP to a trunk of 50-A, and register 50-A IP to a trunk of 50-B, without authentication for each registration. Configuration Rule: IP Phone registers on VPX-50-A with extension number 601. Another IP Phone registers on VPX-50-B with extension number 801. VPX-50-A WAN IP: 192.168.1.100.
- Page 87 Step 3: Create DialRule on 50-A, and add the DailRule to the DialPlan Click【Outbound Routes】->【DialRules】->【New Dial Rule】: Select the created line 192.168.1.200 to 【 Selected Trunks】 , custom pattern is XXX, save and activate. Click【DialPlans】->【New Dial Plan】: Check the created calling rule, save and activate.
-
Page 88: How To Connect Two Sets Vpx Ip Pbxs In Different Network
Step4: Create dialrule on VPX-50-B, add the created dialrule to the dialplan as the same way of Step 3. Step 5: Activate the current configuration and test: 1. Register IP Phone to 50-A as extension 601. 2. Register another IP Phone to 50-B as extension 801. 3. - Page 89 For detail steps, please take chapter 8.2 as reference. Two sets 50 behind router Sometimes 50 doesn’t have public IP, and you have to configure port mapping for your router. Step1: Configure the mapping rule of 50-A on the router. 50-B is connected behind the router, registers on 50-A through internet, you need configure the port mapping of IAX2 port(4569) on the router.
-
Page 90: How To Resolve The Problem "One-Way" Audio Problems
above, but you have to replace the public IP with internal IP:192.168.1.21. Step3: Configure port mapping rule of 50-B on the router Configure port mapping of 50-B on the router as the same way of step1.. Step4: Connect two sets 50 and make the call Create extension 601 on 50-A, extension 801 on 50-B, and create the correct outbound rule. -
Page 91: Manage Skype Account
8.5.2 Manage Skype Account After login, you will find Skype Manager, and click it. 8.5.3 Create a SIP File Click Features: Click Skype connect: Click Set up a SIP Profile:... - Page 92 Create a SIP account, and each account has a channel, you need pay €5 for each channel as monthly rent. Then input the registration profile in the VoIP trunk of 50 and distribute the money to Outgoing calls. When click Authentications details,you will see the SIP account profile: Select the created line 192.168.1.200 to 【...
- Page 93 For any questions or problems during installation and use, please feel free to contact our technical support via email: support@VOPTech.com...
Need help?
Do you have a question about the VPX-20 and is the answer not in the manual?
Questions and answers