
Summary of Contents for Testomat 808
- Page 1 Operating Instructions ® Testomat Online Analysis Instrument for Water Hardness...
-
Page 2: Table Of Contents
Installing Testomat 808 ..............12 ® Operating Testomat 808 in the pressure range 4 to 8 bar ....12 Connecting the water inlet and outlet ..........13 Water inlet ................... 13 Water outlet ..................14 Connecting the power supply and devices ......... 14 ®... - Page 3 Cleaning the measuring chamber and the sight-glass windows ..38 Pump head maintenance message ............ 39 ® Testomat 808 spare parts and accessories ........41 Accessories - indicators ..............42 Technical data ................... 43 EC conformity Declaration ..............44 ®...
-
Page 4: Important Safety Information
Intended use ® Testomat 808 has been designed for use in the field of water treat- ment (e.g. osmosis plants, electroplating, large boiler plants, laun- dries, canteen kitchens). The feed water must be clear, colourless and free of undissolved particles. The instrument is a limit value measuring instrument which automatically monitors the residual total hardness (water hardness) in water. -
Page 5: Warning Notices In These Instructions
Notes and instructions to be observed Warning notices in these instructions The warning notices in these instructions warn the user about poten- tial dangers to individuals and property resulting from incorrect han- dling of the instrument. The warning notices are structured as follows: Description of the type or source of danger Description of the consequences resulting from non-observance SIGNAL WORD! -
Page 6: Installation
808 requires an interference free and stable power NOTE ® supply. If necessary, use a mains filter to protect Testomat against interference voltages caused, e.g., by solenoid valves or large motors. Never lay connecting cables parallel to power cables. Operation ... -
Page 7: Operating Requirements
Scope of delivery Operating requirements CAUTION ® In order for Testomat 808 to operate reliably, use Heyl Tes- ® indicators in the pH-range 4 – 10.5! tomat Only operate the instrument with the parameters specified under “Technical data”. -
Page 8: Performance Specifications
Performance specifications Performance specifications ® Testomat 808 is used for the automatic monitoring of residual total hardness (water hardness) in water. The limit value to be monitored is determined by the indicator selection. Limit values for residual hardness of 0.02 – 10.0 °dH* deter- minable by indicator selection ... -
Page 9: Functions Of The Operating And Display Elements
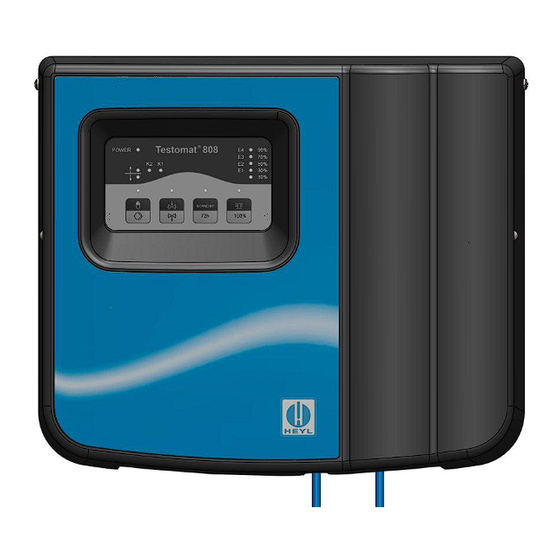
Functions of the operating and display elements Functions of the operating and dis- play elements ® Operating statuses and measuring results are displayed at Testomat 808 via LEDs. The input keys for operating the instrument are posi- tioned below the LEDs. ® Switching Testomat 808 on/off... -
Page 10: Operating Elements/Function Keys
Functions of the operating and display elements Operating elements/Function keys All operating elements/function keys are assigned twice. The respec- tive function is triggered by a short or long (min. 2 seconds) key press. Key 1 Short key press: Starts an analysis (manual start), (manual) the respective LED flashes. -
Page 11: Display Elements/Leds
Display elements/LEDs All measuring results as well as activated functions are displayed at ® Testomat 808 via LEDs. The LEDs above the function keys illuminate/flash when the respec- tive function is activated. The LED illuminates if the instrument is switched on via the power switch on the front of the instru- ment and is operating. -
Page 12: Installation
Risks resulting from incorrect installation! ® WARNING Install Testomat 808 at a location where it is protected against dripping or splash water, dust and aggressive substances – e.g. in a control cabinet or on a suitable wall. Information for trouble-free operation ®... -
Page 13: Operating Testomat 808 In The Pressure Range 4 To 8 Bar
(between 4 and 8 bar) is required. Use a pressure controller (art. no. 37602) for ranges between 4 and 8 bar. Optimum operation of ® Testomat 808 is achieved with operating pressure of between 2 and 4 bar. Information for trouble-free operation NOTE ... -
Page 14: Water Outlet
Risk of damages caused by electromagnetic fields! ® If Testomat 808 or the connecting cables are installed parallel to power cables or in close proximity to strong electromagnetic fields, NOTE the instrument may be damaged or measurements incorrect. ... -
Page 15: Plant Example Testomat 808
Installation ® Plant example Testomat... -
Page 16: Internal Design Testomat 808
Use reset key S1 to execute a reset, i.e. to reset the firmware of ® Testomat 808 after an update. Function key S6 Use function key S6 to set the interval pause between measure- ments. Please refer to the section entitled “Interval pause”... -
Page 17: Slide Switch T1
Installation Switch position NOTE The respective switch position is read after evaluating a measuring result and after a reset. Slide switch T1 Switch position LEFT: If the slide switch is in the left position and the instrument is switched on or the reset key pressed while the instrument is switched on, the microcontroller executes the operating program (firmware). -
Page 18: Base Circuit Board Testomat 808
Installation ® Base circuit board Testomat The illustration above provides an overview of the design of the base circuit board. Plug connector J2 The connection to the controller board is established via the plug ... -
Page 19: Inputs Del. Ext. And Stop
230 V / 0.1 A Primary fuse 115 V / 0.2 A 24 V / 1 A Secondary fuse ® Please refer to the section entitled “Testomat 808 spare parts and accessories” on page 41 for the article numbers when reordering fus-... -
Page 20: Connecting The Mains Voltage
® Testomat 808. The door can now be opened and the terminal box accessed. Feed the cable through one of the cable glands underneath the housing into the terminal box. -
Page 21: Connecting The Inputs And Outputs
CAUTION Do not connect external voltage to these connections! ® Testomat 808 has the following connections for control and monitor- ing functions. Ensure that the strands are held securely in the terminals. Use the two fastening screws to close the door once installation has been completed. - Page 22 Installation “Technical data” on page 43 for * Please refer to the section entitled the maximum contact load of the relays. “Description of the signal Please refer to the section entitled inputs” “Description of the relay on page 23 or outputs”...
-
Page 23: Description Of The Signal Inputs
Description of the signal inputs Description of the signal inputs Connecting the signal inputs Only connect the signal inputs “Delete externally” and “Stop” to CAUTION volt-free contacts! The connection of external voltages would damage the instrument! DEL. EXT. (EXT. LÖSCH.) of relay K3 The input “Delete externally”... -
Page 24: Serial Interface Rs232
Serial interface RS232 ® The serial interface RS232 is located at the front of Testomat (after opening the housing cover). Use a ribbon cable with a 9-pole Sub-D connector to connect the plug J3 on the controller board to RS232. - Page 25 Description of the relay outputs Switch Relay K2 Relay K1 Comment position (message poor analysis) (external flush) for relay K2 Normally open – closes in Normally open – closes after a Continuous contact can be deleted via key 4 (horn) or “Delete external- case of 1 poor analysis, poor analysis for 1 minute ly”.
-
Page 26: Commissioning
Handling reagents/indicators Please adhere to the respective safety data sheet! CAUTION ® Trouble-free operation of Testomat 808 is only guaranteed when ® using Heyl Testomat indicators! Inserting the indicator bottle Open the housing cover to access the housing. -
Page 27: Instrument Settings And Analysis
K2, are carried out on the controller board using the function “Internal design keys and slide switches. Please refer to the section ® Testomat 808” on page 16 for a detailed description. Double assignment of the function keys ® NOTE... -
Page 28: Selecting The Indicator Type And Bottle Size
Instrument settings and analysis Selecting the indicator type and bottle size ® Specifying the measuring/monitoring range of Testomat ® NOTE The measuring/monitoring range of Testomat 808 is specified by the selected indicator type only. ® “Testomat Please refer to the section entitled 808 spare parts and accessories”... -
Page 29: Analysis Process
Instrument settings and analysis Automatic interval mode can be interrupted via standby and analyses started manually. Operating Function/Process mode Standby The instrument is switched on and in standby. Short press key 3 (standby) to switch standby on/off. Note: During an interval pause, the instrument immediately switches to standby;... -
Page 30: Further Basic Functions And Settings
If a very long (approx. 3 – 10 metres) sampling line or a line with a large diameter is used, install an external flush valve upstream of ® Testomat 808. Connect the external flush valve to the "Relay 1" outlet. Flush process – internal/external in manual mode Proceed as follows to additionally flush the instrument: ... -
Page 31: Interval Pause
Further basic functions and settings External flush process: Long press (approx. 2 seconds) key 2 (Flush) to activate the exter- nal flush valve. The external valve is activated via relay K1 and the line is flushed. Long key press (approx. 2 seconds) key 2 (Flush) again to termi- nate the external flush process. -
Page 32: 72 H Operation (Operation Without Permanent Supervision)
4 seconds. flashes quickly for 4 seconds. Error messages/Troubleshooting Alarm/Error message/Relay K3 ® Testomat 808 uses LEDs which either illuminate continuously or flash to display alarm/error messages. Error messages NOTE All status/error messages are lost after a power failure! ... - Page 33 Error messages/Troubleshooting Activate the red alarm LED above key 4 (horn) as follows: Cause Flashes Calculation shows that the indicator filling level is zero No or insufficient indicator in the measuring chamber after dosing Optical fault The instrument is operated outside of the specifi- cation (e.g.
- Page 34 The sensor or LED might be damaged. If necessary, carry out a visual adjustment as described ® in the maintenance instructions for the Testomat 808. Measuring fault analysis Check whether the indicator bottle is empty. ...
-
Page 35: Low Water Level
Error messages/Troubleshooting Low water level The LED above key 4 (horn) illuminates if the water level is low. The low water level is also registered via relay K3. Contacts M and Ö are connected for this purpose. Press key 4 (horn) or close the contacts of the “Delete externally” input to confirm the alarm. -
Page 36: Maintenance
Maintenance Malfunctioning/Repairing a defective instrument The repair of a defective instrument – irrespective of the warranty period - is only possible when the instrument is dismantled and re- turned to us with a description of the error. Please also inform us about the currently used indicator. -
Page 37: Service Instructions
“Replacing the indicator bottle” on page 37! Replacing the indicator bottle ® 808 displays the error message “Low indicator level”, If Testomat replace the indicator bottle (refer to the section entitled “Error mes- sages/Troubleshooting” on page 32) for information about error mes- sages). -
Page 38: Cleaning The Measuring Chamber And The Sight-Glass Windows
Cleaning the measuring chamber and the sight- glass windows Switch off the instrument. ® Close the stop valve in the branch line to Testomat 808. Prior to disassembling the measuring chamber, disconnect the cable from the LED holder and loosen the pump hose at the hose connector of the measuring chamber. - Page 39 Maintenance Remove the sight-glass windows (9) and the respective flat seals (8). Use cleaning spirit to clean the film off the sight-glass windows. If the instrument has been used to measure hard water for a longer period of time, a hard-to-remove film may have formed on the sight-glass windows.
-
Page 40: Pump Head Maintenance Message
Maintenance Pump head maintenance message The effective runtime of the pump head is counted during operation. After 150 hours of operation, the LED E4 flashes with the mainte- nance message for the pump head. This runtime for the pump will be reached during normal operation (analysis interval every 10 minutes) after approx. -
Page 41: Testomat 808 Spare Parts And Accessories
Testomat® 808 spare parts and accessories ® Testomat 808 spare parts and ac- cessories Spare parts – measuring chamber Art. no. 33777 Flat seal 24x2 40170 Sight-glass window 30x3 Caution! 40176 Sight-glass window holder Should you send your 33253 Screw M3x40, A2, DIN 965... -
Page 42: Accessories - Indicators
Please refer to our delivery programme for an up-to-date overview of available accessories at www.heyl.de Bottle connection ® Testomat 808 is delivered with a bottle connection for a 500 ml bot- NOTE tle. Please order a bottle connection for a 100 ml bottle upon request. -
Page 43: Technical Data
Technical data Technical data (24 / 115)* 230V, 50 – 60 Hz Power supply: Instrument protection 230 – 240 V: T0.1 A Instrument protection: 115 V: T0.2 A Instrument protection: 24 V: T0.8 A max. 4 A (n , l) Mains protection for consumers: Power consumption:... -
Page 44: Ec Conformity Declaration
Technical data EC conformity Declaration... -
Page 45: Product Overview Testomat 2000 Instruments
Product overview Testomat 2000®-Instruments ® Product overview Testomat 2000 Instruments Model/Type Measuring Parame- Measuring Applications/Functions Range • Water hardness • Universal for water treatment ® Testomat 2000 0.05-25 °dH plants • Carbonate hard- 0,5-20 °dH • allowed for boiler houses... - Page 46 Gebrüder Heyl Analysentechnik GmbH & Co. KG Orleansstraße 75b D 31135 Hildesheim Testomat_808_GB_131024.doc www.heyl.de Scan the code and visit us on our website!
Need help?
Do you have a question about the 808 and is the answer not in the manual?
Questions and answers