Table of Contents
Advertisement
Quick Links
Advertisement
Table of Contents

Summary of Contents for Amroad IX-6030
- Page 1 AMROAD IX-SERIES ix-6030, ix-6031, ix-6033 version v20131202 - eng...
- Page 2 About this product The use of this equipment may be subject to local rules and regulations. The following rules and regulations may be relevant in some or all areas. Federal Communications (FCC Statement) This device complies with FCC Rules Part 15. Operation is subject to the following two conditions: (1) this device may not cause harmful interference and (2) this device must accept any interference received including interference that may cause undesirable operation.
- Page 3 CE Notice (European Union) The symbol indicates compliance of this equipment to the EMC Directive and the Low Voltage Directive of the European Union. These markings indicate that this system meets the following technical standards: EN 55022:1998+A1: 2000+A2: 2003 Class A EN 61000-3-2: 2000 EN 61000-3-3: 1995+A1: 2001 EN 55024: 1998+A1: 2001+A2: 2003...
-
Page 4: Table Of Contents
TABLE OF CONTENTS 1Introduction............................1 1.1 Overview..........................1 1.2 Platform Category........................2 1.3 Installation..........................2 2Managing with Web Interface......................6 3Wizard Configuration........................... 7 1.4 Add Account Wizard........................ 7 Step 1: Add User Group....................... 7 Setp 2: Add User........................9 Step 3: Choose Device...................... 10 Step 4: Add Device...................... - Page 5 4.1.3 Static IP........................27 4.1.4 DHCP......................... 27 4.1.5 PPPoE........................27 4.1.6 LAN Only........................27 4.1.7 MAC Clone........................ 28 1.10 LAN............................. 28 1.11 LAN Routing........................28 4.1.8 Add a Route....................... 28 4.1.9 Edit a Route....................... 29 4.1.10 Delete a Route......................29 1.12 Dynamic DNS........................
- Page 6 4.1.20.1Back up to USB Mass Storage..............33 4.1.20.2Back up to NFS Server..................33 4.1.21 System Alert......................34 4.1.22 SIP UA........................34 4.1.23 CDR Log........................35 4.1.24 System Log......................37 4.1.25 Active Calls......................38 1.17 Firmware Upgrade....................... 38 1.18 Stackable Management (PC#1 only)...................39 4.1.26 Operation Modes.....................
- Page 7 5.1.7.3Del a Folder..................... 45 5.1.7.4Download a File....................45 5.1.7.5Delete a File....................45 5.1.7.6Upload a File....................45 5.1.8 Disable TFTP Service....................46 1.25 DHCP..........................46 5.1.9 DHCP Service......................46 5.1.9.1Enable DHCP Service..................46 5.1.9.2Disable DHCP Service..................46 5.1.10 Add New........................46 5.1.10.1Add DHCP Range..................46 5.1.10.2Edit DHCP Range..................47 5.1.10.3Delete DHCP Range..................47 5.1.11 Show Leased Clients....................47 1.26 IP PBX..........................
- Page 8 6.1.2.1Add a User...................... 55 6.1.2.2Edit a User...................... 55 6.1.2.3Clone a User....................55 6.1.2.4Delete a User....................55 6.1.2.5Search a User....................55 1.28 Device Management......................56 6.1.3 IP Phone........................56 6.1.3.1Add a Device....................56 6.1.3.2Edit a Device....................56 6.1.3.3Delete a Device....................57 6.1.3.4Search a Device....................57 6.1.4 Extension of IP Phone....................
- Page 9 6.1.8.2Edit a Route Group..................70 6.1.8.3Delete a Route Group..................70 6.1.8.4Search a Route Group..................70 1.30 Trunk........................... 71 6.1.9 SIP Trunk........................71 6.1.9.1Add a SIP Trunk....................71 6.1.9.2Edit a SIP Trunk....................71 6.1.9.3Clone a SIP Trunk................... 71 6.1.9.4Delete a SIP Trunk..................71 6.1.9.5Search a SIP Trunk..................71 6.1.10 Analog PSTN Trunk....................76 6.1.10.1Add an Analog PSTN Trunk................77 6.1.10.2Edit an Analog PSTN Trunk................77...
- Page 10 1.33 Meet-me Conference......................88 7.1.4 Add a Meet-me Conference..................89 7.1.5 Edit a Meet-me Conference..................89 7.1.6 Delete a Meet-me Conference...................89 1.34 Music On Hold........................90 7.1.7 Music on Hold Management..................90 7.1.7.1Add a MOH File....................90 7.1.8 Media File Management....................90 7.1.8.1Edit a MOH File....................90 7.1.9 MOH ID List.......................
- Page 11 7.1.25 Delete a Queue......................98 1.40 Paging..........................100 7.1.26 Add a Paging......................100 7.1.27 Edit a Pagine......................101 7.1.28 Delete Paging......................101 1.41 D-Auth..........................101 1.42 Interactive Voice Response (IVR)..................102 7.1.29 Add a new IVR Menu.....................102 7.1.30 Edit an IVR Menu....................103 7.1.31 Clone an IVR Menu....................
- Page 12 9.1.2.5PBX Commands.................... 118 1.49 IP PBX Voicemail System Menu Tree................122...
-
Page 13: 1Introduction
1 Introduction 1.1 Overview The IP PBX Administration Guide provides instructions for administering the IP PBX system. IP PBX is an embedded call-processing server communicating with client stations with Session Initiation Protocol (SIP). It migrates the telephony network and the data network of a small-to-medium business (SMB) company into a manageable converged network. -
Page 14: Platform Category
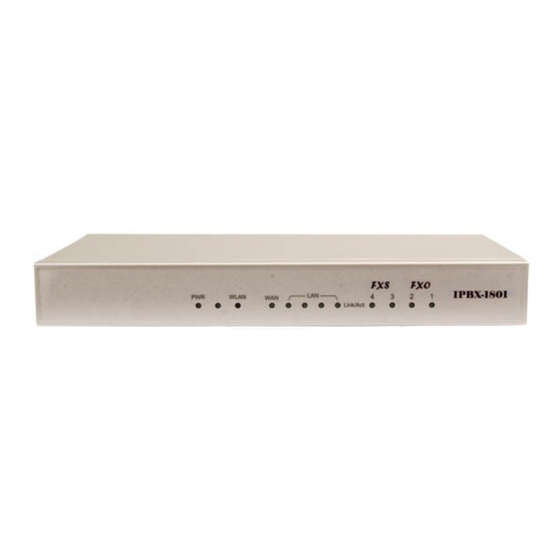
configure information of user, usergroup, route, routegroup, device and extensions step by step. 1.2 Platform Category PC#1 PC#2 Category Module Name Dimension Power Consumption PC#1 IPBX-1825, IPBX-1823 443 x 315 x 44(mm) 40W (Max) PC#2 IPBX-1802, IPBX-1801, IPBX-1801EU 300 x 155 x 38(mm) 25W (Max) 1.3 Installation Operating Condition... - Page 15 Installation Overview for PC#1 1. AC Power 100-240 V, 50-60 Hz Warning: Make sure the AC power is within this range, and the system is properly shut down before AC power is disconnected. Power outage or sudden power off will cause severe damage to the system and may not be recoverable. 2.
- Page 16 7. Console port Connect to a PC through console mode. Installation Overview for PC#2 1. AC Power 100-240 V, 50-60 Hz Warning: Make sure the AC power is within this range, and the system is properly shut down before AC power is disconnected. Power outage or sudden power off will cause severe damage to the system and may not be recoverable.
- Page 17 4. WAN Connect to a broadband modem or a WAN router. 5. LAN Connect to an IP phone or a LAN switch. 6. RESET Press to restart IP PBX system, or hold the button more than 10 seconds to factory default. 7.
-
Page 18: 2Managing With Web Interface
2 Managing with Web Interface The factory default of LAN IP address is 192.168.1.1. Connect to LAN port and the configuration Web interface is at https://192.168.1.1/. Once connected, the browser will ask for accepting a certificate. Click Yes to see the home page. Type in the default administrator ID and password (both are admin) to log in for administration. -
Page 19: 3Wizard Configuration
3 Wizard Configuration With IP PBX Wizard configuration, the administrator can set basic configurations for IP PBX easily. With basic setup, IP PBX can function, and connect to the relevant devices and trunks. The Wizard Configuration including Add Account Wizard, Add Route & Trunk and Mass Extension Adding. When entering Wizard configuration, you will see at the bottom of each page that helps you to configure with Wizard. - Page 20 this usergroup. Note the order matters the hunting sequence in run-time. Routegroup: display available routegroups. Trunk: Display available trunks. Group ID: The default number is “0”. A trunk with Group ID “0” does not form a balance group with any other trunks in Group 0.
-
Page 21: Setp 2: Add User
Select extensions and click to add into the group call. After adding all extensions, click Apply. Caller ID Mapping Specify incoming caller ID to have the same privilege as this usergroup to dial out. Enter a call number and click to add into the list. -
Page 22: Step 3: Choose Device
come back later to revise this selection if no appropriate usergroup could be chosen for now. Step 3: Choose Device Based on the devices you have, click ADD IP PHONE or ADD ANALOG PHONE, and Next to add/set the device. Note: If selecting ADD ANALOG PHONE, the wizard will skip to Step 5. -
Page 23: Step 5: Add Extension
Select if your IP Phone supports VAD. DTMF mode Choose a DTMF mode used by the phone. Step 5: Add Extension 3.1.5.1 Add Extension of IP Phone Enter settings shown in Table 3 -4. Click Add to see the newly added extension in the table of the webpage. For deleting an extension, select an extension number and click Del. - Page 24 the extension. Voicemail Select enable to allocate voicemail account for the extension. Voicemail PIN PIN to access voicemails. This is mandatory if above voicemail option is enabled. Max Voicemail Space Enter maximum space in KBytes for voicemail. Enter 0 or leave it as blank for not limiting the voicemail space. The voicemail will be recorded until the storage is full.
-
Page 25: 2Add Analog Phone
and in-band tone. It must match configuration on the device side. In-band DTMF mode consumes the limited DSP resource when using a highly compressed codec, such as G.729 or G.723.1. Therefore, calls will not connect with such setting if DSP is not installed. Although using a low-complexity codec such as G.711 does not require DSP, DTMF detection still takes considerable CPU resource and impacts... -
Page 26: Add Route & Trunk
Ring Timeout Timeout for ringing before a call is answered. Language Preferred language for system instructions heard from the extension. Voicemail Select Enable to allocate voicemail account for the extension. Voicemail PIN PIN to access voicemails. This is mandatory if above voicemail option is enabled. -
Page 27: Step 2: Add Route Group
any 7-digit called number starting from a digit larger or equal to 2 and with an extra prefix digit 9. Prefix A sequence of digits to be prefixed to the final dialed number after stripping. Using 9NXXXXXX as an example route pattern with number of stripped digits equal to 1 and prefix 1408, dialing 95270001 will be 14085270001 when it actually got dialed out. -
Page 28: Step 3: Choose Trunk
button to add or remove a route to or from the routegroup. The right box lists current selected routes. Click Set to update the information. Note the order of the selected routes is important since it decides which route would be matched first for an outgoing call. ... - Page 29 Dynamic Peer Select if the trunk is a passive trunk which means the registration will be from a dynamic remote peer. Typical application is to accept registration from an IP PBX at a remote site with dynamic IP address. Once the remote IP PBX registers, calls from local to remote can be made reversely over the trunk.
- Page 30 extension can use this trunk to call out, and all incoming calls to this trunk will connect to that extension directly. DID By Number When selected DID By number, enter configurations in DID Prefix and DID Stripping to have the incoming calls directed to the corresponding extension derived by number manipulation.
-
Page 31: 2Add Analog Pstn Trunks
Usergroup of Privilege When disabled DID, click a usergroup in the list whose reachability to other usergroups and trunks will be used as the privilege of inbound calls from this trunk. There may not be appropriate usergroups to select initially. - Page 32 ranges from 1 to 31. It should not overlap with existing ISDN PSTN trunk groups. Trunk Type Select the port type, FXO or FXS. If selecting FXS, users can see By Number and By Privilege in the DID of Extension list, and be able to configure DID Prefix and DID Stripping.
-
Page 33: 3Add Isdn Pstn Trunks
have the incoming calls redirected to dial out. DID Prefix A digit string to be prefixed to the incoming called number after stripping. DID Stripping A number of leading digits to be stripped from the original called number. Click All to strip all digits of the original called number. - Page 34 channels only. User only needs to select one or more B channels here. E.g. 1,2 is for the first physical port, 3,4 is for the second physical port and so on. Switch Type Supports European switch type by default. Description Arbitrary description information.
-
Page 35: Step 5: Assign Trunk
Enter configuration in DID Prefix and DID Stripping to have the incoming calls redirected to dial out. DID Prefix A digit string to be prefixed to the incoming called number after stripping. DID Stripping A number of leading digits to be stripped from the original called number. -
Page 36: Mass Extension Adding
Routegroup Click to select available routegroups. Trunk Click to select available trunks. Group ID The default number is “0”. A trunk with Group ID “0” does not form a balance group with any other trunks in Group 0. If Group ID is 1~9, trunks with the same Group ID form a usage balance group. - Page 37 INFO and Inband. 12. Click Add, and IP PBX will start to add these extensions automatically. 13. Click Back to the homepage.
-
Page 38: 4System Configuration
4 System Configuration This section describes how to configure system parameters used by IP PBX. Click Customize Setup after login the web interface to configure the following system parameters. 1.7 PBX System The PBX Status Management page briefs Product Name, Firmware Versions, WAN/LAN Status, CPU Usage, Memory Usage, Hard Disk Usage and System Runtime. -
Page 39: Static Ip
PBX. Select System -> WAN, and the current setting of WAN network interface is displayed, e.g. type, IP address etc. Unless the LAN Only is selected, you can choose one of the three options, Static IP, DHCP, and PPPoE from the Type list for your configuration. Select LAN Only check box to disable WAN, and only default router and DNS settings are applicable. -
Page 40: Mac Clone
4.1.7 MAC Clone Select MAC Clone and enter a MAC/physical address to change the WAN MAC address. 1.10 The LAN Setup Management page allows administrator to configure LAN network interface for IP PBX. Select System -> LAN to see the current settings of LAN network interface. Enter a new IP address and network mask. -
Page 41: Edit A Route
4.1.9 Edit a Route Edit the information in a row. Click Apply in the row to update the information. 4.1.10 Delete a Route Select a route ID. Click Del to remove the route ID from the IP Route ID column. 1.12 Dynamic DNS Dynamic WAN IP address causes difficulty for inbound connections from remote clients or IP PBX... -
Page 42: Enable Qos
QoS Setup page offers three parameters to characterize the WAN link. The default QoS setting is disabled because these parameters must be correctly given according to the actual WAN speed. 4.1.13 Enable QoS Click Enable. Enter the WAN Uplink Speed, WAN Downlink Speed, and Uplink VoIP Reserved (bandwidth). Click Apply. -
Page 43: Add A Service
To enable access servers in LAN from a machine beyond WAN, select System -> Virtual Server to configure port mappings. Service ID names the service. Protocol and Port specify the TCP/UDP port number on WAN IP to be forwarded to the Forward to Port of Forward to IP in LAN. Say 192.168.1.5 is a Mail Server to be seen from outside, one should configure TCP port 25 to be forwarded to 192.168.1.5 port 25. -
Page 44: 3Allow Auto Provision From Wan
to access. 4.1.18.3Allow Auto Provision From WAN By default, IP PBX only allows IP Phone devices to have auto provision from LAN interface through TFTP service. If enabled, auto provision is achieved through configuration profiles transferred to the device through WAN interface, which means the TFTP port (69) is allowed to access. 4.1.18.4Allow Telnet Connection From WAN By default, it is not allowed to access IP PBX through Telnet service. -
Page 45: Maintenance
Device Select LAN/WAN interface of the application to which the rule is applied. Protocol Select TCP, UDP, ICMP or ALL to which the rule will be applied. Source/Port Range Enter the IP address and port/port range of source side. Rule matches can also be inverted by selecting the Invert option. -
Page 46: System Alert
Click Backup to have the internal main storage stored in the NFS server. 4.1.21 System Alert System Alert page allows the administrator to set a maximum threshold limit for CPU Average Loading, System Memory Usage, USB Mass Storage Usage and Allocated File Number Usage. IP PBX will send alert mails to the administrator whenever the maximum threshold limit of system status is exceeded. -
Page 47: Cdr Log
the stackable mode. It indicates with which slave box a SIP client is registered. Blank means a client is registered to the master box locally. IP PBX supports share-line function and all information of share-line extension/trunk is recorded on SIP UA page. To remove the specific registered extension/trunk ID, please click Del button in that row. - Page 48 CDR Field Description Calling Number where the call comes from Dialed Number where the call dials to Caller ID calling party identification Dest. Interface values Description ST 1000 ST stands for SIP Trunk, and 1000 stands for the Trunk ID. POT 1 POT stands for PSTN Trunk, and 1 stands...
-
Page 49: System Log
which is being forwarding to. Type Possible values: I, O, N, where, I stands for an Incoming call (trunk to extension). O stands for an Outgoing call (extension to trunk). N stands for an internal call (extension to extension). Sequence Number Give each Call Detail Record a unique sequence number to trace them when there is a forwarding/transferring. -
Page 50: Active Calls
4.1.25 Active Calls The Active Calls page shows current active calls. The auto-refresh feature makes the browser refresh its contents at specified intervals. Select to enable auto-refresh this page and set the interval in seconds (10 - 60 seconds). Enter the specified number of minutes (1-9999 minutes) in the text field and enable Only display calls function for displaying the specified active calls list. -
Page 51: Stackable Management (Pc#1 Only)
(2) Do not change the firmware file name or use different model firmware, otherwise the system will reject it. 1.18 Stackable Management (PC#1 only) IP PBX is scalable and allows you to enlarge capacity by stacking up to four IP PBX boxes to form a cluster. -
Page 52: 2Case Ii: Stack A New Ip Pbx Box With An Existing Running Box
networks. Select one of the boxes to be the master box. Others are slave boxes consequently. For each slave box, go to System -> Stackable page to specify the master’s IP address and click Apply. Make sure to configure slave boxes before assigning to master box. For the master box, go to System ->... -
Page 53: 3Case Iii: Add New Slave Boxes To An Existing Stack
Ensure the new box has TCP routing to the existing box via LAN interface if they are in different local networks. Now, backup the IP PBX configuration on the existing box. Then restore this configuration to the new one. On new box, remove all trunk configurations including routes and routegroups, and all Meet-me conference configurations first. - Page 54 back to the login page by clicking it. Note: The GUI will automatically log out after 15 minutes, if no actions are detected.
-
Page 55: 5Service Configuration
5 Service Configuration This section describes details to configure various services built in the IP PBX. 1.21 Select Service -> NTP to specify a NTP server for network time synchronization. You can enable or disable NTP service at any time. 5.1.1 Enable NTP Service Click Enable. -
Page 56: Disable Snmp Service
5.1.4 Disable SNMP Service Click Disable, and click Apply. 1.23 STUN IP PBX has a built-in STUN client to solve NAT problems. Select Service -> STUN to specify a Simple Traversal of UDP through NATs (STUN) server for NAT traversal. You can enable or disable STUN Service at any time. -
Page 57: 1Change Directory
5.1.7.1 Change Directory Current directory is shown in the field on the right side of Directory, for instance, it is /.at the beginning. Click a directory in the Directory list to change to a different folder. Note: The default directory is /. Initially, you may not be able to change the directory, since no folder is created under /. -
Page 58: Disable Tftp Service
5.1.8 Disable TFTP Service Click Disable, and then Apply. 1.25 DHCP Select Service -> DHCP to view the current status of the DHCP Service. You can enable or disable the DHCP Service at any time. Note: If the IP PBX was shut down abnormally, Select Service -> DHCP and click Apply, or Go to Service ->... -
Page 59: 2Edit Dhcp Range
5.1.10.2Edit DHCP Range Click any pool name in the DHCP POOL list to see the settings on the right. Edit the settings. Click Update to change the settings. 5.1.10.3Delete DHCP Range Click any pool name in the DHCP POOL list. Click Del to remove the pool name from the DHCP POOL list. -
Page 60: 3Restore Ip Pbx Configuration
5.1.12.3Restore IP PBX Configuration Click a configuration backup file in the list, click Restore, and IP PBX will restore the configuration as current setup. After restoring, the system will ask for reboot the PBX service, click Yes to reboot IP PBX. - Page 61 Codec, the total amount needs to multiply by 2 to have the least requirements for RTP port range. Insufficient range of ports may cause call blocking due to port depletion. Max/Default Expiration Time Guard and advertise SIP registration respectively, e.g.600 seconds.
-
Page 62: Hotkey
instead of overriding by DSP utilization concerns. Enable DNS SRV Resolution Select to enable looking up IP of dynamic clients or trunks by DNS Service records before their successful registrations. Disable Line-in-use Call Back PBX supports call back function when an extension without multi-line function is in use. -
Page 63: Systemwide Speed Dial
The default is *9. E.g. the caller presses *9100 to talk with Extension 100 right away. Systemwide Speed Dial 5.1.15 Systemwide Speed Dial All of the extensions under this IP PBX could speed dial to the pre-defined number by pressing the hotkey (*0) followed by the key number, e.g. -
Page 64: 6Ip Pbx Configuration
6 IP PBX Configuration This section introduces steps to provision the IP telephony part of the IP PBX. Note that reloading configuration is required in order to make new configuration effective 1.27 User Management 6.1.1 User Group A usergroup is a logically grouping of users and their privileges. For instance, one could have couple of usergroups in an IP telephony network, e.g. -
Page 65: 4Search A User Group
Click Del to remove the usergroup from the Group ID. 6.1.1.4 Search a User Group Type a group ID in the Search box, or click a group ID in Group ID list. Click Go to see the Update page. Table 6-19 Usergroup Configuration Settings Field Description Group ID... -
Page 66: User
If there is not any appropriate SIP trunk and PSTN trunks to select, come back later to revise selection once trunks have been created. Reachable User Groups Select a usergroup and click that is reachable from this usergroup. By default, only users in the same usergroup can reach one another. -
Page 67: 1Add A User
Select User Management -> User, and one can add, edit, delete or search users. Go to Service -> IP PBX, and click Reload to activate changes. 6.1.2.1 Add a User Click the Add New tab. Enter settings shown in Table 6 -20. Click Add. -
Page 68: Device Management
Lee or Conference Room. Password Password for the user to access IP PBX Web management. Description Arbitrary description information. E-mail Address E-mail address of the user for voicemail notification. Attach Voicemail in E-mail Select to enclose the message received in the Notification notification e-mail as an attachment. -
Page 69: 3Delete A Device
reference for detailed ACC settings which is used for auto-configuring IP phones. One can specify the MAC address and audio preferences of the phone. Note that for phones using HTTP for auto-configuring, DHCP setting needs a new option 151 with a value of http://<IP PBX LAN IP>/tftpboot/ in the Code,Value box in Service ->... -
Page 70: Extension Of Ip Phone
Proxy IP/FQDN Specify IP address (or fully qualified domain name) and UDP port of the Proxy Port remote IP PBX. Registrar IP/FQDN Specify IP address (or fully qualified domain name) and UDP port of the Registrar Port remote IP PBX SIP Domain Specify the SIP domain used by the proxy and registrar. -
Page 71: 1Add An Extension
extension B finishes the call, IP PBX will ring extension B within a minute. When extension B is picked up, IP PBX will ring extension A to connect the call. Extension A call also press * to cancel, and will connect to voice mail. -
Page 72: 5Search An Extension
6.1.4.5 Search an Extension Type an extension number in the Search box, or click an extension number in Device ID list. Click Go to see the data. Table 6-22 Device Extension Configuration Settings Field Description Extension Number A unique line number composed of digits only, e.g. 101; 20 digits maximum and the length of digits may not be less than 2. - Page 73 Ring Timeout Timeout for ringing before a call is answered, e.g. 20 seconds. Allow LAN Use Only Check to reject registration and calls from WAN in a SIP ID same as the extension number. I.e., this extension must be on LAN. Call Keep Alive Select to check if the call is still active.
- Page 74 and in-band tone. It must match configuration on the device side. In-band DTMF mode consumes the limited DSP resource when using a highly compressed codec, such as G.729 or G.723.1. Therefore, calls will not connect with such setting if DSP is not installed. Although using a low-complexity codec such as G.711 does not require DSP, DTMF detection still takes considerable CPU resource and impacts...
-
Page 75: Analog Phone
time here into the list. Remove the extension of Unavailable Call Forward from the list by clicking The time must be shorter than Unavailable Timeout, or the function will not work normally. Play Unavailable/Line-in-use Notify the caller that callee is not available and the call Forward Prompt is being forwarded to another extension. -
Page 76: 1Add An Analog Phone
6.1.5.1 Add an Analog Phone Click the Add New tab to see the detailed Analog Phone Management page. Enter settings shown in Table 6 -23. Click Add to see the newly added analog phone in the Extension Number. 6.1.5.2 Edit an Analog Phone Click a port in POTS Port. - Page 77 Voicemail Select Enable to allocate voicemail account for the extension. Voicemail PIN PIN to access voicemails. This is mandatory if above voicemail option is enabled. Max Voicemail Space Enter maximum space in KBytes for voicemail. Enter 0 or leave it as blank for not limiting the voicemail space. The voicemail will be recorded until the storage is full.
- Page 78 or a PSTN number with appropriate outbound prefix. Timeout to Next Forward Enter a period of time in seconds for ringing the extension in Unavailable Call Forward. Click add the extension in Unavailable Call Forward and the time here into the list. Remove the extension of Unavailable Call Forward from the list by clicking ...
-
Page 79: Ip Phone Firmware
6.1.6 IP Phone Firmware The IP Phone Firmware Management page is for uploading firmware of IP phone. When connecting an IP phone to PBX, the IP phone can automatically upgrade to the latest firmware once there is a version available for download on the IP PBX. Select Device -> IP Phone Firmware to add, edit, or delete IP phone firmware configurations. -
Page 80: 1Add A Route
Table 6-25 Digit Set and Wildcard Characters for Route Patterns Expression Description [<digits>] Match any single digit listed explicitly. e.g., digit set [13579] match odd digits. One may use ‘-‘ to indicate a range of digits, e.g. [2-8]. . (dot) Match any digit in any length. -
Page 81: Route Group Management
underscore only without spaces; 16 characters maximum. Description Arbitrary description information. Destination Number Pattern A destination number pattern consisting of digits, digit set, and wildcard characters, 32 characters maximum, e.g. 9NXXXXXX matches any 7-digit called number starting from a digit larger or equal to 2 and with an extra prefix digit 9. -
Page 82: 1Add A Route Group
6.1.8.1 Add a Route Group Type a route group name and click Add. Click the route group in Group ID to see the settings. Enter settings shown in Table 6 -27, and click Back. The newly added route group should be displayed in the Group ID. 6.1.8.2 Edit a Route Group Click a route group name in Group ID. -
Page 83: Trunk
1.30 Trunk 6.1.9 SIP Trunk A SIP trunk refers to a SIP account on a remote call routing or gateway device. A practical example is an account at an Internet Telephony Service Provider (ITSP) where a call is routed to a SIP client or off-ramped to an analog subscriber via PSTN. - Page 84 Table 6-28 SIP Trunk Configuration Settings Field Description Trunk Identifier A unique number consisting of digits only. Usually give the phone number issued by the ITSP for consistency. Description Arbitrary description information. Auth. Name Specify the name for authentication if different to the Trunk Identifier, 64 characters maximum.
- Page 85 None DID When selected None DID, all incoming calls will enter IVR system instead of directly dial to a specified extension. Select a preferred IVR from IVR list for this trunk. Extension DID When selected Extension DID, select an extension in the list to be an unconditional destination for incoming calls to this trunk.
- Page 86 called number. E.g. Original called number of 12345678 becomes 678 after “Retain last”, “3” digit(s). Discard all Strip all digits of the original called number. Centrex DID Select this function to have more flexible calling numbers. All-number Digitmap Select a digitmap ID for calls via the trunk changing numbers.
- Page 87 DTMF mode for all IP extensions and SIP trunks in the IPBX, as well as for all IP phones registered to the IPBX. If it is not feasible to set the same DTMF mode for some IP extensions or SIP trunks, and inline transfer or 2nd-dialing is necessary for those IP extensions or SIP trunks, the Fast Bridging feature can be disabled on a per IP extension and per SIP trunk basis.
-
Page 88: Analog Pstn Trunk
Gateway Trunk Select to (1) trust the peer if IP matches and (2) retain caller ID. Call Keep Alive Select to check if the call is still ongoing in a certain time. Registered Keep Alive Select to check the registration status in a certain time. Send This function has to work with digitmap. -
Page 89: 1Add An Analog Pstn Trunk
6.1.10.1Add an Analog PSTN Trunk Click the Add New tab. Enter settings shown in Table 6 -29. Click Add to see the newly added Analog PSTN trunk in Trunk Group. 6.1.10.2Edit an Analog PSTN Trunk Click a trunk group in Trunk Group. Enter settings shown in Table 6 -29. - Page 90 Extension DID When selected Extension DID, select an extension in the list to be an unconditional destination for incoming calls to this trunk. If prefix or stripping has been given, the result of digit manipulation is dialed in a DTMF string after the call has been answered by the DID extension as an automatic 2 dialing.
-
Page 91: Isdn Pstn Trunk
E.g. Original called number of 12345678 becomes 678 after “Retain last”, “3” digit(s). Discard all Strip all digits of the original called number. IVR List Associate an IVR menu with incoming calls to this trunk. This is mandatory unless the trunk is configured for DID. -
Page 92: 2Edit An Isdn Pstn Trunk
Click Add to see the newly added ISDN PSTN trunk in the Trunk Group. The newly added ISDN Trunk shall display in the Trunk Group. 6.1.11.2 Edit an ISDN PSTN Trunk Click a trunk group in Trunk Group. Enter settings shown in Table 6 -30. Click Apply to change the information. - Page 93 Extension DID When selected Extension DID, select an extension in the list to be an unconditional destination for incoming calls to this trunk. If prefix or stripping has been given, the result of digit manipulation is dialed in a DTMF string after the call has been answered by the DID extension as an automatic 2 dialing.
-
Page 94: Pots
E.g. Original called number of 12345678 becomes 678 after “Retain last”, “3” digit(s). Discard all Strip all digits of the original called number. Language Preferred language for system instructions heard from the trunk. IVR List Associate an IVR menu with incoming calls to this trunk. - Page 95 Impedance/CP Tone The Impedance/CP Tone setting determines the dial tone, busy tone, and ringback tone to the originating party. Select the appropriate impedance/call-progress tone for the local region. Default Codec Select g711ulaw or g711alaw for connecting to other devices. Input/Output Gain Voice amplification or attenuation in dB scale to adjust input/output volume of a PSTN line.
-
Page 96: 2Fxs Port Configuration Settings
6.1.12.2FXS Port Configuration Settings Table 6-32 FXS Port Configuration Settings Field Description Type The type of this port. Port The ID number of physical port. Impedance/CP Tone The Impedance/CP Tone setting determines the dial tone, busy tone, and ringback tone to the originating party. -
Page 97: Digitmap
devices. Compand Type Compand standards vary between countries. Select MULAW or ALAW for the local region. Signaling Select Point to point or Point to multipoint depends on the link type between ISDN service provider and your device. Caller ID Leave it blank to have the default caller ID, or enter a caller ID that is provided by your ISDN service provider. - Page 98 Table 6-34 Digitmap Configuration Settings Field Description Digitmap ID A unique ID containing alphabets, numbers, and underscore only without spaces; 17 characters maximum. Destination Number Pattern A destination number pattern consisting of digits, digit set, and wildcard characters, e.g. 9NXXXXXX matches any 7-digit number starting from a digit larger or equal to 2 and with an extra prefix digit 9.
-
Page 99: 7Feature
7 Feature A feature is a logical entity presenting a function module of IP PBX, e.g. call park, life line, meet-me conference, auto attendant, voice mail, music on hold, broadcast, memo call, automatic call distribution , paging, etc. Any configuration change to a feature requires clicking Reload in Service -> IP PBX to take effect. -
Page 100: Add A Life Line Pattern
changes. 7.1.1 Add a Life Line Pattern Enter settings shown in Table 7 -36. Click Add to see the newly added pattern in the Line Pattern. 7.1.2 Edit a Life Line Pattern Edit settings shown in a row. Click Apply at the end of the row to update the information. 7.1.3 Delete a Life Line Pattern Select a Line pattern. -
Page 101: Add A Meet-Me Conference
Note: The administrator must drop all parties by pressing *5 when the meeting ends. Select Feature -> Meet-me Conference to configure meet-me conference feature. Please click Reload after configuration changes. 7.1.4 Add a Meet-me Conference Enter settings shown in Table 7 -37. Click Add to add a new conference room. -
Page 102: Music On Hold
# to quit conference *1 to mute/unmute *2 to lock/unlock the conference *3 to invite a user into the conference *4 to drop a party from the conference *5 to drop all parties in the conference *6 to drop the last invited party by *3 *7 to mute/unmute the specific party. -
Page 103: Moh Id List
Default MOH 2: Click a MOH ID from the drop-down list and click Set in the row. 7.1.9 MOH ID List 7.1.9.1 Edit a MOH ID 1. Click a file from the Media File and click Apply in the row. 7.1.9.2 Delete a MOH File Select a MOH ID. - Page 104 Voicemail feature, select Feature -> Voicemail. Please click Reload after configuration changes. Enter settings shown in Table 7 -39. Click Apply. Table 7-39 Voice Mail Configuration Settings Field Description Voicemail Pilot Number Number to access voice mail system IVR, e.g. 6666. Voicemail Distinguish Caller-ID Pilot Number to access voice mail system IVR without Number...
-
Page 105: Broadcast
1.36 Broadcast A user can arrange an event at the exact time in IP PBX. IP PBX will inform all users that set in the Callee Extensions list by ringing their extensions. For example, one arranges a meeting and wants to remind all attendants, he/she may enter settings. -
Page 106: Worktime
Dial: IP PBX will ring the party set in the Callee Extensions box first, and then call back to the one in the Dial Extension field to establish a conversation. It is suggested to set one number only in the Callee Extensions unless the extension number in the Dial Extension field is multi- line. -
Page 107: Delete A Worktime
Click a Group ID. Edit settings shown in Table 7 -41. Click Apply to change the information. 7.1.15 Delete a Worktime Click the Management tab. Select a Group ID. Click Del. The deleted worktime shall disappear from the Group ID. Table 7-41 Worktime Configuration Settings Field Description... -
Page 108: Add A Memo Call
7.1.16 Add a Memo Call Click the Add New tab. Enter settings shown in Table 7 -42. Click Add at the bottom of the page to see the newly added memo call in the Memo. 7.1.17 Edit a Memo Call Click the Management tab. -
Page 109: Automatic Call Distribution (Pc#1 Only)
Retry Time A period of time in minutes between two retries. Wait Time Enter timeout in seconds when ringing a callee. Date/Time Select a Date/Time to trigger this memo call. 1.39 Automatic Call Distribution (PC#1 only) IP PBX implements Automatic Call Distribution (ACD) by queues and agents. A pool of agents is created first and then one or more queues could be added with distinct service numbers and a list of agent extensions. -
Page 110: Delete An Agent
Edit settings shown in Table 7 -43 in a row of the table below. Click Apply in the row to update the information. 7.1.22 Delete an Agent Click the Agent Management tab. Select an account in the table. Click Del to remove the agent from the table. 7.1.23 Add a Queue Click the Add New Queue tab. - Page 111 Table 7-44 Queue Configuration Settings Field Description Queue Name Name a queue. A unique ID containing alphabets, numbers, and underscore only without spaces; 20 characters maximum. Waiting Music The default media file in Music On Hold 1/ Music On Hold 2 is the waiting music.
-
Page 112: Paging
1.40 Paging A user can dial a specific number to page all users that set in the Callee Extensions list; those invited parities would be automatically answered. Besides, the user who triggers paging function will be regard as the administrator with the privilege. Table 7 -45 explains the privilege of user/administrator. Select Feature ->... -
Page 113: Edit A Pagine
Click Add at the bottom of the page to see the newly added settings in the Management webpage. 7.1.27 Edit a Pagine Click the Management tab. Click a Paging ID. Edit settings shown in Table 7 -46. Click Apply to update the information. 7.1.28 Delete Paging Click the Management tab. -
Page 114: Interactive Voice Response (Ivr)
User could make calls with its own privilege from other extension’s device. For example, in a company, only the director is allowed to make the international calls, employees could make local or long-distance calls only. If the director wants to make an international call when he is next to employee’s desk, he has to dial D-Auth pilot number (7777 by default), then input the password, he could make the call with his privilege if the password is correct. -
Page 115: Edit An Ivr Menu
7.1.30 Edit an IVR Menu Click an IVR name in the All IVR Menus list. Click Modify if you want to change the prompt and worktime settings for the first level of IVR. Select a prompt and modify the worktime settings. Click Update to change the prompt and worktime settings. - Page 116 Click to add the rule in the Node list. If select ext, and the caller dialed a wrong extension, the system prompts an error message followed by a beep to request reentering a correct one. Any entered digit before the beep will not take effect.
- Page 117 in the Languages list. - Please enter a new extension followed by the # key. - Thank you. - I'm sorry, that is not a valid extension, please try again. - Please hold while I try out that extension. - System is busy at this moment. Please try again later.
-
Page 118: Ivr Parameters
prompt plays. Announce To play the selected prompt. The caller can not enter any digits when the prompt plays. Call To To transfer to an extension No Action Play the prompt in Action Data. Prompt Select a prompt if Greeting or Announce is selected in the Off-Hour Actions list. -
Page 119: Voicemail Prompts
Table 7-49 Replaceable Meet-me Prompts Prompt Description Get PIN Number Please enter the conference pin number. Invalid PIN That pin is invalid for this conference. Only Person You are currently the only person in this conference. 7.1.35 Voicemail Prompts This page allows replacing built-in voicemail system prompts with user recordings. Click a language and a prompt in the corresponding lists. -
Page 120: Ivr Prompts
Lineisdown Device Unreachable. Isnotreg Device Unregistered. 7.1.36 IVR Prompts One can upload customized IVR prompts in Feature -> IVR, and click IVR Prompts Management tab. Please click Reload after configuration changes. 7.1.36.1Add an IVR Prompt Select a language from the Language list. Click Browse to find the expected recording in the local storage. - Page 121 Invalid I am sorry, that is not a valid extension. Please try again.
-
Page 122: 8Example Provisioning
8 Example Provisioning This chapter introduces several practical configuration examples of IP PBX deployment. The configuration of IP PBX is very flexible and the expressiveness of usergroups, routegroups, and trunks are scalable enough to support various network architectures. Users could refer to these examples and build a larger network involving multiple sites and advanced services. - Page 123 Figure 6-1 There are staff phones in cubes and offices, and utility phones in public areas. ˙ Each phone has one extension, and can call any extension without limitation. ˙ Only staff phones can call out to PSTN with a prefix 9. ˙...
-
Page 124: Case Ii: Two-Site Configuration
1.46 Case II: Two-site configuration This case describes the typical settings of a two-site configuration; say Company B headquarters B- HQ and its branch B-BR located in another country. Assume each site has a DSL connection for Internet access. B-HQ has 4 PSTN subscriber lines and B-BR has 2 lines as shown in Figure 6-2. The provisioning tasks include: Both sites have staff phones in cubes and offices and utility phones in public areas. - Page 125 Create a device for each physical phone and designate an extension. Assign extensions of staff phones to corresponding users. Assign all extensions of utility phones to share the same user, public. Create a route, pstn, with pattern “9Z.” with number of digits stripped “1”, no prefix. Create a route, pstn-br, with pattern “90118621.”...
- Page 126 14. Create a SIP trunk with ID 100 pointing to 64.1.0.1 port 5060; password hq-secret; do not select DID, and select staff as the usergroup of privilege. 15. Return to usergroup configuration. For usergroup staff, choose pstn-out as outbound routegroup for pstn1, choose to-hq as outbound routegroup for 100 in Associated Trunks and select utility in Reachable User Group;...
-
Page 127: 9Appendix
9 Appendix 1.47 Default Hotkey Settings for IP PBX IP PBX has some default keypad settings for general users to directly access functions via the keys combination on a phone. Table 9-52Default Hotkey Settings Keypad Description Place a call on hold. Remove the call from hold. -
Page 128: 1Connection
9.1.2.1 Connection Connect the console port with a computer using RS232. Open a terminal emulator such as HyperTerminal on the computer. Configure the serial port setting as follows: Baud Rate: 115200 • Data: 8 bit • Parity: none • Stop: 1 bit •... -
Page 129: 4Admin Commands
History Display the commands you entered before. You can also press ↑ ↓ on the keypad to show the used commands. CLI Command: history Enable Enter the admin level. The system will request for a password. The password is the same as the administrator’s password for web interface. -
Page 130: Show Users
interface will logout. If you are in admin level, enter this command will disable and back to basic level. CLI Command: exit History Displays the commands you entered before. You can also press ↑ ↓ on the keypad to show the used commands. - Page 131 Show Routes Display one or all PBX routes’ information. CLI Command: list route <Route ID> / list route Show Routegroups Display one or all routegroup information. CLI Command: list rg <Group ID> / list rg Show Digitmap Display one or all SIP trunks’ information. CLI Command: list digitmap <Digitmap ID>...
- Page 132 Note: Make sure to download the exported file in the web interface without log out the CLI system. Once log out the CLI system, the file will be deleted. Note: For importing data, the system only adds the new records or updates the existed records. If there is any dependency error, the import action will stop and go back to the original status.
- Page 133 Routegroup #Tag,Route_Group_ID,Description,Associated_Routes, $Route_Group_s,3301g,3301gr,331;332, IP Phone #Tag,Device_ID,Device_URL,Verder_Prefix,Mac,Codec_0,PACKET_TIME_0,Co dec_1,PACKET_TIME_1,Codec_2,PACKET_TIME_2,VAD,DTMF,1st_ProxyIP,1 st_ProxyPort,1st_RegIP,1st_RegPort,1st_SIPDom,2nd_ProxyIP,2nd_ProxyPort,2n d_RegIP,2nd_RegPort,2nd_SIPDom, $IPPhone_s,201,192.168.1.221,sip201,aa:11:22:33:44:51,g711ulaw,10,g711alaw,20,g7 26r16,30,yes,inband, Extension of IP Phone #Tag,Exten_No,Asso_Device,Passwd,User,Pickup_UG,Lang,Voicemail_YN,Vm_pi n,DTMF,Forward_Num,Unav_Timeout,LineType,LAN_Only,Disable_NAT,PEER TP,Call_Block,Timeout_Forward,Unav_Fwd_Prompt,Busy_Forward,Sele_Call_F wd,Block_Anony,Max_VMSpace,Call_Alive,Reg_Alive,sipredirectiondeny,Fastbri dgedisable, $Extension_IPPhone_l,201,201,pp201,user_01,UG_01,en,yes,201,inband,201201,10,wi red,yes,no,INVITE,206;206,101201/10;201202/20,yes,211,111:Local/111;112:Local/11 2,yes,2110,yes,no, SIP Trunk #Tag,SIP_ID,Descript,Dyna_Peer,Auth_Name,Auth_Password,SIP_Proxy,SIP_Pr oxy_Port,Registration ,SIP_Registrar,SIP_Reg_Port,DID,DID_Prefix,DID_Stripping,IVR,Lang,User_Gr oup,SIP_Domain,User_agent ,BW_Sensitive,BW_Limit,DTMF,PEERTP,Enable_ENUM,Clear_Bindings,Disabl e_NAT ,Delay_Before ,Delay_After,Call_alive,Reg_alive,Anti_SIPBlock,GW_trunk,From_callerID,Sub_ Payload,Trunk_relay,Allow_Concurrent_Call,Centrexdid,Allnumberdigitmap,Cen trexdefaultnumber,Inboundmanipulation,Outboundmanipulation,Fastbridgedisab $SIP_Trunk_s,888,SIP Trunk Data,yes,888,88,dynamic,,no,,,bygroup,02,5,,en,UG_DEF,,,no,,Auto,UPDATE,no,yes,n...
- Page 134 o,1,1,yes,no,yes,,89132070,126,yes,3,no,,,,,yes, Full Data Apply all the data above into a CSV file to import. 1.49 IP PBX Voicemail System Menu Tree This section displays the options for IP PBX voicemail box once users login. 1.New/old messages 3.Advanced function 1.Send your reply 2.Call the person who send this message 1.Call this number 2.Enter a different number...
- Page 135 0.New messages 1.Old messages 2.Work messages 3.Family messages 4.Friends messages #.Cancel *.Help #.Exit 2.Change folder 0.New messages (The same as Friends message menu.) 1.Old messages (The same as Friends message menu.) 2.Work messages (The same as Friends message menu.) 3.Family messages (The same as Friends message menu.) 4.Friends messages 1.Friend (New/Old/Work/Family) messages...
- Page 136 8.Transfer this message to another user 1.Prepend message 2.Divorce the message without prepending *.Return to main menu 9.Save this message 0.New message 1.Old message 2.Work message 3.Family message 4.Friend message #.Cancel *.Help #.Exit 2.Change folder 0.New messages 1.Old messages 2.Work messages 3.Family messages 4.Friends messages #.Cancel...
- Page 137 3.Record your name 1.Accept the recording 2.Listen to it 3.Re-record it 4.Change your password *.Return to main menu *.Help #.Exit #.Cancel 3.Advanced function 4.Place outgoing call *.Return the main menu 0.Mail box function 1.Record your unavailable message 1.Accept the recording 2.Listen to it 3.Re-record it 2.Record your busy message...
Need help?
Do you have a question about the IX-6030 and is the answer not in the manual?
Questions and answers