Advertisement
Table of Contents
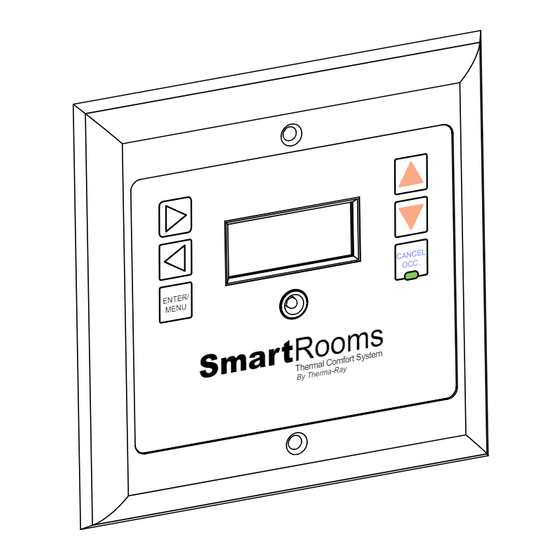
Getting started with your SmartRooms
Comfort Controller is as easy as ... 1,2,3.
Notes:
º Your Low Voltage Comfort Controller must be connected to the SmartRooms Distribution Panel (SRDP) in order
for the heating system to function.
º Your Floor or Earth Storage System is calling for heat when a Down arrow is displayed.
º Your Ceiling System is calling for heat when an Up arrow is displayed.
º Your Floor and Ceiling Systems are calling for heat when a Both arrow is displayed..
º Your System will turn ON when the temperature difference between the Comfort Settings and the actual floor
temperature is more than 2° Fahrenheit (1° Celsius).
Press Cancel/Occ. to put
1
Comfort Controller in
manual mode
Verify that the green light
2
is on indicating manual
mode.
Choose the desired room
3
temperature using the
Up or Down arrows. You
can change this
temperature at any time.
Advertisement
Table of Contents

Summary of Contents for SmartRooms Comfort
- Page 1 º Your Floor and Ceiling Systems are calling for heat when a Both arrow is displayed.. º Your System will turn ON when the temperature difference between the Comfort Settings and the actual floor temperature is more than 2° Fahrenheit (1° Celsius).
- Page 2 COMFORT CONTROLLER FOR LOW VOLTAGE Owners Manual SmartRooms Comfort Controller displays the current time and room temperature. It also displays the day of the week and the given temperature set point. It is programmable and operational in both English and French. See the Secondary Features section on Page ‘4/8’...
- Page 3 After setting all of your day's programs your SmartRooms Comfort Controller is ready to start operating on its own. If at any time you wish to override your day program ENTER/ temperature settings, you can easily press the Cancel/Occ ...
-
Page 4: Secondary Features
Use this chart to keep track of your preferred program schedules. Enter the program end-time and desired temperature in each of the given boxes. Secondary Features Set Occupied Temp Set Language Use this function to set the default room temp- erature when you choose to override your daily programs. - Page 5 Set Time Format Set Mode (cont’d) Display Display Press Press ENTER/ ENTER/ MENU MENU CANCEL OCC. ENTER/ MENU Set Temp Scale Display Press ENTER/ MENU ENTER/ ...
- Page 6 Secondary Features (Continued) Set Vacation Temp (Cont’d) Set Global Option The Global option copies the following common features to all the controllers connected on the network: Date, Occupied, Vacation, Schedule, Programs, Time, Temp Scale (ºC or ºF) , Daylight Savings (On or Off). Press Display Press...
- Page 7 Secondary Features (Continued) Set Address (Cont’d) Set Daylight Savings Time This function is factory set to ON. If your area does not use daylight savings time, set to OFF. Display Display Press Press ENTER/ MENU ...
-
Page 8: Troubleshooting
Sensors option. Select the option, press Enter/Menu and with the “Up and worry, your SmartRooms Controller has a back up sensor Down” arrows, you can choose which sensor for which you wish to view the reading. Once you are done, press located in the face plate. -
Page 9: Warranty
MENU DATE TIME OCCUPIED VACATION FLOOROCC SCHEDULE COPYDAYS SETUP LANGUAGE PADLOCK Copy Sunday's ENGLISH LOCK FLOOROCC MM/DD/YY HH:MM OCCUPIED VACATION Weekday program onto all 20.0ºC 01/11/04 12:00 AM 20.0ºC Sunday other days FRANCAIS OFF or ON UNLOCK System Diagram Sunday Repeat until Prog 01 Saturday is...
Need help?
Do you have a question about the Comfort and is the answer not in the manual?
Questions and answers