Advertisement
Available languages
Available languages
Advertisement
Table of Contents

Related Manuals for Peavey EVH 5150 II


Summary of Contents for Peavey EVH 5150 II
- Page 1 Operating Guide...
- Page 2 ATTENTION: Afin de réduire le risque de choc électrique, ne pas enlever le couvercle. Il ne se trouve à l’intérieur aucune pièce pouvant être reparée par l’utilisateur. Confiez I’entretien et la réparation de l’appareil à un réparateur Peavey agréé. AVERTISSEMENT: Afin de prévenir les risques de décharge électrique ou de feu, n’exposez pas cet appareil à la pluie ou à...
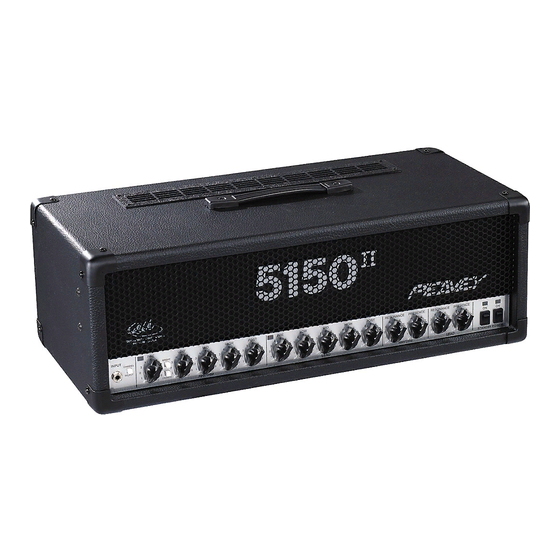
- Page 3 ® Tube Guitar Amplifier Congratulations on your purchase of the all new 5150 II. Peavey’s continuous design collaboration ® with guitar icon and legend, Edward Van Halen, has produced yet another feature-packed, monster guitar head. Like the original 5150 head, the 5150 II offers two channels. However, the 5150 II adds separate EQ, Resonance, and Presence controls to each channel, giving you more control and flexibility.
-
Page 4: Rear Panel Features
Ground Switch in the center position, place the Ground Switch to positive (+) or negative (-) to minimize hum. Should a hum/noise problem continue, consult your authorized Peavey dealer, the Peavey factory, or a qualified service technician. NOTE: THE GROUND SWITCH IS NOT FUNCTIONAL ON 220/240 VOLT MODELS. - Page 5 REMOTE FOOTSWITCH JACK This jack is provided for the connection of the supplied remote footswitch. The footswitch cable should be plugged in before the amp is powered up. When the footswitch is plugged into the Remote Footswitch Jack, the Channel Select switch (14) must be pressed to the “in” position for remote selection of the Lead or Rhythm channel (right footswitch button).
- Page 6 Depress to the “in” position to activate. (23/24) RESONANCE / PRESENCE Unique to Peavey instrument amplifiers, the Resonance control (23) can be set to boost the gain of the power amp in the low frequencies at the resonance/attenuation point of the speaker cabinet.
-
Page 7: Signal Flow Block Diagram
POWER AMPLIFICATION SECTION RATED POWER AND LOAD: 120 W RMS into 16, 8, or 4 ohms POWER @ CLIPPING: (Typically @ 5% THD, 1 kHz, 120 V AC line) 130 W RMS into 16, 8, or 4 ohms (Bias must be reduced to measure.) FREQUENCY RESPONSE: +0, -3 dB, 50 Hz to 20 kHz @ 100 W RMS into 8 ohms... -
Page 8: Hookup Diagram
From EVH 5150 II Effects ® Send Output to Input of Rack Effects Unit From EVH 5150 II Effects ® Send Output to Input of Effects Pedal 5150 ® HOOKUP DIAGRAM 16 Ohms Set switch to 8 Ohms 16 Ohms ™... -
Page 9: Recommended Settings
Southern Rock/Country Signature Setting Activates Effects Loop when switch is pressed and LED illuminates There are no momentary switches on the footswitch. Channel select switch (14) must be pressed to the “in” position for this switch to function. 5150 ® RECOMMENDED SETTINGS Set to proper volume Set to proper volume... - Page 10 • Salida de 120 wats de salida de poder en ohmios • Pedal de tres botones con cable removible de 25' 5150 ® ESPAÑOL 5150 ® II. La colaboraci≤n cont¿nua de Peavey con el ¿dolo y ® es una marca registrada de Edward Van Halen...
- Page 11 Switch de Tierra en la posici≤n central, pasa el switch a la posici≤n (+) ≤ (-) para minimizar el zumbido. Si persiste este problema, consulta a un vendedor autorizado de Peavey, a la fßbrica misma, o a un t¿cnico de servicio calificado.
- Page 12 switch debe ser ajustado a la mitad de ese valor, por ejemplo: dos gabinetes de 16 ohmios: ajustar switch a 8 ohmios; dos gabinets de 8 ohmios: ajustar switch a 4 ohmios. ENTRADA PARA PEDAL REMOTO Este pedal se proporciona para para la conexi≤n del pedal remoto inclu¿do. El cable del pedal debe ser conectado antes de que se prenda el ampli.
- Page 13 instantßnea, eliminando el tiempo de calientamiento. El indicador led de Standby arriba del switch se iluminarß cuando el ampli est¿ en modo operacional. PREAMPLIFICADOR (13) ENTRADA La entrada del 5150 II estß dise±ada para recibir una variedad de niveles de salida de guitarras, sin importar la configuraci≤n de las pastillas.
-
Page 14: Especificaciones
Peavey. ¿ste se puede ajustar para aumentar la ganancia del amplificador de poder en las frecuencias bajas del punto de resonancia/atenuaci≤n del gabinete de bocina. En t¿rminos mßs sencillos, el control de resonancia funciona como un ecualizador de bajas frecuencias para evitar la p¿rdida de las mismas. - Page 15 ® Amplificateur à lampes pour guitare Nous vous félicitons pour l’achat du 5150 II. Il représente le fruit d’une collaboration entre Peavey ® et Edward Van Halen. De même que le 5150 original, le 5150 II possède 2 canaux. Cependant, chacun dispose à...
- Page 16 FACE ARRIERE ALIMENTATION CONNECTEUR D’ALIMENTATION IEC: Connecteur IEC permettant l’alimentation du 5150 II. L’utilisation d’une ligne secteur d’une tension inappropriée peut causer des dommages à votre appareil (consultez les tensions d’alimentation inscrites sur l’appareil). Assurez-vous que l’amplificateur est toujours correctement connecté à la terre. FUSIBLE Un fusible de 3A est placé...
-
Page 17: Face Avant
Return (8) à sa sortie en utilisant des câbles blindés de bonne qualité. Placez dans la boucle d’effets les effets de modulation (chorus, flanger, vibrato, etc...) et d’espace (réverbes, delays, etc...). SORTIE PREAMP OUT Cette sortie peut être utilisée pour connecter le préampli du 5150 II à un ampli de puissance supplémentaire, une table de mixage, etc. - Page 18 (l’interrupteur doit être en position enfoncée). (23/24) RESONANCE / PRESENCE Le contrôle de Résonance (23), exclusif aux amplificateurs Peavey, agit tel un contrôle de présence pour les basses fréquences. Il permet d’augmenter la réponse de l’amplificateur dans les basses fréquences.
- Page 19 POWER AMPLIFICATION SECTION RATED POWER AND LOAD: 120 W RMS into 16, 8, or 4 ohms POWER @ CLIPPING: (Typically @ 5% THD, 1 kHz, 120 V AC line) 130 W RMS into 16, 8, or 4 ohms (Bias must be reduced to measure.) FREQUENCY RESPONSE: +0, -3 dB, 50 Hz to 20 kHz @ 100 W RMS into 8 ohms...
- Page 20 II. Dieser Amp ist die Fortsetzung des ® bekannten Röhrentopteils aus der Zusammenarbeit zwischen Edward van Halen und Peavey. Genau wie das Vorgängermodell besitzt dieser Amp über 2 Kanäle, die bei diesem neuen Modell allerdings über je einen eigenen EQ sowie Resonanz- und Presence-Regler verfügen. Mit dem Fußschalter wird zwischen den Kanälen hin- und hergeschaltet, der Effekt-Loop eingeschaltet und...
-
Page 21: Rückseite Des Gerätes
RÜCKSEITE DES GERÄTES NETZANSCHLUß NETZKABEL: Irgendwoher muß der Strom ja kommen. Bitte NICHT die Erdung aus irgendeinem unerfindlichen Grund isolieren... und bitte VORHER feststellen, ob die Stromversorgung mit den Angaben am Gerät übereinstimmt. SICHERUNG WARNUNG: ERST DEN STECKER ZIEHEN, DANN DIE SICHERUNG AUSTAUSCHEN! Natürlich mußt Du die 5 A Sicherung durch eine gleichwertige Sicherung des gleichen Typs ersetzen. -
Page 22: Vorderseite Des Gerätes
PREAMP OUT Wenn Dir also die Leistung von diesem Gerät nicht genügen sollte, kannst Du von hier aus einen weiteren Amp ansteuern. Wo der Anschluß dort erfolgen sollte, kannst Du in der Bedienungsanleitung des anderen Gerätes nachlesen. Aber nur so viel: Es ist garantiert nicht der Eingang, in den man normaler Weise das Gitarrenkabel stöpselt. - Page 23 (15) KANAL LED Dies sind die beiden LEDs, die Dir anzeigen, auf welchem Kanal Du gerade spielst. (16/20) PRE und POST GAIN Pre (16) und Post (20) Gain Kontrollen sind auf beiden Kanälen vorhanden. Natürlich ist der Pre Gain auf dem Lead Kanal höher voreingestellt als bei dem Rhythmus Kanal. Der Pre Gain gibt in etwa den Grad der Verzerrung bzw.
- Page 24 POWER AMPLIFICATION SECTION RATED POWER AND LOAD: 120 W RMS into 16, 8, or 4 ohms POWER @ CLIPPING: (Typically @ 5% THD, 1 kHz, 120 V AC line) 130 W RMS into 16, 8, or 4 ohms (Bias must be reduced to measure.) FREQUENCY RESPONSE: +0, -3 dB, 50 Hz to 20 kHz @ 100 W RMS into 8 ohms...
- Page 25 NOTES:...
-
Page 26: Important Safety Instructions
WARNING: When using electric products, basic cautions should always be followed, including the following: Read these instructions. Keep these instructions. Heed all warnings. Follow all instructions. Do not use this apparatus near water. For example, near or in a bathtub, swimming pool, sink, wet basement, etc. Clean only with a damp cloth. - Page 27 What Peavey Will Do We will repair or replace (at Peavey's discretion) products covered by warranty at no charge for labor or materials. If the product or component must be shipped to Peavey for warranty service, the consumer must pay initial shipping charges. If the repairs are covered by warranty, Peavey will pay the return shipping charges.
- Page 28 Features and specifications subject to change without notice. Peavey Electronics Corporation • 711 A Street • Meridian • MS • 39301 (601) 483-5365 • FAX (601) 486-1278 • www.peavey.com ©1999 Printed in the U.S.A. 10/99 80304643...