Table of Contents
Advertisement
Advertisement
Table of Contents

Summary of Contents for i3PROJECTOR L3502W UM
- Page 1 L3502 W UM USER MANUAL...
-
Page 2: Table Of Contents
Multimedia........40 Table of Contents ......2 Usage Notice ........3 Accessing Multimedia Files ....40 How to access Multimedia mode ..40 Safety Information ......... 3 Appendices ........47 Precautions ..........4 Installing and Cleaning the Introduction ........6 Optional Dust Filter ......47 Package Overview ........ -
Page 3: Usage Notice
7. Do not let objects or liquids enter the projector. They may touch dangerous voltage points and short out parts that could result in fire or electric shock. 8. See projector enclosure for safety related markings. 9. The unit should only be repaired by appropriate service personnel. i3PROJECTOR manual L3502W UM... -
Page 4: Precautions
Precautions Please follow all warnings, precautions and maintenance as recommended in this user�s guide. • Warning- Do not look into the projector’s lens when the lamp is on. The bright light may hurt and damage your eyes. • Warning- To reduce the risk of fire or electric shock, do not expose this projector to rain or moisture. - Page 5 Extremely hot: > 30°C Extremely cool: < 5°C Extremely humid: > 70% R.H. (Relative Humidity) - In areas susceptible to excessive dust and dirt. - Near any appliance generating a strong magnetic field. - In direct sunlight. i3PROJECTOR manual L3502W UM...
-
Page 6: Introduction
Package Overview Unpack and inspect the box contents to ensure all parts listed below are in the box. If something is missing, please contact your nearest customer service center. VGA Cable Projector Power Cord 电源 确定 菜单 退出 放大 自动 重设... -
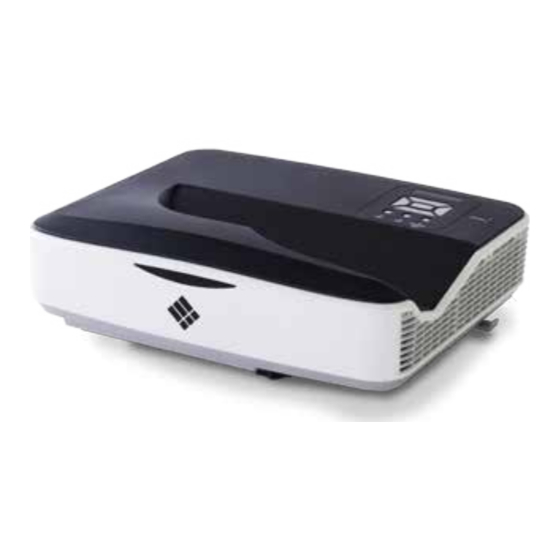
Page 7: Product Overview
Main Unit The interface is subject to model’s specifications. 1. Control Panel 6. Speaker 2. Focus Switch 7. Power Socket 3. Ventilation (inlet) 8. Input / Output 4. IR Receiver Connections 5. Ventilation (outlet) 9. Lens i3PROJECTOR manual L3502W UM... -
Page 8: Control Panel
Control Panel ON(B) TEMP LAMP STANDBY(R) MENU INPUT Enter 1. Power LED 2. Enter 3. Temp LED 4. Lamp LED 5. Menu 6. Input 7. Four Directional Select Keys 8. Power/Standby button www.i3-learning.com... -
Page 9: Input/Output Connections
12. Composite Audio Input (left) Connector 13. Audio Output Connector (3.5mm mini Jack) Monitor loop 14. Audio Input Connector (3.5mm mini jack) through only 15. Audio Input Connector (microphone) support in VGA1- 16. Kensington Lock Port In/YPbPr. i3PROJECTOR manual L3502W UM... -
Page 10: Remote Control
Remote Control 1. Infrared transmitter 2. LED Indicator 3. Power On/Off 4. OK 5. Four Directional Select Keys 6. Menu 电源 7. Exit 8. Zoom in 9. Reset 10. Auto 11. Source 确定 12. Zoom out 13. Volume +/- 14. Keystone +/- 菜单... -
Page 11: Installation
(*) Optional accessory Interactive Whiteboard 1....................*RS232 Cable 2..................... VGA Cable 3....................*HDMI Cable 4....................*USB Cable 5..................*Audio Cable/RCA 6....................*RJ45 Cable 7....................Power Cord 8..................*VGA Output Cable 9..................*Audio Output Cable 10....................*ECP Cable 11 ..................*Audio Input Cable i3PROJECTOR manual L3502W UM... -
Page 12: Connect To Video Sources
Connect to Video Sources i3PROJECTOR L3502W DVD Player, Set-top Box, HDTV receiver Due to the difference in Composite Video Output applications Microphone for each country, some regions may have different accessories. (*) Optional Audio Output accessory 1..........*15-Pin to 3 RCA Component/HDTV Adaptor 2. -
Page 13: Powering The Projector On / Off
“INPUT” button on the control panel or direct source keys on the remote control to switch between inputs. POWER/STANDBY ON(B) TEMP LAMP STANDBY(R) MENU INPUT Turn on the pro- jector first and then select the signal sources. Enter i3PROJECTOR manual L3502W UM... -
Page 14: Powering Off The Projector
Powering Off the Projector 1. Press the “ ” button on the remote control or on the control panel to turn off the projector. The following message will be displayed on the screen. Press the “ ” button again to confirm otherwise the message will disappear after 10 seconds. -
Page 15: Adjusting The Projected Image
1. Locate the adjustable foot you wish to modify on the underside of the projector. 2. Rotate the adjustable ring clockwise to raise the projec- tor or counter clockwise to lower it. Repeat with the remaining feet as needed. Tilt-Adjustment Feet Tilt-Adjustment Ring i3PROJECTOR manual L3502W UM... -
Page 16: Adjusting The Projector�S Focus
Adjusting the Projector�s Focus To focus the image, slide the focus switch to left/right until the image is clear. WXGA series: The projector will focus at distances from 1.413 to 1.884 feet (0.428 to 0.571 meters). Focus switch www.i3-learning.com... -
Page 17: Adjusting Projection Image Size (Diagonal)
31.8 12.5 28.8 11.3 226.2 141.4 89.1 55.7 34.7 13.7 30.0 11.8 236.9 148.1 93.3 58.3 37.5 14.8 31.0 12.2 247.7 154.8 97.5 60.9 40.4 15.9 32.2 12.7 This table is for user’s reference only. i3PROJECTOR manual L3502W UM... -
Page 18: User Controls
Control Panel & Remote Control Control Panel ON(B) STANDBY(R) TEMP LAMP MENU INPUT Enter Using the Control Panel Refer to the “Power On/Off the Projector” POWER section on pages 13-14. Enter Press “Enter” to confirm your item selection. INPUT Press “INPUT” to select an input signal. Press “MENU”... -
Page 19: Remote Control
Volume +/- Adjust to increase / decrease the volume. Use this function to choose your desired Aspect ratio aspect ratio. Press “Menu” to launch the on-screen Menu display (OSD) menu. To exit OSD, press “Menu” again. i3PROJECTOR manual L3502W UM... -
Page 20: Using The Remote Control
Using the Remote Control Press “RGB1” to choose RGB IN 1 RGB1 connector. Momentarily turns off/on the audio Black screen and video. Press “HDMI1” to choose HDMI IN 1 HDMI1 电源 connector. Press “HDMI2” to choose HDMI IN 2 HDMI2 connector. -
Page 21: On-Screen Display Menus
Press “Enter” to confirm, and the screen will return to the main menu. To exit, press “Menu” again. The OSD menu will close and the projector will automatically save the new settings. Main Menu Settings Sub Menu i3PROJECTOR manual L3502W UM... -
Page 22: Picture
Picture Color Mode There are many factory presets optimized for various types of images. Use the < − or − > button to select the item. Bright: For brightness optimization. PC: For meeting presentation. Movie: For playing video content. ... - Page 23 Press the − > button to increase the amount of red in the image. Gamma Effects the representation of dark scenery. With greater gamma value, dark scenery will look brighter. i3PROJECTOR manual L3502W UM...
-
Page 24: Screen
Screen Aspect Ratio Auto: Keep the image with original width-height ratio and maximize the image to fit native horizontal or vertical pixels. 4:3: The image will be scaled to fit the screen and displayed using a 4:3 ratio. 16:9: The image will be scaled to fit the width of the screen ... - Page 25 Front Ceiling: This is the default selection. When selected, the image will turn upside down. Rear: When selected, the image will appear reversed. Rear Ceiling: When selected, the image will appear reversed in upside down position. i3PROJECTOR manual L3502W UM...
-
Page 26: Setting
Setting Language Choose the multilingual OSD menu. Press the < − or − > button into the sub menu and then use the or button to select your preferred language. Press on the remote control to finalize the selection. Menu Location Choose the menu location on the display screen. - Page 27 It will be changed to VGA B Port when setting input. It will be changed to VGA out when setting output. Test Pattern Display a test pattern. Reset Choose “Yes” to return the parameters on all menus to the fac- tory default settings. i3PROJECTOR manual L3502W UM...
-
Page 28: Volume
Volume Speaker On: Choose “On” to play sound through the built-in speaker. Off: Choose “Off” to disable sound to be played through the built-in speaker. Line out On: Choose “On” to play sound through the external speak- ers. - Page 29 Press the < − button to decrease the volume. Press the − > button to increase the volume. Microphone Volume Press the < − button to decrease the microphone Volume. Press the − > button to increase the microphone Volume. i3PROJECTOR manual L3502W UM...
-
Page 30: Options
Options Logo Use this function to set the desired startup screen. If changes are made they will take effect the next time the projector is powered on. Default: The default startup screen. For successful logo User: Use stored picture from “Logo Capture” function. capture, please ... - Page 31 Cleaning Up Reminder: Select “Yes” to reset the dust filter hour counter after replacing or cleaning the dust filter. Information Display the projector information for model name, SNID, source, resolution, software version, color space and aspect ratio on the screen. i3PROJECTOR manual L3502W UM...
-
Page 32: Options | Lamp Settings
Options | Lamp Settings Lamp Hours Used (Normal) Display the projection time of normal mode. Lamp Hours Used (ECO) Display the projection time of ECO mode. Lamp Life Reminder On: Choose “On” to show the lamp end of life warning mes- ... - Page 33 Use this feature to select 96 or 144Hz refresh rate as using 3D nals from Compos- glasses in the1080p @ 24 frame packing. ite/Svideo connec- tor connector. “Frame Packing” / “Side-by-Side(Half)” / “Top and Bottom” are supported from HDMI 1.4a 3D input signals. i3PROJECTOR manual L3502W UM...
-
Page 34: Multimedia
Multimedia Status Display the network connection status. DHCP Configure the DHCP settings. On: Choose “On” to let the projector to obtain an IP address automatically from your network. Off: Choose “Off” to assign IP, Subnet Mask, Gateway, and DNS configuration manually. - Page 35 User Controls Installation Installation Appendices User controls Installation Group Name Display the group name. Projector Name Display the projector name. Location Display the projector location. Contact Display the contact information. i3PROJECTOR manual L3502W UM...
- Page 36 How to use web browser to control your projector 1. Turn on DHCP to allow a DHCP server below: to automatically assign an IP, or 4. Based on network web-page for manually enter the required network the input-string in [tools] tab, the information.
- Page 37 Start, click Control Panel, click Network and Internet Connections, and then click Network Connections. Click the connection you want to configure, address, and type in as below: 1) IP address: 192.168.0.100 2) Subnet mask: 255.255.255.0 i3PROJECTOR manual L3502W UM...
-
Page 38: Crestron Roomview Control Tool
3) Default gateway:192.168.0.254 Step 6: To open Internet Options, click IE web browser, click Internet Options, click the Connections tab and click “LAN Settings...”. Step 7: The Local Area Network (LAN) Setting dialog box appears. In the Proxy Server area, cancel the Use a proxy server for your LAN check box, then click “OK”... - Page 39 Administrator. The Administrator can add, delete, or edit room information, For further information, please visit: contact information and events, which http://www.crestron.com & www. are logged automatically by the software crestron.com/getroomview. for all users. (Operation UI as following image) i3PROJECTOR manual L3502W UM...
-
Page 40: Multimedia
Accessing Multimedia Files This projector supports two methods to project the media files (photos, videos, music, documents) stored on following devices: a. via Wireless dongle (optional) - wirelessly access the media files stored on your mobile phone, tablet PC, notebook, or desktop. b. - Page 41 4. On the initial connection, you will be prompted to enter a password. Enter the password. 5. Launch “EZview” application and enter the PCTOOL password. 6. Wait until the connection is established. The media files on your mobile device or tablet PC can be accessed using the i3PROJECTOR manual L3502W UM...
- Page 42 projector. Laptop Display To access the media files stored on your laptop/notebook, do the folllowing: 1. On Multimedia menu, select Laptop. 2. Enable your laptop/notebook WiFi function, and search the AP name listed in the Wi-Fi network list. 3. On the initial connection, you will be prompted to enter a password.
- Page 43 To access the media files stored on your desktop, do the folllowing: 1. On Multimedia menu, select Desktop. 2. Open your web browser and enter the IP address. Then select “Wifi” on the left side of the screen and install application required by the operation system. i3PROJECTOR manual L3502W UM...
- Page 44 3. Launch “EZview” application and enter the control code shown on the right-bottom side of the screen. 4. Wait until the connection is established. The media files on your desktop can be accessed using the projector. USB Storage Display To access the media files stored on your USB flash drive, do the folllowing: Supported File Format Multimedia Cat-...
- Page 45 Installation Appendices Installation 3. Use the keys to select the file to view/play and press the “Enter” key to confirm. Configuring Multimedia Settings To change the settings, do the folllowing: 1. On Multimedia menu, select Settings. i3PROJECTOR manual L3502W UM...
- Page 46 2. Use the keys to select the desired menu option and press the “Enter” key to enter the submenu. System: Select this option to view the firmware version and update firmware. Video: Select this option to change the display ratio and ...
-
Page 47: Appendices
4. Carefully remove the dust filter. Then clean or change the filter. 2 To install the filter, reverse the previous steps. 5. Turn on the projector and reset the filter usage counter after the dust filter is replaced. i3PROJECTOR manual L3502W UM... -
Page 48: Compatibility Modes
Compatibility Modes VGA Analog a. PC signal Modes Resolution V. Frequency [Hz] H. Frequency [Hz] 640x480 31.5 640x480 35.0 640x480 37.9 640x480 37.5 640x480 43.3 640x480 61.9 720x400 31.5 800x600 35.1 800x600 37.9 800x600 48.1 SVGA 800x600 46.9 800x600 53.7 800x600 77.4... - Page 49 480i 59.94(29.97) 15.7 (1440x480) 720x576 576i 50(25) 15.6 (1440x576) 480p 720x480 59.94 31.5 576p 720x576 31.3 1280x720 45.0 720p 1280x720 37.5 1920x1080 60(30) 33.8 1080i 1920x1080 50(25) 28.1 1920x1080 23.98/24 27.0 1080p 1920x1080 67.5 1920x1080 56.3 i3PROJECTOR manual L3502W UM...
-
Page 50: Hdmi Digital
HDMI Digital a. PC signal Modes Resolution V. Frequency [Hz] H. Frequency [Hz] 640x480 31.5 640x480 35.0 640x480 37.9 640x480 37.5 640x480 43.3 640x480 61.9 720x400 31.5 800x600 35.1 800x600 37.9 800x600 48.1 SVGA 800x600 46.9 800x600 53.7 800x600 77.4 Apple, MAC II 832x624... - Page 51 Modes Resolution V. Frequency [Hz] H. Frequency [Hz] 720p 31.5 Frame 720p 59.94/60 15.7 Packing 1080p 23.98/24 15.6 1080i 31.5 Side-by- Side(Half) 1080i 59.94/60 31.3 720p 45.0 Top and 720p 59.94/60 37.5 Bottom 1080p 23.98/24 33.8 i3PROJECTOR manual L3502W UM...
-
Page 52: Rs232 Commands And Protocol Function List
(D-Sub 9pin connector) Warning! If your projector has a serial number between the following ranges, please refer to the dedicated command protocol at this location: (http://www.i3-learning.com/ images/brochures/ENG/i3projector/ L3502W_L3302FH-L3002UW RS232-18062015.pdf) VARWL3502W5040001 to VARWL3502W5040253 VARWL3502W5050001 to VARWL3502W5050161 VARWL3502W5110001 to VARWL3502W5110005 VARWL3502W5130001 to VARWL3502W5130152... -
Page 53: Commands Set List
Mute 0 ~ 1 Write Fail : F 1 : On Pass : P Volume Volume 0 ~ 30 Write Fail : F Pass : P Volume Microphone Volume 0 ~ 30 Write Fail : F i3PROJECTOR manual L3502W UM... - Page 54 7 : Norwegian 8 : Danish Pass : P 9 : Simplified Chinese Setting Language 1 ~ 18 Write Fail : F 10 : Polish 11 : Korean 12 : Russian 13 : Spanish 14 : Traditional Chinese 15 : Italian 16 : Portuguese 17 : Turkish 18 : Japanese...
- Page 55 Installation Installation Appendices Appendices Installation Apendices i3PROJECTOR manual L3502W UM...
-
Page 56: Wall Mount Installation
Wall Mount Installation If you wish to use a third party ceiling mount kit, please ensure the screws used to attach a mount to the projector meet the following specifications: Screw type: M4*3 Maximum screw length: 11mm Minimum screw length: 8mm ... -
Page 57: Regulation & Safety Notices
FCC regulations. Caution Changes or modifications not expressly approved by the manufacturer could void the user’s authority, which is granted by the Federal Communications Commission, to operate this projector. i3PROJECTOR manual L3502W UM... -
Page 58: Operation Conditions
Operation conditions This device complies with Part 15 of the FCC Rules. Operation is subject to the following two conditions: 1. This device may not cause harmful interference and 2. This device must accept any interference received, including interference that may cause undesired operation. - Page 59 - Adequate instructions for assembly, operation, and maintenance, including clear warnings concerning precautions to avoid possible exposure to laser and collateral radiation in excess of the accessible emission limits in Class 1. i3PROJECTOR manual L3502W UM...
- Page 60 AUTHORISED DISTRIBUTOR WWW.I3-TECHNOLOGIES.COM INFO@I3-TECHNOLOGIES.COM...
Need help?
Do you have a question about the L3502W UM and is the answer not in the manual?
Questions and answers