Advertisement
Quick Links
Advertisement

Summary of Contents for mlink X2
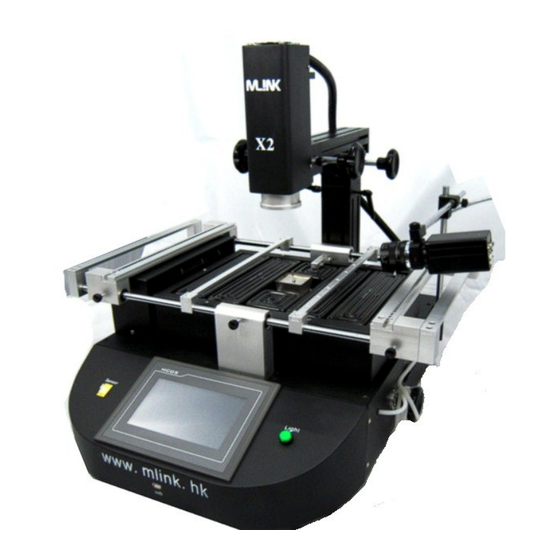
- Page 1 MLINK X2 BGA Repair Workbench Introduction Manual...
- Page 2 Catalogue Rework Station Installing Rework Station Safety Precautions Introduction of Structure and Specification Operating Steps Touch Screen Rework Station Handling Precautions...
- Page 3 Rework Station Installing a. Installation Location In order to ensure the service life of rework station, the installation must meet the following conditions: 1. Away from flammable, explosive materials 2. Don’t spilled by water and other liquid 3. Well-ventilated and Dry Place 4.
- Page 4 3. Main Specification: Total Power: 4400W Top heating: 800W Bottom heating: 800W Bottom infrared preheat: 2400w Current: AC220V 50/60HZ Outer Dimension: L 600mmⅹW600mmⅹH610mm Min PCB Dimension: 40mmⅹ40mm MAX: PCB Dimension: 450mmⅹ500mm Description: This product adopt 7” HD touch screen Human–Machine Interaction(HMI), PLC Control, real-time display Five temperature curve, temperature precision be controlled in ±...
- Page 5 Cleaning of PCB and BGA welding pad, one is use the suction tin line tow to same level, another is use soldering iron drag smooth directly. It is best remove soldering tin in a short time after remove BGA, while BGA not cooling totally, less damage of temperature difference to welding pad ;Use soldering flux in the process of removing solder, can improve the solder activity, conducive to the removal of solder.
- Page 6 or over press, and then lead short circuit because of chip fall on the PCB pad completely while reflowing, Hence, we need decrease temperature and time of the third and forth heating section, or decrease the preheating temperature at bottom. Note: Will appear small quantity ozone when reword station using, in order to ensure a comfortable, healthy and safe operating environment, please keep good air circulation.
- Page 7 b.If selecting ENGLISH, enter into the main work interface, following image will appear: And then will appear top target temperature, top actual temperate, bottom actual temperature, actual thermostatic temperature of the third THERMATIC (preheating temperature at bottom), outer actual temperature from up to down at the right side of the touch screen. Curves on image are: Tope target temperature (blue), top target actual temperature (red), bottom actual temperature (green), infrared actual temperature (purple), out tested actual temperature 1.
- Page 8 Click , return to curve interface Click , the whole machine get into start heating, the running heating curve is specification as above described specification, meantime clean out last curve show on screen. Under normal operation, when top target temperature and heating speed is zero, the whole process finished, machine stop work, hear Roar sound., if have set cooling and vacuum state in cooling vacuum interface, the output of cooling and vacuum will run.
- Page 9 Click return to Chinese-English interface Clock popup “enter code “ window The default pass word is 123456, after enter the code, enter into PID specification setting; All specifications have been set before leave factory, no need change...
- Page 10 Click will appear follow image: Modify and save temperature curve often used Set the heating temperature, constant temperature time, heating speed required by production craft, this product can store the temperature curve up to 50 groups. Save various production craft specifications in system, call it directly when meet different production craft.
- Page 11 Click the Enter key numerical value at the pop-up Enter the modified data, press , Finished setting Temperature specification of Three THERMATICS, click then all specification set just now have stored under the name(serial number) of present formula. Click Popup dialog box...
- Page 12 name this curve, select Chinese or other name convenient for remembering. Also can get the asked temperature curve directly through two buttons. (the formula noted) (0-49) enter corresponding serial NO. Click restart the running temperature curve of heating Or save the modified temperature specification in present interface through Click op following interface:...
- Page 13 Heating finished, System will run cooling and vacuum as (counting by second), or manually control cooling and vacuum state by , after went into manual, whether heating or not, vacuum suction always worked, click cooling manual button, only stop heating, then output, heating start, output stop, for having enough time take away the suction pen, suggest that when remove chip, set the cooling to zero, This machine can real-time monitor the rotating speed of cooling fan of up-down hot air, also can set the min rotating speed.
- Page 14 While alarm due to trouble, all functional button will be locked! It cannot work still after deal with the trouble, power off. New Type Mlink X1 top wind speed modifies has been optimized to show on status bar on touch screen, more easily show the current speed through the column image!
- Page 15 38*38 BGA Solder Temperature Setting Preheating Temperature-holding Heating-up Solder Solder Temperature-drop section section section section section section Top Heating Constant Temperature Time Bottom Heating Constant Temperature Time Infrared Time Constant Temperature Time Slope 31*31 BGA Solder Temperature Setting Preheating Temperature-holding Heating-up Solder Solder...
- Page 16 Above is reference for lead BGA temperature Curve Lead-free temperature curve solder 41*41 BGA Solder temperature setting: Preheating Temperature-holding Heating-up Solder Solder Temperature-drop section section section section section section Top Heating Constant Temperature Time Bottom Heating Constant Temperature Time Infrared Time Constant Temperature...
- Page 17 31*31 BGA Solder Temperature Setting Preheatin Temperature- Heating-up Solder Solder Temperature- g section holding section section section 1 section 2 drop section Top Heating Constant Temperature Time Bottom Heating Constant Temperature Time Infrared Time 110 Constant Temperature Time Slope Above is reference for lead-free BGA temperature Curve If you want to dismantle BGA, it is enough to set the value of temperature-drop section as 0.
- Page 18 unusual, one should stop the installation of BGA and test the temperature, one cannot weld it before it is adjusted properly, otherwise it may damage the BGA or the PCB board. 6. The surface of the machine should be cleaned regularly; in particular, keep the clean of Infrared heating board to prevent dirt accumulating in the top which will affect the normal heat radiation, resulting in poor welding quality, and shortening the life of infrared heater.
- Page 19 Enclose Packing List : Name Specificatio Quantit Unit price Remark Model Main engine of BGA Mlink X1 rework station vacuum nozzle Vacuum sucker Manual Mlink X1 Hot air nozzle heterosexual Clamp plum knob sticks supporting screws Infrared bottom big Infrared bottom small...
Need help?
Do you have a question about the X2 and is the answer not in the manual?
Questions and answers