Table of Contents
Advertisement
Available languages
Available languages
Advertisement
Table of Contents

Related Manuals for Unison Research UNICO CD DUE


Summary of Contents for Unison Research UNICO CD DUE
-
Page 2: Manuale D'istruzioni
MANUALE D’ISTRUZIONI Vi ringraziamo e ci congratuliamo per la fiducia accordataci nello scegliere un prodotto Unison Research - A.R.I.A. Advanced Research In Audio S.r.l. La realizzazione di questo componente audio è non solo il risultato di una lunga esperienza di progettazione e produzione di dispositivi elettronici, ma anche il frutto della nostra passione e della nostra volontà... -
Page 3: Collegamento Alla Rete
Unison Research Unico CDDue SBALLAGGIO E INSTALLAZIONE Verificate che l’imballo sia integro e che l’apparecchio non abbia subito danni evidenti durante il trasporto. Nel caso doveste riscontrare anomalie, vi raccomandiamo di consultare il vostro Rivenditore prima di mettere in funzione l’unità. -
Page 4: Funzionamento
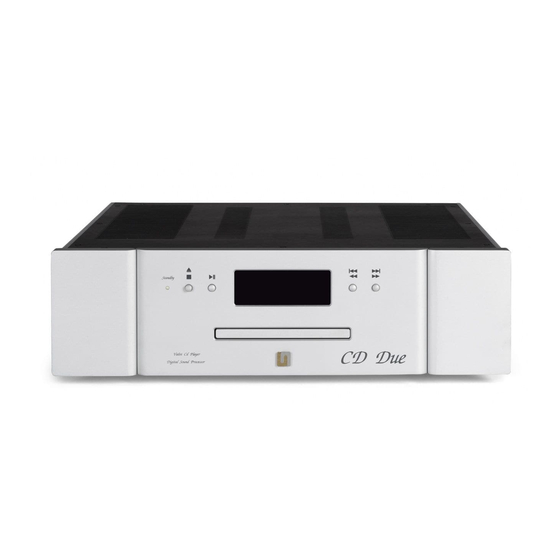
FUNZIONAMENTO PANNELLO FRONTALE 1) CASSETTO INSERIMENTO CD 2) DISPLAY GRAFICO OLED 128x64 3) SENSORE TELECOMANDO 4) PULSANTI DI COMANDO 5) INTERRUTTORE DI ACCENSIONE (SUL FIANCO) PANNELLO POSTERIORE 1) PRESA DI RETE 2) USCITE AUDIO SBILANCIATE 3) USCITE AUDIO BILANCIATE 4) ANTENNA BLUETOOTH 5) INGRESSO USB 6) INGRESSI DIGITALI (TOSLINK, S/PDIF. - Page 5 , il numero totale delle tracce e la durata totale della registrazione. Nel caso il disco inserito non contenga informazioni valide, sul display ® appare il logo UN della Unison Research e l’unità rimane in attesa della sostituzione del CD da parte dell’utente.
- Page 6 ATTENZIONE! Nonostante la meccanica dell’Unico CDDue lo consenta, si sconsiglia vivamente di forzare la chiusura del cassetto spingendolo: a lungo andare, ciò potrebbe causare malfunzionamenti e rotture. SELEZIONE DELLE TRACCE CONTROLLO DELLA RIPRODUZIONE INIZIO Una volta caricato con successo il cd, è sufficiente RIPRODUZIONE premere il pulsante posto sul...
- Page 7 Unison Research Unico CDDue pulsanti contraddistinti dai simboli e , che vanno tenuti premuti fino al raggiungimento della posizione ricercata. La pressione rapida del tasto posto PAUSA PLAY/STOP sul pannello frontale o del tasto PLAY/PAUSE telecomando causa l’interruzione temporanea della riproduzione: il display visualizza la scritta...
-
Page 8: Ripetizione Delle Tracce
La selezione della modalità va effettuata utilizzando il pulsante Time presente sul telecomando. Premendo tale pulsante si selezionano le tre modalità in sequenza. RIPETIZIONE DELLE TRACCE L’Unico CDDue consente di impostare la ripetizione della traccia corrente o di tutto il CD. Premendo il pulsante Repeat posizionato sul telecomando è... - Page 9 Unison Research Unico CDDue Funzioni avanzate : Le funzionalità avanzate sono attivabili da telecomando: Pulsante Funzione Mode Spegne il display fino alla pressione di un tasto qualsiasi Source+- Selezione la sorgente da ascoltare nel seguente ordine = AudioCD TOS = Toslink digital input...
- Page 10 DoP. Se si seleziona un ingresso digitale a cui non è collegato alcun dispositivo, o il cui dispositivo non emette segnale, il display dell’Unico CD Due indicherà “NO LOCK”. Se invece sull’ingresso selezionato è presente un segnale digitale, l’Unico CD Due indicherà la frequenza di campionamento del segnale.
- Page 11 Si noti che il driver è lo stesso usato per l’ingresso USB del Triode 25 e di altri amplificatori Unison Research, per cui se il computer è già stato collegato ad uno di questi prodotti, è già dotato del driver e non occorre installarlo.
- Page 12 Seguire le istruzioni mostrate nella finestra e cliccare sul pulsante “Next” per dare avvio all’installazione. Per prima cosa, il programma di installazione verificherà che l’ingresso USB dell’Unico CD Due sia collegato al computer. Qualora la connessione non sia stata realizzata o nel caso in cui il computer non abbia riconosciuto l’ingresso USB dell’Unico...
- Page 13 USB il riconoscimento. Quindi, cliccare sul pulsante “Next”. Una volta che il programma di installazione ha verificato la presenza dell’ingresso USB dell’Unico CD Due sul bus USB, compare la finestra mostrata in figura 3. Figura 3 L’utente deve accettare i termini del contratto di licenza, cliccando nel quadratino in basso a sinistra nella finestra, come già...
- Page 14 Figura 4 Una volta scelto il percorso di installazione, occorre cliccare sul pulsante “Install” per procedere con l’installazione vera e propria del driver e di tutte le componenti ausiliarie. Comparirà la finestra in Figura 5, in cui una barra mostrerà il progredire dell’installazione. Figura 5...
- Page 15 Unison Research Unico CDDue Una volta completata la copiatura dei file e l’aggiornamento del sistema, la finestra segnalerà la fine dell’installazione come in figura 6. Figura 6 Cliccare su “Next” per procedere. Comparirà la finestra mostrata in figura 7. Premere su “Finish” per chiudere il programma di installazione.
- Page 16 Disinstallazione del driver per Windows Potrebbe rendersi necessario, in determinate situazioni, disinstallare il driver. In questo caso si può procedere in due modi: aprire la utility di installazione applicazioni dal Pannello di Controllo e selezionare il driver per disinstallarlo, oppure accedere alla directory in cui è stato installato il driver e lanciare la utility di disintallazione.
- Page 17 Unison Research Unico CDDue Figura 9 Al completamento della procedura di disinstallazione, la finestra apparirà come in figura 10 ed indicherà il completamento dell’operazione. Figura 10 Cliccare su “Next” per procedere. Comparirà la finestra mostrata in figura 11. Cliccare su “Finish” per chiudere l’utility di disinstallazione.
- Page 18 Windows. Anche i servizi di streaming (tramite il browser) si appoggiano a Windows. In questi casi, è necessario scegliere l’Unico CD Due come periferica audio predefinita. Per fare ciò, occorre accedere al Pannello di Controllo e lanciare la utility di configurazione dell’Audio.
- Page 19 Per scegliere la frequenza di campionamento di uscita, è necessario accedere alle proprietà della periferica selezionata (nel nostro caso l’Unico CD Due) e visualizzare le proprietà avanzate, come mostrato in figura 13. Un menu a tendina permetterà di scegliere la frequenza desiderata, da 44.1kHz a 192kHz (massimo valore gestito da Windows).
- Page 20 Configurazione di un player in ambiente Windows: FooBar 2000 FooBar (www.foobar2000.org) è in grado di funzionare in tutte le modalità compatibili con l’ingresso USB dell’Unico CD Due: Direct Sound, Kernel Streaming, WASAPI e ASIO. Tralasciando l’installazione del programma, che è aldilà dello scopo di questo manuale, spieghiamo come configurarlo per funzionare in modalità...
- Page 21 Selezionare “ASIO: XMOS USB ASIO 2.0 ST302D” nel menù a tendina denominato “Device”. FooBar è già pronto ad utilizzare l’ingresso USB dell’Unico CD Due come dispositivo di uscita in modalità ASIO, per riprodurre audio PCM bit-perfect fino a 384kHz e 32 bit.
- Page 22 SACD ed un file proxy per l’invio di DSD a dispositivi audio compatibili tramite il loro driver compatibile ASIO. E’ questo il caso dell’ingresso USB dell’Unico CD Due. Dopo aver installato DLL e proxy, nella sezione “ASIO” di “Output” compariranno due oggetti ASIO (figura 15): il driver Unison ed il proxy (“foo_dsd_asio”).
- Page 23 Unison Research Unico CDDue Figura 16 Inoltre, per ascoltare il DSD è necessario selezionare come dispositivo di uscita il proxy DSD come indicato in figura 17. Figura 17...
- Page 24 Configurazione di un player in ambiente Windows: JRiver Media Center JRiver Media Center (www.jriver.com) è un player commerciale, quindi “chiuso” e già dotato in origine delle funzioni necessarie per il supporto delle varie modalità di trasferimento audio e dei vari formati audio. Come per FooBar, tralasciamo l’installazione del programma.
- Page 25 Unison Research Unico CDDue Figura 19 A questo punto JRiver riconosce la possibilità di gestire il DSD tramite il formato DoP (DSD over PCM). Dal menù a tendina che si attiva cliccando sulla voce “Bitstreaming”, selezionare la voce “Custom…”, come mostrato in Fig.
- Page 26 Figura 21 La procedura di configurazione è quasi completata: occorre ancora ordinare a JRiver di non sottocampionare i flussi di dati con frequenza di campionamento superiore a 192kHz, operazione che è di norma attivata per gestire correttamente i DAC che lavorano al massimo fino a 192kHz e che sono ancora la maggioranza sul mercato.
- Page 27 L’ingresso USB dell’Unico CD Due rispetta la specifica USB Audio Class 2.0, pertanto è nativamente supportato dal sistema operativo OSX a partire dal 10.6.8 e non richiede alcun driver. L’ingresso USV dell’Unico CD Due viene riconosciuto da un computer Apple non appena collegato ad una porta USB e viene elencato tra i dispositivi audio in uscita come mostrato in figura 23.
- Page 28 Figura 24 Ciò può non essere desiderabile quando si voglia ascoltare una playlist contenente brani campionanti a diversi sample rate e non si voglia che il sistema operativo del computer operi una conversione di frequenza di campionamento in tempo reale. In questo caso occorre utilizzare un player in grado di disabilitare questa funzione del sistema.
- Page 29 ALSA non occorre alcun driver, in quanto ALSA supporta nativamente la USB Audio Class 2.0. Per utilizzare l’ingresso USB dell’Unico CD Due con un computer dotato di sistema operativo Linux, è sufficiente accedere al pannello di configurazione dell’audio e selezionare, nella sezione “Uscita”, la periferica “UNISON Unico CD Due”, come mostrato in figura 26.
- Page 30 Figura 27 Gestione dell’ingresso USB tramite il display dell’Unico CD Due Quando si seleziona l’ingresso USB dell’Unico CD Due, il display mostra lo stato della connessione. In assenza di connessione o qualora il computer collegato sia spento o la sua porta USB sia disattivata, il display mostra l’indicazione “NO HOST”.
- Page 31 Unison Research Unico CDDue connessione è piuttosto semplice, in quanto l’Unico CD Due viene visto dallo smartphone come un dispositivo auricolare. Connessione dello smartphone all’Unico CD Due Per collegare lo smartphone all’Unico CD Due è sufficiente effettuare le operazioni di seguito descritte. Benché l’operazione di pairing sia possibile anche quando l’ingresso Bluetooth dell’Unico CD Due non è...
- Page 32 7. PRECAUZIONI DI SICUREZZA E MANUTENZIONE Non far funzionare il lettore CD con il fondo o la calotta rimossi! L’unità presenta al suo interno alte tensioni che possono essere causa di danni anche gravi. Non aprire l’apparecchio! Nessun ulteriore intervento oltre a quelli descritti in questo manuale deve essere effettuato dall’utilizzatore.
-
Page 33: Caratteristiche Tecniche
Unison Research Unico CDDue CARATTERISTICHE TECNICHE Ingressi Digitali 1 x USB Standard: USB 2.0 Audio Class frequenze: 44.1, 48, 88.2, 96, 176.4, 192, 352.8, 384, DSD64, DSD128, DSD256 Risoluzione 16 to 32 bits 1 x S/PDIF Sensibilità: 0.5Vpp on 75 Ohms Frequenze di campionamento: 44.1, 48, 88.2, 96, 176.4, 192,... - Page 34 Uscite Digitali 1x S/PDIF Tensione in uscita: 0.5Vpp on 75 Ohms 1x AES/EBU Tensione in uscita: 2Vpp on 110 Ohms 1x Toslink™ Transport: 8829CD-KHM DVD-Loader , Only audio CD Display OLED bianco grafico con risoluzione 128 X 64 , (può essere spento) Convertitore digitale DAC: ESS Sabre ES9018K2M con eliminatore di jitter...
- Page 35 Unison Research Unico CDDue Sadio di uscita Numero di canali: Stadio di Uscita: Doppio triodo, in pura classe A differenziale a Totem-poleDuble Valve utilizzate: 4 x 12AX7/ECC83 Connettori di uscita: 1 x RCA stereo 1 x XLR stereo Buffer inseribile Realizzato con AD8597/AD8599 inseribile tramite telecomando e normalmente bypassato da relè...
- Page 36 8. Caratteristiche tecniche pag. 33 Dichiarazione di conformità pag. 73 Unison Research è un marchio registrato di A.R.I.A. Advanced Research In Audio S.r.l.. " # $ % % & ' ( ) * " # $ % % & + +...
- Page 37 - A.R.I.A. Advanced Research In Audio S.r.l. audio component. Every Unison Research product is the result of our extensive electronic design experience and of the deep knowledge of vacuum tube technology in audio applications that we have gained over the years.
-
Page 38: Unpacking And Installation
UNPACKING AND INSTALLATION Please make sure that the packaging is undamaged and the product has not suffered from rough handling during transportation, otherwise we highly recommend you contact your Authorised Dealer for advice before proceeding with the set-up. Carefully remove your CD player and all the accessories from the carton. IMPORTANT! After unpacking please allow at least two hours before operating the device in order for it to adapt to the room temperature. -
Page 39: Operation
Unison Research Unico CDDue OPERATION FRONT PANEL 1) CD DRAWER 2) GRAPHIC LED DISPLAY 128x64 3) IR SENSOR 4) COMMAND BUTTONS 5) MAINS SWITCH (ON THE SIDE) REAR PANEL 1) MAINS CONNECTOR 2) UNBALANCED OUTPUTS 3) BALANCED OUTPUTS 4) BLUETOOTH ANTENNA 5) USB INPUT 6) DIGITAL INPUTS (TOSLINK, S/PDIF. -
Page 40: Loading A Disc
, and shows the total number of the tracks and the total time of the recording. If the loaded disc does not contain valid audio information, the display ® shows the Unison Research UN logo and the CD player stands by until the disc is changed. -
Page 41: Track Selection
Unison Research Unico CDDue IMPORTANT! Even though the Unico CDDue drawer mechanism closes by simply pushing it back, we highly recommend that you do not force it. If this is done regularly, it could cause a drive malfunction and damage to the mechanism. - Page 42 The same functions are accessible from the remote handset. In this case to select a track use the buttons identified by the symbols , while to scan the disc use the buttons , keeping them pressed until the desired position has been found. To pause a playing track, quickly press the PAUSE button on the front panel or the...
-
Page 43: Time Display Mode
Unison Research Unico CDDue TIME DISPLAY MODE The Unico CDDue supports three different time display modes: A) ELAPSED TIME ON CURRENT TRACK. B) ELAPSED TIME ON DISC. C) REMAINING TIME ON DISC. To select the desired mode, use the Time button on the remote handset: push it repeatedly to go through the three options in the sequence as listed above. - Page 44 DIRECT ACCESS TO THE TRACKS The Unico CDDue allows for direct access to a track by pressing its corresponding number on the remote handset. When the first digit is selected, it is displayed and will start blinking on the screen. From this moment, the Unico CDDue allows roughly two more seconds, during which time it is possible to select a second digit for the track number (if necessary), before starting to play the chosen track.
-
Page 45: Advanced Functions
Unison Research Unico CDDue ADVANCED FUNCTIONS : Advanced features are only available when using the remote control: Button Function Mode Turns off the display until you press any button Source + - Select the input source: = AudioCD TOS = Toslink digital input... - Page 46 The display will show “NO CONNECTION”. First, activate Bluetooth on your smart device. Then, from the list of available devices, choose the one named “Unison Research” followed by a 4-digit number. The device will now pair with your Unico CDDue. The display will then show “CONNECTED”.
- Page 47 Unison Research Unico CDDue Once playback is finished, it’s possible to terminate the connection by telling the smartphone to “forget” the Unison CD Due device. Using the digital inputs External digital sources (like sat receivers, digital recorders, digital mixers) can be connected to the digital inputs on the Unico CDDue back panel (coax S/PDIF, balanced AES/EBU, optical Toslink).
- Page 48 Please note that the driver is the same as that used for the USB input on the Triode 25 amplifier and other Unison Research products. If your computer has already been connected to one of these products, then the driver is...
- Page 49 USB cable. To start the driver installation, double-click on the executable (.exe) file downloaded from Unison Research website. Once started, depending on the operating system version, the user could be asked to confirm the permission for the program to modify the system.
- Page 50 Figure 2 Should this happen, connect the Unico CDDue input to the computer or disconnect and reconnect it to allow the USB controller to properly recognize it. Then, click the “Next” button. Once the installation program has confirmed the presence of the Unico CDDue input on the USB bus, the window shown in Figure 3 appears.
- Page 51 Unison Research Unico CDDue Figure 3 The user must accept the license agreement terms by clicking on the checkbox in the lower left of the window, as shown in Figure 3, then click the “Next” button. The window shown in Figure 4 will appear, in which the user may, if necessary, indicate a path for driver installation.
- Page 52 Figure 5...
- Page 53 Unison Research Unico CDDue When the process has finished the window will announce the installation has completed, as shown in Figure 6. Figure 6 Click the “Next” button to proceed. The window shown in Figure 7 will appear. Click “Finish” to terminate the installation program.
- Page 54 It may be necessary, for certain reasons, to uninstall the driver. The uninstall process can be started in two ways: by opening the applications installation utility and selecting the driver for uninstall, or by accessing the driver folder and starting the uninstall program. Either way, the window shown in figure 8 will appear.
- Page 55 Unison Research Unico CDDue Figure 9 Once completed, the window shown in Figure 10 will announce the successful uninstall. Figure 10 Click the “Next” button to proceed. The window shown in Figure 11 will appear. Click “Finish” to terminate the uninstall program.
- Page 56 Configuring Windows to use the Unico CDDue as the predefined output peripheral Some players, such as Windows Media Player, use the system predefined audio peripheral to playback audio. Some streaming services (which rely on a web browser) also do the same. In these cases, it is necessary to choose the Unico CDDue as your predefined audio peripheral.
- Page 57 44.1kHz and 192kHz (the latter being the highest sampling frequency which Windows can handle). Please note that an ASIO- compatible player is needed when the user wants to use the Unico CD Due USB input with sampling frequencies higher than 192kHz, as Windows is unable to handle such high sampling frequencies.
- Page 58 NOTE: unlike many other FooBar DLL’s, which are contained in a zip file and therefore must be manually extracted and copied into the “Components” subfolder inside the FooBar main folder, the ASIO file which is downloaded from FooBar website is an auto-installing program which automatically installs the DLL in the correct folder, without any user action.
- Page 59 Unison Research Unico CDDue DSD to compatible audio devices through their ASIO compatible driver. One such device is the Unico CDDue USB input. After manually installing the DLL and the proxy, two ASIO objects will appear in the “ASIO” section of “Output” (Figure 15): the Unison driver and the proxy (“foo_dsd_asio”).
- Page 60 Figure 16 It is necessary to select the DSD proxy as the output device to listen to DSD files, as indicated in Figure 17. Figure 17 Configuring a player in Windows: JRiver Media Center...
- Page 61 Unison Research Unico CDDue JRiver Media Center (www.jriver.com) is a commercial player, therefore is a closed solution and is provided with all necessary features to support the various audio transfer modes and audio formats. As with FooBar, we won’t go through the program installation. Access JRiver options window and select “ASIO”...
- Page 62 Then, open the configuration window of output mode (“Output mode settings”) that is obviously devoted to ASIO and select the “XMOS USB ASIO 2.0 ST302D” driver, as shown in figure 19. Figure 19 JRiver is now able to handle DSD by the DoP (DSD over PCM) format. From the drop-down menu that shows up clicking on “Bitstreaming”...
- Page 63 Unison Research Unico CDDue Figure 21 The configuration procedure is almost done, but it’s still necessary to tell JRiver not to down-sample data that’s streamed with a sampling frequency higher than 192kHz. This feature is usually enabled to correctly drive other DAC’s with a lower specification than the Unico CDDue.
- Page 64 The Unico CDDue USB input complies with USB Audio Class 2.0 specifications; therefore it’s natively supported by OSX operating systems since version 10.6.8 and doesn’t need any drivers. The Unico CD Due USB input is recognized by any Apple computer as soon as it’s connected to one of its USB ports and is listed amongst the output audio devices as shown in figure 23.
- Page 65 Unison Research Unico CDDue Figure 24 A fixed output may not be desirable when listening to a playlist made of files with different sampling frequencies. In this case, a player capable of disabling this system feature must be used. Many such players are available, both free and commercial.
- Page 66 6. Connecting to a Linux computer No driver is needed for a computer provided with the Linux operating system and an ALSA module, as ALSA natively supports USB Audio Class 2.0. To use the Unico CDDue USB input with a computer provided with Linux operating system, it is sufficient to access the audio configuration panel and select the “UNISON USB DAC 1”...
- Page 67 Unison Research Unico CDDue Figure 27...
- Page 68 SAFETY AND MAINTENANCE PRECAUTIONS Never operate the player with either the bottom or top covers removed. Do not open the amplifier! There are no user serviceable parts inside. For technical assistance or product service please refer to your Authorised Dealer or to a Unison Research authorised Service Centre.
-
Page 69: Technical Specifications
Unison Research Unico CDDue TECHNICAL SPECIFICATIONS Digital Inputs 1 x USB Standard: USB 2.0 Audio Class frequencies: 44.1, 48, 88.2, 96, 176.4, 192, 352.8, 384, DSD64, DSD128, DSD256 Resolution: 16 to 32 bits 1 x S/PDIF Sensitivity: 0.5Vpp on 75 Ohms Sampling frequencies: 44.1, 48, 88.2, 96, 176.4, 192... -
Page 70: Digital Output
Digital Output 1x S/PDIF Output voltage: 0.5Vpp on 75 Ohms 1x AES/EBU Output voltage: 2Vpp on 110 Ohms 1x Toslink™ Transport 8829CD-KHM DVD-Loader , Only audio CD Display 128 X 64 White OLED graphic display , (can be turned off) Digital to Analogue Stage DAC: ESS Sabre ES9018K2M with jitter eliminator... - Page 71 Unison Research Unico CDDue Output Audio Stage Number of channels: Output stage: Duble Triode, pure class A differential Totem-pole Valve complement: 4 x 12AX7/ECC83 Output audio connectors: 1 x RCA stereo 1 x XLR stereo Optional buffer: AD8597/AD8599 output buffer can be activated...
- Page 72 8. Technical specifications pag. 69 Declaration of conformity pag. 73 Unison Research is the registered trade mark of A.R.I.A. Advanced Research In Audio S.r.l.. " # $ % % & ' ( ) * " # $ % % & + +...
-
Page 73: Declaration Of Conformity
Unison Research Unico CDDue DECLARATION OF CONFORMITY UnicoCDDue CD player Manufacturer A.R.I.A. Advanced Research In Audio srl Via E.Barone, 4 31030 Dosson di Casier (TV) ITALY Statement of Conformity Based on test results using appropriate standards, the product is in conformity with... -
Page 74: User Information
NUMERO ISCRIZIONE REG. A.E.E. A.R.I.A. SRL IT08020000002124 INFORMATIVA AGLI UTENTI Ai sensi dell’art. 13 de Decreto Legislativo 25 luglio 2005, n.151 “Attuazione delle Direttive 2002/95/CE e 2003/108/CE, relative alla riduzione dell’uso di sostanze pericolose nelle apparecchiature elettroniche, nonché alla smaltimento dei rifiuti” Il simbolo del cassonetto barrato riportato sull’apparecchiature indica che il prodotto alla fine della propria vita utile deve essere raccolto separatamente dagli altri rifiuti. - Page 75 Unison Research Unico CDDue Možnost posebnih zbiranj za proizvode namenjene recikliranju, obdelavi ali uni enju, je potrebna za prepre itev negativnih u inkov na zdravje in okolje. Hkrati onemogo a ponovno uporabo in/ali nepravilno oz. nestrokovno recikliranje materialov, uporabljenih za take proizvode.
- Page 76 A terméken, vagy csomagoláson szerepl , keresztben áthúzott szeméttároló jel azt jelenti, hogy a terméket más hulladék anyagtól külön választva kell ártalmatlanítani. A felhasználónak a terméket ártalmatlanítás céljából, vagy az erre a célra létrehozott elektronikus hulladékok gy jt helyére kell eljuttatnia, vagy vissza kell juttatnia az eredeti értékesítés helyszínére, amennyiben ott egy hasonló...
Need help?
Do you have a question about the UNICO CD DUE and is the answer not in the manual?
Questions and answers