
Summary of Contents for Phoenix Contact UM EN BLUEMARK LED
- Page 1 CLIPLINE User Manual UM EN BLUEMARK LED Order No.: — UV LED printer for printing plastic labels for labeling terminal blocks, conductors, and devices...
- Page 3 User manual UV LED printer for printing plastic labels for labeling terminal blocks, conductors, and devices 2010-03-25 Designation: UM EN BLUEMARK LED Revision: Order No.: — This user manual is valid for: Designation Firmware Order No. ≥ 2.31 BLUEMARK LED...
- Page 4 Phoenix Contact accepts no liability for erroneous handling or damage to products from Phoenix Contact or third-party products resulting from disregard of information contained in this manual.
- Page 5 The receipt of technical documentation (in particular data sheets, installation instructions, manuals, etc.) does not constitute any further duty on the part of Phoenix Contact to furnish information on alterations to products and/or technical documentation. Any other agreement shall only apply if expressly confirmed in writing by Phoenix Contact.
- Page 6 Phoenix Contact. Violators are liable for damages. Phoenix Contact reserves all rights in the case of patent award or listing of a registered design, in as far as this concerns software of Phoenix Contact that meets the criteria of technicity or has technical relevance.
-
Page 7: Table Of Contents
Settings via the menu ..................3-7 3.5.1 Changing the language setting ............3-7 3.5.2 Menu structure ..................3-8 3.5.3 Setting the display contrast ............... 3-10 3.5.4 Setting the interface ................3-10 3.5.5 Increasing the print intensity (High Density Print) ......3-10 103933_en_01 PHOENIX CONTACT... - Page 8 5.3.2 Testing the printhead ................5-7 5.3.3 Opening the printer ................5-7 Creating a log file for the customer service department ........5-8 Appendix ..........................A-1 Technical data ....................A-1 Ordering data ....................A-2 Declaration of conformity................... A-3 Index............................B-1 PHOENIX CONTACT 103933_en_01...
-
Page 9: Safety And The Environment
Phoenix Contact. Only print on media with complete rows, as missing rows can damage the printhead. In addition, only use consumables from Phoenix Contact. For the order numbers of the Fluid Cartridge and Cleaning Cartridge, please refer to page A-2. -
Page 10: Please Observe The Following Notes
Do not inhale vapor and avoid contact with the skin and eyes. If your skin comes into direct contact with the fluid, wash the affected area thoroughly with water and soap. PHOENIX CONTACT 103933_en_01... -
Page 11: Risk Of Damage To The Device
Fluid Cartridge must be changed. The printer will notify you that the durability period is about to expire (see page 3-5). The Fluid Cartridge is designed for single use and cannot be refilled. Notes on storage NOTE: For optimum durability, store the Fluid Cartridge at 0°C ... 20°C. 103933_en_01 PHOENIX CONTACT... -
Page 12: Notes On Disposal
The PCB of the BLUEMARK is equipped with a lithium battery. Please dispose this battery according to the local regulations. Please support us in this and contact your Phoenix Contact sales office to determine the best way of returning the old device. Phoenix Contact will then handle the necessary recycling and disposal measures. -
Page 13: Setting Up And Connecting The Printer
"Fluid Cartridge Missing" appears in the display. • Press the key (2 in Figure 2-1) to unlock the cover. Figure 2-1 Opening the cover • Press the pushbuttons (1) on both sides of the printer and open the cover. 103933_en_01 PHOENIX CONTACT... - Page 14 (see page 2-3) and use the original packaging. The dummy Fluid Cartridge and the original packaging can also be ordered as replacement parts (see "Ordering data" on page A-2). For additional notes, see "Preparing the printer for transport" on page 4-5. PHOENIX CONTACT 103933_en_01...
- Page 15 Retain the empty Fluid Cartridge. It is clearly marked "DUMMY". It should be inserted before the device is shipped. The fluid system is filled automatically. This takes around 1 minute. The drivers must then be installed (see "Connecting the printer" on page 2-6). 103933_en_01 PHOENIX CONTACT...
-
Page 16: About The Printer
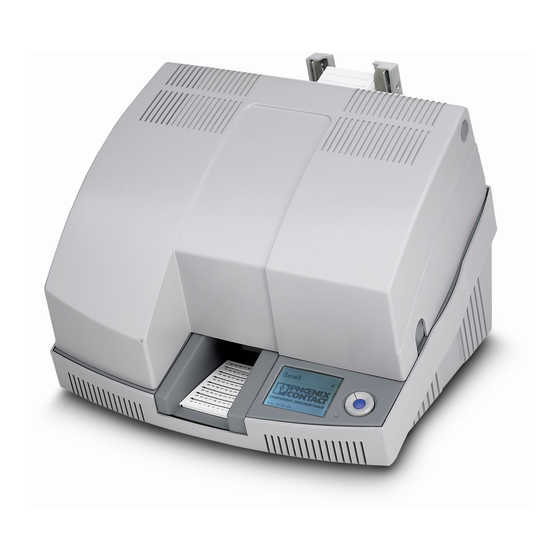
Transport module for holding sheets Keypad Display Output tray Unlocking the cover (pushbutton on both sides of the printer) Normally the cover can only be opened if the printer has already been unlocked via the menu (see page 5-7). PHOENIX CONTACT 103933_en_01... -
Page 17: Setting Up The Printer
(operating range: 5°C to 35°C) To ensure excellent print quality, the device must be set up on a completely level surface. • Unpack the printer and set it up in a suitable location on a solid and level surface. 103933_en_01 PHOENIX CONTACT... -
Page 18: Connecting The Printer
The BLUEMARK LED can be connected to the computer via USB, Ethernet (LAN) or Bluetooth. The BLUEMARK LED automatically selects the interface via which it receives data. The interface can also be preset via the menu (see "Setting the interface" on page 3-10). PHOENIX CONTACT 103933_en_01... -
Page 19: Usb Connection
Connect the printer to the PC using the USB cable supplied. The smaller USB connector (USB B, bottom connector in the figure) is connected to the printer and the wider connector (top connector in the figure) is connected to the PC. Figure 2-8 USB cable 103933_en_01 PHOENIX CONTACT... - Page 20 Figure 2-9 USB installation under Windows XP (1) • Select "No, not this time" and click "Next" to start the installation. • The "Install the software automatically (Recommended)" item is already selected. Click "Next". • Click "Finish" PHOENIX CONTACT 103933_en_01...
- Page 21 If a message appears indicating that the printer has not passed Windows logo testing, click on "Continue Anyway". • Click "Finish" to complete the installation. The printer and the printer driver are installed and the printer is ready to operate. 103933_en_01 PHOENIX CONTACT...
-
Page 22: Ethernet Connection (Lan)
The IP address can be read on the printer (see "Reading the IP Address" on page 2-11). Enter the IP address in 3-digit format or separate the numbers with a dot. Example: IP address 172.24.20.109 or 172024020109. 2-10 PHOENIX CONTACT 103933_en_01... - Page 23 . Confirm by pressing the key. • Set the standard gateway using the arrow and cursor keys. Confirm by pressing the • key. • key can be used to return directly to the start screen (Ready). 2-11 103933_en_01 PHOENIX CONTACT...
-
Page 24: Bluetooth Connection
The BLUEMARK LED is installed in a suitable location. – The BLUEMARK LED is connected to the power supply and switched on. – A Bluetooth interface is installed on your PC and a virtual interface (COM port) has been set up here. 2-12 PHOENIX CONTACT 103933_en_01... - Page 25 Select your Bluetooth interface under "Bluetooth COM port" (COM2 in the example). • Click on "Start". • If installation has been completed successfully, a message is displayed. Confirm this message with "OK". The printer and the printer driver are installed and the printer is ready to operate. 2-13 103933_en_01 PHOENIX CONTACT...
- Page 26 • . Confirm by pressing the key. • • Set the PIN using the arrow and cursor keys. Confirm by pressing the key. • key can be used to return directly to the start screen (Ready). 2-14 PHOENIX CONTACT 103933_en_01...
-
Page 27: Initial Printout (Test Sheet)
In the start menu, select "Settings... Printers and Faxes". • Select the BLUEMARK LED printer and then click on "File... Properties". Figure 2-13 PHOENIX CONTACT BLUEMARK LED Properties: Maintenance • On the "Maintenance" tab, select the "Testprint on UC-TM 5" icon. 2-15... - Page 28 BLUEMARK LED • The test printout should correspond to Figure 2-14. Figure 2-14 Test printout on UC-TM 5 2-16 PHOENIX CONTACT 103933_en_01...
-
Page 29: Printing Sheets And Setting Up The Printer
Printing sheets and setting up the printer Loading sheets NOTE: Only use media which has been approved by Phoenix Contact. Only print on media with complete rows, as missing rows can damage the printhead. NOTE: Observe the maximum capacity when loading sheets. -
Page 30: Starting Printing
"Print" display • • The active print job can be canceled by pressing the key. "Cancel Print" then appears in the display. • Select "Back" to continue the print job and "Continue" to cancel the print job. PHOENIX CONTACT 103933_en_01... -
Page 31: Status Information Via The Menu
The status monitor is called as follows: • In the start menu, select "Settings... Printers and Faxes". • Select the BLUEMARK LED printer and then click on "File... Properties". • Switch to the "Maintenance" tab and click on the "Start status monitor" icon. 103933_en_01 PHOENIX CONTACT... - Page 32 The number and name of the print jobs that are to be printed by the printer (print queue) are shown under "Print job". If you no longer need the status monitor, you can remove it from the Windows task bar. Right-click the status monitor symbol with the mouse and select „Exit“. PHOENIX CONTACT 103933_en_01...
-
Page 33: User Interface Description
This icon indicates that the Cleaning Cartridge is almost full. Obtain a new Cleaning Cartridge. This icon first appears 30 days before the durability of the Fluid Cartridge is set to expire. Obtain a new Fluid Cartridge. Replacement Fluid and Cleaning Cartridge set: BLUEMARK FLUID-CARTRIDGE, Order No. 5147421 103933_en_01 PHOENIX CONTACT... -
Page 34: Keypad Functions
Additional Go back to main Error – menu and cancel information about – menu print job the error Use the key to exit the settings menu without saving changes. Changes are only saved • using the key. PHOENIX CONTACT 103933_en_01... -
Page 35: Settings Via The Menu
• . Confirm by pressing the key. • Select your language using the key. • • Confirm the selected language by pressing the key. • key can be used to return directly to the start screen (Ready). 103933_en_01 PHOENIX CONTACT... -
Page 36: Menu Structure
2-11 Address TCP/IP Manually assigned subnet mask 2-11 Subnetmask TCP/IP Manually assigned standard gateway 2-11 Standard- gateway Bluetooth PIN 0000 PIN assignment for Bluetooth 2-14 connections Display Contrast The display contrast is increased or Medium 3-10 decreased. PHOENIX CONTACT 103933_en_01... - Page 37 Cleaning Cartridge: Fill level of the Cleaning Cartridge Device List Device: Printer serial number MAG1: Transport module serial number Version Hardware: Version number of the printer Firmware: Version number and creation date of the firmware PLD: Internal version number (for servicing) 103933_en_01 PHOENIX CONTACT...
-
Page 38: Setting The Display Contrast
• Select Device Settings via • . Confirm by pressing the key. • Select High Density Print via • . Confirm by pressing the key. • Select Active via • . Confirm by pressing the key. 3-10 PHOENIX CONTACT 103933_en_01... -
Page 39: Maintenance And Cleaning
You can view the status of the Fluid Cartridge (fill level and durability) in the status monitor Fluid Cartridge status (see "Status information via the menu" on page 3-3 or "Status monitor (for USB/LAN connection only)" on page 3-3). 103933_en_01 PHOENIX CONTACT... -
Page 40: Changing The Fluid Cartridge
Empty Fluid Cartridges can be disposed of with domestic waste. Used Fluid Cartridges that are not empty must be disposed of as hazardous waste, in the same way as ink residue, for example. Please observe the local regulations. • Then change the Cleaning Cartridge. PHOENIX CONTACT 103933_en_01... -
Page 41: Changing The Cleaning Cartridge
Close the cover again. The fluid system is filled automatically. Dispose of the Cleaning Cartridge correctly The Cleaning Cartridge must be disposed of as hazardous waste, in the same way as ink residue, for example. Please observe the local regulations. 103933_en_01 PHOENIX CONTACT... -
Page 42: Cleaning The Printhead
The printer switches to offline mode, i.e., printing is no longer possible. • Select Maintenance via • . Confirm by pressing the key. • Select Clean Print Head via • . Confirm by pressing the key. PHOENIX CONTACT 103933_en_01... -
Page 43: Preparing The Printer For Transport
NOTE: Do not move the printhead. The Allen screw can only engage if the printhead remains in the standby position. Figure 4-3 Tightening the transportation safeguard screw • Tighten the Allen screw using the hexagonal screwdriver provided. 103933_en_01 PHOENIX CONTACT... - Page 44 The Cleaning Cartridge must audibly seal the printhead before the printer is switched off. Packing the printer • Transport the printer in its original packaging. The original packaging can also be ordered separately (see "Ordering data" on page A-2). PHOENIX CONTACT 103933_en_01...
-
Page 45: Troubleshooting
The interface cable is not connected or the Check the connection to the PC. though it is switched on. wrong interface has been selected. The printer is not "ready". Exit the menu. If necessary, acknowledge any messages or remove an error and confirm. 103933_en_01 PHOENIX CONTACT... -
Page 46: Error Messages And Information In The Display
Fluid Cartridge" on page 2-1. An error has occurred in the printer. Switch the device off, then on again. If the error persists, inform Phoenix Contact. Error Print Control An error has occurred in the printer. Switch the device off, then on again. - Page 47 Switch the device off, then on again. If the error persists, inform Phoenix Contact. Error UV Unit The UV Unit has failed. Inform Phoenix Contact. Lamp not Working Module Fluid Cartridge, One or more modules are missing: Insert missing module or check that...
- Page 48 PC. easily. Remove the sheet jam, see "Sheets are not being fed through" on page 5-5. Print Please Wait Printing in progress. Please wait. PHOENIX CONTACT 103933_en_01...
-
Page 49: Removing Errors
If the error message has been acknowledged accidentally by pressing the key, even though there is a sheet still in the feed tray, the sheet will become jammed. In this case keys can be used to move the flap so that the jammed sheet can be removed. 103933_en_01 PHOENIX CONTACT... - Page 50 To unlock, insert the hexagonal screwdriver supplied with the printer in the slot on the left-hand side of the printer. • Press the pushbuttons on both sides of the printer and open the cover. • Transport the sheets through manually. PHOENIX CONTACT 103933_en_01...
-
Page 51: Testing The Printhead
Unlocking is delayed until thethe fluid system is emptied. This process can take a few minutes. As soon as the cover can be opened, this is indicated in the display. • Press the pushbuttons on both sides of the printer and open the cover. 103933_en_01 PHOENIX CONTACT... -
Page 52: Creating A Log File For The Customer Service Department
In the PC start menu, select "Settings... Printers and Faxes". • Select the BLUEMARK LED printer and then click on "File... Properties". Figure 5-4 PHOENIX CONTACT BLUEMARK LED Properties: Maintenance • On the "Maintenance" tab, select the "Start status monitor" icon. •... -
Page 53: A Appendix
Type TRBLU23-00200, QPN reference number B02456 Class Class 1 Frequency 2.400 GHz ... 2.485 GHz Transmission power 0 dBm ... 6 dBm Receiver sensitivity Better than -90 dB Transmitting and receiving antenna gain +2 dBi Data transmission rate Up to 300 kbps 103933_en_01 PHOENIX CONTACT... -
Page 54: A 2 Ordering Data
96-section, can be labeled using the BLUEMARK LED UniCard sheet, 3 markers/card, with self-adhesive plastic labels, UC-EMLP (60X30) 0819343 can be labeled using the BLUEMARK LED For numerous other print media, please refer to the Phoenix Contact CLIPLINE catalog. Application program Description Type Order No. -
Page 55: A 3 Declaration Of Conformity
Declaration of conformity Declaration of conformity 103933_en_01 PHOENIX CONTACT... - Page 56 BLUEMARK LED PHOENIX CONTACT 103933_en_01...
-
Page 57: B Index
Log file ............... 5-8 Emergency release ............ 5-6 Maintenance Environment............... 1-3 Menu item ............3-9 Errors ................. 5-1 Media supply............. A-1 Ethernet connection Menu Description ............2-6 Change language ..........3-7 Installation ............2-9 Structure............... 3-8 Technical data ............. A-1 103933_en_01 PHOENIX CONTACT... - Page 58 Printing a test sheet..........2-15 Range ..............4-1, A-1 Scope of supply ............2-1 Settings Menu item ............3-8 Status Fluid Cartridge............4-1 Menu item ............3-9 Status monitor ............3-4 Transport module............3-1 Illustration ............. 2-4 PHOENIX CONTACT 103933_en_01...
Need help?
Do you have a question about the UM EN BLUEMARK LED and is the answer not in the manual?
Questions and answers