Table of Contents
Advertisement
Quick Links
Advertisement
Table of Contents

Related Manuals for Divio NBF232P


Summary of Contents for Divio NBF232P
- Page 1 Full HD Extreme WDR Box Network Camera NBF232P User Manual Version 1.3...
-
Page 2: Table Of Contents
http://www.diviotec.com Table of Contents Overview ..........................2 Features ........................2 Package Contents ....................... 3 Dimensions ........................3 Connectors ........................4 Camera Cabling ........................5 Power Connection ....................... 5 Ethernet Cable Connection ..................5 Lens Mounting ......................6 Alarm I/O Connection ....................6 RS485 Connection (for DC12V/AC24V/PoE Model) ............ -
Page 3: Overview
http://www.diviotec.com Overview The Full HD Multiple Streams Ultra-WDR Box IP Camera supports H.264 and MJPEG standard. The performance of the H.264 encoder is up to 1080P 60fps. Also, the camera supports Dual Full HD 1080P real-time streaming. With more computing power, the camera can provide more flexibility for users and system managers. -
Page 4: Package Contents
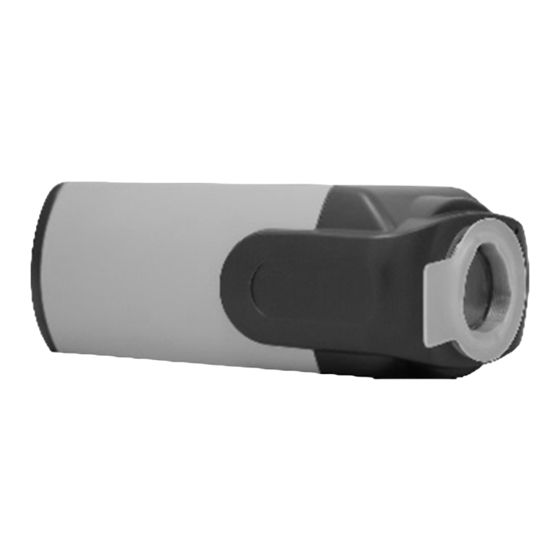
http://www.diviotec.com Package Contents Please check the package contains the following items listed below. Full HD Multiple Streams Back focus adjuster Ultra-WDR Box IP Camera Quick Guide (bundled software and documentation) Dimensions The IP camera’s dimensions are shown below. -
Page 5: Connectors
http://www.diviotec.com Connectors The diagram below shows the IP Camera’s reset button and various connectors. Definition for each connector will be given as follows. DC 12V / PoE DC 12V / AC 24V / PoE Connectors Definition Audio I/O Two-way audio transmission Power LED For power connection indication (green light) Press the button with a proper tool for at least 20... -
Page 6: Camera Cabling
http://www.diviotec.com Camera Cabling Please follow the instructions below to complete IP camera installation. Power Connection Please refer to section Connectors. Alternatively, users can power up the camera by PoE if a Power Sourcing Equipment (PSE) switch is available. Refer to the section below for Ethernet cable connection. NOTE: If PoE is used, make sure PSE is in used in the network. -
Page 7: Lens Mounting
http://www.diviotec.com Lens Mounting If use C-Mount lens, after removing the camera’s plastic cover, users need to mount the C/CS Mount adapter to the camera. Then attach the lens onto the C/CS Mount adapter, as the illustrations shown below. C/CS Mount Adapter Completion Alarm I/O Connection The camera equips one alarm input and one relay output for alarm application. - Page 8 http://www.diviotec.com PIN 6: D- PIN 7: D+...
-
Page 9: System Requirements
http://www.diviotec.com System Requirements To perform the IP Camera via web browser, please ensure the PC is in good network connection, and meet system requirements as described below. Items System Requirement 1. Intel® Pentium® M, 2.16 GHz or Personal Computer Intel® Core 2 Duo, 2.0 GHz 2. -
Page 10: Access Camera
http://www.diviotec.com Access Camera For initial access to the IP camera, users can search the camera through the installer program: DeviceSearch.exe, which can be found in “DeviceSearch” folder in the supplied CD. Accessing the Camera by Device Search Software Step 1: Double click on the program Device Search.exe. Step 2: After its window appears, click on the <Device Search>... - Page 11 http://www.diviotec.com Step 8: A prompt window requesting for default username and password will appear. Enter the default username and password shown below to login to the camera. Login ID Password Admin 1234 NOTE: ID and password are case sensitive. NOTE: It is strongly advised that administrator’s password be altered for the security concerns.
- Page 12 http://www.diviotec.com Once the DC Viewer is successfully installed, the IP camera’s Home page will be able to correctly display as the figure below. Note: Please refer to the Full HD Multiple Streams Ultra-WDR IP Camera Menu Tree in the supplied CD for more details about the function buttons.
-
Page 13: Setup Video Resolution
http://www.diviotec.com Setup Video Resolution Users can setup video resolution on Video Format page of the user-friendly browser-based configuration interface. Video Format can be found under this path: Streaming> Video Format. video resolution are as below. 1920 x 1080 (25 fps) + 720 x 480 (25 fps) 1920 x 1080 (30 fps) + 640 x 480 (30 fps) For more details about the combinations of video resolution, please refer to the Full HD Multiple Streams Ultra-WDR IP Camera Menu Tree in the supplied CD. - Page 14 http://www.diviotec.com 6. Configuration File Export / Import To export / import configuration files, users can access the Maintenance page on the user-friendly browser-based configuration interface. The Maintenance setting can be found under this path: System> Maintenance. Users can export configuration files to a specified location and retrieve data by uploading an existing configuration file to the camera.
-
Page 15: Appendix A: Technical Specifications
Appendix A: Technical Specifications Camera: NBF232P Image Sensor 1/2.8" Progressive CMOS Effective Pixels 1920(H) x 1080(V) Minimum Illumination Color: 0.01 Lux @F 1.2 ; B/W: 0.001 Lux @F1.2 Shutter Speed 1/1 ~ 1/100,000 sec. Lens Lens Mount C / CS Mount... - Page 16 http://www.diviotec.com Video Video Compression H.264: Baseline / Main / High Profile , MJPEG Quad Streams: H.264 + H.264 + H.264 + H.264/MJPEG Configurable frame rate and bitrate Regions of Multi Steaming Interest (ROI) Image Resolution Full HD 1080P / SXGA / HD 720P / XGA / SVGA / D1 / VGA / CIF / QCIF Maximum Frame Rate H.264 / MJPEG Full HD 1080P @60 fps Network...
-
Page 17: Appendix B: Delete The Existing Dc Viewer
http://www.diviotec.com Appendix B: Delete the Existing DC Viewer For users who have installed the DC Viewer in the PC previously, please first remove the existing DC Viewer from the PC before accessing to the IP camera. Deleting the DC Viewer In the Windows <Start Menu>, activate <Control Panel>, and then double click on <Add or Remove Programs>. -
Page 18: Appendix C: Setup Internet Security
http://www.diviotec.com Appendix C: Setup Internet Security If ActiveX control installation is blocked, please either set Internet security level to default or change ActiveX controls and plug-ins settings. Internet Security Level: Default Step 1: Start the Internet Explorer (IE). Step 2: Click on the <Tools> tab on the menu bar and select <Internet Options>. Step 3: Click on the <Security>... -
Page 19: Appendix D: Back Focus Adjustment (Non-Abf)
http://www.diviotec.com Appendix D: Back Focus Adjustment (Non-ABF) This section is for Non-ABF models only. Follow the instructions below to adjust the back focus of the camera. When to adjust back focus Back Focus refers to the distance from the rear lens element to the camera focal plane. In most cases, it is required to adjust back focus only when the camera’s lens cannot hold focus throughout its zoom range. - Page 20 http://www.diviotec.com Step 8: Tighten the retaining screw to fasten the back focus ring.
Need help?
Do you have a question about the NBF232P and is the answer not in the manual?
Questions and answers