Table of Contents
Advertisement
Available languages
Available languages
Quick Links
Advertisement
Table of Contents

Summary of Contents for Standler Form Q
- Page 1 Gebrauchsanweisung Operating instructions Operating instructions Mode d‘emploi Istruzioni per l‘uso Manual de instrucciones Gebruiksaanwijzing Brugsanvisning Käyttöohje Bruksanvisning Bruksanvisning...
- Page 2 FOR CLEANING...
- Page 4 Teilen Sie Ihr Feedback von Q auf: Share your feedback about Q on: Partagez votre commentaire sur Q: www.stadlerform.com/Q Für häufig gestellte Fragen besuchen Sie: For frequently asked questions go to: Trouvez la foire aux questions sur: www.stadlerform.com/Q/support Bedienungsanleitung hier herunterladen: Download instruction manual: Téléchargez le mode d’emploi:...
-
Page 5: Wichtige Sicherheitshinweise
Deutsch Gratulation! Sie haben soeben den aussergewöhnlichen Ventilator «Q» erworben. Er wird Ihnen viel Freude machen und die Raumluft für Sie ver- bessern. Wie bei allen elektrischen Haushaltsgeräten wird auch bei diesem Gerät zur Vermeidung von Verletzungen, Brand- oder Geräteschäden besondere Sorg- falt verlangt. -
Page 6: Inbetriebnahme/Bedienung
• Reparaturen an Elektrogeräten dürfen nur von instruierten Fachkräften durchgeführt werden. Inbetriebnahme/Bedienung 1. Wenn der Ventilator «Q» am gewünschten Platz steht: Netzkabel (2) an der Steckdose im Haushalt anschliessen. 2. «Q» am Regler (4) einschalten und gewünschte Drehzahl (Stufe 1-3 von Brise bis viel Wind) einstellen. -
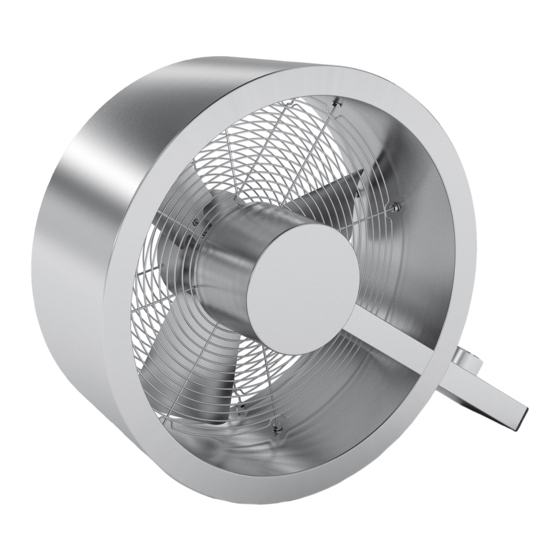
Page 7: Specifications
After the «Q» fan has been placed in the desired position, connect the mains cable (2) to the domestic supply socket. Switch on the «Q» fan at the controller (4) and set the desired speed (Positions 1-3, from gentle breeze to powerful circulation). -
Page 8: Important Safety Instructions
English Congratulations! You have just purchased the exceptional «Q» fan. He will give you great pleasure and improve the indoor air for you. As with all domestic electrical appliances, particular care is needed with this model also, in order to avoid injury, fire damage or damage to the appli- ance. - Page 9 1. After the «Q» fan has been placed in the desired position, connect the mains cable (2) to the domestic supply socket. 2. Switch on the «Q» fan at the controller (4) and set the desired speed (Positions 1-3, from gentle breeze to powerful circulation).
- Page 10 orted, and that it is ance it must be separately collected. Consumers should contact their local authority or retailer for information concerning the cor- rect disposal of their old appliance. dren (in its packag- Specifications Rated voltage 230 Volt / 50 Hz Rated power 40 watt use, switch off the...
- Page 11 Français Félicitation ! Vous venez d‘acheter le superbe ventilateur «Q». Nous espé- rons que cet appareil vous donnera entière satisfaction et améliorera l’air intérieur pour vous. Comme pour tous les appareils ménagers électriques, il est important d‘entretenir cet appareil correctement afin d’éviter les blessures, les incen- dies ou les dommages.
-
Page 12: Mise En Marche/Utilisation
1. Après avoir placé le ventilateur «Q» à l‘endroit souhaité: Raccorder le cordon d‘alimentation (2) à une prise. 2. Mettre «Q» en marche en actionnant le régulateur (4) et régler la vitesse de rotation souhaitée (niveau 1 à 3 de brise à vent fort). - Page 13 After the «Q» fan has been placed in the desired position, connect the mains cable (2) to the domestic supply socket. Switch on the «Q» fan at the controller (4) and set the desired speed (Positions 1-3, from gentle breeze to powerful circulation).
-
Page 14: Descrizione Dell'apparecchio
Italiano Congratulazioni! Avete appena acquistato il fantastico ventilatore «Q». Sarà estremamente piacevole e migliorerà l’aria nell’ambiente per voi. Come con tutte le apparecchiature elettriche domestiche, è necessaria par- ticolare attenzione anche con questo modello, al fine di evitare infortuni, danni da incendio o danni al dispositivo. Studiare con attenzione queste istruzioni per l’uso prima di utilizzare il dispositivo per la prima volta e segui-... - Page 15 1. Dopo che il ventilatore «Q» è stato posizionato nella posizione deside- rata, collegate il cavo di alimentazione (2) alla presa di corrente. 2. Accendete il ventilatore «Q» con il controller (4) e impostate la velocità desiderata (posizioni da 1 a 3: da brezza leggera a circolazione potente).
- Page 16 orted, and that it is I dispositivi usati devono essere raccolti separatamente in modo da otti- mizzare il recupero e il riciclaggio dei materiali in essi contenuti e ridurre l’impatto sulla salute e sull’ambiente. Il simbolo del “cestino con ruote” dren (in its packag- barrato sul prodotto ricorda l’obbligo di smaltire il dispositivo me- diante raccolta differenziata.
-
Page 17: Descripción Del Aparato
Español ¡Enhorabuena! Acaba de adquirir el extraordinario ventilador «Q». Quedará encantado con sus beneficios y mejorará la calidad del aire ambiente. Como con todos los aparatos electrodomésticos también este aparato exi- ge un especial cuidado para evitar heridas, daños causados por incendios o daños en el aparato. - Page 18 1. Después de haber colocado el ventilador en el lugar deseado, conecte el cable principal (2) a la toma de corriente doméstica. 2. Encienda el ventilador «Q» desde el controlador (4) y seleccione la velo- cidad deseada (posiciones de la 1-3, desde una agradable brisa a una circulación con fuerza).
- Page 19 After the «Q» fan has been placed in the desired position, connect the mains cable (2) to the domestic supply socket. Switch on the «Q» fan at the controller (4) and set the desired speed (Positions 1-3, from gentle breeze to powerful circulation).
-
Page 20: Belangrijke Veiligheidsinstructies
Nederlands Gefeliciteerd! U hebt zojuist de bijzondere «Q» ventilator aangeschaft. Hij zal u veel plezier doen en de ruimtelucht voor u verbeteren. Zoals met alle elektronische apparaten, is zorgvuldig gebruik noodzakelijk om verwonding, brandschade of schade aan het apparaat te vermijden. Be- studeer de instructies nauwkeurig en volg de adviezen op het apparaat zelf, alvorens het apparaat voor het eerst te gebruiken. - Page 21 • Reparaties aan het toestel dienen te worden verricht door een erkende reparateur. Ingebruikname/bediening 1. Nadat de «Q» ventilator in de gewenste positie gesteld is, het snoer (2) met het stopcontact verbinden. 2. De «Q» ventilator met de bedienknop (4) aanzetten en de gewenste snel- heid instellen (standen 1-3, van een aangenaam briesje tot krachtige circulatie).
- Page 22 orted, and that it is niet in de normale gemeentelijke ongesorteerde afvalstroom mogen worden weggegooid. Oude apparaten moeten apart worden ingezameld om recy- cling en hergebruik van de materialen daarin te optimaliseren en de gevol- dren (in its packag- gen op het milieu en de volksgezondheid te verminderen. Het symbool met de doorgekruiste “vuilnisbak op wieltjes”...
-
Page 23: Vigtige Sikkerhedsinstruktioner
Dansk Tillykke! Du har netop købt den exceptionelle «Q» ventilator. Den vil give dig stor fornøjelse, når luften omkring dig trænger til at blive renset. Som med alle elektriske husholdningsapparater er særlig pleje en nødven- dighed også med dette produkt, for at undgå fysisk skade, brandskade eller beskadigelse af produktet. - Page 24 • Reparationer af elektriske apparater må kun udføres af en kvalificeret, elektrisk tekniker. Ibrugtagning/betjening 1. Efter at «Q» ventilatoren er placeret i den ønskede position, forbind elek- tricitetsledningen (2) til stikkontakten. 2. Tænd «Q» ventilatoren med betjeningen (4) og indstil den ønskede hastig- hed (Position 1-3, fra stille brise til kraftig cirkulation).
- Page 25 After the «Q» fan has been placed in the desired position, connect the mains cable (2) to the domestic supply socket. Switch on the «Q» fan at the controller (4) and set the desired speed (Positions 1-3, from gentle breeze to powerful circulation).
-
Page 26: Tärkeitä Turvallisuusohjeita
Suomi Onneksi olkoon! Olet juuri hankkinut loistavan Q-tuulettimen. Laite tarjoaa nautinnollisempaa oloa parantaen huoneen ilmanlaatua. Kuten kaikkien kotitalouden sähkölaitteiden kanssa, myös tämän mallin kanssa tulee noudattaa erityistä huolellisuutta, jotta laite välttyy vahin- goilta tai palovaurioilta. Lue nämä käyttöohjeet ensin huolellisesti ennen laitteen ensimmäistä... - Page 27 • Sähkölaitteiden korjauksia saa suorittaa yksinomaan opetettu ammatti- henkilökunta. Käyttöönotto / käyttö 1. Kun olet sijoittanut «Q»-tuulettimen haluamaasi paikkaan, liitä virta- johto (2) verkkovirtaliittimeen. 2. Kytke tuuletin päälle säätimen (4) avulla ja aseta haluamasi nopeus (1–3, kevyt tuuletus – voimakas kierto).
- Page 28 orted, and that it is Tekniset tiedot Nimellisjännite: 230 V / 50 Hz Luokiteltu teho: 40 W dren (in its packag- Mitat: (leveys x korkeus x syvyys) 430 x 360 x 150 mm Paino: 4.0 kg Nopeus: 3 asetusta use, switch off the Melutaso: 41 –...
-
Page 29: Viktige Sikkerhetsinstrukser
Norsk Gratulerer! Du har akkurat kjøpt den eksepsjonelle Q-viften. Den vil gi deg mye nytelse og forbedre innendørsluften for deg. Som med alle elektriske husholdningsartikler er det nødvendig å utvise sær- lig hensyn til bruk av denne modellen, for å unngå personskader, brann eller produktskader. - Page 30 • Reparasjoner på dette produktet må kun utføres av kvalifiserte teknikere. Installasjon/drift 1. Etter at «Q»-viften har blitt plassert i en ønskelig posisjon, koble strøm- kabelen (2) til strømstøpselet. 2. Slå på «Q»-viften med kontrollen (4) og angi den ønskede hastigheten (Posisjonene 1-3, fra frisk bris til kraftig sirkulasjon).
- Page 31 After the «Q» fan has been placed in the desired position, connect the mains cable (2) to the domestic supply socket. Switch on the «Q» fan at the controller (4) and set the desired speed (Positions 1-3, from gentle breeze to powerful circulation).
-
Page 32: Viktiga Säkerhetsanvisningar
Svenska Grattis! Du har just införskaffat den enastående Q-fläkten. Den kommer att ge dig stor glädje och förbättra din inomhusluft. Som med alla elektriska hushållsapparater krävs det att du är extra försik- tig med den här modellen också, för att undvika personskador, brandskador eller skador på... - Page 33 • Reparationer av elektriska apparater får endast utföras av en kvalificerad eltekniker. Inställning/drift 1. Efter att «Q»-fläkten har placerats i önskat läge, anslut nätkabeln (2) till eluttaget. 2. Slå på «Q»-fläkten på regulatorn (4) och ställ in önskad hastighet (lägen 1-3, från mild fläkt till kraftig cirkulation).
- Page 34 orted, and that it is Specifikationer Märkspänning 230 Volt / 50 Hz Märkeffekt 40 Watt dren (in its packag- Mått (bredd x höjd x djup) 430 x 360 x 150 mm Vikt 4.0 kg Hastighet 3 inställningar use, switch off the Ljudnivå...
- Page 35 Garantie/Warranty/Garantie/Garanzia/Garantía Garantie/Garanti/Takuu/Garanti/Garanti 2 Jahre Garantie Diese umfasst Konstruktions-, Produktions-, sowie Materialfehler. Ausge- nommen sind sämtliche Verschleissteile und unsachgemässe Benutzung oder Pflege. 2 Years warranty This warranty covers defects of construction, production and material. All abrasion parts are excluced and also inappropriate usage or maintenance. Garantie 2 ans Cette garantie couvre les défauts de construction, de fabrication et de matériaux.
- Page 36 Design by Carlo Borer Thanks to all people involved in this project: Roland Schmid for his endurance, patience and engagement, Jianneng Xu for the engineering and CAD work, Mario Rothenbühler for the cool photos, Carlo Borer for the unique design and Matti Walker for the graphic work. Martin Stadler, CEO Stadler Form Aktiengesellschaft Stempel Verkaufsstelle / Retailer’s stamp / Cachet du point de vente / Timbro del rivenditore /...
Need help?
Do you have a question about the Q and is the answer not in the manual?
Questions and answers