Table of Contents
Advertisement
Quick Links
Advertisement
Table of Contents

Related Manuals for Docomo dtab 01


Summary of Contents for Docomo dtab 01
- Page 1 INSTRUCTION MANUAL ’ 13.2...
- Page 2 (in Japanese only) ■ Information This manual provides detail information about functions, operations, screens, etc. · In this manual, “dtab 01” mobile terminal is usually referred to as “the Tap “取扱説明書 (Instruction manual)” from the Application screen (P. 48). terminal”. · ·...
-
Page 3: Basic Package
Basic package ■ dtab 01 terminal ■ Quick Start Guide ■ dtab AC adapter 01 (With warranty) (With warranty) (in Japanese only) <dtab AC adapter 01 unit> <microUSB cable> ■ Stand (Sample) -
Page 4: Table Of Contents
Reduction of Hazardous Substances ....128 Screen/Icon ............41 EU Regulatory Conformance ......128 File management Software complying with GPL/LGPL ....129 docomo Palette UI Export Controls and Regulations ....... 129 Intellectual Property Right ......... 130 File Manager ............85 Home screen ............44 Index .............. -
Page 5: Before Using The Terminal
· Maintain a separate record of the data you saved in the terminal. Note that DOCOMO assumes no responsibility for any loss of saved contents of data resulting from malfunction, repair, changing of the model or other handling of the terminal. -
Page 6: Precautions
Precautions (Always follow these This symbol denotes that using the terminal or its components in a bathroom or other highly humid area is directions) No liquids not allowed. This symbol denotes that using the terminal or its ■ Before using your terminal, or when necessary, read the components with wet hands is not allowed. - Page 7 Use the AC adapter (including microUSB cable) specified storage, immediately perform the following operations. by NTT DOCOMO for your terminal. · Remove the power plug from the wall outlet. Not doing so may cause fire, burns, injuries, electric shock.
- Page 8 CAUTION 2. Handling the terminal Do not leave the equipment on unstable or sloping ■ The terminal has the following type of internal battery. surfaces. Don’t The terminal may fall and cause injuries. Display Battery type Do not store the equipment in extremely humid, dusty or Li-ion00 Li-ion battery hot areas.
- Page 9 WARNING Turn the terminal OFF near high-precision electronic control equipment or electronic equipment using low- Do not put foreign objects such as liquid like water, metal power signals. pieces or burnable things into microSD card slot. May cause the equipment to fail or malfunction. Don’t May cause fire, burns, injuries, electric shock.
- Page 10 Do not discard the terminal together with other garbage. May cause igniting or environmental destruction. Bring an old Don’t terminal to a docomo Shop or other sales outlet, or dispose of as provide by local ordinance. To use the terminal in car, check with automobile manufacturer or dealer to determine how the device is affected by radio waves before using.
- Page 11 3. Handling the AC adapter (including Do not touch the AC adapter (including microUSB cable) or microUSB cable) outlet with wet hands. No wet hands May cause fire, burns, electric shock. Only use with the specified power source and voltage. DANGER When charging the terminal overseas, use AC Adapter for global use.
- Page 12 4. Handling mobile phones near electronic 5. Material list medical equipment Part Material/Surface treatment ■ These precautions are based on the guidelines produced at the Terminal Display/front Glass Electromagnetic Compatibility Conference Japan, regarding the Exterior case (Front frame) PC/10%GF protection of electronic medical equipment from radio waves Exterior case (Rear top) emitted by mobile phone units.
-
Page 13: Handling Precautions
■ Maintain a separate record of the data you saved in the terminal. the printing may disappear or color may fade. If the data is deleted, DOCOMO assumes no responsibility for the loss of ■ Clean the jack occasionally with a dry cotton swab etc. - Page 14 May cause malfunction. conditions. See “Repairs” on the rear cover of this manual or a repair counter specified by DOCOMO for battery pack replacement. ■ Charge the battery in an area within the proper ambient temperature range (5-35°C).
-
Page 15: Bluetooth Devices
Bluetooth. communications may be intercepted or hacked by malicious parties. It is recommended to make necessary security settings ■ DOCOMO assumes no responsibility for any information which on your judgment and responsibility. may be leaked during communication via Bluetooth. ■ Wireless LAN ■... - Page 16 ■ Cautions on using 2.4 GHz devices CAUTION In the frequency band for WLAN devices, in addition to home electric appliances such as a microwave oven and industrial/scientific/medical ■ Do not use a remodeled terminal. Using a remodeled terminal devices, in-plant radio stations for identification of mobile objects violates the Radio Law.
-
Page 17: Before Using The Terminal
Before using the terminal Part names and functions ❺ ❼ ❽ ❾ ❶ ❻ ❷ ❸ ❹ Before using the terminal... - Page 18 ❶ In-camera · Shoot still images or videos. ❷ Light sensor* · Sense the ambient brightness to adjust brightness of the display. ❸ Earphone jack ❹ External connection jack · Use for charging or connecting to a PC, etc. ❺ Microphone ·...
-
Page 19: Microsd Card
With the gold contacts on the microSD card facing up, microSD card push in gently until it clicks in place · Check that the microSD card is completely installed. Using microSD card allows you to save data in the terminal or import data in the microSD card to the terminal. - Page 20 Removing Pull microSD card out to remove · Be sure to unmount microSD card before removing microSD card (P. 74). Use notch to open the cover of the microSD card slot ❶ ❷ Notch Close the cover of the microSD card slot Press the microSD card in The microSD card ejects a little.
-
Page 21: Charging
Estimated charge time of internal battery Charging Time to charge battery fully from a depleted state with dtab 01 power turned off. Charging time is longer when power is left on or when Precautions on charging charging in low temperatures. - Page 22 Insert the AC adapter’ s power plug into an outlet (❸) Charging with AC adapter Charging starts. appears on the status bar. When charging is Charging with the bundled dtab AC adapter 01 is described here. complete, appears on the status bar. ·...
-
Page 23: Turning Power On/Off
Turning power OFF Turning power ON/OFF Press and hold T for 1 second or more Turning power ON Press and hold T for 2 seconds or more · When the power is ON for the first time, make initial settings (P. 40). Cancel the screen lock “Power off”... -
Page 24: Stand
Canceling the screen lock Stand By setting the screen lock (P. 79), you can lock the terminal not to operate it until the specified operation is performed after the power is ON or the You can use the terminal placed in the stand (sample). ·... -
Page 25: Basic Operation
Tap/Double-tap Basic operation Touch the screen lightly and release the finger. Double-tap is an operation of tapping twice on the same position. Using the touch panel The display of the terminal is a touch panel for touching directly with finger to operate. Various operations are available by touching patterns. Before using the touch panel The touch panel of the terminal senses movements of finger using static Flick... - Page 26 Slide (Swipe) Setting auto-switch of display orientation Touch the screen lightly with your finger and drag to the desired position. Set to switch the display orientation automatically to portrait/landscape view by sensing the orientation or tilt of the terminal. Display the notification panel (P. 43) ·...
-
Page 27: Character Entry
Changing keyboard Character entry → “基本機能/設定 (Basic From the Home screen, To enter characters, use keyboard displayed on the screen. Functions/Settings)” → “Settings” Input methods (keyboards) are following 4 types. Input method (keyboard) Description “Language & input” The language and input setting screen is displayed. Select for entering only alphanumerics/ Android keyboard symbols. - Page 28 ❶ Display conversion candidates. Tap a candidate to enter characters. Entering with FSKAREN for Huawei · To switch conversion candidate display, flick the conversion candidate field left/right. With FSKAREN for Huawei, the following 4 types of keyboards are · to expand conversion candidate field. available.
- Page 29 ■ QWERTY ❾ Delete a character on the left of the cursor. Touch and hold to delete characters continuously. Key arrangement is the same as the keyboard of a PC. To enter Finalize entered characters. Japanese, input by alphabet. · When appears, add a linefeed.
- Page 30 ■ Handwriting Convert. · When is displayed, enter a space. Enter characters by handwriting input. Finalize entered characters. · Depending on touch panel recognition condition or character shape, · When appears, add a linefeed. recognition may not be accurate. ❶ ❼...
- Page 31 ■ Japanese syllabary Delete a character on the left of the cursor. Touch and hold to delete characters continuously. Tap the syllabary table to enter. · Convert. displayed during one-byte alphanumeric entry to switch upper/ · When is displayed, enters a space. lower case.
- Page 32 Change the keyboard type Using symbols/smileys/phrases When the keyboard is displayed, “Menu” When the keyboard is displayed, “Menu” Tap the keyboard type “Emoticons”/“Symbols”/“Templates” ■ Information ❻ ❶ ❼ ❷ · You can also tap to switch 10 key/QWERTY. ❸ ❹ ❽...
- Page 33 ❶ Display conversion candidates. Tap a candidate to enter characters. Entering with Japanese IME · To switch conversion candidate display, swipe the conversion candidate field left/right. Use a layout similar to a PC keyboard to enter Japanese using the ❷ Use symbols/smileys list.
- Page 34 ❹ Switch upper case/lower case. Double-tap to switch to capitals lock. Entering with Android keyboard ❺ Displays input options. ❻ Use voice input. It is a QWERTY keyboard whose key arrangement is the same as a PC. ❼ Enters a slash. One-byte alphabets, one-byte numbers/symbols can be entered.
- Page 35 Editing characters Using user dictionary (FSKAREN for Huawei) Selecting/cutting/copying/pasting text Registering a word to the user dictionary Entered text can be selected/copied/cut/pasted to use. It is convenient to register kanji with specific reading, frequently-used abbreviation, etc. To call up a registered word in the user dictionary, enter a head word in the character entry field to convert.
- Page 36 ■ Information Editing user dictionary · While using a keyboard, you can also tap “Menu” → “User Dictionary” to → “基本機能/設定 (Basic From the Home screen, use the user dictionary. · Functions/Settings)” → “Settings” When user dictionary (extension: suj) is saved, the content can be saved to “FSKaren_UserDic”...
- Page 37 ■ Renaming dictionary Editing user dictionary ① Tap a dictionary to edit → “Rename” ② Rename a dictionary → “OK” → “OK” → “基本機能/設定 (Basic From the Home screen, ■ Deleting a dictionary Functions/Settings)” → “Settings” ① Tap a dictionary to delete → “Delete” → “OK” → “OK” “Language &...
- Page 38 Adding/editing/resetting phrases/smileys Changing settings of keyboard Add/edit phrase or smiley. You can reset to the default. → “基本機能/設定 (Basic From the Home screen, · Use in FSKAREN for Huawei. Functions/Settings)” → “Settings” → “基本機能/設定 (Basic From the Home screen, “Language & input” → Tap displayed on the right Functions/Settings)”...
- Page 39 ■ FSKAREN for Huawei Item Description Item Description Advanced Suppress Not available on the terminal. The settings language function cannot be used even if the Screen Change Set a keyboard design. setting is changed. switch key Settings Design Switch to Linage of Set the number of lines in which to other input...
- Page 40 ■ Google voice typing Item Description Item Description Settings 10 Key Input Set input method for 10 key input from “Flick and Toggle” / “Flick” / “Toggle” / Choose input languages Select language to enter. “2-touch”. Block offensive words Set whether to display incorrect result Touch Screen Set the sensitivity for the touch panel of voice recognition.
- Page 41 ■ Japanese IME Item Description Sound on Key Press Set whether to emit operation sound when a key is tapped. Vibrate on key Press Set whether to vibrate when a key is tapped. Auto Capitalization Set whether to capitalize the first letter of a sentence when entering English.
-
Page 42: Initial Settings
Setting up a Google account allows you to use online services provided When you turn on the terminal for the first time or after performing by Google such as Gmail and Google Play. “Factory data reset” (P. 81), Wi-Fi and docomo services initial settings · Wi-Fi must be configured beforehand. -
Page 43: Screen/Icon
Main notification icons Screen/Icon Icon Status Status bar New Gmail Displayed in the status bar at the bottom of the display are onscreen New email keys for operating the terminal, notification icons such as for received mail and data send/receive results, and terminal status icons. New instant message (Google Talk) Status Icon Notification of event (Calendar) - Page 44 Synchronizing data GPS positioning Silent mode (Vibrate) is set Saving screenshot is complete Silent mode (Mute) is set Notification for docomo Palette UI or other Battery is nearly empty Keyboard is displayed · Charge the battery. Battery level is low...
-
Page 45: Notification Panel
❸ Notification information and running information appear. Tap to check Notification panel notification information or operate related function. To delete notification information, flick left or right. Tap the time display or a icon in the status bar to display the notification ❹... -
Page 46: Docomo Palette Ui
Palette UI Home screen Managing the Home screen ❶ Items to add to the Home screen ❷ Add shortcuts, widgets, folders, application groups, etc. to the Home screen. Adding shortcuts ❸ From the Home screen, touch and hold the wallpaper area without shortcuts, widgets, etc. - Page 47 Home screen Traffic Enter a widget name and destination to display amount of time required from the current location to destination and widget on the Home screen. Tap the widget to confirm traffic situation docomo Palette UI...
- Page 48 Alternatively, open a folder then touch and hold the folder name to rename. · Alternatively, from the Home screen, touch and hold a widget or shortcut you want to delete and drag it to displayed at the bottom right of the screen. docomo Palette UI...
-
Page 49: Changing Wallpaper
Alternatively, touch and hold a thumbnail of home screen you want to delete → Tap “Delete”. · Alternatively, pinch in on the Home screen to display a home screen list. · Up to 12 screens can be added to the Home screen. docomo Palette UI... -
Page 50: Application Screen
Book viewer application for reading books purchased with d Display Application screen. book MyShelf. ❷ Recommended tab - Install applications recommended by DOCOMO. dヒッツ (d hit) A choice selection from about one ❸ million songs through “dミュー Group name ジック(d music)”, mostly J-POPs Tap to show/hide applications in a group. - Page 51 Send/Receive Google account P. 58 character input method, reset mails. learning, and reset settings. Talk Chat via Google Talk. P. 58 取扱説明書 - Display instructions for the (Instruction terminal. manual) Browser It is a web browsing application. P. 59 docomo Palette UI...
- Page 52 Some preinstalled applications can be uninstalled. It may be downloaded books from Google possible to download uninstalled applications again from “Play Store” (P. 92) Play. or other venues. Gallery View/organize still images or P. 97 videos. Calendar Display a calendar to manage P. 110 schedule. docomo Palette UI...
-
Page 53: Managing Applications
■ Information Drag it to a position/group name you want to move to · “Recently”, “DOCOMO Services”, and “Download Application” groups and release it cannot be renamed. · Alternatively, touch and hold an application → Tap “Move” to move to the other group. -
Page 54: Searching Applications
Tap “おすすめアプリを見る (View recommended applications)” on the cannot be deleted. “Recommends” tab to activate browser and top page of “dmenu” appears. Application info On the Application screen, “Application info” You can confirm docomo Palette UI provider, version information, etc. docomo Palette UI... -
Page 55: Phonebook
Phonebook Phonebook Using contacts → “基本機能/設定 (Basic From the Home screen, Adding contacts Functions/Settings)” → “People” Use the phonebook application to manage various kinds of information Contacts list appears. for contacts, such as names, phone numbers, mail addresses. Tap a contact you want to check →... -
Page 56: Joining Contacts
❺ Saved items Menu on Contacts list Registered information for the selected contact is displayed. · on Contacts list to show the following items. Tap a mail address to create mail. · ❻ Register new contact Available menus vary with displayed information. Save contacts. -
Page 57: Mail/Web Browser
Mail/Web browser Email Managing email account → “Google” → “Email” From the Home screen, Setting email accounts Email list appears. · If several accounts are set, tap an account name to select and show Set up an email account compatible with POP3 or IMAP provided by a email list. - Page 58 Creating/Sending email Item Description Download Set whether to automatically download → “Google” → “Email” → From the Home screen, attachments attachment files when Wi-Fi is connected. Email notifications Set whether to show a notification icon on the status bar when email is received. Creating email screen appears.
- Page 59 Replying to email Checking received email → “Google” → “Email” From the Home screen, → “Google” → “Email” From the Home screen, Tap an email → Email list appears. · If several accounts are set, tap an account name to select and show ■...
-
Page 60: Gmail
Gmail Google Talk Email can be sent or received via Gmail. Google Talk is an instant message program provided by Google. You · A Google account is required for using Gmail. If Google account setup can chat (exchanging text messages) with Google account users. To use screen appears, set up your Google account. -
Page 61: Web Browser
Menu icon Web browser activates and web page set as home page (dmenu Display the settings menu for the browser (P. 60). (http://smt.docomo.ne.jp/ (in Japanese only)) by default) appears. ❼ Bookmarks icon Display registered bookmarks or history, or saved web pages. - Page 62 Available operations while opening browser screen Menu on the browser screen The following operations can be made on the browser screen. on the browser screen to show the following items. · Depending on web pages opened, some operations cannot be made. Item Description Intention...
- Page 63 Operating links on web page Managing bookmarks and history Touch and hold a link on the browser screen Adding to bookmarks Tap item you want to use · Items shown differ depending on links. From the Home screen, Open web page to add to bookmarks → Item Description Open...
- Page 64 Setting browser Menu on the BOOKMARKS/HISTORY/SAVED PAGES screen From the Home screen, Touch and hold a web page in the list to show the following menu items. · → “Settings” Items shown defer depending on web pages. · On the saved page list screen, only “Delete saved page” appears to delete Set each item saved pages.
- Page 65 Item Description Item Description Privacy & Clear cache Clear cache data. Accessibility Force enable Set whether to enable security zoom “Accessibility” setting to enable Clear history Clear web page history. to zoom in/out in every web page. Show security Alert if security problem is Text scaling Set font size.
- Page 66 Item Description Item Description Advanced Set search Set search engine. Bandwidth Search result Set to allow browser to preload engine management preloading reliable search results in background. Open in Display a new tab behind the background displayed tab. Web page Set the browser to preload linked preloading web pages in the background.
-
Page 67: Settings
Settings Setting menu Enabling Airplane mode Stop sending and receiving radio wave with the terminal powered ON. If You can change and check terminal settings from the setting menu. enabled, functions which require sending and receiving radio wave such · Some items cannot be viewed or selected depending on terminal status. - Page 68 ■ Connecting to a secured access point Using Wi-Fi function ① Enter a password → “Connect” · Mark “Show password” to show entered password. Connect to home network, company network, or access points for public · Mark “Show advanced options” to show setting items for wireless LAN services using Wi-Fi function to use mail and Internet.
- Page 69 Connecting manually to an access point Checking MAC address/IP address To connect to a private access point, manually enter setting. → “Advanced” On the Wi-Fi setting screen, · For the necessary information, refer to the instruction manual of your Wi-Fi MAC address/IP address of the terminal appears.
- Page 70 Using other connection functions Connecting to VPN Configure a VPN or USB network adapter. VPN (Virtual Private Network) is a technology to connect to the information in a protected local network from another network. VPNs are → “基本機能/設定 (Basic From the Home screen, generally available in companies, schools or other facilities.
- Page 71 Disconnecting VPN Set each item Item Description Tap a VPN to disconnect on the VPN setting screen → Preferred connection Select a network with connection priority “Disconnect” from USB/Wi-Fi. mode VPN is disconnected. Obtain IP automatically Obtain an IP address automatically when connecting by a USB network adapter.
-
Page 72: Device
Sound DEVICE You can make settings for ringtone, notification, Silent mode, etc. → “基本機能/設定 (Basic From the Home screen, Power saving Functions/Settings)” → “Settings” Reduce the battery consumption on the terminal. “Sound” → “基本機能/設定 (Basic From the Home screen, Functions/Settings)” → “Settings” Item Description Volume... - Page 73 Adjusting volume Setting Silent mode You can adjust media sound, notification sound, and alarm volume. You can set not to emit notification sound. → “基本機能/設定 (Basic → “基本機能/設定 (Basic From the Home screen, From the Home screen, Functions/Settings)” → “Settings” Functions/Settings)”...
- Page 74 Adjusting the color temperature of the screen Display → “基本機能/設定 (Basic From the Home screen, Make settings for display brightness, delay until the backlight dims, etc. Functions/Settings)” → “Settings” → “基本機能/設定 (Basic From the Home screen, Functions/Settings)” → “Settings” “Display” → “Color Temperature” Drag the slider left or right →...
- Page 75 Storage Item Description SD card Total space Show total amount of data saved Check amount of memory for the terminal, microSD card installed in the in microSD card. terminal, etc. Available Show available memory space in → “基本機能/設定 (Basic From the Home screen, microSD card.
- Page 76 Setting the save destination for data Formatting microSD card Set the destination for saving downloaded or captured data. Format microSD card. Note that formatting microSD card erases all data in the microSD card. → “基本機能/設定 (Basic From the Home screen, →...
- Page 77 Formatting USB storage Battery Format USB storage (initialize). Check use of the internal battery. Note that formatting erases all data on USB storage. → “基本機能/設定 (Basic From the Home screen, → “基本機能/設定 (Basic From the Home screen, Functions/Settings)” → “Settings” Functions/Settings)”...
-
Page 78: Apps
Disabling applications Apps You can disable applications and services you cannot uninstall. Disabled applications are not shown on the screen or not operated but they are not Manage apps uninstalled. → “基本機能/設定 (Basic From the Home screen, You can check information on installed applications, force-close Functions/Settings)”... -
Page 79: Personal
→ “基本機能/設定 (Basic From the Home screen, Functions/Settings)” → “Settings” → “Manage apps” Make setting for using docomo service. → “基本機能/設定 (Basic → “Reset app preferences” → “Reset” From the Home screen, Functions/Settings)” → “Settings”... - Page 80 Make passwords Set whether to show password when visible entering it. license etc.) to identify your subscription, the terminal to a docomo Shop. For details, contact “General Inquiries” on the rear cover of this manual. Device Enable/disable device administrators. administrators Unknown sources P.
- Page 81 ■ Information Setting security unlock preference · You can set “PIN” (security code) of 4- to 16-digit numbers or “Password” of Set to require security unlock operation when unlocking the screen. 4- to 16-alphanumeric characters (requiring at least 1 alphabet). →...
- Page 82 ■ If security unlock failed Language & input If a pattern, PIN, or password is set and entry has failed 5 times in a row, Make settings for display language and keyboard used for character a prompt to enter again appears 30 seconds later. ·...
-
Page 83: Reset Tablet
Reset tablet Item Description Voice Language Set language to be used for Google Reset the terminal. Search voice typing. → “基本機能/設定 (Basic From the Home screen, Speech output Select whether to enable voice Functions/Settings)” → “Settings” output always or only when using a hands-free device. -
Page 84: Account
“Factory data reset” resets the terminal to its default state, and erases Continue by following the onscreen instructions. installed applications, saved information, etc. · docomo accounts cannot be deleted. ■ Information · To set items to be synchronized, tap the account → Mark the item to be synchronized. -
Page 85: System
Accessibility SYSTEM Make settings for applications and functions helping user operations. → “基本機能/設定 (Basic From the Home screen, Date & time Functions/Settings)” → “Settings” Set date and time. · “Accessibility” You can set the date and time automatically by unmarking “Automatic date &... -
Page 86: Developer Options
Developer options Item Description Certification Displays information including a Set options for using application development. technical conformity mark and FCC ID showing conformity with technical standards based on the Radio Law About tablet and the Telecommunications Business Law. Display various kinds of information for the terminal. →... -
Page 87: File Management
File management File Manager Moving/Copying files or folders Touch and hold a file or folder to move/copy on the View/play and manage files and folders saved in the internal storage and “Internal”/“SD card” tab → “Cut”/“Copy” microSD card. · → “Select item(s)” → Tap To move/copy several files or folders, files or folders →... - Page 88 on the File manager screen to show the following items. Menu on the File Manager screen Item Description Touch and hold a file or folder on the File Manager screen to show the Select item(s) Select several files or folders to move/copy, following menu items.
-
Page 89: Bluetooth Communication
with wireless LAN capability, radio wave interference may occur, and Bluetooth communication communication speed may be reduced, noise may occur, or connection may not be established. In these cases, do the following: Send and receive data between the terminal and Bluetooth device. ·... - Page 90 Pairing/connecting Sending/receiving data · Turn Bluetooth function of the terminal ON and pair receiver’s device Pair/Connect the terminal with other Bluetooth device to enable data beforehand. communication. Receiving data Pairing/Connecting with other Bluetooth device Send data from the other party’ s device On the Bluetooth setting screen, “SEARCH FOR DEVICES”...
-
Page 91: Connecting External Device
· The system requirements for available PC are as follows. Connecting external device Item Description PC-AT compatible PCs with USB ports equipped Connecting a PC Japanese version of Windows 8 (32/64 bit), Windows 7 (32/64 bit), Windows Vista (32/64 bit), Windows XP Connect the terminal and a PC with the bundled microUSB cable. - Page 92 Removing the terminal from the PC Using the terminal as a USB storage ■ When being connected by “USB mass storage” Connect the terminal to a PC with the bundled microUSB cable and send/ receive data to/from the internal storage or a microSD card in the Perform USB safely remove on the PC terminal.
-
Page 93: Applications
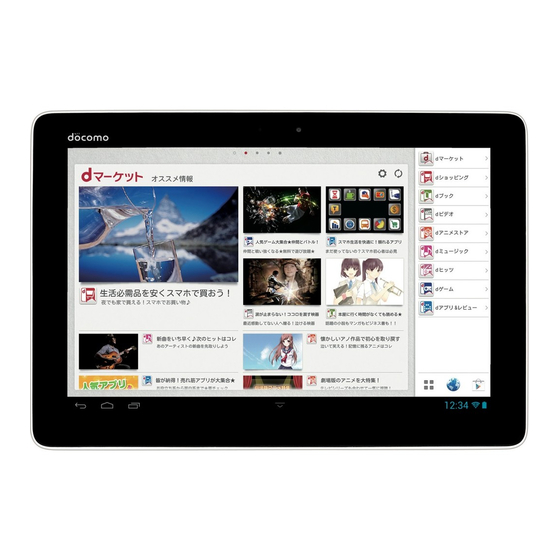
Applications dmenu dmarket In dmenu, you can easily access sites recommended by DOCOMO or You can obtain useful and interesting contents which meet your needs at convenient applications. dmarket. · A docomo ID and password are required to use dmarket. -
Page 94: Play Store
The terminal may be infected with a virus and the data may be damaged. · NTT DOCOMO is not liable for malfunctions, if any, caused by the application you installed. In such case, the repair is charged even during the warranty period. -
Page 95: Camera
Camera Copyrights and portrait rights Taken pictures and recorded sounds by the terminal are not allowed to use without the copyright holders authorization except for personal use etc. They are protected by the Copyright law. Avoid using or altering pictures of Before using the camera others without their consent, because it may infringe on portrait rights. -
Page 96: From The Home Screen
Starting up the camera ❷ ❼ ❸ → “エンタメ/便利ツール From the Home screen, (Entertainment/Tools)” → “Camera” The shooting screen appears. · To end the camera, on the shooting screen tap ❶ ❹ Shooting screen ❷ ❺ ❸ ❻ Shooting screen (video) ❶... -
Page 97: Shooting Videos
■ Information Shooting videos · Icons shown on the shooting screen rotate depending on the orientation of the terminal. Display an object on the video shooting screen · Setting items vary depending on the shooting mode. Tap the shutter Start shooting sound is heard and a shooting video is started. Shooting still images Tap the shutter to stop shooting Stop shooting sound is heard and a video is saved. - Page 98 Menu on the shooting screen Icon/Item Description Picture quality Set image quality. Tap on the shooting screen to show the following menu items. Settings · Displayed menu items differ between the in camera and out camera. Picture size Set picture size. ·...
-
Page 99: Gallery
❶ ❷ ❸ ❹ Gallery Play still images/videos shot by the terminal and downloaded data. Also, editing still images and sharing still images/videos are available. · In Gallery, you can play data stored in the microSD card or internal storage. ·... - Page 100 Playing still image/video Menu on the album list screen on the album list screen to show the following menu items. Tap a folder to play on the album list screen Item Description ❶ ❷ ❸ ❹ Select album Tap to select several folders to share or delete them.
- Page 101 · Tap a still image/video For videos, use the touch panel to perform the following operations. - Drag left half of screen left/right: Adjust volume Icons appear on the screen then you can perform the following - Drag right half of screen left/right: Adjust brightness operations.
- Page 102 Editing still images Menu on the playing screen on the playing screen to show the following menu items. Tap a still image in the thumbnail screen · Displayed menu items differ between still images and videos. → “Edit” Item Description Edit image using icons Slideshow Show slideshow of still images in a folder.
-
Page 103: Media Player
■ Information Media Player · Contents protected by Digital Rights Management (DRM) technology may not be able to be played if “Factory data reset” is performed. You can use the Media player to play music/video stored in the microSD card or internal storage and use contents from stores in dmarket. ·... - Page 104 Using play list Menu of the Media Player on the data list screen or playing screen of the Media Player to Use play list to play songs in your desired order. show the following menu items. · Create a play list Available menu options vary depending on screens.
-
Page 105: Youtube
Enter/Set required items → “UPLOAD” YouTube Uploading starts. YouTube is an online video streaming service. You can play videos and upload videos to this service. Playing videos → “Google” → “YouTube” From the Home screen, YouTube screen appears. Search a video → Tap a video to play The playing video screen appears. -
Page 106: Gps/Navigation
When there are obstructions (people or objects) near the terminal result of irregularities in the GPS system. · Note that DOCOMO is not liable for pure economic loss if you cannot confirm the Enable location information positioning (communication) result with the terminal because of failure, malfunction or external factors such as power failure (including battery exhaustion). -
Page 107: Using Google Maps
■ Information Using Google Maps · On the map screen, use the touch panel to perform the following operations. Use Google Maps to check current location or search location. - Slide (swipe) : Scroll the map to show other area - Touch and hold : Show address in a call-out Also using Google Maps, you can access following applications. - Page 108 Using layer function Searching routes You can add traffic information on the map and switch to aerial Set start point and end point to check route. photograph. On the map screen, On the map screen, Enter start point in “My Location” Tap an item Enter end point in “End point:”...
- Page 109 · You can tap “Contacts”/“Starred places” and search for addresses Menu on the map screen saved in contacts or starred places. on the map screen to show the following menu items. ■ Information Item Description · → Tap For details on Google Maps Navigation, on the navigation screen, “Help”...
-
Page 110: Clock
Setting alarm Clock On the desk clock screen, “Set alarm” Check time and set alarm. The alarm setting screen appears. → “エンタメ/便利ツール From the Home screen, “Add alarm” (Entertainment / Tools)” → “Clock” Set required items Item Description Turn alarm on Activate/Deactivate alarm. - Page 111 When sounding alarm Making alarm basic settings When set alarm time comes, alarm sounds and alarm screen appears. On the alarm setting screen, “Settings” Tap “Snooze” to stop alarm and sound alarm again later. Tap “Dismiss” to cancel alarm. Set required items ■...
-
Page 112: Calendar
❶ Switching icons Calendar Tap to switch Day/Week/Month/Agenda list view. ❷ Calendar Use calendar to manage schedule. Also, the terminal’ s calendar can be Appears in Day/Week/Month view mode. · synchronized with Google Calendar, etc. on the web. In Day/Week view mode, days which passed current date are shown on gray background. - Page 113 Adding new events in calendar Menu on the calendar screen on the calendar screen to show the following menu items. In the calendar screen, · Displayed menu items differ depending on conditions. New event screen appears. Item Description Set required items Refresh Manually update schedule.
- Page 114 Checking/Editing/Deleting events Checking/Set Snooze for/Deleting reminder for events When setting reminder for an event and set time arrives, appears on Tap an event in the calendar screen the status bar. Event details screen appears. Opening the notification panel ■ Editing an event ①...
-
Page 115: Calculator
Changing calendar settings Calculator → “Settings” On the calendar screen, You can four arithmetic operations (+, −, ×, ÷), functional calculus, Set each item etc. → “エンタメ/便利ツール From the Home screen, Item Description (Entertainment/Tools)” → “Calculator” Hide declined events Set whether to show events for which invitations are declined. -
Page 116: Sd Card Backup
Restoring backed up data up or restore. · For backing up or restoring, you need docomo apps password (P. 77). Restore backed up data to the terminal. · This application only backs up data (still images, videos, etc.) that is saved →... - Page 117 “Schedule ON” data to copy → “Overwrite”/“Add” “Select” → Mark data to back up → “Select” The copied contacts data is saved to the docomo account. Select Repeat task → Set time to execute “OK” “Enter” → “Set” → Enter docomo apps password →...
-
Page 118: Appendix/Index
Some products are unavailable depending on the area. For details, contact a sales outlet such as docomo Shop. For details about the optional devices, refer to the instruction manual for each device. -
Page 119: Troubleshooting (Faq)
Check for the necessity of software update first, and update the software if necessary (P. 122). · When checking the following items does not to improve the state, contact “Repairs” on the rear cover of this manual (in Japanese only) or DOCOMO-specified repair office. - Page 120 2. Press T for 2 seconds or more with the power of the terminal OFF, and then press and hold - (Volume down key) from when the logo of “NTT docomo” appears until the terminal starts up * When safe mode is booted, “Safe mode” is displayed at the lower left of the Home screen.
- Page 121 ■ Display Trouble Check and remedy · The display is dim Do you adjust the brightness of the display (P. 72)? · Is the light sensor covered with fingers, sticker, etc.? · Is “Power saving” set to “Balanced” (P. 70)? ■...
-
Page 122: Smartphone Anshin Remote Support
Smartphone Anshin Remote Support Warranty and After-Sales Service By sharing screens of your terminal with DOCOMO, you can receive Warranty technical support to make settings. · This service is not available when not connected to an access point, in ·... - Page 123 Replacement parts (parts required to maintain the product functions) are or have repairs done to the terminal. DOCOMO shall have no liability for any basically kept in stock for at least 4 years after termination of production.
-
Page 124: Software Update
This function allows you to connect the network and check if software in When the remaining battery is not sufficient for software update the dtab 01 needs to be updated, if software update is necessary, it When the remaining memory is not sufficient for software update ·... -
Page 125: Updating Software
■ Information Updating software · If “ Software update was suspended Please check the status of the If new software is available on the server, is displayed on the status handset and retry.” appears on the status bar at the software update start bar. -
Page 126: Main Specifications
■ Terminal OPP (Object Push Profile) Bluetooth profile* SPP (Serial Port Profile) Product name dtab 01 HID (Human Interface Device Profile) Approx. 175.9 mm (H) × 257.4 mm (W) × 9.9 Size A2DP (Advanced Audio Distribution Profile) mm (T) AVRCP (Audio/Video Remote Control Profile) - Page 127 ■ dtab AC adapter 01 (including microUSB cable) ■ Numbers of still images (Estimation) Power supply AC 100 V – 240 V 50 – 60 Hz Number of images that Number of images that Picture size can be saved to the can be saved to the Input current Maximum 0.5 A...
-
Page 128: Operating Environment
Operating Environment Certification Information (SAR) The device complies with the RF specifications when the device is used at This device meets guidelines for exposure to radio waves. your body. For body worn operation, please use an accessory designated for Your device is a low-power radio transmitter and receiver. As recommended this product or an accessory which contains no metal and which positions the by international guidelines, the device is designed not to exceed the limits for device a minimum of 1.5 cm from the body. -
Page 129: Fcc Statement
FCC Statement Disposal and Recycling Information This equipment has been tested and found to comply with the limits for a Class B digital device, pursuant to Part 15 of the FCC Rules. These limits are designed to provide reasonable protection against harmful interference in a residential installation. -
Page 130: Reduction Of Hazardous Substances
Reduction of Hazardous Substances EU Regulatory Conformance This device is compliant with the REACH Regulation [Regulation (EC) No Hereby, HUAWEI TECHNOLOGIES CO., LTD. declares that this device is in 1907/2006] and RoHS Directive Recast (Directive 2011/65/EU). Batteries (if compliance with the essential requirements and other relevant provisions of included) are compliant with the Battery Directive (Directive 2006/66/EC). -
Page 131: Software Complying With Gpl/Lgpl
In the “スタート (Start)” menu, right-click “コンピュー ター (Computer)” / “コンピュータ (Computer)” / “マイ コンピュータ (Mycomputer)” Right-click “CDドライブ(B:)dtab 01 (CD drive (B:) dtab 01)”, and click “開く (open)” · The drive name (B:) may be displayed differently depending on your PC settings. -
Page 132: Intellectual Property Right
® The Bluetooth word mark and logos are owned by the Bluetooth SIG, INC. Business. · and any use of such marks by NTT DOCOMO, INC. is under license. Other ® ® Windows XP indicates the Microsoft Windows XP Professional trademarks and names are those of their respective owners. -
Page 133: Index
91 Application list..........48 Icon..............41 dmenu............... 91 Application screen......... 48 Initial settings..........40 docomo service..........77 Apps..............76 Internal battery Double-tap............23 Auto-rotate screen......... 24 Charging time..........124 Downloads. - Page 134 Messenger............50 Screen lock microSD card..........17 Locking manually......... 22 Vibration............70 Formatting............. 74 SD card backup........... 114 Installing/Removing........17 Search............... 50 Videos Playing..........98,.101 Unmounting........... 74 Security............78 Shooting............95 Security code..........78 microUSB cable Voice Search...........
- Page 135 From PCs My docomo (http://www.mydocomo.com/) ⇒ 各種お申込・お手続き (Various application/Procedures) (in Japanese only) * Requires “docomo ID/Password”. * “docomo ID/Password”, contact to the numbers for “General Inquiries” on the last page of this manual. * You may not use the services depending on your subscription.
- Page 136 (Business hours : 9:00 a.m. to 8:00 p.m. (open all year round)) ● Please confirm the phone number before you dial. ● For Applications or Repairs and After-Sales Service, please contact the above-mentioned information center or the docomo Shop etc. near you on the NTT DOCOMO website. NTT DOCOMO website http://www.nttdocomo.co.jp/english/...
Need help?
Do you have a question about the dtab 01 and is the answer not in the manual?
Questions and answers