Table of Contents
Advertisement
Advertisement
Table of Contents

Summary of Contents for HYPERVIBE G17 PRO
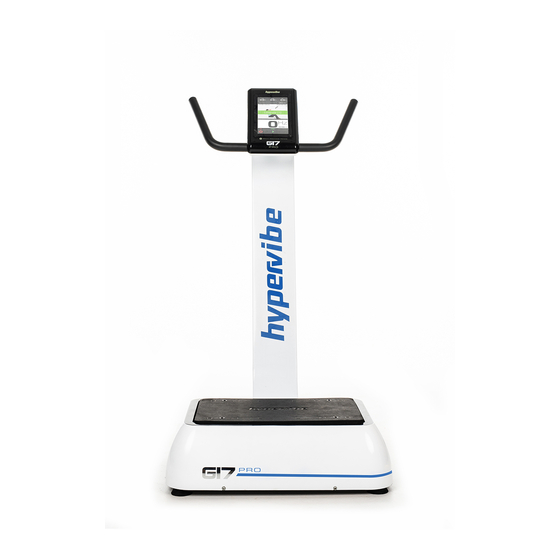
- Page 1 HYPERVIBE OWNERS MANUAL...
-
Page 2: Table Of Contents
Hypervibe G17 PRO Owners Manual Contents Introduction Gravity Resistance Training (GRT) Benefits of GRT Instruction Manual Important Product Safety Instructions Grounding instructions Places to avoid Places to look for Important Health Precautions Machine Assembly Step 1 Step 2 Parts List... - Page 3 Manual Mode Overview Manual Mode - Quick Start Manual Mode - Preset Manual Mode - Starting Manual Mode - Paused Manual Mode - Complete Program Mode Overview Program Mode - Menu Program Mode - Sub Menu Program Mode - Starting Program Mode - Pause Program Mode - Rest Phases...
-
Page 4: Introduction
Hyper- Vibe saw lots of room for improvement. The G17 Pro has an im- proved vibration profile compared to traditional pivotal machines, to become more user friendly, more effective and allow a wider range of exercises. -
Page 5: Gravity Resistance Training (Grt)
10 times the strength of Earth’s gravity. While manufacturers of low powered machines attempt to use smoke and mirrors, we at Hypervibe focus on the reality of Whole Body Vibration technology and what sets it apart from other ap- proaches to health and fitness. We focus on its ability to provide... -
Page 6: Benefits Of Grt
Hypervibe G17 PRO Owners Manual body and begin to actually improve its performance and integrity. It’s time for Whole Body Vibration to become Gravity Resistance Training. Benefits of GRT At the time this was written, the effects of GRT had been studied for almost 20 years, with hundreds of clinical papers published in scientific journals. -
Page 7: Instruction Manual
Familiarise yourself with this manual and look it over carefully. Be sure you understand the control panel operation and the safe ex- ercise positions before using the G17 PRO. This manual includes basic information on starting an exercise program and safety tips that will assist you in reaching your goals for a healthy lifestyle. -
Page 8: Important Product Safety Instructions
READ ALL INSTRUCTIONS BEFORE USING THIS APPLIANCE. To reduce risk of burns, fire, electrical shock or injury to persons: 1. Always ensure proper operation of your HyperVibe, it is recom- mended that your HyperVibe machine be connected to a dedi- cated 110V 60Hz electrical circuit. - Page 9 center for examination and repair. • Do not carry this appliance by supply cords or use cord as a handle. • Keep the cord away from heated surfaces. 4. Never operate the appliance with the air openings blocked. Keep the air openings free of lint, hair and the like. 5.
-
Page 10: Grounding Instructions
Hypervibe G17 PRO Owners Manual Grounding instructions This product must be grounded. If it should malfunction or break- down, grounding provides a path of least resistance for elec- tric current to reduce the risk of electric shock. This product is equipped with a cord having an equipment-grounding conductor and a grounding plug. -
Page 11: Places To Avoid
Places to avoid Avoid placing the machine anywhere that could become wet, damp or subject to moisture, such as: • Balcony or veranda • Screened porch, porch or deck • Carport Places to look for • Dry, dust free • Hardwood, tile or carpet over solid Concrete foundation •... -
Page 12: Important Health Precautions
Hypervibe G17 PRO Owners Manual Important Health Precautions The following conditions do not necessarily exclude you from us- ing the G17 Pro, however, if you suffer from any of the following conditions please confirm with your physician before using the machine. - Page 13 breath, stop exercising immediately and consult your physician before continuing. We do not recommend use for children unless your physician has been consulted. Possible side effects you may experience when using your hyper- vibe machine include: • Skin lesions or blisters - These can be prevented by wearing shoes, socks or placing a foam mat on the platform.
-
Page 14: Machine Assembly
Hypervibe G17 PRO Owners Manual Machine Assembly Step 1 Ensure vibration insulator (D) is located on the lower end of post (F). Connect the base unit wire connector (L) to the lower post wire connector (K). Install post (A) onto the base unit (B), then slide the vibration in- sulator (D) down to insulate the post (A) from the base cover (G). - Page 15 Figure 2...
-
Page 16: Quick Fix - Twist-Lock Anchor System
Hypervibe G17 PRO Owners Manual Quick Fix - Twist-Lock Anchor System The G17 Pro features the all new QuickFix - Twist-Lock Anchor System, a mechanism which allows quick and efficient connec- tion of upper body vibration straps, and other attachment acces- sories. -
Page 17: Instructions
Instructions To connect a QuickFix attachment accessory to the G17 Pro plat- form, simply align the locking pin with the socket, insert the pin and turn counter-clockwise. To disconnect simply turn the locking pin clockwise and then remove. Note: QuickFix attachment accessories should only be connected to the machine when they are being used. -
Page 18: Safe & Effective Use
If you are not excluded from using the machine due to a health condition, the G17 Pro can be used by almost everyone. Howev- er, the key to success when using the G17 Pro is safe and effec- tive use. There are three main variables that will determine safe and effective use: 1. -
Page 19: Time
Time When referring to time on the G17 Pro, we can refer to the dura- tion of time that an exercise is performed for, the duration of time you rest between exercises, and also the total time use of ma- chine in any given week in terms of number of sessions. - Page 20 GRT machine setting. Sometimes locked knees may be instructed for lower intensity vibration therapy exercises. The G17 Pro has a pivotal platform, which means the platform vibrates in the same motion as a see-saw. For standing exercises where both feet are on the platform your feet should be kept at equal distance from the middle platform pivotal point.
-
Page 21: Getting Started
Getting Started The G17 Pro has a manual mode for custom use of the machine, and then over 30 pre-installed programs categorised by 5 Goal categories. 1. Active Aging 2. Weight Loss & Fitness 3. Women’s Health & Beauty 4. Performance & Recovery 5. -
Page 22: Software Guide
Hypervibe G17 PRO Owners Manual SOFTWARE GUIDE Screen Modes Display Mode When the machine is switched on at the mains power it will start in DISPLAY MODE. Display mode shows the clock and prompts the user to press the START button by highlighting it green. -
Page 23: Setting The Clock
Setting the Clock While in DISPLAY MODE clicking and holding the ‘P’ button for three seconds enters clock setting mode. It begins with the hours underlined and the underline blinking on and off slowly. The SELECT button toggles between hours, minutes and AM/PM. The UP/DOWN buttons increase or decrease the number. -
Page 24: Sound On/Off
Hypervibe G17 PRO Owners Manual Sound On/Off While in DISPLAY MODE, clicking both the UP and DOWN button at the same time toggles sounds either on or off. Each time both buttons are pressed together the text and sound icon appear on the bottom of the screen for three seconds then... -
Page 25: Home Screen
Home Screen From DISPLAY MODE, when you press the START button you are taken to the HOME SCREEN. PARTS OF THE SCREEN At the top are three grey boxes containing the G-FORCE indica- tors. The numbers being zero indicates two things: 1.The machine has not had any frequency settings entered, and 2.The platform is not currently moving Below that is the TIMER indicator. - Page 26 Beneath the timer indicator is the NOTIFICATION area. At the home screen you are not being instructed to do anything so the area simply contains the HyperVibe logo. When the machine is in use this area will either display a video of an exercise and/or notifications such as “get ready”...
-
Page 27: Manual Mode Overview
Manual Mode Overview Manual mode gives you full control over the time and frequency settings on G17 Pro, however in manual mode there are no exer- cise videos, nor are there any recommended amplitude contract positions. Manual mode is recommended for experienced users, or for those who are following a custom made program. - Page 28 Hypervibe G17 PRO Owners Manual 5Hz. The timer immediately starts counting down from the default time of 10-minutes. The P button has the function of PAUSE. The UP/ DOWN buttons increase or decrease the frequency. Clicking or clicking and hold- ing either button continuously changes the value of the frequency.
-
Page 29: Manual Mode - Preset
Manual Mode - Preset Instead of starting the machine with the default frequency of 5Hz and default timer of 10-minutes, the user can preset these val- ues. Starting at the HOME SCREEN the user clicks and holds the MANUAL button for three seconds. Notice the button indicators along the bottom have changed. - Page 30 Hypervibe G17 PRO Owners Manual In this example the user has set a frequency of 24Hz. As they do so the G- FORCE indicators show what the G- FORCE will be at each contact position for a frequency of 24Hz. While setting the frequency the G-FORCE numbers increase or decrease accord- ingly as the frequency value increases or decreases.
-
Page 31: Manual Mode - Starting
Manual Mode - Starting When you click PROCEED to start the machine it doesn’t start vi- brating immediately. Instead it displays “Get Ready” in the NOTI- FICATION area. This notification flashes on and off for 5 seconds. For the last 3 times it flashes on, it is accompanied by an audible beep. - Page 32 Hypervibe G17 PRO Owners Manual After 5 seconds vibration starts on the 6th second and the notifi- cation area displays the HyperVibe logo. As soon as the platform starts vibrating the G-FORCE indicators switch to colour. As we don’t know which amplitude contact position you are going to choose, all three contact positions are indicated.
-
Page 33: Manual Mode - Paused
Manual Mode - Paused While the machine is running in Manual mode, if you press the PAUSE button the machine stops vibrating and the notification area displays “Paused”. The timer and frequency values freeze but does not go to zero as do the G-FORCE indi- cators however they go from colour to grey as the platform is no longer vibrating. - Page 34 Hypervibe G17 PRO Owners Manual When you push the RESUME button, the notification area dis- plays a “resuming” notification which like the “get ready” notifica- tion flashes on and off for 5 seconds before starting the machine. During this 5 seconds the PAUSE button illuminates so you may prevent the machine starting again and put it back into ‘paused’...
-
Page 35: Manual Mode - Complete
Manual Mode - Complete When the timer counts down to zero the machine stops and the notification area displays “Complete” with a number in square brackets. This is to indicate the number of times the user has per- formed consecutive workouts with the same preset values. In this example the user has completed such a workout once. -
Page 36: Program Mode Overview
Hypervibe G17 PRO Owners Manual Program Mode Overview Program mode makes using the G17 Pro very easy. Simply choose a program and go, the machine will automatically start the vibration at recommended vibration settings, whilst playing the programmed exercise video on the screen. The user inter- face even tells you where to place your feet or hands according to the amplitude contact points on the platform. -
Page 37: Program Mode - Menu
Program Mode - Menu From the HOME SCREEN if you press the PROGRAMS button you are brought to the Programs Menu. From here you can click the UP / DOWN buttons to go up and down the list of available menu items. Click PROCEED to select the highlighted menu item. -
Page 38: Program Mode - Sub Menu
Hypervibe G17 PRO Owners Manual Program Mode - Sub Menu After clicking PROCEED from the Programs menu you are taken to that menu item’s sub menu. In this example the user selected Weight Loss & Fitness. The sub menu shows which programs are contained in the Weight Loss &... -
Page 40: Program Mode - Starting
Hypervibe G17 PRO Owners Manual Program Mode - Starting After highlighting a program and pressing the START button the screen changes. In this example, only the centre “MED” G-FORCE indicator has a value. This tells you which amplitude contact position to use. The... - Page 41 After 5 seconds vibration starts on the 6th second and the notifi- cation area displays the video only. As soon as the platform starts vibrating the G-FORCE indicator at the recommended amplitude contact position will switch to co- lour. Pressing PAUSE will pause the program at that point. Pressing SKIP skips to the next sequence in the program.
-
Page 42: Program Mode - Pause
Hypervibe G17 PRO Owners Manual Program Mode - Pause If at any time you click PAUSE the current exercise along with its G-FORCE, timer and frequency values will freeze and a “Paused” notification will be displayed similar to what happens in Manual mode when it is Paused. -
Page 43: Program Mode - Rest
Program Mode - Rest Once the timer counts down to zero all indicators go to zero, the next exercise in the program will be shown, and a notification area displays a “rest” label over the top of the next exercise video. During rest mode a countdown will show the number of seconds of rest period remaining in the square brackets, and a video of the next exercise in the program is shown. -
Page 44: Phases
Hypervibe G17 PRO Owners Manual Phases Some programs may include a WARM UP, and/or WORK-OUT and/or COOL DOWN phase. If one of these phases has been as- signed to a particular exercise the yellow “Warm Up” “Workout” or “Cool Down” label appears for 5 seconds. -
Page 45: Program - Complete
Program - Complete Similar to Manual mode - when you come to the end of the last exercise in the program you are given the option to REPEAT that same program again or QUIT to return to HOME SCREEN. -
Page 46: Specifications
Hypervibe G17 PRO Owners Manual Specifications Base unit size: 715 x 565 x 210mm Platform size: 535 x 335mm Machine set up size: 715 x 818 x 1355mm Net Weight: 76.5kg Motor: 850w - 4700rpm Vibration frequency: 5-35Hz (adjustable in 1Hz increments) Vibration amplitude: 7mm maximum (peak to peak) Vibration acceleration: 17.3g maximum... -
Page 47: Maintenance
The G17 Pro is built to withstand home and clinical use. However, as the owner, you are responsible for cleaning and maintaining the unit’s integrity. If you fail to maintain the G17 Pro as described below, it could affect or void the G17 Pro limited warranty. -
Page 48: Troubleshooting
Hypervibe G17 PRO Owners Manual Troubleshooting PROBLEM SOLUTION There is no power to the LCD Check the power lead is pushed display. firmly into power socket at rear of machine. - Turn the power off and then back on again at the base unit. - Page 50 Hypervibe G17 PRO Owners Manual HYPERVIBE OWNERS MANUAL HyperVibe PO Box 1781 Noosaville DC QLD, 4566 au.hypervibe.com...
Need help?
Do you have a question about the G17 PRO and is the answer not in the manual?
Questions and answers