Advertisement
Quick Links
Advertisement

Summary of Contents for LogiLink wl0143
-
Page 2: Safety Instruction
In any case, liability for loss of data is limited to the effort that is necessary to restore from existing backup copies. Congratulations to the Purchase of WL0143! Please read the Manual and Safety Instructions before using the product for the first time. Otherwise damage can be the result. -
Page 3: Specification
2.0 Introduction 2.1 Specification 3T3R 2.4 / 5GHz dual band concurrent with 300/450Mbps PHY data rate Compliant with IEEE 802.11a/n/g/b standards Supports Wi-Fi ON/OFF switch button Supports Wi-Fi WPS switch button 20/40 MHz channel bandwidth ... -
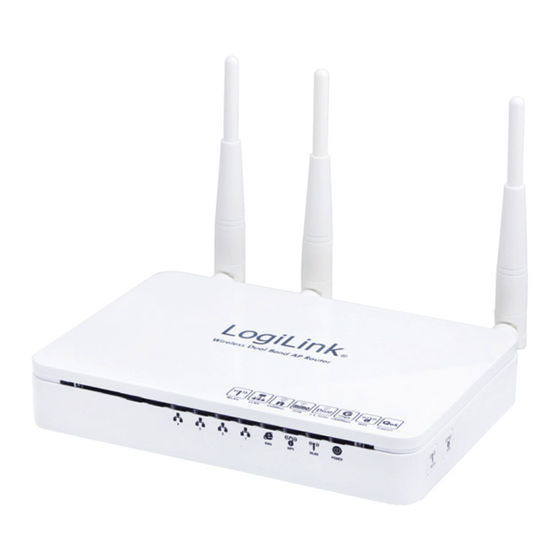
Page 4: Installation And Setup
STEP. STEP 1 Connection of WL0143 LED Meaning The WL0143 has indicator lights on the front side. Please see below for an explanation of the function of each indicator light. Power indicator WPS Active indicator... - Page 5 Disconnected active The icons appear on the products are for application indication only. The trademark or intellectual property is belonging to their respective owners. Rear View of the WL0143 Note: Actual ANTENNA may vary depending on model. - 4 -...
- Page 6 Please press WPS button 0.5 seconds at least to active WPS pairing. STEP 2 Configuration Procedures Before starting The WL0143 configuration, please kindly configure the PC computer as below, to have automatic IP address / DNS Server. For Windows 98SE/ME/2000/XP Click on "Start"...
- Page 7 Single RIGHT click on "Local Area connection", then click "Properties". Double click on "Internet Protocol (TCP/IP)". Check "Obtain an IP address automatically" and "Obtain DNS server address automatically" then click on "OK" to continue. Click "Show icon in notification area when connected" (see screen image in 3.
- Page 8 For Windows 7-32/64 Click on "Start" -> "Control Panel" (in Category View) -> "View network status and tasks". In the Control Panel Home, click on "Change adapter settings" to continue. Single RIGHT click on "Local Area connection", then click "Properties". - 7 -...
- Page 9 "OK" to continue. STEP 3 WL0143 Configuration Please insert the supplied CD into your CD-ROM drive. The CD should auto-start, displaying the window shown in 3. below. If your CD does not start automatically, go to Windows Explorer, Select your CD drive and double click autorun.exe.
- Page 10 To configure the device, please click on “Advanced Configuration” button. Please enter the User Name: admin and Password: 1234 and then click on OK button. From the Internet Settings menu, click on WAN. - 9 -...
- Page 11 Select the WAN Connection Type STATIC (fixed IP), DHCP (Auto config) or PPPoE (ADSL) and enter related parameters that your ISP (Internet Services Provider) or Network Administrator provided and then click on Apply button. STEP 4 Connect Wirelessly For easy installation it is saved to keep the settings. You can later change the wireless settings via the wireless configuration menu.
- Page 12 Click on the wireless network that you enter SSID name to connect. If the wireless network isn’t encrypted, click on Connect Anyway button to connect. If the wireless network is encrypted, enter the network key that belongs to your Encryption type and Passphrase (the default settings Security Mode = Disable).
- Page 13 Click on Connect or Apply button. Now, The WL0143 has been configured, and able to connect to ISP/ Website. For more detail, please refer to the detail manual in the CD. CE Declaration: This device corresponds to EU directive 1999/5/EC and 2006/95/EC: With the CE sign Logilink®, a registered...
Need help?
Do you have a question about the wl0143 and is the answer not in the manual?
Questions and answers