Table of Contents
Advertisement
Quick Links
Advertisement
Table of Contents

Summary of Contents for Kanto YARO2
- Page 1 English User Manual YARO2 AMPLIFIER Supporting your digital lifestyle ™...
-
Page 2: Important Safety Precautions
Important Safety Precautions DANGEROUS VOLTAGE ATTENTION CAUTION: TO REDUCE THE RISK The lightning flash with arrowhead, within an The exclamation point within an equilateral OF ELECTRIC SHOCK, DO NOT equilateral triangle, is intended to alert the user of triangle is intended to alert the user of REMOVE BACK PANEL.NO USER the presence of non-insulated “dangerous voltage”... - Page 3 110 V to 240 V and can be used worldwide. We recommend you read all instructions carefully before using the system and keep them for future reference. Kanto cannot be liable for damage or injury caused by incorrect setup or use of this product.
-
Page 4: Setting Up Your Speakers
Setting Up Your Speakers The YARO2 Amp is designed to power a pair of passive speakers. We recommend the Kanto YARO2 Passive Speakers. 1) Ensure that the YARO2 Amp is not plugged into power. 2) Connect the speakers to the amp as shown below using the supplied speaker cable. -
Page 5: Connecting Audio Sources
Connecting Audio Sources YARO2 features a high quality DAC (digital-to-analog converter) that supports data streams up to 24-bit/96 kHz resolution. Use the appropriate audio cable to connect your audio source components to your speakers. Refer to the following diagram on connectivity options. The examples in the following pages are not meant to be exhaustive - just examples. -
Page 6: Connecting A Subwoofer
YARO2 is equipped with an RCA connector to provide output signal to a powered subwoofer. Simply connect a single RCA subwoofer cable from the SUB OUT connection on the YARO2 to the AUDIO INPUT on your subwoofer. If your subwoofer has a stereo L/R RCA input, either left or right inputs will work. -
Page 7: Using Your Speakers
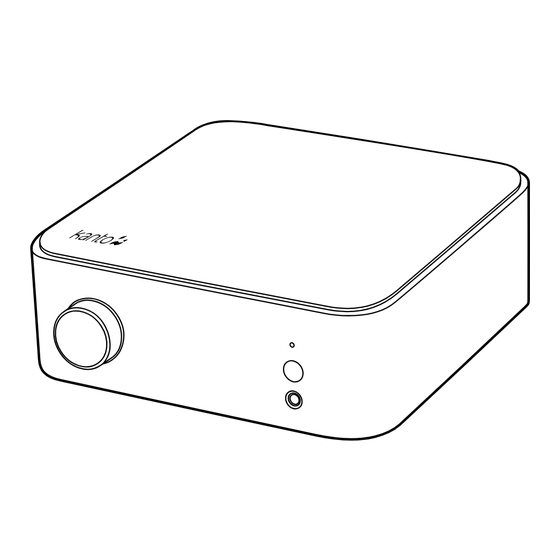
STATUS LED ONTROL INFRARED PORT KNOB Using Your Speakers 3.5MM HEADPHONE STATUS LED CONTROL INFRARED PORT KNOB 3.5MM HEADPHONE Front Control Knob Functions The control knob is used to turn on/off, select input and adjust volume. A short press turns the amplifier on while a long press switches the amplifier to standby. -
Page 8: Remote Control Functions
Remote Control Functions Install two supplied AAA batteries in the back of your YARO2 remote. Remote Control functions are listed below. Standby Button - press to enter or exit Standby Mode 3.5mm AUX Input Select Optical Input Select USB DAC Input Select... - Page 9 Auto Power-up / Auto Power-down The YARO2 Amp is designed to save power when not in use. When no audio signal has been detected for 15 minutes, the YARO2 Amp will put itself into stand-by mode. If the audio signal returns via the same input that the YARO2 Amp was playing when it entered standby, the YARO2 Amp will wake up and resume playing.
-
Page 10: Specifications
Specifications YARO2 AMPLIFIER Nominal Impedance 4 Ohm Amplifier Type Class D Power Output 70 Watts RMS (35 Watts RMS/channel) Input Sensitivity 450 mV Total Harmonic Distortion < 0.1% Frequency Response 20 Hz - 20 kHz ± 1 dB Inputs 1 x 3.5 mm stereo mini-jack AUX... -
Page 11: Warranty
24 months parts and labour If equipment fails because of such defects and Kanto or an authorized dealer is notified within 24 months from the date of shipment with proof of original invoice, Kanto will, at its option, repair or replace the equipment, provided that the equipment has not been subjected to mechanical, electrical, or other abuse or modifications. - Page 12 Check out more great products from Kanto! Kanto Speakers • Check out our full line of bookshelf and desktop speaker systems • Available in a stunning array of colors • Visit kantospeakers.com for more! SP26 • Full line of Audio and Video Cables •...
Need help?
Do you have a question about the YARO2 and is the answer not in the manual?
Questions and answers