Table of Contents
Advertisement
Quick Links
Advertisement
Table of Contents

Related Manuals for usha 3250

Summary of Contents for usha 3250
- Page 1 Manual ElEctric PrEssurE cookEr Model - 3250...
- Page 2 Dear Customer, Congratulations! You are now the proud owner of Usha Electric Pressure Cooker. Innovatively designed, using only the highest quality material and components, your Usha Electric Pressure Cooker is designed for years of trouble free performance. Please read this Instruction Manual carefully before using and keep it cautiously after reading for future reference.
-
Page 3: Product Introduction
Product introduction Usha electric pressure cooker is a kind of new cooking utensil developed with the latest technology, not only boasts the merits of ordinary pressure cookers, electric rice cookers and stewing cookers, but abandons the shortcomings of them. It enjoys stylish appearance and advanced structure, is safe for use, easy operable, multifunctional and energy saving, thus ideal for modern families. -
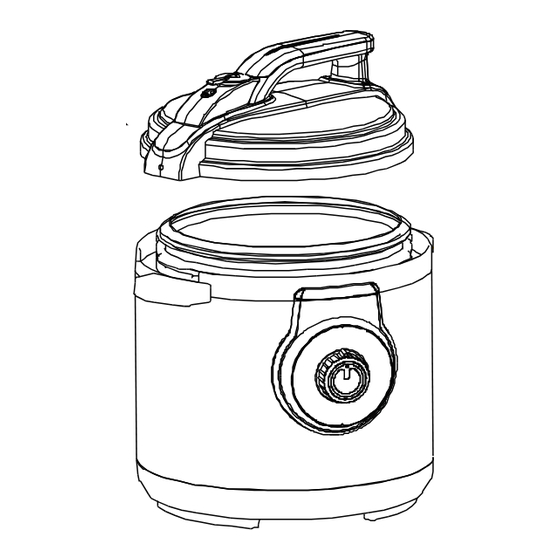
Page 4: Parts List
Pressure relief safety device: An elastic support mechanism is provided at the bottom of the heating plate. When all above devices fail and the inside pressure reaches the limit, the inner cooker will move downward automatically to make it away from the seal ring, and release pressure to prevent any risk. - Page 5 oPEration instructions 1. Uncover: Firstly hold the cover handle tightly, turn the cover clockwise, and then raise it up. (See Fig. 3, 4) 2. Take out the inner cooker and fill food in it. The amount of food shall not be more than 4/5 of inner cooker height (4L: 3/4: 6L), and expansible food such as bean shall not be more than 3/5 of inner cooker height (4L: 1/4, 6L);...
-
Page 6: Cooking Guide
6. Put the pressure limiting valve on the exhaust tube, turn it and ensure the “sealing’’ and handle position in correspondence with the handle direction, and check and ensure the float valve falls. (See Fig. 9 and 10) 7. Switch on the power supply, with heating light on. -
Page 7: Cleaning And Maintenance
9. Turn the knob clockwise to the scale of corresponding function (See Fig. 11), with heating light on to start heating. E.g. for cooking, turn the knob to the cooking function; air pressure generates after cooked for some time, and the float valve rises to lock the cooker cover. - Page 8 3. Following cover parts shall be cleaned: seal ring, pressure limiting valve, anti-blockage hood, exhaust tube and float valve. *Cleaning of seal ring: take the seal ring out of the steel ring, clean it and then fit it again. After that, check and ensure the clearance between seal ring and cover border is uniform and the cover may turn freely.
-
Page 9: Important Precautions
ParaMEtErs Working Pressure Heat Pressure Model Voltage Power Volume Size Pressure Limit Maintenance Preservation 220-240 V 3250 800 W 22 cm 0-70 KPa 90 KPa 60-80 0-30 min AC, 50 Hz... -
Page 10: Schematic Wiring Diagram
scHEMatic wiring diagraM troublEsHooting guidE *If following abnormal condition are found during use, they may not be the product failures. Please carefully check the cooker prior to sending to repair. Phenomena Possible Causes Solutions *Is power off? Indicator light not on Power supply not connected *Is plug breaking off? *Is switch on? -
Page 11: Warranty Card
warranty card This appliance is warranted for one year against all manufacturing defects from the date of sale. In the event of any complaint, please contact your nearest Company Service Centre or call at our Toll Free no: 1800-1033-111 this warranty is valid only when… The appliance has not been opened or tempered with, by any unauthorized person.
Need help?
Do you have a question about the 3250 and is the answer not in the manual?
Questions and answers