Advertisement
Available languages
Available languages
Quick Links
ECHOFISH 300
OPERATION GUIDE
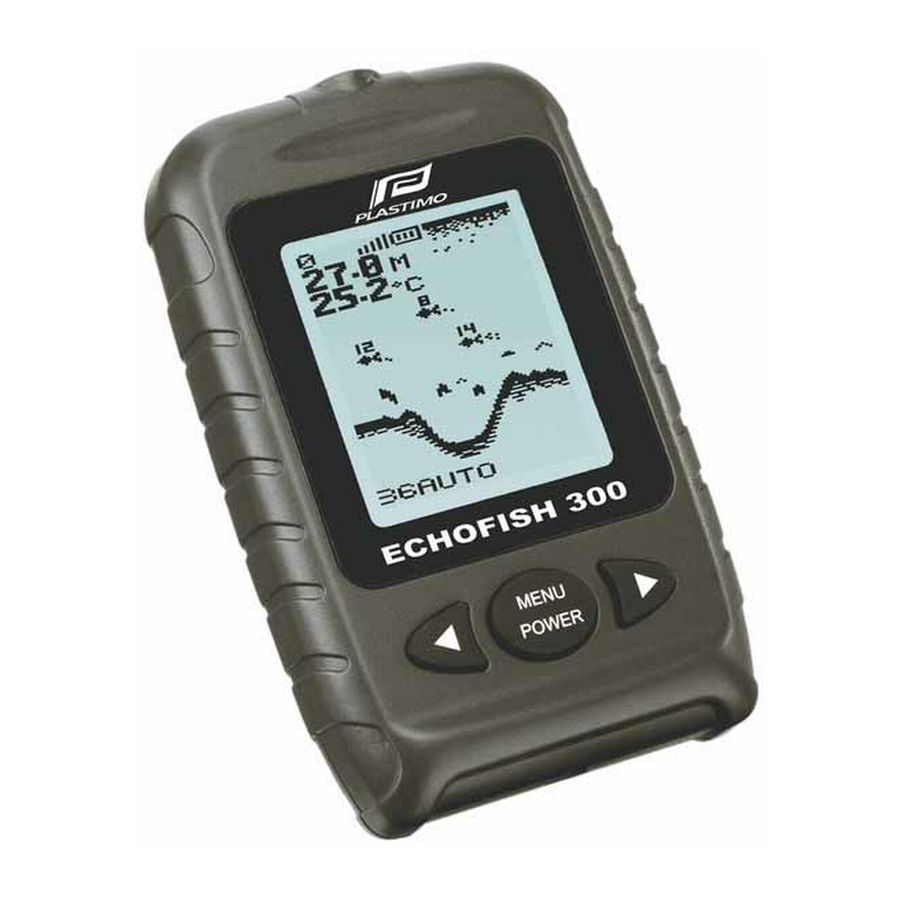
1 PRODUCT OVERVIEW
Plastimo is happy to present
you the Echofish 300. With
its innovative technology, the
Echofish 300 is perfect for
people who want to go
fishing on a small boat or
from the seashore. The unit
can be used in oceans, rivers
or lakes. Thanks to the
Echofish 300, you will find
out the location of fish, depth
and bottom contours
fig.1
2 HOW SONAR WORKS
Echofish 300 sonar
technology is based on
sound waves. The system
uses sonar to locate and
define structure, bottom
contour and composition, as
well depth directly below the
transducer.
The transducer sends a
sound wave signal and
determines distance by
measuring the time between
the transmission of the
sound wave and when the
sound wave is reflected off
an object; it then uses the
reflected signal to interpret
location, size, and
composition of an object.
fig.2
3 DISPLAY VIEW
3
1
2
4
5
6
7
8
Water Surface Line
1
2 Battery Strength Indicator
3 Sensitivity Indicator
4 Upper Zoom Range
5 Water Depth
6 Water Temperature
7 Bottom Contour
8 Lower Zoom Range
9 Fish Icon with Depth
4 Powering ON and OFF
Press and release POWER-MENU to power the unit on.
Press and hold POWER-MENU until the unit shuts down to
power off.
When Unit powers on, the Start Up menu temporarily
appears.
From this menu, select either
Start-Up for on-the-water use,
or Simulation for learning to use
the system with simulated
sonar data.
The Start-Up menu disappears
after several seconds and the
Unit begins operation.
5 Accessing Menu Features
A simple menu system accesses unit's adjustable
features.To activate the menu system,press POWER-
MENU and a menu appears.Press POWER-MENU
repeatedly to access other menus one at a time.When a
menu is on the display,use the right and left arrow keys
to adjust the menu.Menus automatically are removed
from the screen after several seconds.
1
Menu Title
Setting
Button Changes
9
5.1 Light
(Setting Saved in Memory)
Press POWER-MENU until the LIGHT menu appears.
Select either OFF or ON to activate the backlight at the
desired level.
Note: Continuous backlight operation
significantly decreases battery life on portable
units.
5.2 Sensitivity
(Setting Saved in Memory, 1 to 5)
Press POWER-MENU until the SENSITIVITY menu
appears.
Note:In manual operation, if the depth is greater
than the depth range setting,the bottom will not
be visible on-screen. Select AUTO to return to
automatic operation.
5.3 Depth Range Menu
(Setting Saved in Memory)
Press POWER-MENU until the Depth Range menu
appears. Select AUTO to have the Unit automatically
select the Depth Range or manually select 4.5m, 9m,
18m, 36m, 55m or 73m. This locks the depth range to a
specific setting.
5.4 Zoom
(Setting Saved in Memory)
Press POWER-MENU until the ZOOM menu appears.
Select ON to magnify the area around the bottom thus
revealing fish and structure close to the bottom that may
not be visible in typical operation.
In Zoom, the Unit continually changes the upper and
lower Depth Range to keep area just above and below
the bottom on the display.
Select OFF to return to normal operation.
Upper Zoom Range
Magnified Bottom
with More Detail
Lower Zoom Range
Select a higher number to show smaller sonar returns on-
screen, or a lower number to remove clutter from the screen.
Adjusting Sensitivity also affects how sonar returns are
identified as Fish Icon Symbols - more fish will be detected at
a higher setting, fewer at a lower setting. "5" is the Factory
Setting.
Low Sensitivity
Normal Sensitivity
High Sensitivity
5.5 Depth Alarm
(Setting Saved in Memory)
Press POWER-MENU until the DEPTH ALARM menu
appears.
Select OFF for no Depth Alarm;
select a number from 1 to 30m to set the alarm depth
point and turn it on.
An audible alarm sounds when the depth is equal to
or less than the setting.
5.6 Fish Alarm
(Setting Saved in Memory, Defaults to OFF)
Press POWER-MENU until the FISH ALARM menu
appears. Select OFF for no fish alarm, or select the fish
icon to set the fish alarm and turn it on.
5.7 Fish Icon
(Setting Saved in Memory)
Fish Icon ID
Press POWER-MENU until the FISH ICON
menu appears. Select either OFF to view
"raw" sonar returns, or ON to take
advantage of Unit's ability to identify sonar
returns that are determined to be a fish.
2
Advertisement

Subscribe to Our Youtube Channel
Related Manuals for Plastimo ECHOFISH 300

Summary of Contents for Plastimo ECHOFISH 300
- Page 1 OPERATION GUIDE Button Changes Magnified Bottom 1 PRODUCT OVERVIEW with More Detail Plastimo is happy to present you the Echofish 300. With Lower Zoom Range its innovative technology, the 5.1 Light Echofish 300 is perfect for people who want to go...
- Page 2 5.8 Chart Speed NOTE: 6 HOW TO USE THE SIDE-SCAN NOTE: There may be a wrong Remove the batteries from the fish finder to prevent TRANSDUCER display on the screen if you battery leakage and corrosion. use this SIDE-SCAN 6.1 SIDE-SCAN Clean the sonar sensor and cable with fresh water and Transducer in the situation (Setting Saved in Memory, 1 to 5)
- Page 3 6 Température de l'eau profondeur maximum que vous souhaitez voir affichée. Appuyez sur AUTO pour que l'ECHOFISH 300 choisisse (Réglage mémorisé de façon automatique, de 1 à 5) 7 Nature du fond automatiquement la profondeur pour visualiser le fond ou Appuyez sur POWER-MENU jusqu'à...
-
Page 4: Spécifications
6 UTILISATION DU SONDEUR A 5.8 Rapidité d'affichage de la carte ATTENTION: NOTE: Retirez les piles de votre ECHOFISH 300 pour éviter tout MAIN L'image votre écran risque de fuite ou de corrosion. pourrait être saturée si vous Rincez la sonde et le câble à l'eau douce et séchez avant utilisez le sondeur à... -
Page 5: Display-Anzeige
Einstell-Tasten Gespreizte Boden- Darstellung mit mehr 1 PRODUKT MERKMALE Plastimo stellt hiermit den neuen Unterer Zoom-Bereich Fischfinder Echofish 300 vor. Die innovative Technik des Echofish 5.1 Beleuchtung 300 bietet Hobby-Anglern eine (Einstellungen werden gespeichert) ideale Lösung, um vom Ufer oder Einen höheren Wert wählen, um auch schwache Sonar-... - Page 6 5.8 Bildlaufgeschwindigkeit 8 Produkt Spezifikation: HINWEIS: Im Seiten-Scan Modus werden bei falscher Winkelplatzierung eventuell Display : FSTN LCD 128Bx64H viele Echopunkte über den (Einstellungen werden gespeichert, 1 bis 4) Hinterleuchtung : weiße LED gesamten Tiefenbereich [MENU/POWER] drücken, bis Menu 'CHART SPEED' erscheinen.
- Page 7 1 PRODUCT OVERZICHT Plastimo heeft het genoegen Onderwaarde diepte u de Echofish 300 te presenteren. Dankzij de innovatieve technologie, is 5.1 Belichting Kies een hoger getal om kleinere weerkaatsingen te zien op de Echofish 300 perfect het scherm of een lager getal om "vervuiling"...
- Page 8 5.8 Kaart snelheid 6 HOE GEBRUIKT U DE SIDE-SCAN 7 Product specificatie: TRANSDUCER Display : FSTN LCD 128Vx64H 6.1 SIDE-SCAN (Instellingen opgeslagen in het geheugen, 1 tot 4) Belichting: Wit led Druk op POWER-MENU en kies menu CHART SPEED. De Side-Scan transducer is geschikt om vanaf de Kies instelling 1,2,3, of 4 waarbij instelling 1 de waterkant of vanuit een boot te gebruiken als fishfinder.
-
Page 9: Cómo Funciona
El menú le permite un acceso fácil a todas las funciones 5.7 Símbolos Presa Pulsar POWER-MENU hasta llegar a la función ZOOM. de la ECHOFISH 300. Para activarlo, Pulsar la tecla Seleccionar ON para efectuar una exploración del fondo POWER-MENU. Volver a pulsar esta tecla brevemente (Ajuste configurado por defecto) y descubrir elementos que no se apreciarán con un nivel... - Page 10 5.8 Velocidad de indicación del mapa NOTA: 6 UTILISACIÓN DE LA SONDA ATENCIÓN: imagen pantalla Sacar las baterías de la ECHOFISH 300 para evitar MANUAL podría emborronarse en cualquier riesgo de escape o corrosión. caso de utilizar la sonda en 6.1 SONDA MANUAL...
- Page 11 Förstorad botten med mer 1 PRODUKT ÖVERSIKT 5.1 Ljus Nedre zoom Plastimo är glada över att kunna presentera Echofish 300. Med en innovativ (Intällningar sparas i minnet) teknologi är Echofish 300 Tryck på POWER-MENU till LIGHT (ljus) menyn syns i perfekt för dig som vill fiska...
- Page 12 5.8 Kartfart SIDE-SCAN givaren kan användas från bryggor, 7 Produkt specification: stranden eller båten. Display : FSTN LCD 128Vx64H (Inställningar sparas i minnet, 1 till 4) Bakgrundsbelysning Vit LED Tryck på POWER-MENU till CHART-SPEED (kartfart)syns i displayen. Väl en inställning mellan 1-4 för Ström 4-AAA alkaliska batterier att minska eller öka kartfarten, där 1 är sakta och 4 är...
- Page 13 Titolo del Menu Selezionare un numero maggiore per mostrare un ritorno sonar più basso sullo schermo, o un numero inferiore per ECHOFISH 300 GUIDA DI 3 VEDUTA DEL DISPLAY Regolazione rimuovere i disturbi. La regolazione della Sensibilità influenza anche il modo in cui i dati sonar vengono...
- Page 14 5.8 Velocità del Diagramma 7 Specifiche del prodotto: Questo Trasduttore a LETTURA LATERALE può essere usato da un ponte, da una barca o da riva. Display : FSTN LCD 128Vx64H (Impostazione Salvata in Memoria, da 1 a 5) Premere POWER-MENU finché non compare il menu Retroilluminazione : LED Bianco VELOCITA' DEL DIAGRAMMA.
- Page 15 KÄYTTÖOHJE Näppäimen Suurennettu pohja vaihto 1 ESITTELY Suurennos alaraja Plastimo on tyytyväinen esitellessään Echofish 300 sinulle. Sen teknologia on 5.1 Valaistus innovatiivista. Echofish 300 on sopiva kalastajille Valitse suurempi numero, näyttöön niin pienempi paluukaiku pienessä veneessä, näkyy ruudussa, tai pienempi numero poistaaksesi sotkun rannalla tai avannossa.
- Page 16 5.8 Kuvanopeus 6 SIVU-SKANNAUSANTURIN HUOM: HUOM: Poista paristot luotaimesta välttääksesi korroosiota ja KÄYTTÖ Näyttöön voi tulla virheitä vuotoja. Puhdista anturi ja kaapeli makealla vedellä ja kuivaa ne 6.1 SIVU-SKANNAUS käytät SIDE-SCAN anturia kuten kuvassa alla. Side- ennen varastointia.Älä upota ja/tai ruiskuta luotaimen Asetus tallennettuna muistiin, 1 - 4 Sivu-skannausanturia on mahdollisuus käyttää...
- Page 17 1ΓΕΝΙΚΗ ΕΙΚΟΝΑ ΠΡΟΪΟΝΤΟΣ 5.1 Φωτισμός Η Plastimo είναι στην Χαμηλότερο εύρος ευχάριστη θέση να σας παρουσιάσει το Echofish 300 . Με την καινοτόμο (Οι ρυθμίσεις αποθηκεύονται στη μνήμη) τεχνολογία που Επιλέξτε ένα μεγαλύτερο νούμερο συχνότητας για να Πατήστε POWER-MENU μέχρι να...
- Page 18 ΣΗΜΕΙΩΣΗ: 5.8 Ταχύτητα ανανέωσης χάρτη 6 Πώς χρησιμοποιείται το μάτι Μπορεί να υπάρξει μια ΣΗΜΕΙΩΣΗ: πλάγιας σάρωσης λαθεμένη απεικόνιση στην Αφαιρείτε τις μπαταρίες από το οθόνη αν χρησιμοποιείτε βυθόμετρο ώστε να αποτρέψετε τη 6.1 ΠΛΑΓΙΑ ΣΑΡΩΣΗ τον αισθητήρα / μάτι (Οι...
Need help?
Do you have a question about the ECHOFISH 300 and is the answer not in the manual?
Questions and answers