Table of Contents
Advertisement
Quick Links
Advertisement
Table of Contents

Summary of Contents for MOBICEL DCTS 900
- Page 1 DCTS-900 Executive Speakerphone USER’S MANUAL...
- Page 2 MobiCel Systems, Inc. has made every effort to ensure the technical accuracy of this manual. Features and technical data are subject to change without notice. Copyright© 1997, MobiCel Systems, Inc. All Rights Reserved.
-
Page 3: Important Safety Instructions
WARNING MobiCel Systems, Inc. doesn’t represent this unit to be waterproof. To reduce the risk of fire, electrical shock, or damage to the unit, do not expose this unit to rain or moisture. TO PREVENT FIRE OR SHOCK HAZARD, DO NOT EXPOSE THE UNIT TO RAIN OR MOISTURE. -
Page 4: Save These Instructions
voltages or other risks. Incorrect reassembly can cause electric shock when the product is subsequently used. 12. Unplug this product from the wall outlet and refer servicing to qualified service personnel under the following conditions: When the power supply cord is damaged or frayed. If liquid has been spilled into the product. - Page 5 FCC INFORMATION This telephone has been tested and found to comply with all applicable UL and FCC standards. This product’s design enables it to be connected to most telephone lines. However, each device you connect to the telephone line draws power. This power draw is known as the Ringer Equivalence Number (REN) which is identified on the bottom of the telephone.
-
Page 6: Table Of Contents
1. BECOMING FAMILIAR WITH YOUR SPEAKERPHONE 1 2. THE DISPLAY ................ 2 3. THE FEATURES..............3 4. WHAT’S INCLUDED WITH YOUR SPEAKERPHONE ..6 5. COMPONENTS OF THE DCTS-900 SYSTEM..... 7 DCTS 900 W ........... 7 IRELESS ANDSET DCTS-900 C ............ - Page 7 7. DELAYED RINGING ............23 8. CO TRUNK CONNECTION..........24 9. CO LINE GROUP NUMBER ..........25 AUTOMATIC LINE SELECTION ........26 CALL FORWARD ............. 27 AUTO MUTE ENABLE/DISABLE........28 FLASH ................29 SPEED DIAL ..............30 14.1. 1-20... 30 TORING A ELEPHONE UMBER IN...
- Page 8 8. PLACING A CALL ON HOLD ..........36 9. RETRIEVING A CALL ON HOLD ........36 MAKING AN INTERCOM CALL........37 10.1 ............37 SING THE ANDSET 10.2 ..........38 SING THE PEAKERPHONE 10.3 ... 39 SING THE IRECT TATION ELECTION UTTONS ANSWERING AN INTERCOM CALL......
- Page 9 LAST NUMBER REDIAL ..........48 SPEED DIALING............... 48 23.1 ....48 IALING A UMBER TORED IN PPER 23.2 ....48 IALING A UMBER TORED IN OWER CALL PRIVACY..............49 TIMING A CALL............... 50 PULSE-TO-TONE SWITCHING........50 CALLER ID OPERATION 1. CALLER ID BUTTONS............51 2.
-
Page 10: Becoming Familiar With Your Speakerphone
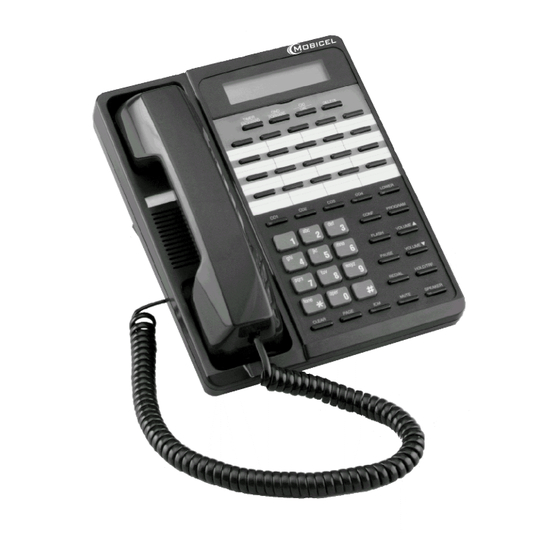
INTRODUCTION 1. Becoming Familiar With Your Speakerphone The DCTS-900 four-line telephone system provides you with the most advanced technology and features such as wireless extensions, paging, and multi-line access. Your Executive Speakerphone has a display and various feature buttons as shown below. -
Page 11: The Display
Feature Buttons: LOWER – Used in conjunction with speed dialing and the dual-function display buttons. CONF – You can establish a 3-way conference. PROGRAM – Used to define various feature settings. FLASH – Programmable from 0.1 second to 1.2 seconds. VOLUME s - Increases ringing, receive, and speaker volumes. -
Page 12: The Features
3. The Features Your DCTS-900 Executive Speakerphone provides many features such as: Handsfree Speakerphone – This feature enables you to conduct telephone conversations hands-free. Supertwist 2 x 16 Dot Matrix Liquid Crystal Display – The display shows useful information such as the current time, day, and date, as well as a number dialed and the call duration. - Page 13 Call Privacy with Release – When you are using an outside line, another person cannot join your conversation on that line unless you release Call Privacy. Conference – You can establish a 3-way conversation with any two outside parties or with one outside party and one other extension. Call Forward to Wireless Extensions or Other Console –...
- Page 14 Battery Low Indication – The display will show a battery low indication warning you that the batteries need to be changed. Hearing Aid Compatible – This telephone will support hearing aids. Optional Caller ID – With the optional Caller ID Server, the caller’s name and number and the time and date of the call will be displayed on all DCTS- 900 telephones.
-
Page 15: What's Included With Your Speakerphone
4. What’s Included With Your Speakerphone The following items are provided along with your telephone: Handset 10 Foot Handset Cord AC Power Adapter Wall Mounting Short Line Cord Screws & Anchors (for wall mounting) Three (3) AAA Batteries Two (2) Long Line Cords User’s Manual (for desk mounting) Elevator Stand... -
Page 16: Components Of The Dcts-900 System
RF links (paths) for intercom and outside calling by any wireless handset. 5.3 Caller ID Server The Caller ID Server provides the DCTS 900 Wireless Handsets and Executive Speakerphones with Caller ID capability. The server enables the telephones to identify both the name and number (if provided by the telephone company) of a caller. -
Page 17: Installation
INSTALLATION 1. Site Planning Select a location where the speakerphone will not interfere with daily activities. You can choose to connect the speakerphone to as many as four telephone lines. The speakerphone can be connected to two 2-line (RJ14C) modular telephone jacks to accommodate all four lines. If you install more than one speakerphone, ensure that they are all connected to the same Line 1 wiring. - Page 18 Remove the battery compartment cover by pushing in the tab and lifting. Locate the batteries packed with the telephone and install the batteries. Ensure that correct polarity is maintained as indicated by the “+” and “-” markings inside the compartment and on the batteries. Note: Use three (3) AAA batteries only.
- Page 19 Plug one of the long line cords into the L1&2 jack at the bottom of the telephone. Plug the other long line cord into the L3&4 jack. Route the two cords through the channel on the bottom of the telephone. Plug the AC adapter power cord into the jack at the bottom of the telephone and route through the cord channel as shown.
-
Page 20: Installing The Elevator Stand
If you want the telephone to have a high profile angle, refer to section 3.2 to install the elevator stand prior to installing the desk/wall stand. Reinstall the desk/wall stand in the desk mode by inserting the hooks on the stand into the slots on the bottom of the telephone (rubber feet on the stand are positioned at the top of the telephone). -
Page 21: Wall Mounting
Position the desk/wall stand in the wall mode (Refer to section 3.3). 3.3 Wall Mounting You will want to ensure the following: The location where the telephone will be mounted should be away from electrical cables, pipes, or other items which may be punctured when the screws are inserted into the wall. - Page 22 Turn the speakerphone over to view the bottom. Remove the screw from the battery compartment. Remove the battery compartment cover by pushing in the tab and lifting. Locate the three (3) AAA batteries packed with the telephone and install the batteries. Ensure that correct polarity is maintained as indicated by the “+”...
- Page 23 Remove the desk/wall stand by pressing and lifting the two tabs at the top of the stand. Rotate the stand and install it in the wall mounting position.
- Page 24 Plug one of the line cords into the L1&L2 jack at the bottom of the telephone. Plug the other line cord into the L3&L4 jack. Route the cords through the channel on the bottom of the telephone. Plug the AC adapter power cord into the bottom of the telephone. Note: Use only the AC power adapter provided with the telephone.
- Page 25 Position the telephone on the two screws in the wall and slide the telephone downward to secure it to the wall. 10. Rotate the handset tab by lifting up and turning to position it in the wall mount mode. 11. Insert one end of the handset cord into the handset and the other end into the left side of the telephone.
- Page 26 15. Refer to the Programming section to set the extension number. Note: If the batteries are not installed or require changing the display will show a low battery indication as follows:...
-
Page 27: Programming
PROGRAMMING 1. General Programming Guidelines Press to enter the programming mode. The lamp will light steady. The display will show: buttons are used for scrolling through the programming selections. button acts as the “select” or “enter” button. Press to return to the previous main menu. Pressing a SPEED DIAL button allows you to program that particular button. -
Page 28: Extension Number
2. Extension Number Default Setting: 00 Extension Number Range: 11-40 EACH SPEAKERPHONE MUST HAVE A UNIQUE EXTENSION NUMBER PROGRAMMED. Before using your telephone, you must assign a unique extension number. You will hear a continuous alerting tone until the telephone is assigned its unique ID. -
Page 29: Date And Time
Press . The display shows: Press to select the dialing mode. Press to save. 4. Date and Time Default Setting: Jan 01 SU 1:00A You can program the time in either 12-hour or 24-hour (military) format. Press Press until the display shows: Press to program the month. -
Page 30: Co/Pbx Line Ringing
Press to select the appropriate setting and proceed to programming the hour. Press to view the choices for the hour. Press to select the appropriate hour and proceed to programming the minutes. Press to view the choices for the minutes. Press to select the appropriate minutes. -
Page 31: Co Line Ring Tone
Press again. The display shows: Press to choose the setting. Press To continue programming the remaining lines press and then perform steps 4-6. 6. CO Line Ring Tone Default Setting: Range: You can choose one of four different ringing tones for your telephone. The selection chosen will apply to all four CO lines on your telephone. -
Page 32: Delayed Ringing
7. Delayed Ringing Default Setting: Disabled Range: Disable, 2 seconds to 30 seconds (2 second increments) You may choose to have the CO line ringing delayed for overflow and caller ID applications. Press Press until the display shows: Press . The display shows: Press to select the delay time between 2 seconds and 30 seconds (in 2 second increments). -
Page 33: Co Trunk Connection
8. CO Trunk Connection Default Setting: All Lines Connected Your telephone can detect another telephone, facsimile, or modem that is in- use on one or more of the CO lines. This privacy feature will prevent accidental intrusion by the DCTS-900 speakerphone user. The “Line-In-Use” circuit will light the CO line button if the line is not physically connected. -
Page 34: Co Line Group Number
9. CO Line Group Number Default Setting: 2 for CO 2, 3 for CO 3, 4 for CO 4 Range: PRV, 2,3,4,….,14,15 PRV is “Private Line” which is not used by any other telephone user. This feature gives you the ability to group lines for a specific use. For instance, even though Line 1 must be assigned at all extensions, you may choose to place Line 2 in a group by itself, accessed only by you and your associate. -
Page 35: Automatic Line Selection
10. Automatic Line Selection Default Setting: CO 1 The line that you assign for automatic line selection(line preference) will be automatically accessed when you pick up the handset or press Press Press until the display shows: Press . The display shows: Press to choose the line (or intercom) you want to program for this feature. -
Page 36: Call Forward
11. Call Forward Default Setting: Range: 11-70 When this feature is enabled (on) any intercom or transferred call you receive will be forwarded to the wired or wireless extension that you have identified. When the feature is enabled, upon receiving a call you will hear a triple tone and the display will briefly show Call forward on the display prior to the call being forwarded. -
Page 37: Auto Mute Enable/Disable
12. Auto Mute Enable/Disable Default Setting: Enabled This feature prevents unauthorized eavesdropping when someone makes a single page to you. Note: For intercom page with handsfree reply at your extension, Auto Mute must be set to Disable. Press Press until the display shows: Press . -
Page 38: Flash
13. Flash Default Setting: 0.7 seconds Range: 0.1 second to 1.2 seconds This feature is typically used to access custom calling services. You may also use Flash to end a call without hanging up the handset or pressing Press Press until the display shows: Press . -
Page 39: Speed Dial
14. Speed Dial You can store forty (40) frequently dialed numbers in speed dial memory. You can store numbers in a speed dial bin by pressing the appropriate speed dial button during programming. The button is used to access the lower level speed dial bins (21-40) in the memory stack. -
Page 40: Storing A Telephone Number In Primary Bins 1-20
Press to save . Repeat step 2 and press another speed dial button to continue programming speed dial numbers. 14.2 Storing a Telephone Number in Bins 21-40 Press Press . The button lamp will light steady. Press SPEED DIAL Button 1 (while is selected you will actually be storing in bin 21 instead of bin 1). -
Page 41: Storing A Caller Id Number
14.4 Storing a Caller ID Number Display the number in the caller ID list.(Refer to section 3 in Caller ID Operation). Press Press a SPEED DIAL button. Press Press . Ensure that the lamp is off. Press to save. 14.5 Erasing the Contents of a Speed Dial Bin Press Press the SPEED DIAL button (press to access bins 21-40). -
Page 42: Basic Operation
BASIC OPERATION 1. Lamp (LED) Operation Line Buttons Off – Lamp is off when the line is not being used. On steady – Lamp is on if the line is being used by another extension. Wink – Lamp will “wink” to indicate the line you are talking on. Slow flash –... -
Page 43: Line-In-Use Indication
2. Line-In-Use Indication If a single line telephone or other equipment such as a facsimile machine is using a line, that line lamp will light on your telephone to indicate that the line is busy. You may intrude on that busy line to verify that the line is not out of order. -
Page 44: Making An Outside Call
6. Making an Outside Call Each DCTS-900 speakerphone may have four (4) outside lines programmed for direct access and dialing. 6.1 Using the Handset Lift the handset. (If you have Automatic Line Selection enabled, the telephone will automatically select a line – proceed to Step 3.) Press a line button. -
Page 45: Answering An Outside Call
7. Answering an Outside Call 7.1 Using the Handset Lift the handset. The ringing outside line is automatically selected. 7.2 Using the Speakerphone Press the flashing line button, Press Note: When several lines are ringing, you can directly answer any line by pressing the associated line button. -
Page 46: Making An Intercom Call
10. Making an Intercom Call 10.1 Using the Handset Note: Skip Step 1 if you programmed the intercom for Automatic Line Selection. Press . The display will show: Lift the handset or press Dial the desired intercom number (from 11 to 70). For instance, if you dial intercom number 15 the display will show: When the person you called answers, your display will show: Hang up the handset to end the call. -
Page 47: Using The Speakerphone
10.2 Using the Speakerphone Note: Skip Step 1 below if you programmed the intercom for Automatic Line Selection. Press . The display will show: Press Dial the desired intercom number (from 11 to 70). For instance, if you dial intercom number 15 the display will show: When the person you called answers, your display will show: Press to hang up . -
Page 48: Using The Direct Station Selection Buttons
10.3 Using the Direct Station Selection Buttons The speed dial buttons are also preprogrammed for use as Direct Station Selection (DSS) buttons. You can access extensions 11 through 30 by simply pressing the appropriate button. Use to call extensions 31 through Note: Skip Step 1 below if you programmed the intercom for Automatic Line Selection. -
Page 49: Answering An Intercom Call
11. Answering an Intercom Call 11.1 Using the Handset For example, if Station 12 is calling you, your handset will ring, your button will flash, and the display will show: Lift the handset. Hang up the handset to end the call. The display will return to the idle mode. -
Page 50: Transferring A Call
13. Transferring a Call While on a line; Press . The display shows: Dial the extension number where you will transfer the call (or press a DSS button). For instance, if you want to transfer a call to extension 15 the display will show: Note 1: You will hear a single tone if the call has transferred. -
Page 51: Muting A Call
15. Muting a Call The Mute feature turns off the telephone handset and speakerphone microphone so the distant party cannot hear you. You can also use Mute to block out background noise momentarily. While on a line or using the intercom; Press . -
Page 52: One (1) Outside Line And Two (2) Extensions
16.2 One (1) Outside Line and Two (2) Extensions While on a call on the first line; Press . The first line is placed on Hold and the display shows: Press Dial the intercom number for the other internal party. For example, if you dial extension 20 the display will show the following when extension 20 answers: Press... -
Page 53: Paging
17. Paging 17.1 Paging Another Telephone Lift the handset. Press . The display shows: Dial the desired intercom number. For instance, if you dial extension 15 the display shows: Make your page announcement. Note: Only DCTS-900 speakerphones can receive voice paging. 17.2 Answering a Page You will hear a tone prior to receiving a voice page. -
Page 54: Changing Signaling Modes
17.3 Changing Signaling Modes If you have made a voice page to an extension and do not receive a reply, press and the other extension will begin tone signaling to alert users in the area. To Switch From Page Mode to Tone Ringing: After establishing a voice page to another extension, press To Switch From Tone Ringing to Page Mode: After establishing an intercom call, press... -
Page 55: Receiving A Voice Page To All Extensions
17.5 Receiving a Voice Page to All Extensions For example, if extension 12 sends a Voice Page to all telephones in the system, the extension telephones will show: 17.6 Meet Me Answer to All Page Press to answer the page. For instance, if extension 12 performs an All Page, the display shows: 18. -
Page 56: Using The Flash Button
19. Using the Flash Button You may use Flash instead of pressing the hookswitch to access custom calling features provided by your telephone service such as call waiting, 3- way calling, etc. While on a line; Press to obtain new dial tone. Dial the new telephone number or service code. -
Page 57: Last Number Redial
22. Last Number Redial To dial the last number dialed from the telephone: Lift the handset or press Press a line button. Press and the number is dialed automatically. Note: If you press first, you will activate Auto Busy Redial. 23. -
Page 58: Call Privacy
24. Call Privacy Another extension cannot access a line that you are using unless you override Privacy for that call. Overriding the Call Privacy feature allows someone else to join your conversation on the same line. To disable: Press the line button that you are currently accessing until you hear a single tone. -
Page 59: Timing A Call
25. Timing a Call Default Setting: 00:00 Range: 00:00 to 59:59 A call duration timer is provided which will clock the duration of a call. Approximately 10 seconds after you dial the last digit of the telephone number, the timer will automatically begin to time your call. You can also start or stop the timer manually. -
Page 60: Caller Id Operation
CALLER ID OPERATION Your system must be equipped with a 4-Line Caller ID Server to interface with the caller ID service provided by your telephone company. 1. Caller ID Buttons There are four (4) buttons used to access five (5) Caller ID functions: BACKWARD, FORWARD, CID, DIAL, and DELETE. -
Page 61: To Erase The Programmed Area Code
2.2 To Erase the Programmed Area Code Press Press until the display shows: Press Press . The display will show: Press again. The area code is deleted. -
Page 62: Receiving A Call
3. Receiving a Call You will need to subscribe to the Caller ID service from your telephone company to receive caller ID information. When a call is received, the display will show the name and number of the caller, and the date and time the call is received. Some telephone companies send both the name and number of the caller. -
Page 63: Receiving Multiple Calls
3.2 Receiving Multiple Calls If two or more lines are ringing, the telephone will show the caller ID information for the line that began ringing first. Press to view the caller ID information for the next ringing line. You can continue to press the button to view caller ID information for subsequent ringing lines. -
Page 64: Receiving A Blocked Call
3.4 Receiving a Blocked Call Sometimes a caller will prevent the number from being displayed on your telephone: 3.5 Receiving a Call from Outside the Calling Area If a caller is outside of your Caller ID area:... -
Page 65: Reviewing Calls In The Caller List
4. Reviewing Calls in the Caller List Information for a maximum of forty (40) calls will be maintained. If more than 40 calls are received the newest call received will replace the oldest call in the list. Press Press . The display will show the caller information for the most recent call received. -
Page 66: Dialing A Telephone Number
Note 1: When the caller list is empty the display will show “NO CALL.” When you reach the end of the list the display will show “End.” Note 2: If there is an error in sending the data to your telephone the display will show: 5. -
Page 67: Product Specifications
PRODUCT SPECIFICATIONS Physical: Modular, Desk/Wall Mounted, High/Low Angle Stand Power: Class 2 Transformer Input: 120VAC, 60 Hz, 7W Output: 12VDC, 300Ma Electrical: 4 CO/PBX Lines, 2 Wire, Loop Start, 600 Ohms, 24/48VDC Ringer Equivalence: 0.3B Mechanical: 2 Each RJ-14C Jacks Power Jack 12VDC Battery: Memory Backup, 3 AAA Type LCD:... -
Page 68: Wall Mounting Template
WALL MOUNTING TEMPLATE 3-1/4”... - Page 69 PET9400A...
Need help?
Do you have a question about the DCTS 900 and is the answer not in the manual?
Questions and answers