Table of Contents
Advertisement
Advertisement
Table of Contents

Summary of Contents for JS-AZ PRIS SCALE
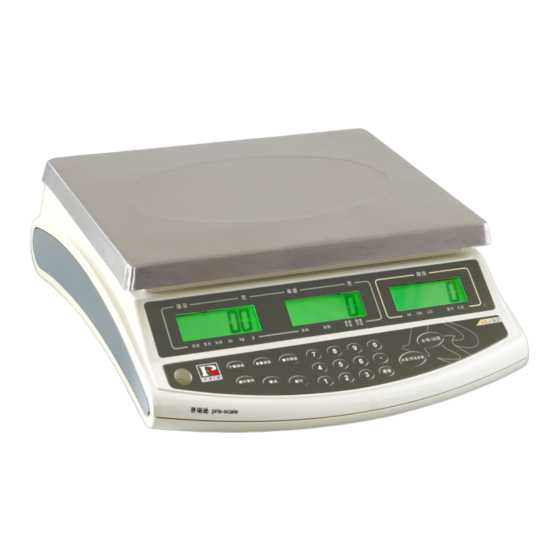
- Page 1 HIGH PRECISION ELECTRONIC SCALE Operation Manual JS-AZ...
-
Page 2: Table Of Contents
Table of Contents Precautions before Using the Scale --------------------------------1 Explanation of Display Symbols --------------------------------------3 III. Keypad Functions ----------------------------------------------------------5 IV. Position of the Connectors ---------------------------------------------6 V. Operations ---------------------------------------------------------------------8 i. Switch off------------------------------------------------------------------------8 ii. Change platform--------------------------------------------------------------8 iii. Zero the scale-------------------------------------------------------------10 Sampling before counting----------------------------------------------10 v. -
Page 3: Precautions Before Using The Scale
I. Precautions before Using the Scale Environment The scale should always be used in an environment, which is free from excessive air currents, corrosives, vibration, and temperature or humidity extremes. These factors will affect displayed weight reading. DO NOT install the scale: Next to open windows or doors causing drafts or rapid temperature changes. -
Page 4: Protection In The Transportation
Protection in the transportation When the initial use, please refer to the following drawing to take off the protection screw. When the transportation will be made, please install the protection screw on the machine to avoid any damage sensitive components. Leveling the Scale The scale is equipped with a level indicator on the left bottom side of the front panel and four adjustable leveling feet. -
Page 5: Explanation Of Display Symbols
II. Explanation of Display Symbols WEIGHT UNIT WEIGHT COUNT 000000 000000 000000 Battery Ib kg Local Remote HI OK Stable Zero NET lack lack Display Windows Weight Display – Total 6 digits for weight accumulated or being measured on the pan. Unit Weight Display –... - Page 6 Indicated Symbols Symbols Specification Scale is in TARE mode. ZERO Scale is in ZERO mode. Scale is in ACCUMULATION mode. Stable The display reading is in STABLE condition. Lack of Sample Weight S.W. If the total sample weight on the pan is less than 10 display lack divisions, a triangular indicator will appear to remind the user to add more samples until the indicator disappears.
-
Page 7: Keypad Functions
III. Keypad Functions Keys Specification Numeric keys Decimal point key Use this key to set the backlight on or off. Use this key to clear out the displayed numeric CLEAR/EXIT readings. Use this key to exit from setting mode. If there is a minor weight displayed without ZERO anything on the pan, Press the zero key to clear the display. -
Page 8: Position Of The Connectors
IV. Description of the Connectors Output ports The scale is designed with two output ports: 1. Bidirectional RS-232, which can be connected to PC, printer, and a control box to output 3 section control signal 2. 9-pins connector for a remote platform. Position of the connectors Both of the connectors are located at the left side of the bottom housing. - Page 9 Remote platform connector + Excitation Shield – Excitation + Signal – Signal RS232 Connector (3-color alarm lamp) Yellow Green...
-
Page 10: Operations
V. Operations (I) Switch on & off Push the ON/OFF switch to “I “position to turn on the scale & to “O” position to turn off the scale. (II) Change Platform 1. When local platform is used, you can press LOCAL/REMOTE key to change to remote platform. - Page 11 2. If the remote platform is not connected to the scale, when press LOCAL/REMOTE key, the display will show “E2”. WEIGHT UNIT WEIGHT COUNT remote Battery Ib kg Local Remote HI OK Stable Zero NET lack lack Several seconds later, the display will show: WEIGHT UNIT WEIGHT COUNT...
-
Page 12: (Iii) Zero The Scale
(III) Zero the scale Press ZERO key to return the display to zero in case there is any zero drifting while unloaded. (IV) Sampling before counting Unknown unit weight 1. Place a few pieces of item to be counted on the pan. WEIGHT UNIT WEIGHT COUNT... - Page 13 4. The sampling operation is completed while stable display appears as below: WEIGHT UNIT WEIGHT COUNT 2000.0 Battery Ib kg Local Remote HI OK Stable Zero NET lack lack Sample Weight Unit Weight Sample size The larger sample size, the more accurate unit weight. Press SMPL key to recompute unit weight during counting process.
-
Page 14: Preset Unit Weight In Numeric Keys
(V) Preset unit weight in numeric keys How to store unit weight in memory cells 1. To obtain unit weight by inputting the known value (ex.35g) or by sampling operation mentioned before. WEIGHT UNIT WEIGHT COUNT Battery Ib kg Local Remote HI OK Stable Zero NET lack... -
Page 15: (Vi) Subtract Container's Weight
(VI) Subtract container’s weight Container’s weight unknown 1. Place a container on the pan. WEIGHT UNIT WEIGHT COUNT 960.0 Battery Ib kg Local Remote HI OK Stable Zero NET lack lack Container’s weight 2. Press TARE/P.TARE/MOVE key WEIGHT UNIT WEIGHT COUNT ------ tare... - Page 16 Give a long press of TARE/ P.TARE/MOVE key WEIGHT UNIT WEIGHT COUNT pretA ------ Battery Ib kg Local Remote HI OK Stable Zero NET lack lack Input container’s weight known WEIGHT UNIT WEIGHT COUNT 960.0 preta ------ Battery Ib kg Local Remote HI OK Stable Zero NET...
-
Page 17: (Vii) Weight/Quantity Accumulation
(VII) Weight/Quantity accumulation 1. Place item to be weighed/counted on the pan. WEIGHT UNIT WEIGHT COUNT 1000.0 Battery Ib kg Local Remote HI OK Stable Zero NET lack lack Weight on the pan Unit weight Count 2. Press ADD key WEIGHT UNIT WEIGHT COUNT... -
Page 18: (Viii) Preset Counting Check Range
5. Press TOTAL/PRINT/ENTER key to enter into accumulation status mode. At this moment, total accumulated weight is shown In WEIGHT window, total accumulation times is shown in UNIT WEIGHT window and TOTAL PIECES window displays accumulated count. Press TOTAL/PRINT/ENTER key again to revert to counting mode. - Page 19 2. Key in the desired high limit value. (Use CLEAR/EXIT key to erase the value keyed in) WEIGHT UNIT WEIGHT COUNT --Hi-- 2000 Battery Ib kg Local Remote HI OK Stable Zero NET lack lack High limit High limit value keyed in Window for displaying Low limit value to be input 3.
- Page 20 Procedures ALARM 1. Press key while the scale is either loaded or unloaded. WEIGHT UNIT WEIGHT COUNT --Hi-- Battery Ib kg Local Remote HI OK Stable Zero NET lack lack High limit Window for displaying high Window for displaying limit value to be input low limit value to be input 2.
- Page 21 WEIGHT UNIT WEIGHT COUNT Battery Ib kg Local Remote HI OK Stable Zero NET lack lack Clear high / low preset value Follow the above preset procedures and key in “0” or press CLEAR/EXIT key directly for high and low limit value. Backlight color indication in check-weight/count.
-
Page 22: User Programming Functions
VI. User Programming Functions (I) Auto. shut off time span . . . . 1. Turn on the scale & press key 4 times one after another during counting down (self-checking) to zero to enter into USER PROGRAMMING FUNCTION MODE. The displays will indicate as below eventually. -
Page 23: Backlight Type
2. Press TARE/P.TARE/MOVE key to revolve the system-preset units of Measure. (o – kg or g, 1 – lb) (Default setting: 0) 3. Press CLEAR/EXIT key to determine and return to normal counting mode press TOTAL/PRINT/ENTER determination and move to next. (III) Backlight type 1. -
Page 24: (Iv) Unit Weight Recomputing
Manual backlight Press key to switch on and off backlight. The backlight can’t be closed right after switched on. It can be done only when the Unit Weight has been confirmed and the value in display window stops flickering. ★ Scale will keep the backlight type selected in memory for next use. -
Page 25: Transmit Mode Setting
When adding objects to the pan, be sure that the quantity is LESS THAN those already on the pan. The alarm will sound a beep when the unit weight is averaged again. ★ Recomputing function effective only after sampling operation is done. -
Page 26: (Vi) Baud Rate Setting
(VI) Baud Rate setting 1. Keep pressing TOTAL/PRINT/ENTER USER PROGRAMMING FUNCTION MODE and release until the following displays appear. WEIGHT UNIT WEIGHT COUNT B.rate 82483 Battery Ib kg Local Remote HI OK Stable Zero NET lack lack 2. Press TARE/P.TARE/MOVE key to revolve the system-preset baud rate. -
Page 27: Check Alarm Type
2. Press TARE/P.TARE/MOVE key to revolve the system-preset label format types. (Form0~9) (Default setting: 0) Note: When a label printer is used, the file name of the label format must be FORM (0~9) (such as FORM0, FORM1, FORM2, and etc.) 3. - Page 28 Ex. 1 Counting check alarms (Quantity in COUNT window blinks) WEIGHT UNIT WEIGHT COUNT 2000.0 Battery Ib kg Local Remote HI OK Stable Zero NET lack lack EX. 2 Weight check alarms (Weight in Weight window blinks) WEIGHT UNIT WEIGHT COUNT 2000.0 Battery...
-
Page 29: Zero Tracking Range
(IX) Zero tracking range 1. Keep pressing TOTAL/PRINT/ENTER PROGRAMMING FUNCTION MODE and release until the following displays appear. WEIGHT UNIT WEIGHT COUNT traC 82483 Battery Ib kg Local Remote HI OK Stable Zero NET lack lack Zero tracking range Zero tracking Internal count ( 0 ~ 4 ) 2. -
Page 30: Stable Class Range
2. Press TARE/P.TARE/MOVE key to revolve the system-preset zero display range (0, 1, 2, 3, 4). (Default setting: 3) The larger number selected, the wider range. 3. Press CLEAR/EXIT key to determine and return to normal counting mode press TOTAL/PRINT/ENTER determination and move to next. -
Page 31: Zero Return Range
(XII) Zero return range 1. Keep pressing TOTAL/PRINT/ENTER USER PROGRAMMING FUNCTION MODE and release until the following displays appear. WEIGHT UNIT WEIGHT COUNT t.rate 82483 Battery Ib kg Local Remote HI OK Stable Zero NET lack lack Zero return range Zero return Internal count (0 ~ 5) -
Page 32: Calibration
VII. Calibration (can only be done in kg/Ib) 1. Turn on the scale and be sure it is zeroed. 2. Keep pressing ZERO key until the following displays appear. (Take 6kg scale for instance) WEIGHT UNIT WEIGHT COUNT 6000.0 Battery Ib kg Local Remote HI OK... -
Page 33: Power Supply & Battery Operation
VIII. Power Supply & Battery Operation POWER SUPPLY ● AC 220V ● DC 12V/800 mA BATTERY OPERATION The scale can be operated from the battery if desired. The battery life is approximately 80 hours. When the battery needs charging an indicator “Battery Low” on the COUNT display will be on. -
Page 34: Rs-232 Output
IX. RS-232 Output The scale can be ordered with as optional RS-232 output. 1. Model EIA-RS 232C’s UART signal 2. Format: Baud rate: 1200~9600 BPS Data bits: BITS Stop bit: Code format: Code ASCll Connector: 9 Pin Socket Pin2 Input Pin3 Output Pin5... - Page 35 TOTAL 05000.0 g 000000 Net=Net Weight Pcs=Quantity U/W=Unit Weight 4. Variables (The prompt character) used in scale also in label printer. Variable Name Specifications Size Accumulated times 2 byte Net weight 7 byte Net weight(no dot) 6 byte Tare weight 7 byte Tare weight (no dot) 6 byte...
-
Page 36: Error Codes
X. Error Codes During the initial power-on testing it is possible the scale may show error message. The meaning of the error messages is described below. Error Possible causes Remedy codes EPROM data lose. Recalibrate the scale. Remote platform Connect the remote connected to the scale when platform properly to press LOCAL/REMOTE key to... -
Page 37: Technical Date
XI. Technical Data Capacity 3000g 6000g 15000g 30000g Readability 0.1g 0.2g 0.5g Maximum Displayed 1:30000 1:30000 1:30000 1:30000 Resolution Weighing Units g/kg, Ib ● Bidirectional RS-232, which can be connected to PC, printer, and a Output Port control box to output 3 section control signal ●...
Need help?
Do you have a question about the PRIS SCALE and is the answer not in the manual?
Questions and answers