
Summary of Contents for Precidia ipocket232
-
Page 1: User Guide
User Guide Software Release: 4.03.00 Document No.: 23-CML000293 Revision Date: 08 Sept 06 Document Revision: 1.3 www.precidia.com... - Page 2 The content of this document is furnished for informational use only, is subject to change without notice, and should not be construed as a commitment by Precidia Technologies Inc. (Precidia). Precidia assumes no responsibility or liability for any errors or inaccuracies that may appear in this document.
-
Page 3: Table Of Contents
1.6 Configuration Requirements ..............6 ..................6 Ethernet Settings ................... 6 Serial Port Settings 2 Setting up the iPocket232 ..............9 2.1 Connecting the Hardware................. 9 ..................9 After Configuration 2.2 Mounting the iPocket232 ................10 2.3 Setting Up the Terminal................11 2.4 Understanding the Configuration Screen ...........12... - Page 4 Table of Contents iPocket232 User Guide 4.12 Maximum Inter-Character Delay.............. 34 4.13 Preferred Packet Size................35 4.14 Initial String (Transparent Protocol Only)..........35 5 Configuring the Security Settings ............ 37 5.1 Console Password ................. 38 ..............38 Setting the Console Password ..............
- Page 5 User Guide Table of Contents 7 Accessing System Information ............57 7.1 System Status..................57 ...............57 Accessing the System Status Page ............58 Understanding the System Status Page 7.2 System Log ..................60 ................60 Accessing the System Log ..............61 Understanding the System Log 7.3 Static Web Page ..................65...
- Page 6 Table of Contents iPocket232 User Guide Precidia Technologies Inc. 23-CML000293...
-
Page 7: Before You Start
1 Before You Start Familiarize yourself with the features and installation requirements of the unit. 2 Setting up the iPocket232 Set up the hardware and configure the unit via terminal software. 3 Configuring the Ethernet Settings Input the IP address, subnet mask, and gateway address for the unit. -
Page 8: Functionality And Features
Ethernet port to the remote server, according to the parameters set in the Ethernet Settings. The process is reversed when information is received from the remote server. The figure below illustrates an example configuration of the iPocket232 in a network. iPocket232 — Network Configuration... -
Page 9: Ipocket232 Layout
- Connection recovery, to ensure the session remains active - Modem Connection Control that allows the iPocket232 to act as a Hayes- compatible modem to your serial device •... -
Page 10: Hardware Interfaces
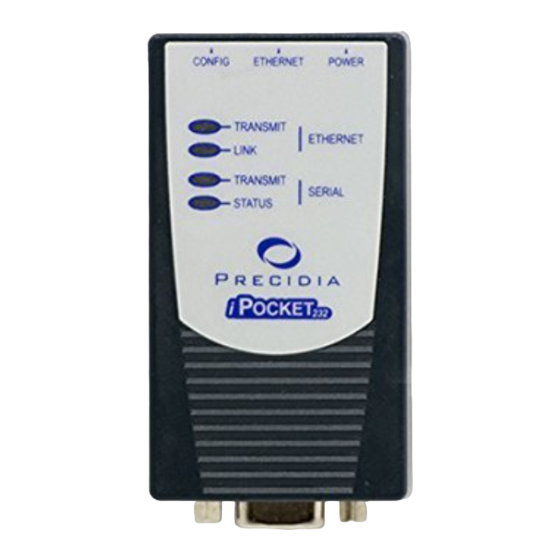
See Appendix B, Troubleshooting and Support, for descriptions of how indica- tor lamps can be used for troubleshooting. Hardware Interfaces The iPocket232 has 4 interfaces, each described in Table 1.2. The figure below shows the top view of the iPocket. Top View of iPocket232 Precidia Technologies Inc. -
Page 11: Hardware Requirements
(1) PC with terminal software, or a dumb terminal for configuration • one (1) Ethernet cable for your network connection. • If you are connecting the iPocket232 to a DTE (Data Terminal Equipment) device, or as a modem replacement: - one (1) RS-232 serial cable for configuration and operation 23-CML000293... -
Page 12: Software Requirements
RS-232-E serial ports. Reconfiguration After your iPocket232 is operational, you will require a standard RS-232 serial cable and a PC or dumb terminal to locally reconfigure the unit. You can also reconfigure the iPocket232 remotely using telnet, if you have set the Remote Password. - Page 13 User Guide 1 Before You Start • Remote Port and Remote IP: port number and IP address of remote host (as required) • Fallback Port and Fallback IP: backup remote host address (optional) Security Settings • Remote Password: must be configured to enable remote access and configuration •...
- Page 14 1 Before You Start iPocket232 User Guide Precidia Technologies Inc. 23-CML000293...
-
Page 15: Setting Up The Ipocket232
After Configuration 1 Disconnect the serial cable from the COM port of your PC. 2 Connect your serial device to the serial port of the iPocket232 using the appropriate cable. (See Section 1.4, Hardware Requirements‚ on page 5.) 23-CML000293... -
Page 16: Mounting The Ipocket232
STATUS 5 If you know the IP address of the iPocket232, ping the unit to ensure you have a valid network connection. (See Check IP Address (Ping) on page B-3.) 2.2 Mounting the iPocket232... -
Page 17: Setting Up The Terminal
User Guide 2 Setting up the iPocket232 2.3 Setting Up the Terminal Once the iPocket232 is connected to your PC, you can access the Configuration screen using terminal software. You may use any terminal emulation software as HyperTerminal, which comes stan- dard with Windows operating systems, or Procomm Plus (Symantec). -
Page 18: Understanding The Configuration Screen
2 Setting up the iPocket232 iPocket232 User Guide 4 Using a ballpoint pen or similar item, press and hold the recessed CONFIGURE button at the rear of the unit for several seconds, until the initial Configuration screen appears (as shown below). -
Page 19: Timeout During Configuration
User Guide 2 Setting up the iPocket232 Table 2.1: Device Settings Menu Options Menu Menu Item Description Ethernet Configure the local network information before the device is placed on a network so it does not cause a problem with the existing LAN, or configure auto- matically with a DHCP server. -
Page 20: Resetting To Factory (Default) Configuration
2 Setting up the iPocket232 iPocket232 User Guide 2.6 Resetting to Factory (Default) Configuration You may need to reset to “factory” settings if you have configured and subsequently lost a Console Password, or if you wish to completely reconfigure the unit. The proce- dure below will delete your previous configuration and revert all settings to factory default. -
Page 21: Configuring The Ethernet Settings
The Ethernet Settings sub-menu allows you to specify a unique IP address for your iPocket232 to enable communication over an IP network and with the remote host(s). If you are using a DHCP server, leave all Ethernet Settings at zero (0.0.0.0). The settings will always appear as zeros in the menu regardless of the values assigned by the DHCP server. -
Page 22: Ip Address
IP address and subnet mask set at 0.0.0.0, which automatically enables DHCP. The DHCP server must be on the same physical subnet as the iPocket232. To enable DHCP configuration: 1 Choose from the Device Settings menu. (If the IP Address and Ethernet Settings Subnet Mask are both 0.0.0.0, then DHCP is already enabled.) -
Page 23: Subnet Mask (Static - No Dhcp)
3 Configuring the Ethernet Settings 3.1.2 Static - (No DHCP) IP Address Settings If you decide not to allow DHCP to automatically detect and assign your iPocket232’s IP Address, you may enter the IP Address manually. To enter or change the... -
Page 24: Additional Gateway
Protocol) manager on a computer on another network. You can also telnet to the iPocket232, or ping to check its status, from a computer on another network. In this way, if your primary network goes down, you can still access the iPocket232 and remotely reconfigure it to another network. -
Page 25: Gateway
User Guide 3 Configuring the Ethernet Settings Gateway The Gateway specified under Additional Gateway defines the address of the second router (gateway). Packets with destination addresses matching the Network Address and Subnet Mask configured above are sent to the additional gateway. - Page 26 3 Configuring the Ethernet Settings iPocket232 User Guide Precidia Technologies Inc. 23-CML000293...
-
Page 27: Configuring The Serial Port Settings
Once you choose a protocol, different options appear in the sub-menu. Set the option first. Protocol ,-----------------------------------------------------------------------------. | Precidia iPocket232 Configuration v4.03.00 | |-----------------------------------------------------------------------------| Device Settings: Serial Port Settings: | 1) Ethernet: 0.0.0.0 | A) Protocol:... -
Page 28: Protocol
DSR signal, and flow control. Once the serial port is set, the iPocket232 forwards the data to the serial device unchanged. If any changes to the Com Port or modem line occur, the iPocket232 will automatically send a notification packet to the host. - Page 29 Telnet Turns the iPocket232 into either a telnet client (most common use) or a telnet server and allows the user to telnet out of the iPocket232 to a remote server, such as a UNIX workstation. The standard connection control options are supported. By leaving the Connection Control parameter at Automatic (default setting), the user can initiate the telnet session by pressing any alphanumeric key.
- Page 30 Typical configuration for most applications. nel) Use tcp(tunnel) mode when the iPocket232 must be able to initiate TCP connections and accept TCP connections from the host. In this configuration, the iPocket232 can communicate with the TCP/IP host as if it were virtually connected. Local Port, Remote Port, and Remote IP must be configured.
-
Page 31: Port Setting
Enter 4.2 Port Setting The serial port settings of the iPocket232 must match the settings of the attached serial device to enable communication. Settings include bit rate, data width, error detect, framing, and flow control. To avoid data loss, choose hardware flow control if you set the port speed to 19 200 bps or higher. - Page 32 (xon/xoff) asserted and obeyed on the COM port. XON is used by either the iPocket232 or the remote host to signal the other end to start send- ing data. XOFF can also be used by either the iPocket232 or the remote host to signal the other to stop sending data.
-
Page 33: Connection Control
1 start bit + 8 data bits + 1 parity bit + 2 stop bits. Serial ports on the iPocket232, however, support only 10- and 11-bit transfers. Port configurations of 9, 12, or 13 bits are automatically converted by adding an extra stop bit to 9-bit transfers, and dropping stop bits and parity bits (if necessary) from 12- and 13-bit transfers. - Page 34 CTS is currently asserted. Modem Enables the iPocket232 to act as modem to a device connected to its serial port. The iPocket232 processes a superset of the standard Hayes command set, including the ability to answer, dial, and orig- inate a connection.
-
Page 35: Terminal Type (Telnet Protocol Only)
Local Port is the port number that listens for incoming connections. This option must be set if the iPocket232 will ever receive a session initiated from an outside source (in tcp(tunnel), tcp-server, and udp modes). If the iPocket232 will only be used to initiate sessions, this setting can be left at 0 (tcp-client mode). -
Page 36: Remote Ip
You are prompted to enter the IP address of the remote system. 3 Type the remote IP address and press Enter 4.7 Remote Port Remote Port is the port address on the remote device to which the iPocket232 sends incoming data. Remote Port must be set in , and modes. -
Page 37: Fallback Port
User Guide 4 Configuring the Serial Port Settings Table 4.5: Fallback IP Configurations Fallback IP Setting Result 0.0.0.0 Fallback operation disabled. 255.255.255.255 Incoming connections are accepted from any source as long as the unit is not already connected. Any host can establish a connection if the primary host connection is lost. -
Page 38: Terminators (Terminated Protocol Only)
Change which option? Setting the Terminators The iPocket232 continues to capture data from the serial port into the receive buffer until any one of six specific terminators is identified. Once this character is marked, the iPocket232 continues to capture a configurable number of characters (tail bytes), then terminates the frame and transmits it to the host. - Page 39 User Guide 4 Configuring the Serial Port Settings 2 Choose a from Terminator #1 through #6. Terminator You are prompted to enter a terminator character in decimal. 3 Type in a terminator and press Enter You are prompted to enter the number of tail bytes in decimal.
-
Page 40: Packet Prefix (Transparent Protocol Only)
60 000 ms. This option accumulates the data before sending it and therefore tends to group related data together and reduce network over- head. If left at zero (0), the iPocket232 determines a reasonable delay based on the config- ured Port Settings. To enter or change the... -
Page 41: Preferred Packet Size
Initial String allows you to insert a string of characters that are prepended to the initial data packet at the beginning of every established connection between the iPocket232 and your serial device. The string can be a unique identifier for each device, a maximum of 16 characters long, and can include the special characters listed in Table 4.7. - Page 42 4 Configuring the Serial Port Settings iPocket232 User Guide Precidia Technologies Inc. 23-CML000293...
-
Page 43: Configuring The Security Settings
SNMP (Simple Network Security Settings Management Protocol) and IPsec (Internet Protocol security), and restrict access to the iPocket232 by specifying passwords and user IDs. To configure or change the Security Settings, choose from the Security Settings bottom of the Device Settings menu. -
Page 44: Console Password
5.1 Console Password The Console Password allows you to restrict local access to configuration mode. After creating a Console Password, anyone accessing the iPocket232 locally through the COM port must enter the password before the Configuration screen appears. Setting the Console Password Passwords are case sensitive and can consist of uppercase letters, lowercase letters, numbers, and symbols. -
Page 45: Remote Password
5 Configuring the Security Settings 5.2 Remote Password To remotely configure the iPocket232, you must first set the Remote Password through local configuration. This is a security option to disable unauthorized remote access. Appendix D: Connecting with Telnet describes how to remotely telnet into the iPocket232. -
Page 46: Web Server
5 Configuring the Security Settings iPocket232 User Guide 2 Choose from the Security Settings sub-menu. Remote Password You are prompted to enter a remote access password with a maximum of 8 charac- ters. type any characters. Press to clear the password. -
Page 47: Access Userid
5 Configuring the Security Settings 3 Type the letter that corresponds to the desired setting and press Enter 5.4 Access Userid Access Userid also provides security against unauthorized access to the iPocket232’s dynamic Web pages. 1 Choose from the Device Settings menu. -
Page 48: Snmp Server
Enter The password is displayed as (not set) in the Security Settings sub-menu. 5.6 SNMP Server The SNMP Server enables or disables the SNMP function in the iPocket232. The default setting is “enabled”. To enable or disable the SNMP Server 1 Choose from the Device Settings menu. -
Page 49: Ipsec Tunnels #1 And #2
IP protocol that encrypt both the payload data and the packet header. Encapsulated Secure Payload (ESP) for IP is defined in RFC1827. You can define up to two tunnels to securely connect the iPocket232 to two separate networks. IPsec contains computationally intensive algorithms. Enabling IPsec MPORTANT may cause a significant decrease in the speed/performance of the iPocket232. -
Page 50: Protocol
5 Configuring the Security Settings iPocket232 User Guide Protocol The IPsec protocol defines the method of encryption and authentication to use through the IPsec tunnel. You can choose between two modes: DES-MD5-96 or 3DES-MD5- 96. Encoding is provided by DES (Data Encryption Standard), a secret key cryptog- raphy method. -
Page 51: Secure Address
Secure Address Secure Address is an optional parameter to configure a “private” IP address for the iPocket232 on the network. This IP address can be the same or different from the IP address configured in the Ethernet Settings. If you leave the Secure address set to zero (0.0.0.0) it will display as “public” in the menu and automatically default to the configured or dynamic IP Address of the unit. -
Page 52: Spi
5 Configuring the Security Settings iPocket232 User Guide SPI (Security Parameters Index) is a 32-bit hexadecimal number used to identify the security association of an IP packet. The SPI is used to look up the Encode and Authenticate Keys, and must be the same at both ends of the tunnel. The first 256 SPI values are reserved, but you can use any number from 100 hex up to FFFFFFFF hex as the SPI. -
Page 53: Encode/Authenticate Keys
Enter Encode/Authenticate Keys Encode and Authenticate Keys are manually keyed in the iPocket232 by the user to provide IP packet security. Encode and Authenticate Keys must be the same on both ends of the IPsec tunnel. You must manually configure the remote end, a gateway or device, with the same encode and authentication keys as you configured in the iPocket232. - Page 54 5 Configuring the Security Settings iPocket232 User Guide 2 Type the first half of the authentication key (16 characters) in hexadecimal format at the prompt, and press Enter 3 Choose from the Secure IP Association sub-menu. Auth (Pt2) You are prompted to enter bits 65–128 of the authentication key in hex.
-
Page 55: System Settings
Remember to save your changes by typing "*" to exit configuration! 6.1 Unit ID Value Unit ID Value is the hardware address of the iPocket232 and cannot be changed. It is assigned at the factory and printed below the barcode on the bottom of the iPocket232. -
Page 56: Web
6.2 Web Page Download Use Web Page Download to change or upgrade the internal static web page in the iPocket232. You can access this page by obtaining the IP address of the unit and typing it in the address bar of your browser: http://IP address See Section 7.2, System Log‚... -
Page 57: Display System Status
6.5 Dump System Log Dump System Log allows you to review all activity that has occurred on the iPocket232 since it was configured, or since the Delete System Log option was used. The dump may require a few minutes to complete. -
Page 58: Delete System Log
User Guide 6.6 Delete System Log Delete System Log erases the system log in the iPocket232. When diagnosing a problem, you can clear the System Log to start capturing relevant information. For a complete explanation of the information on the log refer to Section 7.2, System Log‚... -
Page 59: Reset Unit
System Log cleared, however, the message “===== iPocket232 Started =====” is appended to the System Log. Reset Unit allows you to reset the iPocket232 from a telnet session, without saving any changes to the configuration menu. 6.9 Simple Network Time Protocol Simple Network Time Protocol (SNTP) is an adaptation of the Network Time Protocol (NTP) and is used to synchronize computer clocks on the Internet. -
Page 60: Sntp Settings
SNTP in unicast mode. In unicast mode, the client (iPocket232) sends a request to a designated server or servers and waits for a reply. You can configure up to two SNTP servers. The iPocket232 will attempt to update the internal clock every five minutes. -
Page 61: More Information
7 Type “ ” to save your changes and exit the Configuration screen. SNTP is enabled in the iPocket232 by configuring an IP address for the Primary Server. Entering 0.0.0.0 for the Primary Server disables SNTP, regardless of whether the Secondary Server is configured. - Page 62 6 System Settings iPocket232 User Guide Precidia Technologies Inc. 23-CML000293...
-
Page 63: Accessing System Information
• Static Web page(s) All the information pages for the iPocket232 are accessible through a Web browser. You can disable this feature, or establish secure access with a user ID and password, through the Security Settings menu. See Section 5, Configuring the Security Settings‚... -
Page 64: Understanding The System Status Page
• Network Routing System Uptime This describes how long the system has been operational, the loading on the Precidia device's CPU, and the firmware version of the iPocket232. Table 7.1 describes each parameter: Table 7.1: System Uptime on the System Status Page... - Page 65 Serial Port This section describes the configured serial port in the iPocket232. It consists of a header line and a table showing the data received and transmitted. If the serial port is not configured, or incorrectly configured, this section does not appear on the System Status page.
-
Page 66: System Log
The System Log, an example of which is shown below, logs transaction data and system information. Connection attempts and failures, and remote and console access attempts are logged. iPocket232 Log: ===== iPocket232 Started ===== 00000 days 00:00:00 Port #1: Listening for connections on tcp port 9999... 00000 days 09:07:22 Port #1: Incoming connection on tcp port 9999 from 192.168.1.2:2569... -
Page 67: Understanding The System Log
User Guide 7 Accessing System Information To access the in configuration mode: System Log 1 Access the iPocket232 Configuration screen either locally or remotely. 2 Choose from the Device Settings menu. System Settings 3 Choose from the System Settings sub-menu. - Page 68 7 Accessing System Information iPocket232 User Guide Table 7.3: System Log Messages Message Description TELNET: login from The unit went into telnet configuration xxx.xxx.xxx.xxx rejected (config- mode, a password prompt was given, and the uration already running) correct password was entered, but configura- tion was already running (probably locally through the COM port).
- Page 69 User Guide 7 Accessing System Information Table 7.3: System Log Messages Message Description Connection was not from config- The incoming connection attempt was not ured remote address - refused from the IP address configured as the Remote IP. Port #n: Connection reset by...
- Page 70 7 Accessing System Information iPocket232 User Guide The following table lists all possible error codes that may appear in the system log. Table 7.4: System Log Error Messages Error Error the i/o request has been scheduled but not completed no more i/o paths are available...
-
Page 71: Static Web Page
7.3 Static Web Page You can host static Web pages in the iPocket232 for displaying information such as help desk telephone numbers or updates on the latest software downloads. The iPocket232 comes loaded with a default static Web page that includes specifications and product information. - Page 72 7 Accessing System Information iPocket232 User Guide Precidia Technologies Inc. 23-CML000293...
-
Page 73: Appendix A:glossary Of Terms And Acronyms
232 serial communications. Data Carrier Detect. A modem signal line (pin 1 of DB-9 connectors). Data Communications Equipment. It is the interface that a modem or other serial devices use to exchange data with a computer. 23-CML000293 Precidia Technologies Inc. - Page 74 Appendix A: Glossary of Terms and Acronyms iPocket232 User Guide Data Encryption Standard. A standard cryptography method that uses a 56-bit private key. DES performs encryption operations on 64-bit blocks of data in 16 rounds. DES was developed by IBM in 1977 and was considered “strong”...
- Page 75 User Guide Appendix A: Glossary of Terms and Acronyms HTTP HyperText Transfer Protocol. A stateless protocol used by the World Wide Web. HTTP defines how messages are formatted and transmitted, and which actions Web servers and browsers should take in response to various commands. Defined in RFC2616.
- Page 76 Appendix A: Glossary of Terms and Acronyms iPocket232 User Guide Management Information Base. A database of managed objects accessed by net- work management protocols. An SNMP MIB is a set of parameters which an SNMP management station can query, or set, in the SNMP agent of a network device (e.g.
- Page 77 User Guide Appendix A: Glossary of Terms and Acronyms Transmission Control Protocol. TCP is the connection-oriented protocol built on top of Internet Protocol (IP) and is nearly always seen in the combination TCP/IP (TCP over IP). It adds reliable communication and flow-control and provides full-duplex, process-to-process connections.
- Page 78 Appendix A: Glossary of Terms and Acronyms iPocket232 User Guide Precidia Technologies Inc. 23-CML000293...
-
Page 79: Appendix B:troubleshooting And Support
2 Ensure that you are using the correct serial cables and that all cables are prop- erly connected and in good working order. - If you are connecting the iPocket232 to a DTE (Data Terminal Equipment) device or using it as a modem replacement, use an RS-232 serial cable. - Page 80 Appendix B: Troubleshooting and Support iPocket232 User Guide Troubleshooting Configuration Access Troubleshooting Flow for Set-Up Connection Precidia Technologies Inc. 23-CML000293...
- Page 81 Appendix B: Troubleshooting and Support Check IP Address (Ping) Use ping to check if the iPocket232 is correctly configured on the network. If you cannot reach the iPocket232 using Ping, the iPocket232 is either incorrectly configured or there is a network problem.
- Page 82 Appendix B: Troubleshooting and Support iPocket232 User Guide Table B.1: Basic Troubleshooting Problem Solution The TRANSMIT lamp illuminates but 1 Check the terminal settings. Ideal settings are nothing appears on the terminal screen 9600 bps, 8 data bits, no parity, 1 stop bit, hard-...
- Page 83 Table B.2: LINK Lamp Troubleshooting Lamp Status Standard Troubleshooting Procedure OK - Ethernet None connection in place This light may be on if the iPocket232 is not configured. No Ethernet • Ensure the Ethernet cable is properly plugged connection into the iPocket232. •...
- Page 84 Appendix B: Troubleshooting and Support iPocket232 User Guide ETHERNET – TRANSMIT lamp Flashes when the iPocket232 is sending or receiving data via the Ethernet port. Normally you will see very short data bursts. Table B.3: TRANSMIT Lamp Troubleshooting Lamp Status...
- Page 85 Fast OK - attempting None Flash connection to remote host Unit may be • Ensure cable between the iPocket232 incorrectly and the RS-232 device is properly connected or connected with the correct serial cable configured • Check configuration of unit...
- Page 86 Appendix B: Troubleshooting and Support iPocket232 User Guide Precidia Technologies Inc. 23-CML000293...
-
Page 87: Appendix C:specifications And Warranty
Appendix C:Specifications and Warranty iPocket232 Specifications Serial interface: RS-232 DCE Interface Serial connector: DB-9 female Serial speed: 300 – 115 200 bps Device support: RS-232 asynchronous serial devices with 7- or 8-bit data, with or w/out parity Ethernet interface: Ethernet, IEEE 802.3, 10baseT... - Page 88 User Guide. The warranty is extended to cover the iPocket232 as well as the power adapter. Precidia's obligation under this warranty shall be limited to the repair, including all necessary parts and the cost of labour connected therewith, or at our option the exchange of a unit, which shows manufacturing defect within the warranty period with a like new unit.
-
Page 89: Appendix D: Connecting With Telnet
Appendix D:Connecting with Tel- Before you can access and reconfigure Precidia products remotely, you must configure the following settings locally: • the IP Address and Subnet Mask (or automatically with DHCP) • the Gateway address if necessary (or automatically with DHCP) •... - Page 90 Appendix D: Connecting with Telnet iPocket232 User Guide 3 From the menu, chose Connect Remote Systems... The Connect window appears. 4 Type the of the unit in the field, and choose IP address Host Name Telnet field. Port 5 Click Connect You are prompted to enter your password in the Telnet window.
-
Page 91: Appendix E:pinouts And Power Supply
Serial Port Pinout (DB-9 Female) Signal Type Data Carrier Detect (DCD) Transmit Data (TD) Receive Data (RD) Data Terminal Ready (DTR) Signal Ground (GND) Power Data Set Ready (DSR) Request to Send (RTS) Clear to Send (CTS) No Connect/Power 23-CML000293 Precidia Technologies Inc. -
Page 92: Power Supply
Appendix E: Pinouts and Power Supply iPocket232 User Guide ETHERNET Port Pinout (RJ-45) Signal Type Transmit positive (TX +) Transmit negative (TX-) Receive positive (RX+) — — Receive negative (RX-) — — Power Supply Customers in North America are supplied with an AC power adapter conforming to the specifications below. -
Page 93: Appendix F:mcc
Appendix F:MCC Modem Connection Control is available with the Precidia’s Remote Access prod- ucts. The iPocket232 is slightly different since it is a DCE device and drives the DCD signal. When you choose as the method of Connection Control, Modem the iPocket232 behaves like a Hayes, or “universal”... - Page 94 ATA or ATD, that command is aborted. Supported AT Commands Precidia supports a subset of the standard Hayes command set, and a selection of extended commands, including the ability to initiate and perform FTP and HTTP transfers (see page F-10).
- Page 95 Description Parameters Syntax A[pppp] ANSWER [pppp] Allows the iPocket232 modem to listen for a connec- The listening port number, tion, or accept a connection on the provided port range 0-65535 [pppp]. Successful connection returns a “CONNECT <speed>” message. Otherwise, the modem waits indefinitely, or until a key is pressed to cancel.
- Page 96 = 0 (or no option present) Closes an open connection. will close an open connection. INQUIRY n = 0 returns the product Displays information about the iPocket232. name n = 1 returns the product name, the company name, version string and Device ID...
- Page 97 (default) &Dn DTR CONTROL n = 0 ignore Sets how the iPocket232 will react to changes n = 1 DTR on-off transition returns in the DTR signal. modem to command mode and maintains the connection n = 2 DTR on-off transition returns...
- Page 98 Appendix F: MCC iPocket232 User Guide Table F.2: Extended AT& and AT+ Commands Command Description Parameters Syntax &Hn FLOW CONTROL n = 0 disables flow control Sets the type of flow control used. The default n = 1 selects hardware (CTS/ is set in configuration.
- Page 99 For IP232 and Cell 232Plus only. Establishes or drops PPP connections to the configured host. +Pstring FTP PUT / HTTP PUT string = Upload from Precidia modem to an FTP or ftp://[userid[:pass- HTTP server.* word]@]ipadr[:port]/path/file.ext +Gstring FTP GET / HTTP GET...
- Page 100 Basic S-registers (S0–S12) store information used by the modem and communi- cation software. Basic S-registers have predefined values. Extended S-registers (S13+) are used for storing command option values. The following table summa- rizes the values and purpose of Precidia-supported S-registers. Table F.3: Precidia S-Register Definitions “S”...
- Page 101 User Guide Appendix F: MCC Result Codes A result code is returned after each command sequence. The modem is set by default to return result codes in verbose format. Result code format is set using the “Vn” command. Numeric result codes display as: Numeric Code<CR>. Verbose result codes display as: <CR><LF>Verboce Code<CR><LF>.
- Page 102 Appendix F: MCC iPocket232 User Guide Using the FTP/HTTP Client The iPocket232 modem supports an FTP and HTTP client through the use of proprietary extended AT commands. FTP is defined in RFC959 and HTTP is defined in RFC2616 (available at http://www.rfc-editor.org/).
- Page 103 CONNECT and the iPocket232 modem will send that data as an FTP or HTTP file transfer to the server. The transfer is considered complete when there is no data from the terminal for the number of seconds specified in register S14, or the DTR line is dropped (hung-up).
- Page 104 Appendix F: MCC iPocket232 User Guide F-12 Precidia Technologies Inc. 23-CML000293...
-
Page 105: Appendix G:regulatory Compliance
Declaration of Conformity We Precidia Technologies Inc. of, Ottawa, Ontario, Canada 613 529 7557 www.precidia.com info@precidia.com. Declare under sole responsibility that the product: Precidia Technologies Inc. iPocket232 is manufactured by Precidia. 23-CML000293 Precidia Technologies Inc. -
Page 106: Rohs Compliance
(PBB), or polybrominated diphenyl ethers (PBDE) to a minimum acceptable level.. The iPocket232 (release 5.00.01-EU) meets RoHS compliance directives, restricting the use of Lead (Pb), Mercury (Hg), Cadmium (Cd), Hexavalent Chro- mium (Cr6+), Polybrominated biphenyls (PBB), and Polybrominated diphenyl Ethers (PBDE) to meet the requirements of this directive.
Need help?
Do you have a question about the ipocket232 and is the answer not in the manual?
Questions and answers