Table of Contents
Advertisement
Quick Links
Advertisement
Table of Contents

Related Manuals for Chinavision CVLM-I70

Summary of Contents for Chinavision CVLM-I70
- Page 1 USER MANUALV1.0...
-
Page 2: Table Of Contents
IP Camera User Manual CATALOGUE THE 1ST CHAPTER DESCRIPTION OF PRODUCT................ - 1 - 1.1 PACKING............................- 1 - 1.2 THE LOWEST SYSTEM CONFIGURTION ................- 1 - 1.3 FEATURES ............................ - 1 - THE 2ND CHAPTER HE INSTALLATION OF IP CAMERA ............- 2 - 2.1 INSTALLATION OF PREPAREATION.................. - Page 3 IP Camera User Manual 4.2.1 CONNECT INTERNET VIA ADSL DIRECTLY ......- 23 - 4.2.2 IP CAMERA CONNECT INTERNET BY LAN....... - 25 - THE 5TH CHAPTER TECHNICAL PARAMETER ................- 27 - 5.1 KEY FUNCTIONS ........................- 27 - 5.2 KEY PARAMETERS ........................
-
Page 4: The 1St Chapter Description Of Product
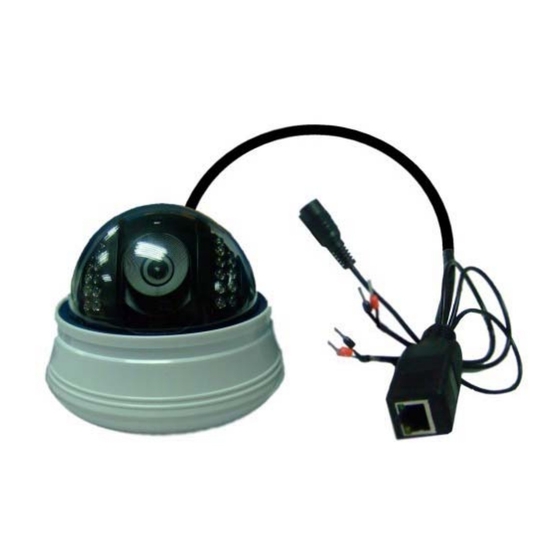
CHAPTER DESCRIPTION PRODUCT 1.1 PACKING Packing in detail as follow (If find any missing part, please contact with your supplier immediately) 1.IP camera, bracket 2.Driver 3.Power adapter 4.B-B network cable 1.2 THE LOWEST SYSTEM CONFIGURTION The lowest system configuration of your PC when using this IP camera as below: 1.Pentium III CPU or above, 1Ghz frequency or higher 2.256M built-in memory or above 3.10-100M network card or above... -
Page 5: The 2Nd Chapter He Installation Of Ip Camera
IP Camera User Manual Viewing/Recording — Clear user interface to view real-time pictures. Even when you leave for a while, IP CAMERA will record the pictures and transfer files to your PC. Files will be saved in the form of standard windows media, suitable for extensive application program Dynamic Monitoring —... -
Page 6: Hardware Installation
IP Camera User Manual 2.2 HARDWARE INSTALLATION This part is for introducing how to finish hardware installation and physical connection of IP camera. After it, please connect power supply, IP camera will start work and the indicator light will shine. 1.Install IP camera at the place where monitoring required 2.Connect network Connect IP camera with Hub(10/100M) or switch(10/100M),insert one end of the... - Page 7 IP Camera User Manual Picture2.4: installation interface 1 3.Installation guidance will help you to finish the installation. Please press “Next” buttons in turn, please refer to picture 2.5 Picture 2.5: Continue the installation 4.When finish the installation, please restart your computer. Please refer to picture 2.6 - 4 -...
-
Page 8: The 3Rd Chapter Configuration Of Ipcam
IP Camera User Manual Picture 2.6: finish installation CHAPTER CONFIGURATION IPCAM After finish the 2nd chapter, IP camera can work in LAN. We can find the IP address of IP Camera by IP camera Tool program and visit IP camera by browser. (input IP address and port number of IP camera into the IE browser address field, such as “http://192.168.1.112:100”,... -
Page 9: Get Ip Address In Internal Network
IP Camera User Manual to the following descriptions 3.1 GET IP ADDRESS IN INTERNAL NETWORK Please pay attention to the camera power and available connection before getting IP address. Used LAN or PC need to support DHCP (dynamic IP allocation), because the camera's default setting is dynamic accessing to IP address;... -
Page 10: Software Edition Update
IP Camera User Manual Please do not choose “ Using DHCP”, if your LAN or PC doesn’t support DHCP. You can set up the camera IP address according to the network space of LAN or PC, but it should be different from that of other devices or PC in the same network space(the first 3 items and subnet mask should be same).You can change the port setting on the webpage only. -
Page 11: Login The Configuration Page
IP Camera User Manual 3.3 LOGIN THE CONFIGURATION PAGE If input the IP address of IP Camera into the IE browser address field like http://192.168.1.188 and press “Enter” or directly double press the listed IP address in the dialog box of IP Camera Tool, IE browser will be start up automatically and the administrator login window will also appear. -
Page 12: Visitor Operating
IP Camera User Manual 3.4.1 VISITOR OPERATING Working status for each channel as followed: For example: channel 1 is monitoring (motion detection status), if flickering. Click the right key for 4-picture view: Video on/off Recording: Press to save the recording files through appointed path. Take picture: press to capture and save pictures through appointed path. -
Page 13: 2Operator Operating
IP Camera User Manual Default path: my computer/my document Green button: Normal connection and display; Gray button: camera unavailable Red button: camera alarm (motion detection alarm) 3.4.2OPERATOR OPERATING Click , to set up following parameters Resolution: VGA(640 X 480)/ QVGA(320 X 240) working mode:... -
Page 14: Device Information
IP Camera User Manual 3.5.1 DEVICE INFORMATION please refer to the following picture: Click The sequence number of the device: our factory sequence number. Edition of system firmware of device: edition of system software of IP Camera Edition of application firmware of device: edition of application software of IP Camera 3.5.2 DEVICE NAME SETTINGS ,... -
Page 15: Device User Settings
IP Camera User Manual Automatically get time from PC or server, It will get time from PC if didn’t connect to LAN. 3.5.4 DEVICE USER SETTINGS Click please refer to the following picture IP Camera can set up maximum 8 users and permissions 3.5.5 MULTI-CHANNEL DEVICE SETTINGS Click please refer to the following picture... - Page 16 IP Camera User Manual For example: add the 2nd channel image , please refer to the following picture: Click Fill Host,Http Port ,User, Password of IP Camera Input the Host, Http Port, User, Password, Click , then , and then to switch to 4-picture monitoring mode, as following: - 13 -...
-
Page 17: Basic Network Settings
IP Camera User Manual 3.5.6 BASIC NETWORK SETTINGS Please refer to the following picture. For example, the IP address of this device can be set up as follows: Please set up IP address, subnet mask, gateway, DNS server well. Dynamic IP setting also available - 14 -... -
Page 18: Wireless Lan Settings
IP Camera User Manual Please choose and click for confirmation. 3.5.7 WIRELESS LAN SETTINGS Click, please refer to the following picture. If WIFI is required, please set it up as follows:available wireless network information can be can out and make a list. Please choose and click for confirmation. -
Page 19: Upnp Settings
IP Camera User Manual 3.5.9 UPNP SETTINGS Click , please refer to the following picture. It is unnecessary if the router does not have this kind of function. 3.5.10 DYNAMIC DOMAIN NAME SETTINGS Click , please refer to the following picture: DDNS Service: Fill in the web address for applying the domain name - 16 -... -
Page 20: Mail Service Settings
IP Camera User Manual DDNS User: Fill in the domain name DDNS Password: Fill in the password of the domain name DDNS Domain Name: DDNS domain name will automatically get the IP if connect well. DDNS Status: Display the status of connecting the domain name It will be necessary to set up this function if you want to make a visit through Internet. -
Page 21: Alarm Service Settings
IP Camera User Manual This function is to upload the pictures to the Internet. FTP Server: Fill in the web site to be uploaded FTP Port: Fill in the FTP Port FTP User: Fill in the FTP user name FTP Password: Fill in the password of the FTP user FTP Upload Folder: Fill in the file name to be uploaded FTP Mode: Select PORT Upload Image Now: Click it if needed... -
Page 22: System Software Upgrade
IP Camera User Manual Select Alarm Mode by yourself: IO linkage, or e-mail sending, or image upload. Following information is an example for selecting the method of email sending: Click for confirmation 3.5.14 SYSTEM SOFTWARE UPGRADE Click , please refer to the following picture: - 19 -... -
Page 23: Backup & Restore Settings
IP Camera User Manual 3.5.15 BACKUP & RESTORE SETTINGS Click , please refer to the following picture. It can Backup the IP camera configuration. It will turn to your Restore settings it there is something wrong with your IP camera configuration. 3.5.16 RESTORE FACTORY DEFAULT SETTINGS Click , and re-start the device, the factory default settings... -
Page 24: Return
IP Camera User Manual 3.5.19 RETURN Click , it will return to the monitoring interface THE 4th CHAPTER HOW TO VIEW IP CAMERA After adjust IP camera on the web page, you can visit it through internet accordingly. This will be divided into two conditions: LAN view and Internet view. About internet view, it will be divided into the modes of dynamic connection and static connection, on the basis - 21 -... -
Page 25: View In Lan
IP Camera User Manual of IP camera connection method with internet. 4.1 VIEW IN LAN Picture 4.1: Sketch map of Lan view Under this mode, PC and IP camera is in the same LAN, both of them can be connected with each other by network cable (picture 4.1-1),hub(picture 4.1-2) or switch. IP address(4.1-3).IP address is a private one(like 192.168.1.*), subnet mask:255.255.255.0 1.... -
Page 26: View Internet
IP Camera User Manual and make the other advanced operations) View via IP camera Tool” After run IP Camera Tool of IP camera, it will search the IP camera in LAN automatically and show IP address and name on the window, you just need to double click this IP address, the PC will display IE browser window and the login interface, input user and password, you can enter into monitoring page for view. - Page 27 IP Camera User Manual IP address is dynamic and changeable. Every connection to internet via the dial-up of ADSL,IP camera will get a temporary and different IP address from ISP In this case, we can fill ADSL’s user name and password on IP camera interface and choose the option of “use dial-up of ADSL for connection”.
-
Page 28: Ip Camera Connect Internet By Lan
IP Camera User Manual 4.2.2 IP CAMERA CONNECT INTERNET BY LAN Picture 4.5 IP camera use static IP address to connect Internet Under this mode, the network where IP camera exists use the dial-up of ADSL or other ways to connect Internet, and the whole LAN share the same external IP address, IP cameras in LAN can be differentiated by port Numbers. - Page 29 IP Camera User Manual “192.168.1.101”,“192.168.1.102”, port number is 81,82 2. Open your router, find port transfer page ( some routers named dummy service), make the rules for the port transfer, and please remember the port no. of IP camera after It is assigned 1.
-
Page 30: The 5Th Chapter Technical Parameter
IP Camera User Manual 192.168.1.102,port No. is 82. Set up the port transfer of the router as follows: camera transfer port start port IP address IP Camera_1 192.168.1.101 IP Camera_2 192.168.1.102 When user input http:// 219.134.248.11:81 on PC, router receives application and automatically transfers to 192.168.1.101,... -
Page 31: Key Parameters
IP Camera User Manual 5.2 KEY PARAMETERS Image Compression M-JPEG Format Sensor CMOS,1/4” Image Resolution VGA(640x480)/ QVGA(320x240) RJ-45/10-100 Base T ,802.11b/g Network Interface Network Protocol TCP/IP,DHCP,SMTP,TP,DDNS,UPNP, PPPoE Image Transfer Velocity 30frames/sec(QVGA), 15frames/sec(VGA) Alarm Control Input:1 Channel (closed trigger) Motion Detection Support Software Update Automatic upgrade... -
Page 32: Trouble Shooting
IP Camera User Manual 6.2 TROUBLE SHOOTING 1. Can not find the device by making use of the searching program. Please check if there is a correct physical connection? A-B network cable will be required if device connects with the PC directly 2.
Need help?
Do you have a question about the CVLM-I70 and is the answer not in the manual?
Questions and answers