Advertisement
Advertisement
Table of Contents

Summary of Contents for Kaiser Baas R10+
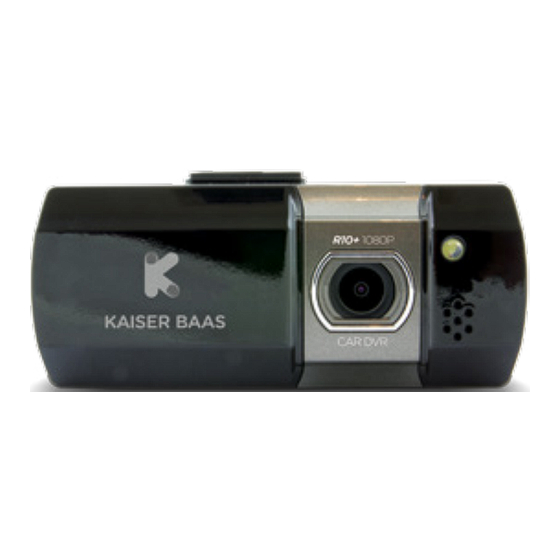
- Page 1 USER GUIDE R10+ CAR DVR Your expert witness on board...
- Page 3 Languages English...
- Page 4 Community /kaiserbaas Tech support: e: helpdesk@kaiserbaas.com w: www.kaiserbaas.com/support p: Australia 1300 302 306 p: New Zealand 0800 302 306 (business hours, AEST)
-
Page 5: Table Of Contents
Contents Safety Precautions What’s in the Box Product Diagram Setting up the R10 Car DVR In Car Operation Computer Connection Interface Specifications Frequently Asked Questions Contact Us... -
Page 6: Safety Precautions
Safety Precautions Before using your R10+ Car DVR, please ensure you have read and understood all of the information below. • Only use the provided USB-mini cable to power the R10+. • Do not expose the R10+ to water, dust, oil or tempera- tures above 70˚c. -
Page 7: What's In The Box
What’s in the Box Please ensure the product package has all the following contents: R10 Car DVR User Guide Car Charger Windscreen Mount 3m USB Mini Cable 80cm USB Mini Cable Adhesive Pad... -
Page 8: Product Diagram
Product Diagram Wide Angle Lens DOWN Button Mounting Slot Micro SD Slot 2.7” Display HDMI Mini Port (adapter required for HDMI) POWER Button AV Out Port MENU Button Mini USB Port MODE Button UP Button OK Button... - Page 9 Setting up the R10+ General • Insert a Micro SD card into the allocated slot on the left side of the R10+. An ideal placement for the R10+ is behind the rear vision mirror. • The R10+ will power up and start recording as soon as it receives power from the connected USB-mini power cable (i.e turning your car on) Car set up...
-
Page 10: In Car Operation
In Car Operation The R10+ is optimised to use a Class 6 Micro SD card (not included) with at least 8GB of free space. For best results please use a Class 6 Micro SD card. • The internal G-sensor will register any impacts and will log them as an ‘Event’. -
Page 11: Computer Connection
Computer Connection • Either connect the R10+ via the USB-mini cable, or insert the Micro SD card (not included) to your computer via an SD card adapter. • Select “Mass Storage” mode to access files. • R10+ will appear as an external storage device. •... -
Page 12: Interface
Interface Recording/Viewfinder screen From this screen you can manually start and stop recording using the OK button. You can also navigate to the menu screen by using the MENU button. Cycle through the Recording and Video Playback modes using the MODE key. To cycle through these modes you will need to ensure that the camera is not recording. - Page 13 Playback In this screen the UP and DOWN buttons are used to navigate through files and the OK button is used to play back files. The MODE button is used to navigate back. Once a video is playing, the UP and DOWN buttons are used to control the volume and the OK button pauses.
- Page 14 Film menu Resolution: • 1296P (scaled up) Defines the level of • 1080P recording detail. • 720P • WVGA • VGA Loop Recording • Off Sets the length of recording • 1 Minute loop files. • 3 Minutes • 5 Minutes •...
- Page 15 Exposure • +2.0 Sets exposure levels. • +5/3 • +4/3 • +1.0 • +2/3 • +1/3 • +0.0 • -1/3 • -2/3 • -1.0 • -4/3 • -5/3 • -2.0 Motion Detection • Off Triggers recording when • On motion is detected. Record Audio •...
-
Page 16: Camera Settings Menu
Parking Guard • Off When activated, the R10+ • On will detect an impact or shock after the car has been parked, triggering a 30 second recording. G-Sensor • Off Determine the sensitivity • Low of the trigger for the Parking Guard and Event •... - Page 17 Language Set language for device. Frequency • 50 Hz Allows the frequency to be • 60 Hz edited. Carplate • Off Add or remove your • On (Enter licence plate licence plate from the number) footage. Format A quick way to delete all items on the inserted Micro SD card.
-
Page 18: Specifications
Specifications Dimension (L x W x H) 110mm x 47mm x 25mm Weight Lens 140˚ Wide Angle Lens CMOS AR0330 LCD Display 2.7” 16:9 Resolution 1920 x 1080 FHD 30fps Compresson format H.264 Cigarette adaptor DC 12/24 V Input voltage Main unit Input voltage DC 5 V Power Current... -
Page 19: Frequently Asked Questions
Frequently Asked Questions Q. The image is blurry. A. Try repositioning the camera. For best results, try and aim the camera through a section of the windshield that is not overly curved or angled, as this can cause a blurring effect. -
Page 20: Contact Us
Contact Us Having trouble setting your R10+ Car DVR up? Please contact us. No question too big or small and we are more than happy to help. Please visit: www.kaiserbaas.com/support Or email: helpdesk@kaiserbaas.com For further information please visit: www.kaiserbaas.com Tech support: e: helpdesk@kaiserbaas.com w: www.kaiserbaas.com/support p: Australia 1300 302 306...
Need help?
Do you have a question about the R10+ and is the answer not in the manual?
Questions and answers