
Summary of Contents for Yeastar Technology TA100
- Page 1 Sales Tel: +86-592-5503309 E-mail: sales@yeastar.com Support Tel: +86-592-5503301 E-mail: support@yeastar.com Web: http://www.yeastar.com Version: 44.19.0.16 Revised: January 25, 2016...
-
Page 2: Declaration Of Conformity
Declaration of Conformity Hereby, Yeastar Information Technology Co., Ltd. declares that TA100/200 is in conformity with the essential requirements and other relevant provisions of the CE, FCC. Warranty The information in this document is subject to change without notice. -
Page 3: Table Of Contents
Call Waiting ......................... 11 Call Transfer ........................11 Three-party Conference ...................... 12 Direct IP Call ........................12 Change TA100/200’s IP Address Using Analog Phones ............ 12 Port Settings ......................14 General Settings ......................... 14 Advanced Settings ......................16 FXS Settings ........................17 Dial Plan .......................... - Page 4 TA100/200 User Manual Security Center ..................... 35 Security Center ........................35 AMI Settings ........................36 Certificates .......................... 37 Firewall Rules ........................38 IP Blacklist .......................... 40 System Preferences ..................... 42 Password Settings ......................42 Date and Time........................42 Auto Provision Settings ....................... 43 Firmware Update ........................
-
Page 5: About This Guide
Audience This manual will help you learn how to operate and manage your TA100/200 Analog Telephone Adapter. In this guide, we describe every detail on the functionality and configuration of TA100/200. We begin by assuming that you are interested in TA100/200 and familiar with networking and other IT disciplines. -
Page 6: Installation
Connecting Your TA100/200 TA100/200 Packing List Upon receiving Yeastar TA100/200 gift box, please open the package and check if all the items are supplied as TA100/200 Packing List. If there is any problem, please contact your provider. Table 2-1 TA100/200Packing List... -
Page 7: Connecting Your Ta100/200
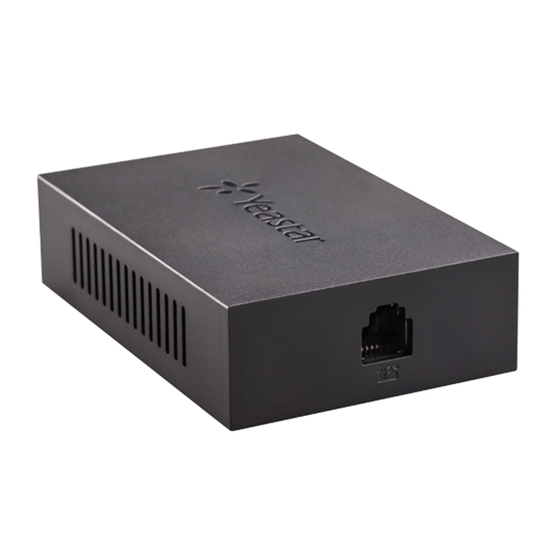
Yeastar TA100/200 is designed for easy configuration and easy installation. Connection of Ethernet Port Insert the Ethernet cable into the LAN port of TA100/200 and connect the other end of the Ethernet cable to an uplink port (a router or a switch, etc.) ... -
Page 8: Getting Started
TA100/200 User Manual Getting Started In this chapter, we guide you through the basic steps to start with a new TA100/200: Accessing Web GUI Web Configuration Panel Making and Receiving Calls Accessing Web GUI The TA100/200 attempts to contact a DHCP server in your network to obtain valid network settings (e.g., the IP address, subnet mask, default gateway address and... -
Page 9: Web Configuration Panel
TA100/200 User Manual Web Configuration Panel There are 4 main sections on the Web Configuration Panel for users to check the TA100/200’s status and configure it. Status: check System Status, Port Status, Trunk Status, Network Status and check call logs, system logs. -
Page 10: Basic Operations
Change TA100/200’s IP Address Voice Menu TA100/200 provides a voice menu to guide you to configure the network settings for the device. You need to press *** on the analog phone which is connected to TA100/200’s FXS port to enter the voice menu. -
Page 11: Call Hold
"hookflash" to toggle between the active call and the incoming call. Figure 4-2 Enable Call Waiting Call Transfer Blind transfer and attended transfer are supported on TA100/200. Users can achieve call transfer by pressing the feature code during the call. Blind Transfer Default feature code: *03 1. -
Page 12: Three-Party Conference
To call the IP phone, you should dial *96192*168*2*123*5060 on the analog phone. Change TA100/200’s IP Address Using Analog Phones By default, TA100/200 obtains a dynamic IP address from the DHCP server. You can change the device’s IP address via the analog phone which is connected to the FXS port. - Page 13 TA100/200 User Manual Here we introduce how to set a static IP address for TA100/200. IP address: 192.168.10.125 Subnet mask: 255.255.255.0 Gateway: 192.168.10.1 DNS: 8.8.8.8 1. Press *** to enter the voice menu. 2. Press 3 to enter the “Advanced Settings”.
-
Page 14: Port Settings
TA100/200 User Manual Port Settings This chapter explains how to configure FXS port on TA100/200, go to Gateway→ Port Settings→ FXS Port page to configure the FXS ports. General Settings Advanced Settings FXS Settings Dial Plan Click "Edit"... - Page 15 TA100/200 User Manual Table 5-1 Description of FXS Port General Settings General Settings A character-based name for the user. For example, Caller ID Name Bob. The Caller ID string used when this user calls another Caller ID Number user. User Name User name provided by the VoIP provider.
-
Page 16: Advanced Settings
TA100/200 User Manual Advanced Settings Figure 5-2 FXS Port Advanced Settings Table 5-2 Description of FXS Port Advanced Settings Follow Me Choose the forward type and configure the relevant destination number. In different conditions, the incoming calls to the account will be forwarded to different destinations. -
Page 17: Fxs Settings
Figure 5-3 FXS Settings Table 5-3 Description of FXS Settings Flash TA100/200 will take the flash duration between Min Flash and Max Flash as an effective flash. Any flash lasting over the longest time will be considered by TA100/200 as hang-up. -
Page 18: Dial Plan
TA100/200 User Manual Dial Plan Figure 5-4 Dial Plan Figure 5-4 Description of Dial Plan Settings Hotline Select whether to use Hotline or not. Hotline is disabled by Enable Hotline default. If this feature is enabled, the system will dial out the hotline number automatically after the time of Delay Dial. - Page 19 TA100/200 User Manual For example, if users must press 0 before dialing a phone number, one digit should be stripped from the dial string before the call is placed. Prepend Digits to prepend to a successful match. If the dialed number matches the patterns, then this will be prepended before sending to the trunks.
-
Page 20: Gateway Settings
TA100/200 User Manual Gateway Settings This chapter explains Gateway settings, which can be applied globally to TA100/200. The gateway settings can be configured under Gateway→ Gateway Settings. Basic Preferences Feature Codes Speed Dial System Prompts Basic Preferences... -
Page 21: Feature Codes
TA100/200 User Manual Feature Codes There are various feature codes on TA100/200. The feature codes are used to acquire the gateway info or activate and inactivate supplementary services. The default feature codes are illustrated below. The parameters for feature codes are configurable. - Page 22 TA100/200 User Manual Call Forwarding Preferences Table 6-3 Description of Call Forwarding Preferences Items Default Description Users may reset all call forwarding defaults Reset to Defaults by calling *70 on their phone. Users may enable always forward by Enable Forward All Calls calling *71 on their phone.
-
Page 23: Speed Dial
The number you want to call. To make a speed dial, e.g. you want to call 18033334444, simply dial *981. The *98 tells TA100/200 that you want to use the Speed Dial and the 1 is the Speed Dial Code for destination number 18033334444. - Page 24 TA100/200 User Manual Figure 6-3 System Prompts Settings Page 24/52...
-
Page 25: Advanced Settings
TA100/200 User Manual Advanced Settings This chapter explains SIP settings and Distinctive Ringtones. SIP Settings Distinctive Ringtones SIP Settings It is wise to leave the default setting as provided on this page. However, for a few fields, you need to change them to suit your situation. - Page 26 Port used for SIP registrations. The default is 5060. TLS Port Port used for SIP registrations. The default is 5061. When using TA100/200 as a TLS client, whether or not TLS Verify Server to verify server’s certificate. It is “No” by default.
- Page 27 TA100/200 User Manual 2) NAT Figure 7-2 NAT Settings Table 7-2 Description of NAT Settings Items Description Enable STUN (Simple Traversal of UDP through NATs) is a protocol for assisting STUN devices behind a NAT firewall or router with their packet routing.
- Page 28 TA100/200 side. 4) Response Code You can change the response code on TA100/200 to the one you want before sending it to the VoIP server. It helps the VoIP server understands better the exact call status, like busy, no response and others.
- Page 29 Default: no. It’s recommended that it is disabled for security reason. Pedantic Enable pedantic parameter. Default: no. If enabled, when TA100/200 rejects incoming “Register” or “Invite” packets, TA100/200 always respond the packets using “SIP403Forbidden”.It’s Alwaysauthreject recommended that it is enabled for security reason.
-
Page 30: Distinctive Ringtones
TA100/200 User Manual Distinctive Ringtones TA100/200 provides 10 configurable distinctive ringtones. Users could configure different ringtones to match different incoming caller ID. For example, if Inbound Caller Pattern is configured as “100.”, all the incoming calls start with digits “100” will ring using cadence “2000,4000” as the following figure shows. -
Page 31: Network Preferences
VLAN Settings VPN Settings LAN Settings After successfully logging in the TA100/200 Web GUI for the first time, users could go System→Network Preferences→LAN Settings to configure the network for TA100/200. Figure 8-1 LAN Settings Table 8-1 LAN Settings... -
Page 32: Service
Figure 8-4 Service Settings Table8-2 Description of Service Settings Items Description By using SSH, you can log in to TA100/200 and run commands. It's disabled by default. We don't recommend enabling it if not needed. The default port for SSH is 8022. -
Page 33: Vlan Settings
A VPN can provide secure information transport by authenticating users, and encrypting data to prevent unauthorized persons from reading the information transmitted. The VPN can be used to send any kind of network traffic securely. TA100/200 supports OpenVPN. 33/52... - Page 34 Enable VPN feature. Import VPN Config Import configuration file of OpenVPN. Notes: 1. Uncomment “user” and “group” in the “config” file. You can get the config package from the OpenVPN provider. 2. TA100/200 works as VPN client mode only. 34/52...
-
Page 35: Security Center
TA100/200 User Manual Security Center This chapter describes how to secure your TA100/200. It is strongly recommended that users configure firewall and other security options on TA100/200 to prevent the attack fraud and the system failure or calls loss. ... -
Page 36: Ami Settings
If necessary, you can enable it. Figure 9-4 AMI Settings User Name, Password & Port After enabling AMI, you can use this username and password to log in TA100/200. The default port is 5038. Permitted "IP address/Subnet mask"... -
Page 37: Certificates
TA100/200 User Manual You can set which IP is allowed to log in TA100/200 AMI interface. Certificates TA100/200 supports TLS transport, you can configure FXS port with TLS transport. To use TLS, you should upload certificates first. Figure 9-5 Upload Certificate ... -
Page 38: Firewall Rules
TA100/200 User Manual Firewall Rules Firewalls are used to prevent unauthorized Internet users from accessing private networks connected to the Internet, especially intranets. All messages entering or leaving the intranet pass through the firewall, which examines each message and blocks those that do not meet the specified security criteria. - Page 39 TA100/200 User Manual Figure 9-7 Common Rules Table 9-2 Description of Common Rules Items Description A name for this rule, e.g. “HTTP”. Name Simple description for this rule. E.g. accept the specific host to Description access the Web interface for configuration.
-
Page 40: Ip Blacklist
TA100/200 User Manual Table 9-3 Description of Auto Defense Items Description The port you want to auto defense, for example, 8022. Port Select the protocol. You can select UDP or TCP. Protocol The maximum packets or connections can be handled per unit time. - Page 41 TA100/200 User Manual Table 9-4 Description of Auto Blacklist Rules Items Description Auto defense port Port Auto defense protocol. TCP or UDP. Protocol Allowed IP packets number in the specific time interval. IP Packets The time interval to receive IP packets. For example, IP packets 90, Time interval time interval 60 means 90 IP packets are allowed in 60 seconds.
-
Page 42: System Preferences
4. Log in TA100/200 using the new password. Figure 10-1 Password Settings Date and Time Please adjust the time of TA100/200 (including the time zone) consistent with your local time. Go to System→System Preferences→Date and Time to configure the system date and time. -
Page 43: Auto Provision Settings
MyPBX during boots up. In PNP mode, you just need to place the TA100/200 in the same IP range network with MyPBX, then you can find the TA100/200 and provision it on MyPBX ”TA Provisioning”... - Page 44 Server). Figure 10-5 Set MyPBX as a DHCP Server Then select DHCP mode on LAN settings page to make TA100/200 as a DHCP client. Figure 10-6 Set TA100/200 as a DHCP Client Another way to do auto provision is to download configuration file from the configured server URL.
-
Page 45: Firmware Update
With Yes, it will always apply the updated configuration file. Firmware Update TA100/200 can be upgraded to a new firmware version via network or locally. Users could upgrade firmware via HTTP or TFTP. Please go to System→ System Preferences→ Firmware Update to do upgrade. -
Page 46: Upgrade Through Tftp
TA100/200 User Manual Step2. Click “Start” to upgrade. Figure 10-8 Upgrade through HTTP Upgrade through TFTP Step1.Download firmware file from Yeastar website. Step2. Create a tftp Server (For example, tftpd on Windows). 1) Install tftpd32 software on computer . Download link: http://tftpd32.jounin.net/tftpd32_download.html... -
Page 47: Backup And Restore
TA100/200 configurations to a file. Notes: 1. When you have updated the firmware version, it’s not recommended to restore using an old package. 2. Backup from an earlier version cannot be restored on TA100/200 of a later version. Create a New Backup Click to create a new backup. - Page 48 TA100/200 User Manual Reset and Reboot. Figure 10-12 Reset and Reboot 48/52...
-
Page 49: Status
TA100/200 User Manual Status Users could check the system status on Status→System Status, where FXS Port Status, Network Status and System Info can be checked. CDR and System Logs can be checked under Status→ Reports. FXS Port Status ... -
Page 50: Network Status
TA100/200 User Manual Network status In this page, the IP address of LAN port will appear with their status. Figure 11-2 Network Status If your VLAN or VPN are configured, you can check the status in this page also. System Info In this page, we can check the hardware/firmware version, or the disk usage of TA100/200. -
Page 51: System Logs
TA100/200 User Manual Figure 11-4 Call Logs System Logs You can download and delete the system logs of TA100/200. Figure 11-5 System Logs Enable Hardware Log Save the information of hardware; (up to 4 log files) Enable Normal Log Save the prompt information;... -
Page 52: Packet Tool
TA100/200 User Manual Packet Tool This feature is used to capture packets for technician. Integrate packet capture tool “Wireshark” in TA100/200. Users also could specify the destination IP address and port to get the packets. Figure 11-6Packet Tool Specify the destination IP address to get the packets.
Need help?
Do you have a question about the TA100 and is the answer not in the manual?
Questions and answers