Table of Contents
Advertisement
Advertisement
Table of Contents

Related Manuals for Trilogy Orator

Summary of Contents for Trilogy Orator
-
Page 1: Installation Guide
Orator INTERCOM Installation Guide Issue 1.0 TRILOGY BROADCAST LIMITED 26 Focus Way Walworth Estate Andover Hampshire SP10 5NY England Telephone +44 (0) 1264 384000 +44 (0) 1264 334806 Email mail@trilogy-broadcast.co.uk Web site www.trilogy-broadcast.co.uk... - Page 2 Orator Installation Guide The Copyright of the information and drawings in this document is the property of Trilogy Broadcast Limited of Andover, Hampshire and is neither to be reproduced in whole or in part, nor disclosed to a third party, without the prior written consent of Trilogy Broadcast Limited.
-
Page 3: Table Of Contents
Orator Orator Installation Guide CONTENTS INTRODUCTION ..........................5 1.1 O ................5 PTIONS VAILABLE AND ODULE UMBERS INSTALLATION ..........................7 2.1 I ............................ 7 NTRODUCTION 2.2 U ............................7 NPACKING 2.3 R ..........................7 OUNTING 2.4 M ......................8 AINS... - Page 4 Orator Orator Installation Guide 6.6 P.C..............................36 6.7 I ....................37 NTERNAL ANEL WITCH ETTINGS 6.8 500-41 D ..................37 ESKTOP ANEL NTERNAL ETTINGS Page 4 of 37 Issue 2 Trilogy Broadcast Limited...
-
Page 5: Introduction
Due to the nature of talkback systems, any given installation may have some custom parts. Trilogy Broadcast Ltd. prides itself on its ability to tailor standard parts to meet specific requirements and is willing to discuss any other customisation as required. - Page 6 Orator Orator Installation Guide Page 6 of 37 Issue 2 Trilogy Broadcast Limited...
-
Page 7: Installation
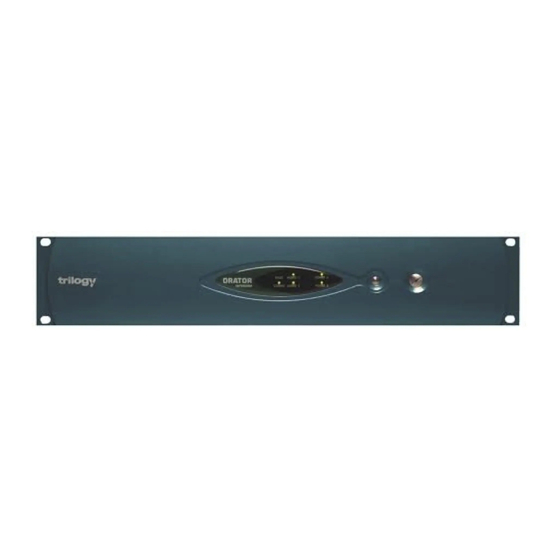
2U although a series of 1U panel are available and custom panels may be 3U, 4U or larger. It is most likely that a system contractor or Trilogy personnel will install the central matrix. Suitable care should be taken with cooling and ventilation within the equipment bay. -
Page 8: Mains Connection And Fusing
Orator Orator Installation Guide Mains Connection and Fusing The Orator matrix operates from a single power supply, although an optional second power supply may be fitted to provide full redundancy. This may be purchased and fitted later if required. The power supplies are fitted from the rear of the matrix and fixed with retaining screws. - Page 9 Orator Orator Installation Guide As the system is powered, all front panel LEDs are lit briefly. Under normal operating conditions, the LEDs are lit as detailed in the following table. Phase Colour Status POWER UP COMMS YELLOW POWER A BLUE...
- Page 10 Orator Orator Installation Guide Page 10 of 37 Issue 2 Trilogy Broadcast Limited...
-
Page 11: Connecting To The Matrix
3.2.1 Connection via a PC COM port using RS232 protocol Connect the Orator matrix to the PC COM port with a 9 way D-type cable A 2 metre cable is supplied with the unit. If the PC has a 25 way D-type COM port, fit the adaptor supplied. -
Page 12: Installing A Cardport Isa To Pcmcia Adaptor Into A Desktop Pc
3.2.3 Installing a PCMCIA download card in a laptop computer The Trilogy part number for the PCMCIA link adaptor card is 500-16-01. It is supplied with a short link cable, which may be extended as necessary to a suggested maximum of 5 metres of RS422 cable. -
Page 13: Installing Pathfinder Lite
3.2.4 Installing PathFinder Lite Software is supplied on CD-ROM but is also available on 3.5" floppy or by download from the Trilogy web-site by prior arrangement. To install from CD-ROM, follow the instructions below. Click Ok then follow the on-screen prompts. When the software installation is complete, the PathFinder Lite icons will be visible in a folder on the desktop. -
Page 14: Other Connections
Orator Orator Installation Guide This allows system name and PC Adapter Address to be changed. Changes to the PC card adapter address will only be required if there is a hardware clash with other PC devices such as a sound card or CD-ROM. Any changes within PathFinder Lite must be matched by changes to the adapter card itself. -
Page 15: Alarms
Orator Orator Installation Guide 3.3.3 Alarms The output is a normally made solid state relay contact. Maximum current rating is 120mA. Connector type; 9 way D type fixed socket. Function PSU FAIL+ PSU FAIL - PSU FAIL+ PSU FAIL -... -
Page 16: Bit/S Link
Orator Orator Installation Guide 3.3.5 20M bit/S Link Connector type: 9 way D type fixed plug Function Error Out CPU Analyse N Test N Reset Ground From PC- From PC+ To PC- To PC+ Page 16 of 37 Issue 2... -
Page 17: Gpi O Connector
Pin Number Function GROUND Output 1+ Output 1- The circuit below shows suggested Output 2+ wiring for Output 1 of the Orator Output 2- Logic facilities Maximum current Output 3+ through the output stage must be Output 3- limited to 200mA and the maximum Output 4+ permitted external voltage is +200V. -
Page 18: Beltbox
Orator Orator Installation Guide 3.3.7 Beltbox Connector type: 12 way Hirose fixed plug Pin Number Function Chassis (cable screen) Main audio + (PTB) to beltpack Main audio - (PTB) to beltpack Audio 2+ (Prog Snd) to beltpack Audio 2- (Prog Snd) to beltpack... -
Page 19: Control Panels
Orator Orator Installation Guide 4. CONTROL PANELS All control panels connect to the matrix in point to point topology. Each panel utilises a single matrix port, although expansion panels may be connected to a single “ master” panel using the expansion in and expansion out connectors fitted on the rear of the panel. Two standard panels may be linked together, for example to provide 48 keys for an operator, but only utilising a single matrix port. -
Page 20: 500-30 Series Standard Control Panel Rear View
Orator Orator Installation Guide 4.1.1 500-30 Series Standard Control Panel Rear View 4.1.2 500-30 Series Control Panel Connections Function Analyse Input Matrix – 9D Fixed Plug Enable Remote Boot Function Ground NC (Screen) Transputer Link Out+ Data Out- Transputer Link In+... -
Page 21: 500-30 Series Dip Switch Settings
Orator Orator Installation Guide GPIO (Local logic in and out) - 9D Fixed Socket Function Notes Ground Logic Input 1 Logic Input 2 Logic 2 Out Common Internal +5V (Out) Protected with series 44R & 1N4002 diode. Logic Output 1... -
Page 22: 500-39-30 / 31 1U 12 Key Standalone Panel With Loudspeaker
Orator Orator Installation Guide 4.2 500-39-30 / 31 1U 12 key Standalone Panel with loudspeaker This panel provides more basic facilities than the 500-30 range. It does not have LCD displays and only provides connection to the matrix, audio I/O and the test port at the rear. -
Page 23: 500-39-30 Rear View
Orator Orator Installation Guide 4.2.2 500-39-30 Rear View Trilogy Broadcast Limited Issue 2 Page 23 of 37... -
Page 24: 500-41 Series Desktop Panels
Orator Orator Installation Guide 4.3 500-41 Series Desktop Panels These differ from the other control panels since the matrix link is via a RJ-45 connector. The pin-out is given in the table below. To make a cable, use a 9-way plug at the matrix end. The following wiring applies to panels marked "Mod State 2"... -
Page 25: 500-40 Series Expansion Panels
Orator Orator Installation Guide 4.4 500-40 Series Expansion Panels Control Panels may be linked together to provide additional facilities at one operating position. Additional level controls (RENs) or switches may be added. Alternatively, two standard panels from the 500-30 series may be linked together and will only utilise a single matrix port. -
Page 26: 500-40 Series Control Panel Rear View
Orator Orator Installation Guide 4.4.2 500-40 Series Control Panel Rear View Page 26 of 37 Issue 2 Trilogy Broadcast Limited... -
Page 27: Typical Expansion Panel Configuration
B (see 4.4.4). Ø The audio only operates on the first panel of the chain: if required, the microphone may be removed from the second “ standard” panel. Trilogy can supply a blank plug for the mic fixing. Ø The maximum suggested cable length for interlinking cables is 10 metres. - Page 28 Orator Orator Installation Guide Page 28 of 37 Issue 2 Trilogy Broadcast Limited...
-
Page 29: Expansion Panel Interconnection Cables
Orator Orator Installation Guide 4.4.4 Expansion panel interconnection cables Type A (max length 10 metres) 9 way D Free Function Function 9 way D Free Plug - Pin Plug - Pin Transputer Pair 1 Transputer Data out + Data in +... - Page 30 Orator Orator Installation Guide Page 30 of 37 Issue 2 Trilogy Broadcast Limited...
-
Page 31: Other Equipment
5. OTHER EQUIPMENT 5.1 Belt Boxes Belt Boxes may be connected to the Orator matrix, on ports configured as 4 wire. They require an external voltage supply, either +15V or µ 15V depending on the type number. If the belt-boxes have been supplied as part of the initial system, then an external voltage connector will have been fitted to the Orator power supply. -
Page 32: Telephone Interfaces
Telos ONE “ smart” telephone hybrid. To obtain the full facilities available with the Orator system, the Telos ONE should be fitted with the Telos Super Auto Answer (SAA) option. During the installation it is important to remember that the Telephone Interface must be connected to the matrix via a panel port wired with 4 pair cable. -
Page 33: Rt Equipment
If the Telos equipment is purchased separately (i.e. not via Trilogy) it is important to specify to your supplier that the equipment is for connection to a Trilogy Orator system. This allows the correct software versions and hardware modifications to be fitted. -
Page 34: Isdn Interface Connector Pin-Outs
Orator Orator Installation Guide 5.4.1 ISDN Interface Connector Pin-Outs 5.4.1.1 Bearer 1 & Bearer 2 Audio Input XLR pin 1 Ground XLR pin 2 Balanced input 1 XLR pin 3 Balanced input 2 Audio output XLR pin 1 Ground XLR pin 2... -
Page 35: Specification
Orator Orator Installation Guide 6. SPECIFICATION 6.1 General Number of Ports 18 or 36 if second audio card is fitted. 6.2 Matrix Audio Specification Port Type 4 wire electronically balanced Frequency Response -3dB @ 25Hz and 15.5kHz 0dB ± 1dB... -
Page 36: Gpio Specification
Orator Orator Installation Guide 6.5 GPIO Specification Number of physical Inputs 8, grounding contact Number of physical Outputs 8, earth-free opto-isolated mosfet Loopback I/O Outputs 9 to 16 internally loped back to inputs 9 to 16. 6.6 P.C. Type Any IBM PC or compatible computer running Windows 95 / 98. -
Page 37: Ettings
In addition, the 500-41 desktop panel is factory configured to operate with PathFinder Lite systems. To set the panel software to emulate T-Edit systems, solder a shorting link in the position labelled R130. This requires surface mount soldering tools: contact Trilogy for further advice.
Need help?
Do you have a question about the Orator and is the answer not in the manual?
Questions and answers