Table of Contents
Advertisement
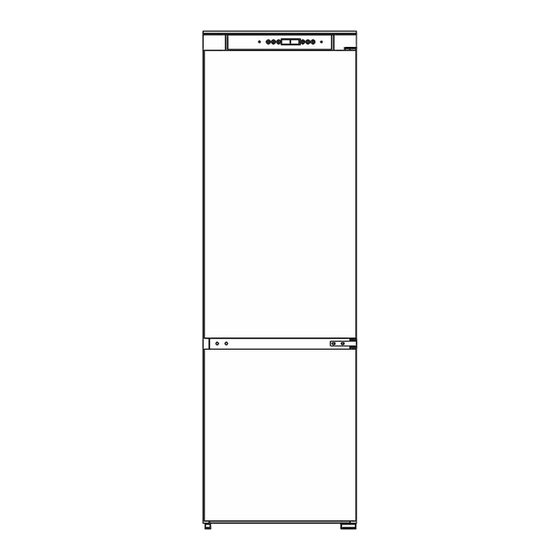
Integrated Fridge Freezer
Focal Point Fires plc.
Christchurch, Dorset BH23 2BT
Tel: 01202 499330 Option 5
Fax: 01202 499326
www.focalpointfires.co.uk
e : sales@focalpointfires.co.uk
Please note: Except where otherwise stated, all rights,
including copyright in the text, images and layout of this
booklet is owned by Focal Point Fires plc. You are not
permitted to copy or adapt any of the content without
the prior written permission of Focal Point Fires plc.
Downloaded from
www.Manualslib.com
Owner's Instructions
MODELS COVERED BY THESE INSTRUCTIONS
RD-270REU Integrated Fridge Freezer
manuals search engine
RD-270REU
All instructions must be handed to the user for
safekeeping.
Revision C - 09/13
1
GB IE
©
2013 Focal Point Fires plc.
Advertisement
Table of Contents

Summary of Contents for FocalPoint RD-270REU
- Page 1 Integrated Fridge Freezer Owner’s Instructions GB IE MODELS COVERED BY THESE INSTRUCTIONS RD-270REU Integrated Fridge Freezer Focal Point Fires plc. Christchurch, Dorset BH23 2BT Tel: 01202 499330 Option 5 Fax: 01202 499326 www.focalpointfires.co.uk e : sales@focalpointfires.co.uk RD-270REU Please note: Except where otherwise stated, all rights, including copyright in the text, images and layout of this booklet is owned by Focal Point Fires plc.
-
Page 2: Table Of Contents
Your appliance is only designed to be used in the home. It is suitable for storing food that needs to be chilled and refrigerated. If it is used for any other purpose or it is not used correctly, FOCALPOINT will accept no liability for any damage that may be caused. -
Page 3: Important Safety Information
2.0 IMPORTANT SAFETY INFORMATION GB IE - CONTINUED Refrigeration Your appliance contains R600a Refrigerant, which is a natural gas that does not contain CFC’s that can damage the environment. However it is a flammable substance, therefore care should taken: During the transportation and installation of the appliance make sure that the refrigeration pipework does not get damaged. If it does become damaged then sources of ignition and open flames should be avoided, also the room that the appliance is situated in should be thoroughly ventilated. -
Page 4: Rd-270Reu Specification
3.0 RD-270REU SPECIFICATION GB IE Appliance dimensions 200 cm Height: 1787mm Width: 540mm Depth: 544mm Aperture dimensions* Height: 1776 - 1782mm Width: 570mm Depth: 550mm 1034 1102 Ventilation requirements 1769 1787 Integrated appliances MUST have a minimum of 200cm free air flow for ventilation at the bottom and 200cm at the top of the appliance. -
Page 5: Appliance Description
3.1 APPLIANCE DESCRIPTION GB IE Important: when you install the appliance it is important to bear in mind its climate class. In order to find out the climate class of the appliance you should check the rating plate.The rating plate is located on the inside of the freezer, its climate class is SN,N,ST. -
Page 6: Appliance Features
3.2 APPLIANCE FEATURES GB IE Safety glass shelves The shelves may be placed in any of the guide slots within the interior of the appliance, they are protected from sliding out. To remove a shelf take off all of the items that are stored on the shelf that you want to remove.Then lift the rear of the shelf and carefully pull it out of the grooves. -
Page 7: Using Your Appliance
GB IE Before switching on Make sure that it has been installed by a suitably qualified person, as per the information contained in FOCALPOINT’s installation instructions. After delivery, wait for eight hours before connecting the appliance to the mains supply.This will allow any refrigerant gasses that may have been disturbed during the transportation process to settle. -
Page 8: Storing Food In The Fridge & Freezer
6.0 STORING FOOD IN THE FRIDGE & FREEZER GB IE Warm food or evaporating liquids should not in stored in the refrigerator as this will increase the humidity inside of the appliance. All foods should be wrapped or covered.This is particularly important if the food has a strong flavour.You should use polythene bags or sheets, aluminium foils or wax paper. -
Page 9: Freezer Tips
6.2 FREEZER TIPS GB IE Freezing fresh food To freeze the maximum quantity of fresh food specified on the rating plate you should follow the “Freezing using the super frost setting” section as per below on page 9 a few hours prior to freezing. For smaller quantities of fresh food then it should be switched on 1 hour prior to freezing as per the below. -
Page 10: Saving Energy When Using The Fridge Freezer
6.2 FREEZER TIPS GB IE - CONTINUED Freezing using the Super Frost Setting There is no need to adjust either of the thermostat displays. The freezer temperature will decrease and then appliance will get to its lowest temperature. Place the food that is to be frozen inside the freezer. Once the food is frozen you should turn off the super frost setting. -
Page 11: Cleaning And Maintenance
7.1 CLEANING AND MAINTENANCE GB IE WARNING: PLEASE ENSURE THAT THE APPLIANCE IS DISCONNECTED FROM THE MAINS SUPPLY BEFORE ATTEMPTING TO CLEAN IT. Do not clean the appliance by pouring water onto it or spraying water over it. The refrigerator and freezer compartment should be cleaned periodically using a solution of bicarbonate of soda and lukewarm water. Clean the accessories separately with soap and water. -
Page 12: Replacing The Led Panel
GB IE Disconnect the appliance from the mains supply. Leave the door to the freezer compartment open.You can place a bowl of warm water inside the freezer compartment to speed up to defrost process. Once all the ice that has built up has melted then inside of the freezer compartment should be dried thoroughly. Failure to do this will result in immediate ice build-up when the appliance is turned back on. -
Page 13: Electrical Connection
Check whether there is an electrical socket available, which will be accessible after the appliance is installed. 8.3 REVERSING THE RD-270REU DOORS The doors of the Fridge/freezer can be set to open from the left or the right. If you want the doors to be hinged on the left hand side and opening from the right hand side you will need to follow the door reversal process. -
Page 14: Tools Required
8.3 REVERSING THE RD-270REU DOORS GB IE - CONTINUED Tools Required 1. Grip Pliers 2. Bladed Screwdriver 3. Phillips Cross Headed Screwdriver A) Remove the upper support plate by removing the screws from the top Figure 10 and sliding the support plate forward. As shown in Figure 10. - Page 15 8.3 REVERSING THE RD-270REU DOORS GB IE - CONTINUED E) Unscrew the two screws and remove the central hinge. As shown in Figure 14. F) Remove the freezer door by lifting it upwards and away from the lower Figure 15 hinge As shown in Figure 15.
- Page 16 8.3 REVERSING THE RD-270REU DOORS GB IE - CONTINUED I) Remove the screw hole covers. As shown in Figure 18. IMPORTANT: the screw cap and screw hole covers should be retained for use on the opposite side of the appliance.
- Page 17 8.3 REVERSING THE RD-270REU DOORS GB IE - CONTINUED M) Refit the upper support bracket along with the hinge cover. As shown in Figure 22. IMPORTANT: Check that both the upper and lower doors open and shut correctly without fouling after you have completed the door reversal process.
-
Page 18: Aperture & Ventilation Requirements
8.4 APERTURE & VENTILATION REQUIREMENTS GB IE The appliance aperture should be: Height 1780mm Depth 550mm Width 570mm 1) The height of the aperture needs to be exactly 1780mm. If necessary, you should utilise extra filler shelves to fill any additional space that you have in the aperture. -
Page 19: Installing Your Fridge Freezer
8.5 INSTALLING YOUR FRIDGE FREEZER GB IE Please note: This section applies to a fridge/freezer which doors open from the right hand side. If your fridge/freezer doors open from the left hand side then installation stages will need to be reversed. A) Install the application towards the left hand side of the housing unit leaving a gap of approximately 5mm. - Page 20 8.5 INSTALLING YOUR FRIDGE FREEZER GB IE - CONTINUED F) Fix the bracket that is supplied with the fixing kit into position. As shown in Figure 34. G) Fix the flat bracket that is supplied with the fixing kit, on the opposite side of the appliance.
-
Page 21: Troubleshooting
This includes situations where appliances have been tiled in, sealed in with sealant, have wooden obstructions placed in front of the appliance like plinths or any installation other than the one specified by FOCALPOINT has been completed. ©...
Need help?
Do you have a question about the RD-270REU and is the answer not in the manual?
Questions and answers
NO POWER TO FRIDGE FREEZER WHAT CAN THIS BE?
The possible causes of no power to the FocalPoint RD-270REU fridge freezer are:
- The plug is not fully inserted into the power socket.
- There is no power to the mains supply (e.g., due to a power cut or a blown fuse).
- The display has been turned to the off position.
- The mains supply voltage does not match the voltage stated on the appliance's rating plate.
This answer is automatically generated
@Mrs Marie C Rogerson Mijn diepvriezer bereikt zijn gevraagde graden niet, de super invriesknop is ingeschakeld,