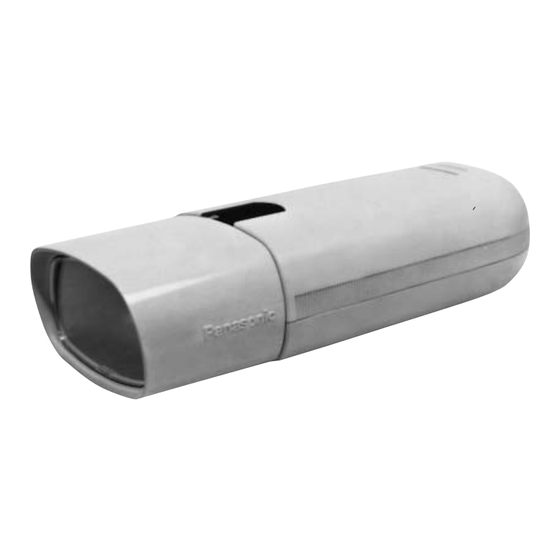
Summary of Contents for Panasonic WV-7110A
- Page 1 Indoor Camera Housing WV-7110A Before attempting to connect or operate this product, please read these instructions completely.
- Page 2 You should note the serial number of this unit in the space provided and retain this book as a permanent record of your purchase to aid identification in the event of theft. Model No. WV-7110A Serial No.
-
Page 3: Table Of Contents
LENS FOCUS ADJUSTMENT ... 10 SPECIFICATIONS ... 11 ACCESSORIES ... 11 PREFACE The Panasonic's WV-7110A Camera Housing is designed to be used for indoor applications. This hous- ing can easily be installed after the camera adjustment and installation had been completed. -
Page 4: Installation
INSTALLATION A.Mounting from top 1. Disassembling of camera housing Remove the Front Case, Rear Cover and Upper/ Lower Covers as shown in the following. Upper Cover Front Case APPLICABLE MODELS AND MOUNTING Camera WV-BL200 Series WV-LA6/LA12 WV-BL600 Series WV-LA4.5/LA6B2/LA12B2 WV-LA8B/LA16B/LA25B/LA50B WV-LM6B2/LM12B2 WV-LA2.8 2. - Page 5 APPLICABLE MODELS AND MOUNTING Camera WV-CP460 Series See below. WV-CP470 Series WV-CP240 Series WV-BP140 Series Camera WV-CP460 series WV-CP470 series WV-CP240 series WV-BP140 series Lens Angle-A Apply the placing directions and fixing holes shown below. <Normal Position> Hole A B C D E F Use properly the other side applicable hole, besides the hole A through F.
- Page 6 a.Mounting of the Angle-A(supplied) a-1. Remove the mounting adaptor of the camera by removing the two mounting adaptor fixing screws. Note: Use the supplied screws when fixing the Angle- A or Angle-B. Using shorter ones may cause the camera to fall down, or longer ones may damage the inside of the camera.
- Page 7 a-3. Be sure to stick the Angle Seat(supplied) onto the Angle-A. Angle seat (supplied) Caution: When the left and right pan limit screws should be removed from the pan/tilt unit due to the Angle-A installation, use the Angle Seat as shown below.
- Page 8 b-3. Re-install the mounting adaptor on the Angle-B. 2-2. Complete adjustment required for the camera operation. 2-3. Mount the camera mounting bracket or the pan/tilt mechanism onto the mounting adaptor of the cam- era. 3. Installation of Upper and Lower Cover 3-1.
- Page 9 3-3. Attach the Front Case to the Upper and Lower Covers. 4. Installation of Rear Cover Attache the Rear Cover as shown in the following. Cut off the shaded portion Note: 1. Be sure to insert the cable opening side to this housing first.
-
Page 10: Lens Focus Adjustment
5 Cable Clamp 5-1. Attach the Cable Clamp (supplied) to the housing. 5-2. Clamp the cables with the cable clamp. B.Mounting from bottom The Upper and Lower Cover must be attached on the camera in reverse. LENS FOCUS ADJUSTMENT When the focus adjustment is required, remove the Front Case. -
Page 11: Specifications
SPECIFICATIONS Dimensions : 133(W) X 83(H) X 320(D) mm 5-1/4"(W) X 3-1/4"(H) X 12-5/8"(D) Weights : 0.5 kg(1.1 lbs.) Weight and dimensions indicated are approximate. Specifications are subject to change without notice. ACCESSORIES Angle-A...1 pc. Angle-B...1 pc. Angle Fixing Screw...2 pcs. Angle Seat ...1 pc. - Page 12 Unit Company of Matsushita Electric Corporation of America Security Systems www.panasonic.com/cctv Executive Office : One Panasonic Way 3E-7, Secaucus, New Jersey 07094 Zone Office Eastern : One Panasonic Way, Secaucus, NJ 07094 (201) 348-7303 Central : 1707 N.Randal Road, Elgin, IL 60123 (847) 468-5205 Western : 6550 Katella Ave., Cypress, CA 90630 (714) 373-7840...


Need help?
Do you have a question about the WV-7110A and is the answer not in the manual?
Questions and answers