Table of Contents
Advertisement
Advertisement
Table of Contents

Related Manuals for Tevion FS 5000

Summary of Contents for Tevion FS 5000
-
Page 3: Contents Of Box
Dear Customer, Congratulations on purchasing this high-quality TEVION® product. You have chosen a modern Film Scanner, with generous features and good accessories, which is especially easy to use. Please read this instruction manual before using the product with due care and attention, in particular, the safety instructions. -
Page 4: Table Of Contents
2. Table of contents Page Introduction 1. Contents of box 2. Table of contents 3. Safety instructions 4. Overview of device 5. Inserting negatives 6. Inserting slides 7. Removing dust from scanner optics 8. Installing the software 9. Connecting the Film Scanner to your computer 10. -
Page 5: Safety Instructions
3. Safety instructions Improper use of the scanner and accessories puts you and others at risk of danger and may damage or destroy the scanner, so please read and observe strictly the following safety instructions, hazard warnings and general warnings. Purpose of use ... - Page 6 Do not wrap anything around the Film Scanner and do not place it on top of clothing or textiles. This can potentially cause a build-up of heat within the unit, causing the housing to deform, and there is a risk of fire. Injuries and material damage ...
-
Page 7: Overview Of Device
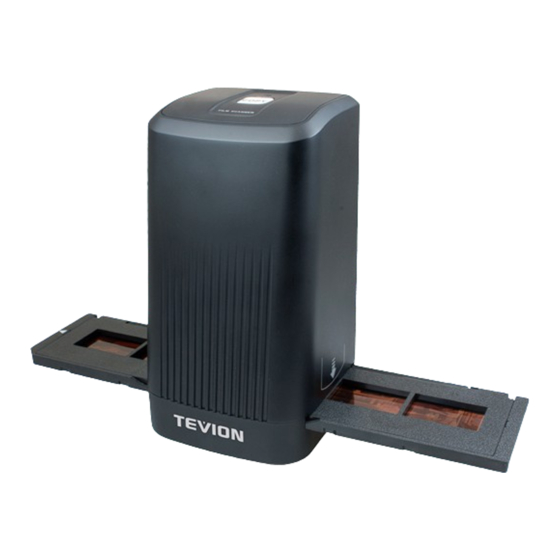
4. Overview of device Cleaning brush Slide feeder Negative holder Note: • This Film Scanner supports only Windows XP SP2 and above, Vista, Windows 7 and USB 2.0. • In the interests of getting clear images at all times, it is advisable to clean the glass surface of the scanner’s media bay often using the cleaning brush (inclu- ded) or a clean, dry cotton bud free of alcohol. -
Page 8: Inserting Negatives
5. Inserting negatives Open the negative holder at the position marked “Open” and place the holder, open- ed, in front of you as shown below. Then place the negatives the usual way up (neither turned nor upside down) into the recesses provided in the holder for this purpose. Use the numbering on every negative strip as a guide. -
Page 9: Inserting Slides
6. Inserting slides The supplied Film magazine can be used for slides of a variety of thicknesses up to a maximum of 3.2 mm. Before using the magazine it must be set to the thickness of the slides to be scanned. Use the sliding button on the upper side of the slide feeder to choose from three thicknesses (see picture): 1) Upper position: for cardboard-framed slides up to 1.0 mm... - Page 10 Note: • If the slide feeder is inserted into the scanner from the wrong side you will damage the scanner’s protective fl aps! Such damage cannot be repaired under warranty! Slides placed in the bay are pushed into the scanner one by one using the lever loca- ted on the side of the slide feeder.
-
Page 11: Removing Dust From Scanner Optics
7. Removing dust from scanner optics Open the NimoFilm program just as if you were going to scan in an image (see page 15). Do not insert either the slide feeder or the negative holder into the scanner. You will now see in the NimoFilm preview window where any dust has gathered. -
Page 12: Installing The Software
8. Installing the software The program NimoFilm must be installed before using the Film Scanner. Place the installation CD in your CD/DVD drive, and the installation CD menu will appear automatically. When the start-up screen appears, select “NimoFilm” to install the software. You will then be given general instructions for installing the software under Windows XP, Vista and 7 (varies slightly from system to system). - Page 13 1. First, choose the language in which the program should be installed, then click “Next”. 2. The installation procedure is then prepared. 3. Click “Next” to continue installation.
- Page 14 4. Read the license agreement before saying whether or not you are in agreement with it. Then click “Next”. 5. Choose the folder in which the program should be installed, then click “Next”. 6. Click “Install” to install the program.
- Page 15 7. The installation procedure is then carried out. To complete the installation, click “Finish”, then remove the installation CD from your drive and re-boot the computer. 9. Once installed, the software automatically puts a “NimoFilm” symbol on your desktop.
-
Page 16: Connecting The Film Scanner To Your Computer
9. Connecting the Film Scanner to your computer Plug the scanner’s connector cable into one of your computer’s USB ports. The power LED on the scanner will then light up in green. The transparency scanner will only work on a USB port that supports USB 2.0. On desk- top computers, such connection ports are usually located on the rear side. -
Page 17: Using The Film Scanner
10. Using the Film Scanner On your system’s desktop, double-click the NimoFilm icon to open the software. To scan in images, select the folder – on the left-hand side of the screen – in which you want the scanned images to be saved. The default setting is the “My Files/My Images” folder. - Page 18 On the “File” drop-down menu, select “Capture”. This opens the “Photo preview” win- dow which handles the scanning-in process. Now place slides or negatives into the Film Scanner using the appropriate original- image holder. The image is then displayed in the preview window showing how it will look when scanned in.
-
Page 19: Film Types
The preview window then presents you with the following setting options: Film Types 1) Positive: to scan in slides. 2) Negative: to scan in colour negatives. 3) Black-White: to scan in black-and-white negatives. Note: • Upon scanning in, negatives are converted immediately into positive images. Resolution ... - Page 20 Colour settings Select one of the pre-set colour settings “Nature”, “Colourful” or “Old Photo” or choose “Customize” and create your own colour settings manually for the preview image by moving the sliders to adjust exposure, brightness, contract and colour balance. As soon as you have made all settings, the image can be scanned in –...
- Page 21 11. Confi rmity This device has been tested under Part 15 of the FCC Rules, and it has been con rmed that the tolerance limits for a Class B digital device have been met. These tolerance limits are intended to o er suitable protection against hazardous sources of interference when installed in residential accommodation.
-
Page 22: Cleaning The Device
12. Cleaning the device CAUTION! Be sure to disconnect the USB cable from the computer before undertaking any cleaning activity. Do not clean with any solutions or aggressive or scouring cleaning agents, otherwise the surfaces may become damaged. Clean the equipment carefully using a soft, dry cloth. Remove stubborn dirt or soiling by making the cloth slightly damp, but take care to allow no moisture whatsoever to get into the equipment. -
Page 23: Warranty And Service
3-year manufacturer’s warranty. For details, please refer to the warranty card enclosed separately. Please contact our hotline before returning any defective equipment. Service address: Manufacturer’s address: Sertronics LTD supra TEVION® Service Foto-Elektronik-Vertriebs-GmbH 45 Regal Drive, Wallsall Enterprise Park Denisstr. 28A Wallsall, WS2 9HQ 67663 Kaiserslautern United Kingdom Germany Tel.: 0800 - 78 77 23 68... -
Page 24: Technical Data
16. Technical data Model Tevion FS 5000 Image sensor 5.1 megapixel CMOS Lens F=4, f=3.93 Distance Fixed focus Resolution 5 MP, 1800dpi (3600 dpi interpolated) Colour depth 30 bit (10 bit per colour channel) Scanning method Single pass Exposure control... -
Page 25: Glossary
17. Glossary Accessories 1 Image scanning 15 et. seq. Image sensor 22 Installation (software) 10 Brightness 18 Negatives (inserting) 6 Negative holder 5,6 Calibration 15 NimoFilm 10, 15 et. seq Cleaning (device) 20 Cleaning brush 5,9 Colour settings 18 Compliance 19 Overview of device 5 Computer connection 14 Conformity 19... - Page 26 Technical data 22 USB port 14 USB connection 5 Warnings 3 et. seq. Warranty 21...
- Page 28 supra Foto-Elektronik-Vertriebs-GmbH 50240 Denisstr. 28A 03/2012 67663 Kaiserslautern 2525 7632 Germany...
Need help?
Do you have a question about the FS 5000 and is the answer not in the manual?
Questions and answers