Table of Contents
Advertisement
Advertisement
Table of Contents

Related Manuals for Unimax MA-2025-4G

Summary of Contents for Unimax MA-2025-4G
-
Page 1: User Manual
Unimax HSPA+ Ethernet Modem Router | MA-2025 Unimax 4G Ethernet Modem Router | MA-2025-4G Unimax Ethernet Modem Router MA-2025 | MA-2025-4G User Manual This manual is the sole and exclusive property of Maxon Australia. Not to be distributed or divulged without prior... - Page 2 ...
-
Page 3: Table Of Contents
CONTACT INFORMATION ................8 RF EXPOSURE COMPLIANCE ............... 9 Caution ....................9 REVISION HISTORY ................. 11 UNIMAX+ USER MANUAL ................. 12 Disclaimers ..................12 INTRODUCTION ................13 Overview ................... 13 ... - Page 4 WEB INTERFACE ................24 Configuration Page Descriptions ............ 25 5.1.1 Status .................. 25 5.1.2 LAN ..................27 5.1.2 WAN ................... 28 5.1.3 Maxconnect ................. 31 5.1.4 Password ................
- Page 5 Environment ..................61 Unimax+ Configuration ..............61 PowerSNMP Free Manager Configuration ..........62 Setting Unimax+ as a VPN Gateway or VPN Client ........64 VPN Gateway .................. 64 VPN Client (L2TP over IPSec) ..............65 ...
-
Page 6: Contact Information
C O N T A C T I N F O R M A T I O N In keeping with Maxon's dedicated customer support policy, we encourage you to contact us. TECHNICAL: Hours of Operation: Monday to Friday 8.30am to 5.30pm* Telephone: +61 2 8707 3000 Facsimile:... -
Page 7: Rf Exposure Compliance
R F E X P O S U R E C O M P L I A N C E The use of this device in any other type of host configuration may not comply with the RF exposure requirements and should be avoided. During operation, a 20 cm separation distance should be maintained between the antenna, whether extended or retracted, and the user’s/bystander’s body (excluding hands, wrists, feet, and ankles) to ensure RF exposure compliance. - Page 8 Potentially Unsafe Areas Posted Facilities: Turn off this device in any facility or area when posted notices require you to do so. Blasting Areas: Turn off your device where blasting is in progress. Observe restrictions and follow any regulations or rules. Potentially Explosive Atmospheres: Turn off your device when you are in any area with a potentially explosive atmosphere.
-
Page 9: Revision History
R E V I S I O N H I S T O R Y Product UNIMAX+ Industrial Ethernet Router Model MA-2025, MA-2025-4G Document Type Current Version Number Status of the Document Public Release Revision Date July 2014 Total Number of Pages... -
Page 10: Unimax+ User Manual
U N I M A X + U S E R M A N U A L All data and information contained in or disclosed by this document are confidential and proprietary information of Maxon Australia, and all rights therein are expressly reserved. -
Page 11: 1 . I N T R O D U C T I O N
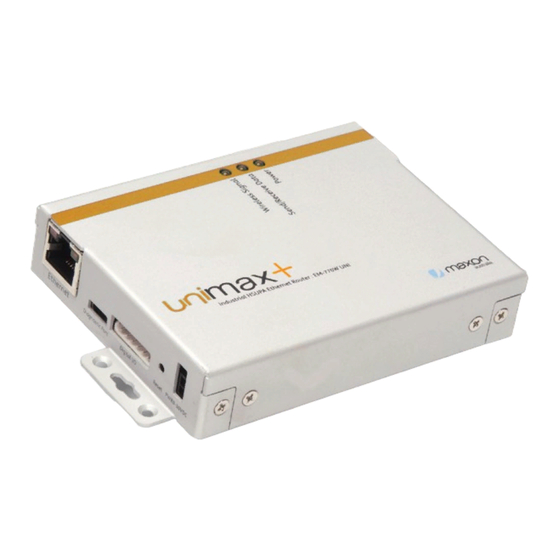
The Unimax+ Ethernet Router performs data communication functions between wired- LAN (Local Area Network) and wireless WAN (Wide Area Network) using LTE cellular station wirelessly (Unimax+ 4G) and HSPA cellular stations wirelessly (Unimax+ 3G). The Unimax+ has wide input voltage range from 9~30 [VDC] which provides compatibility for platforms utilizing various industrial applications. - Page 12 Periodic Reset Diagnostic Port Digital Inputs (5V tolerable) Digital Outputs (Supports up to 24V, 30mA with external I/O Board) L2TP/IPsec VPN Wide Range input Voltage range from 9 to 30[VDC] Flash USB 2.0 Socket (8MB) Memory SDRAM (32MB) Mini PCI Express USB2.0 GPIO...
-
Page 13: 2 . H A R D W A R E
Solid ON data communication Send/Receive Indicates connection mode with 500ms ON and 500ms OFF Data data communication Indicates Unimax+ is not connected to Internet Indicates main power is ON POWER Indicates main power is OFF [Table 1: LED Display] ... -
Page 14: Side Panel (Left)
Side Panel (Left) 1. Ethernet Port 2. Diagnostic Port (for debugging) 3. Digital I/O (Input: max 5VDC, Output: max 3.3VDC) PIN NUMBER DESCRIPTION 1 (VDD) 3.3V out 2 (D/I 1) Digital input (max 5VDC) 3 (D/I 2) Digital input (max 5VDC) 4 (D/O 1) Digital output (max 3.3VDC) 5 (D/O 2) -
Page 15: 3 . S P E C I F I C A T I O N S
Under 150 [mA] @ 12 [VDC] PKT Data Connection Under 180 [mA] @ 12 [VDC] [Table 5: Electrical Specifications] Hardware ITEM DESCRIPTION Product UNIMAX+ (3G & 4G) Industrial Ethernet Router User MCU 32-bit Network Processor Program Memory 8M Bytes (Flash) Data Memory 32M Bytes (SDRAM) -
Page 16: 4 . P R O T O C O L S & E N C R Y P T I O N S
4 . P R O T O C O L S & E N C R Y P T I O N S PPP (Point-to-Point Protocol) PPP (Point-to-Point Protocol) is a protocol for communication between two computers using a serial interface, typically a personal computer connected by phone line to a server. -
Page 17: Dhcp (Dynamic Host Configuration Protocol)
DHCP (Dynamic Host Configuration Protocol) DHCP (Dynamic Host Configuration Protocol) is a communication protocol that lets network administrators centrally manage and automate the assignment of Internet Protocol (IP) addresses in an organization's network. Using the Internet Protocol, each machine that connects to the Internet needs a unique IP address, which is assigned when an Internet connection is created for a specific computer. -
Page 18: Snmp (Simple Network Management Protocol)
A local IP address to one global IP address statically A local IP address to any of a rotating pool of global IP addresses that a company may have A local IP address plus a particular TCP port to a global IP address or one in a pool of them A global IP address to any of a pool of local IP addresses on a round-robin basis NAT is described in general terms in RFC 1631, which discusses NAT's relationship to... -
Page 19: Icmp (Internet Control Message Protocol)
servers are outfitted with the receivers and they use protocols such as SNTP to synchronize the clock times of networked computers. Degrees of separation from the UTC source are defined as strata. A radio clock (which receives true time from a dedicated transmitter or satellite navigation system) is stratum-0;... -
Page 20: Ike
Internet Key Exchange (IKE or IKEv2) is the protocol used to set up a security association (SA) in the IPSec protocol suite. IKE uses a Diffie-Hellman key exchange to set up a shared session secret, from which cryptographic keys are derived. Public key techniques or, alternatively, a pre-shared key, are used to mutually authenticate the communicating parties. -
Page 21: Esm
4.11 Encapsulating Security Payload (ESP) is a member of the IPSec protocol suite. In IPSec, it provides origin authenticity, integrity, and confidentiality protection of packets. ESP also supports encryption-only and authentication-only configurations, but using encryption without authentication is strongly discouraged because it is insecure. Unlike Authentication Header (AH), ESP does not protect the IP packet header. -
Page 22: 5 . W E B I N T E R F A C E
Unimax+ can be configured through its web interface. [Figure 2: Web-based configuration of Unimax+] Power ON the Unimax+ Router and connect to a computer using an Ethernet cable. To launch the web interface of the Unimax+, open a web browser such as Internet Explorer... -
Page 23: Configuration
Operation time after power up System Time System time acquired from modem F/W Version Current firmware version of Unimax+ Router Current Firmware version of the cellular module inside Module Version Unimax+ Router Current operation mode i.e. Modem Router or Bridge... - Page 24 Packets billing purposes. Unimax+ IP address Netmask Subnet Mask assigned by Unimax+ for LAN MAC address of Unimax+ LAN adaptor Send/Receive Status of Incoming and Outgoing LAN data packets Packets [Table 6: Status Page Information] ...
-
Page 25: Lan
5.1.2 The LAN page allows configuring the IP address of Unimax+, DHCP range and viewing information of the clients connected on the Unimax+ LAN port. [Figure 6: LAN Page] ITEM DESCRIPTION Unimax+ can be configured with a Static IP or... -
Page 26: Wan
5.1.2 The WAN page allows configuring network authentication information, connection retrial and Scheduler timers. [Figure 7: WAN Page] ... - Page 27 LAN. Disconnecting client from LAN will also force Unimax+ to disconnect WAN connection with this setting disabled Unimax+ will start a back off algorithm on power up as set by these times instead of constantly retrying PPP connection. Unimax+ will reset if PPP connection is not successful after 2 retrial timer has expired and start again.
- Page 28 [Table 9: WAN Page Information] Invalid PPP password characters list: “(double quotation mark) ‘(quotation mark) ?(question mark) )(bracket) @(at sign) ;(semi colon) |(pipe sign) I(upper case I) ...
-
Page 29: Maxconnect
5.4.15. 5.1.4 Password The Password page allows changing the authentication information required to access the Unimax+ web page. If new authentication details are applied, you will be prompted to re-enter those details as a confirmation. ITEM DESCRIPTION... -
Page 30: Log Out
[Figure 8: Password Page] 5.1.5 Log Out Log Out page provides a user with an option to close the web interface window. [Figure 9: Log out Page] ... -
Page 31: Configuration Page Descriptions - Advanced
5.2.3 DoS Filters This page allows the user to congfigure the Unimax to be blocked from DoS attack. Using the DoS filter features, TCP SYN packets, TCP/UDP New Connections and ICMP requested can be filtered to avoid DoS attacks. In order to use this feature, the user should upgrade their device with a firmware later then 5.4.23... -
Page 32: Dmz
Check box to enable DMZ IP Address of the target device. If DMZ is set, all DMZ Host IP traffic addressed to Unimax+ WAN IP is passed Address to the host with this IP address only. Web interface of the Unimax+ will not be accessible. -
Page 33: Port Forwarding
The Port forwarding page allows for setting up a firewall that will allow remote access for specific ports and protocols to designated hosts. When remote users send requests for accessing the local server, Unimax+ can forward those requests to the appropriate server(s). -
Page 34: Ip Filtering
5.2.6 IP Filtering The IP filtering page provides simply a mechanism that decides which types of IP datagram’s should be processed or discarded. ITEM DESCRIPTION Enable IP Check box to enable IP Filtering Filtering IP Address IP address of the target device Filtering Protocol: Select protocol TCP, UDP or both [Table 14: IP Filtering Page Information]... -
Page 35: Mac Filtering
DESCRIPTION Enable MAC Check the box to enable MAC Filtering filtering Select Access or Deny. Access - Allows access to Unimax+ web page Rule but denies internet access. Deny – Denies access to Unimax+ web page and internet. Input MAC address to determine deny or MAC Address access to the internet. -
Page 36: Vpn
5.2.8 The VPN page allows configuring VPN Server/Client mode in the Unimax+. The Unimax+ VPN supports only L2TP OVER IPSec protocol. [Figure 15: VPN Page] ITEM DESCRIPTION VPN Gateway (L2TP/IPSec): Unimax+ acts as a VPN Server VPN Client (L2TP/IPSec Mode... - Page 37 [Figure 16: Digital I/O Control Page] ...
-
Page 38: 5.2.10 Ping Tool
Message designated phone numbers when an input INPUT changes state This is the message that will switch the outputs on when received only from the designated Message phone numbers. The Unimax+ will ignore the OUTPUT message received from different phone numbers than the designated on this page. -
Page 39: 5.2.11 Snmp
The SNMP page is used to configure SNMP agent. If this option is enabled then a remote SNMP manager can connect to the SNMP agent and acquires network information. The Unimax+ supports SNMPV2. Please contact Maxon for the most up to date MIB. -
Page 40: 5.2.12 Static Route
LAN, WAN and VPN interfaces. Using this feature the user can communicate in both directions once a VPN is established. Configuration Page Descriptions – Administrator 5.3.3 The AT page allows for sending commands to the Unimax+ module. [Figure 21: AT Commands Page] ... -
Page 41: Backup (Save/Reload)
File configurations to a file Load Settings Allows the user to restore configurations from from File a saved file Restore to Allows setting the Unimax+ configurations to Factory Default factory default Table 24: Backup Page Information] Figur Syst Logs The System page allows for viewing the system logs plus enabling the remote syslog function and the IP address of the remote syslog server. - Page 42 ITEM DESCRIPTION Enable Logs Check the box to enable Syslogs Enable Remote Check the box to enable Remote Syslog Syslog function Log Server IP Enter the IP address of remote server address Refresh the system logs or Clear the system Refresh / Clear logs data [Table 25: System Logs Page Information]...
-
Page 43: Time Zone
Maxon does not recommend enabling the NTP server when using the scheduler function on WAN page, as the Unimax+ does not contain a real time clock. On the other hand (network time) will remain in the same time zone as the carrier. -
Page 44: System
5.3.6 System The System page allows for the configuration of Administration and Remote Management options. [Figure 26: System Page] ... -
Page 45: Upgrade Firmware
5.3.7 Upgrade Firmware Upgrade Firmware page is used to upgrade the firmware of Unimax+. Please note that this option doesn’t upgrade the cellular module firmware. This process can take several minutes (when upgrading locally connected via LAN to the Unimax+) and the device should not be switched off during the upgrade process. -
Page 46: Save & Reboot
5.3.8 Save & Reboot Save & Reboot page allows saving the current settings and restarting the Unimax+. [Figure 28: Save and Reboot Page] ... -
Page 47: 6 . O P E R A T I O N
Modem Router Mode In Modem Router Mode, the Unimax+ acquires the IP from the ISP, keeps it and shares it with connected Host PC's via NAT. Unimax+ gets public/private IP (IP-2) from ISP via the cellular network whereas the host PC's get each private IPs (IP-1) from the DHCP server of the Unimax+. - Page 48 [Figure 30: Setting Host PC] Right click on “Local Area Connection” under Network Connections and select Properties. [Figure 31: Local Area Connection] Double click on the “Internet Protocol [TCP/IP]” item. [Figure 32: Internet Protocol TCP/IP] Check “Obtain an IP address automatically” and then click the OK button. ...
-
Page 49: Bridge Mode
WAN IP address and the Send/Receive Data LED will blink. Bridge Mode In Bridge mode, the host PC acquires an IP from the ISP directly through the Unimax+. The Unimax+ has a PPPoE Authenticator internally that communicates with PPPoE on client PC or other Router. - Page 50 PPPoE connection should be created on the host PC as follows: For Windows XP, right click on “My Network Places” icon and select Properties. [Figure 35: Setting Host PC] For establishing PPPoE connection, click on “Create a new connection” [Figure 36: Create a new connection] A New Connection Wizard will appear.
- Page 51 [Figure 38: Connect to the Internet] Check the “Set up my connection manually” icon and then click Next. [Figure 39: Set up my connection manually] If your connection requires a username and password then check “Connect using a broadband connection that requires a user name and password” item, otherwise click “Connect using a broadband connection that is always on”.
- Page 52 [Figure 41: ISP Name] Enter user Username/Password and confirm password details provided by the ISP and then click Next. [Figure 42: Username/Password details] Check “Add a shortcut to this connection to my desktop” and click on Finish to close the wizard. [Figure 43: Shortcut for the connection] Click the PPPoE shortcut icon on the desktop and then click “Connect”...
- Page 53 [Figure 44: PPPoE connection screen] Connecting to the internet [Figure 45: Connecting Unimax+ on the internet] Verifying username and password [Figure 46: Verifying username and password] Host PC acquires the WAN IP and PPPoE connection is successful.. [Figure 47: Registering PC on the network] ...
-
Page 54: Appendix
A digital input is a switch and a voltage sending device. Depending on the switch's open/closed status, the Unimax+ detects a voltage or no voltage condition, which in turn generates a logical 0 or 1, ON or OFF, alarm or normal or similar a defined state. -
Page 55: Factory Default Function
Please note that no external circuit is required when using the inputs at 3.3 V. Factory Default Function Following are the two methods to set Unimax+ back to factory default: Hard Reboot Press the factory reset switch, located on the left end plate next to the power switch, and hold in for 5 seconds. - Page 56 SMS Syntax for enabling dyndns.org : UNIMAX.PARK.DDNS1 1 SMS Syntax Disable dyndns.org : UNIMAX.PARK.DDNS1 0 ConCConfiguration Syntrax for DYNDNS: UNIMAX.PARK.DDNS2 domain name,username,password Custom DYNDNS 1. SMS Syntax for enabling Custom : UNIMAX.PARK.DDNS1 3 2. Service Provider setting syntrax : UNIMAX.PARK.DYNDNS1 3, Service ...
-
Page 57: Requirements
Ethernet port. SIM card with SMS enabled. Setup Log into the Unimax+ Web page using the gateway IP address. Default is 192.168.0.1 Web page username and password is admin by default. Enable Telnet into the web page of the Unimax+ router. - Page 58 Username and password for the telnet session is: Username: admin Password: admin Send SMS without Disconnecting Internet Connection: [root@INEWDC]# echo “destination number in international format, Type message to be sent” > /var/tmp/cmdsndsms1 <Carriage return to send> Read SMS [root@INEWDC]# cd /var/tmp/ [root@INEWDC]# cat SMSRes Check file size: [root@INEWDC]# ls -al SMSRes...
-
Page 59: Wan Connection - Signal Level
[root@INEWDC]#rm SMSRes WAN Connection – Signal Level The Unimax+ will drop WAN connection if the signal (CSQ) level drops below 4 or the response is 99. This is not dBm. The Unimax+ will initiate WAN connection if the signal (CSQ) level is between 4 ~ 31 dBm. -
Page 60: Powersnmp Free Manager Configuration
Once the PowerSNMP finds the Unimax+ as an SNMP Agent then add the Unimax+ as an agent by enabling the check box. Figure 54: Unimax+ as SNMP Agent] PowerSNMP will run as follows after the Unimax+ has been added as a SNMP Agent. ... - Page 61 Figure 56: PowerSNMP Free Manager] You can load the Unimax+ MIB file provided by Maxon in order to identify • the old values. ...
-
Page 62: Setting Unimax+ As A Vpn Gateway Or Vpn Client
Setting up a Unimax+ as a VPN Gateway or a VPN Client VPN Gateway Figure 56: VPN Gateway] ... -
Page 63: Vpn Client (L2Tp Over Ipsec)
VPN Gateway Sample Configuration PPP Authentication CHAP User Name DemoVPN Password ****** Assigned IP Address 192.168.0.240 NAT-T Enabled Key Exchange Encryption 3DES-MD5-1024 IPSec Authentication ESP Encryption 3DES-HMACMD5 VPN Client (L2TP over IPSec) ... - Page 64 [Figure 57: VPN Client (L2TP over IPSec)] ...
- Page 65 VPN Client (L2TP over IPSec) Sample Configuration PPP Authentication CHAP User Name DemoVPN Password ****** NAT-T Enabled IPSec Type Tunnel Key Exchange Encryption 3DES-MD5-1024 IPSec Authentication ESP Encryption 3DES-HMACMD5 ...
-
Page 66: Vpn Client (Ipsec)
VPN Client (IPSec) [Figure 58: VPN Client (IPSec)] VPN Client (IPSec) Sample Configuration NAT-T Enabled IPSec Type Tunnel Key Exchange Encryption AES256-MD5-1024 IPSec Authentication ESP Encryption AES256-HMACMD5 ... -
Page 67: Vpn Client (Pptp)
Advanced Settings User can connect the Unimax+ to other network devices as follows: Connecting to a HUB If a user wants to connect a Unimax+ to a HUB then the Unimax+ should be configured in Modem Router Mode. Port Forwarding The port forwarding page allows for setting up a firewall that will allow ... - Page 68 Note: If you forward port 80 to a web server/camera, you will not be able to access the Unimax+ web page unless you change the Web Access port on the Unimax+ from 80 to 8080 (for example). It is recommended that this is done first.
- Page 69 [Figure 60: Port Forwarding] Figure 61:System] ...
-
Page 70: Setting Dmz Host
The DMZ page sets one IP address in a Zone which is exposed to internet without sacrificing unauthorized access to the local private network. [Figure 62: Unimax+ connected to a server and a PC via DMZ Host] To set an IP address in the DMZ, click on the DMZ page under Advanced. -
Page 71: Troubleshooting
192.168.0.100 using the DHCP server. To set a static IP address on a PC, you can use an IP from the DHCP range of the Unimax+ which is not used by any other device on the network. Also you need to assign the Unimax+ IP as the default gateway on that PC. - Page 72 (POP3 incoming) are used for Mail Server. You can get more information by viewing the documentation provided with the server you installed. APPLICATION PORT PROTOCOL IP ADDRESS Web server 192.168.0.200 VPN IPSEC 192.168.0.2 SMTP 192.168.0.202 POP3 192.168.0.202 FTP server 192.168.0.50 [Table 30: Example of Port Forwarding] I can’t connect to any server or any other application.
Need help?
Do you have a question about the MA-2025-4G and is the answer not in the manual?
Questions and answers