Acer iconia one 7 User Manual
Hide thumbs
Also See for iconia one 7:
- User manual (61 pages) ,
- Product manual (21 pages) ,
- Manual (52 pages)
Table of Contents
Advertisement
Quick Links
Download this manual
See also:
User Manual
Advertisement
Table of Contents

Related Manuals for Acer iconia one 7


Summary of Contents for Acer iconia one 7
- Page 1 User’s Manual...
- Page 2 This revision: May 2014 Sign up for an Acer ID and enable Acer Remote Files Open the Acer Portal from the Home screen to sign up for an Acer ID or sign in if you already have an Acer ID.
-
Page 3: Table Of Contents
Table of contents - 3 A B L E O F C O N T E N T S Getting started with your tablet Google services ........24 Features and functions ......4 Playing music and video Unpacking your tablet......4 Multimedia playback ...... -
Page 4: Getting Started With Your Tablet
Your new tablet comes packed in a protective box. Carefully unpack the box and remove the contents. If any of the following items is missing or damaged, contact your dealer immediately: • Acer Iconia B1-740 tablet • Product setup and safety information • USB cable •... -
Page 5: Getting To Know Your Tablet
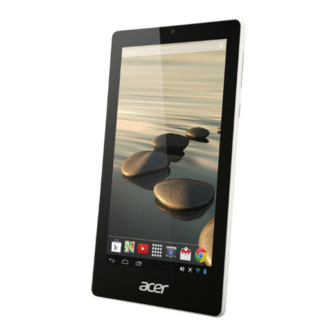
Getting started with your tablet - 5 Getting to know your tablet Views 9 10 11 12 No. Item Description A 0.3-megapixel camera for video chats Front-facing camera and self-portrait images. 7.0", 1024 x 600 pixel capacitive Touchscreen touchscreen. Increases and decreases the tablet Volume control key volume. - Page 6 6 - Getting started with your tablet No. Item Description 3.5 mm headphone Connects to stereo headphones. jack Receives audio for video chats and Microphone internet calls. microSD card slot Insert a microSD card into the slot. Connects to a computer via a USB cable. Also serves as the charging port for the Micro USB port AC adapter.
-
Page 7: Using Your Tablet
Using your tablet - 7 S I N G Y O U R T A B L E T Charging your tablet For first-time use, you need to charge your tablet for four hours. After that you can recharge the battery as needed. Note Charger illustration is for reference only. -
Page 8: Turning On For The First Time
Turning on for the first time To turn on your tablet, press and hold the power button until you see the Acer logo. Wait a moment for your tablet to boot up. You will then be asked some questions before you can use your tablet. - Page 9 Using your tablet - 9 To start, tap to select your language then tap Start. Follow the rest of the instructions as they are displayed. If the tablet’s screen turns off, it has entered sleep mode. Briefly press the power button to wake it up. For more information see Waking your tablet on page Sign in to or create a Google account...
-
Page 10: Using The Touchscreen
10 - Using your tablet If you have multiple Google accounts, such as separate accounts for personal and business contacts, you can access and synchonize them from the Accounts settings section. See Multiple Google accounts on page Using the touchscreen Your tablet uses a touchscreen for selecting items and entering information. - Page 11 Using your tablet - 11 The Home screen features some useful controls and information. Search Widgets Application menu Navigation Status Note Bundled apps differ depending on region and configuration. Search To search for applications, files or for information on the internet, tap the Google icon in the top-left corner.
- Page 12 12 - Using your tablet Navigation To navigate through menus and options, three (or more) icons are shown in the Back Home Recent bottom-left corner. Back Tap this icon to go to the previous page, or to go up one level in a menu.
-
Page 13: Status And Notification Area
Using your tablet - 13 Adding an application to a Home screen Tap and hold an icon to add a shortcut to one of your Home screen pages. When you select an icon, you are taken to the initial Home screen. - Page 14 14 - Using your tablet Status and notification icons Connection icons Note The icons displayed on your device vary depending on your connection. Icon Description Connected to a wireless network (waves indicate signal strength) Airplane mode (wireless connectivity disconnected) Battery status icons Icon Description Icon...
-
Page 15: Personalizing The Home Screen
Using your tablet - 15 Icon Description Icon Description Application update Uploading data available System update available Downloading data Virtual private network (VPN) status Personalizing the Home screen You may personalize your Home screen by adding or removing application shortcuts or widgets, and by changing the wallpaper. Adding or removing shortcuts or widgets To add shortcuts or widgets, tap the APPS icon in the bottom-center of the Home screen. -
Page 16: The Onscreen Keyboard
16 - Using your tablet each side, tap and drag the diamond until the widget is the correct size. Tap Back to finish. Note Not all widgets can be resized. Removing an item from the Home screen To remove an item from the Home screen, tap and hold the item until the Remove option appears at the top of the screen. -
Page 17: Editing Text
Using your tablet - 17 Tap the ?123 button to see numbers and special characters, and then tap the ~ \ { key to see more options. Tap and hold a key to select alternative characters (if available for that key), such as letters with accents or related symbols. - Page 18 18 - Using your tablet Selecting text To select text that you want to cut, copy, delete or replace: 1. Tap the text you want to select. If you can select this text, a cursor is inserted below the text. 2.
-
Page 19: Shutting Down Your Tablet
Using your tablet - 19 Security Options For additional security, you may set a code or number that must be entered to access the tablet, such as an unlock pattern (a set of dots that must be tapped in the correct order). Open the Home screen and tap APPS >... -
Page 20: 20 - Connecting Devices To Your Tablet
20 - Connecting devices to your tablet O N N E C T I N G D E V I C E S T O Y O U R T A B L E T Connecting to AC power See Charging your tablet on page 7 Inserting a microSD card You may install a microSD card to expand your device's storage space. -
Page 21: Accessories
3. Pull down the notification bar, and tap Connected as a media device, or Connected as a camera to configure the USB options. Your device will now be available as a drive in your computer’s file explorer. Accessories For a complete list of accessories, visit store.acer.com. -
Page 22: Going Online
22 - Going online O I N G O N L I N E Managing Wi-Fi connections If you did not connect to a Wi-Fi network when you first started your tablet, or want to connect to a new network, tap APPS > Settings > Wi-Fi to manage your connection settings. -
Page 23: Setting Up The Email Application
Going online - 23 To navigate forward and backward in your browser’s history, view your bookmarks, adjust browswer settings, and perform other tasks, tap the Menu icon. Chrome enables you to open multiple tabs. When a page is open, tap the small New tab button. -
Page 24: Google Services
24 - Going online Google services Note Applications may not be available in all countries and regions. You must activate a Google account before using Google services. The first time you access Google services, you must read and accept the Terms of Service. -
Page 25: Play Store
Going online - 25 searches. When the Speak now prompt displays, state your command or query. Play Store Tap Play Store from the home screen or application menu to open Google Play. Here you can obtain a variety of add-on programs and applications to enhance the functionality of your tablet. - Page 26 26 - Going online Once you have selected an application, tap the Install button to download and install the application. You will be told which services (contact information, wireless access, GPS, etc.) the application requires access in order to function correctly. If none of these services seem unusual, tap Accept &...
- Page 27 Going online - 27 Google Hangouts Tap Hangouts from the application menu to open Google Hangouts. Here you can see a list of your contacts connected to Google Hangouts services. Tap on a contact to open a chat session. After you have connected, you can open a video chat session.
-
Page 28: Playing Music And Video
28 - Playing music and video L A Y I N G M U S I C A N D V I D E O Multimedia playback Your tablet comes supplied with a variety of programs that you can use to enjoy multimedia content. Note The available options of Google Play Music and Video varies by region. - Page 29 Playing music and video - 29 The Menu button in the top-right of the main screen contains general options like Refresh, Settings, Help, and Send feedback. Albums and invidividual tracks have their own Menu buttons as well, each with their own set of options. You can return to the Home page while playing music.
-
Page 30: Managing People And Contacts
30 - Managing people and contacts A N A G I N G P E O P L E A N D C O N T A C T S Your tablet features an address book that allows you to save contacts to the internal memory or your Google account. -
Page 31: Adding A New Contact
Managing people and contacts - 31 Adding a new contact to add a new contact. If you have multiple accounts, you will be asked which account you want to use to store the contact. The contact will be synchonized with that account. You may now edit the new contact entry. - Page 32 32 - Managing people and contacts Tap Done (top-left corner) to finish and save the contact. Note Set each phone number to match the type of network as this can determine some functions, i.e. certain applications only recognize ‘Mobile’ numbers as they require a function only available on a mobile network.
-
Page 33: Using The Camera And Camcorder
Using the camera and camcorder - 33 S I N G T H E C A M E R A A N D C A M C O R D E R Your tablet features front-facing and rear-facing digital cameras. This section will take you through all the steps in taking photos and videos with your tablet. -
Page 34: Taking A Photo
34 - Using the camera and camcorder Camera settings Icon Description Front/rear camera switch Toggles between the front and rear camera. Exposure Increase or decrease image exposure: +2, +1, 0, -1, -2. Options Tap to see camera options: • Select storage device •... -
Page 35: Camcorder Icons And Indicators
Using the camera and camcorder - 35 Camcorder icons and indicators Record Settings Mode Tap the O on the right side to bring up camcorder settings. Tap the mode icon to switch between camera, camcorder and panorama modes. Camcorder options Icon Description Front/rear camera switch... -
Page 36: Shooting A Video
36 - Using the camera and camcorder Shooting a video 1. Ensure the options described above are set to your preferences. 2. Tap the record icon to begin recording. 3. Tap the record icon again to stop recording. Supported formats Type Formats Image... -
Page 37: Advanced Settings
Advanced settings - 37 D V A N C E D S E T T I N G S Access Settings from the application menu. Tap APPS, then Settings. Wireless & Networks Activating or deactivating connections Tap APPS Settings, then under WIRELESS & NETWORKS each >... -
Page 38: Device
38 - Advanced settings Putting your tablet in Airplane mode You can enter Airplane mode (also known as flight mode) to turn off the network function and use your tablet during a flight. Check with your airline to make sure this is permitted onboard. Switch your tablet off during takeoff and landing as it may interfere with aircraft electronic systems. - Page 39 Advanced settings - 39 Item Description Show volume icon in the status Show or hide the volume icon in the status bar. Display You can adjust your tablet screen settings by tapping APPS > Settings > Display. Item Description TV screen Set the resolution and refresh rate for external resolution display devices.
-
Page 40: Personal
40 - Advanced settings Uninstalling an application You can remove programs installed on your tablet to free up extra storage memory. Tap and hold a program icon from the application menu and drag it into the Uninstall area in the top-left corner. Note You cannot uninstall applications that were pre-loaded on your tablet. -
Page 41: System
Advanced settings - 41 them from the Accounts settings section. Tap APPS > Settings > Add account. Changing language and text options Set your location and language input preferences by tapping APPS > Settings > Language & input. System Setting the date and time To set the date and time, tap APPS >... -
Page 42: Resetting Your Tablet
42 - Advanced settings To check for updates, tap APPS > Settings > About device > System Update > Check Online. Note Downloading new firmware can take up to 40 minutes, depending on your network speed. Do not press the power or reset button or access your tablet in any way during a system upgrade to prevent firmware installation failure. -
Page 43: Faq And Troubleshooting
FAQ and troubleshooting - 43 F A Q A N D T R O U B L E S H O O T I N G This section lists frequently asked questions that may arise during the use of your tablet, and gives easy answers and solutions to these questions. - Page 44 Google account username and password. I forgot my unlock You must have an active Google Unlock pattern pattern. account on the tablet and an internet connection. If this option is not available, please contact your local Acer service center.
-
Page 45: Other Sources Of Help
All Acer tablets are factory-tested before release. Other sources of help For information on: Refer to: Up-to-date information www.acer.com... -
Page 46: 46 - Specifications
46 - Specifications P E C I F I C A T I O N S Performance • WM8880 dual-core Cortex A9 1.5 GHz processor • System memory: • 1 GB of RAM • 8 / 16 GB of flash memory Google Android operating system Display •... - Page 47 Specifications - 47 Power • DC power-in (via USB port) Connectivity • Wi-Fi IEEE 802.11b/g/n Camera • Rear camera • 1.9-megapixel • Fixed focus • Front camera • 0.3-megapixel • Fixed focus Expansion • microSD card slot (up to 32 GB) Battery •...
- Page 48 48 - Specifications Dimensions Height 191 mm Width 112 mm Thickness 9.9 mm Weight 289 g Environment Temperature ° ° Operating: 0 C to 35 ° ° Non-operating: -20 C to 60 Humidity (non-condensing) Operating: 20% to 80% Non-operating: 20% to 80%...
-
Page 49: End User License Agreement
1. Use or copy the Software except as that you may, after prior written notification provided in this Agreement; to Acer, transfer the Software as a whole to 2. Rent or lease the Software to any third a third party so long as you do not retain party;... - Page 50 TRADEMARKS This Agreement does not grant to you any rights in connection with any trademarks or service marks of Acer or of Acer's licensors or suppliers. DISCLAIMER OF WARRANTIES TO THE MAXIMUM EXTENT PERMITTED BY...
- Page 51 WITHOUT TERMINATION Without prejudice to any other rights, Acer may 2. Destroy or return to Acer the original and immediately terminate this Agreement without all copies of the Software; and notice if you fail to comply with any terms and 3.
- Page 52 52 - End user license agreement products of Acer's licensors' or suppliers' third subject to additional terms and conditions and party licensors. Your use of the Third Party policies which can be accessed through our Software and Third Party Services is also global website.
Need help?
Do you have a question about the iconia one 7 and is the answer not in the manual?
Questions and answers