Table of Contents
Advertisement
Quick Links
Advertisement
Table of Contents

Related Manuals for Xtrons D713GDAB


Summary of Contents for Xtrons D713GDAB
- Page 1 USER MANUAL Thank you for buying this XTRONS product. Please read through these instructions so you will know how to operate this unit properly. After you have finished reading the instructions, keep this document in a safe place for future reference.
-
Page 2: Table Of Contents
Contents Precaution ......................Main Menu ......................Radio ........................DAB+ ........................Play DVD ......................USB/SD ......................... AUX Input ......................Bluetooth ......................Bluetooth Music ....................Navigation ......................Settings ........................ Troubleshooting .................... -
Page 3: Precaution
Precaution Before installing this product - Use this unit with a 12-volt battery and negative grounding only. Failure to do so may result in a fire or malfunction. - To avoid shorts in the electrical system, be sure to disconnect the (-) battery cable before installation. - Page 4 - Do not disassemble or modify this product, as there are high-voltage components inside which may cause an electric shock. Be sure to consult your dealer for internal inspection, adjustments or repairs. Before using this product , be sure to read and fully understand the following safety information: - Do not operate this product, any applications, or the rear view camera option (if purchased) if doing so will divert your attention in any way from the safe operation...
-
Page 5: To Ensure Safe Driving
To ensure safe driving WARNING - LIGHT GREEN LEAD AT POWER CONNECTOR IS DESIGNED TO DETECT PARKED STATUS AND MUST BE CONNECTED TO THE POWER SUPPLY SIDE OF THE PARKING BRAKE SWITCH. IMPROPER CONNECTION OR USE OF THIS LEAD MAY VIOLATE APPLICABLE LAW AND MAY RESULT IN SERIOUS INJURY OR DAMAGE. -
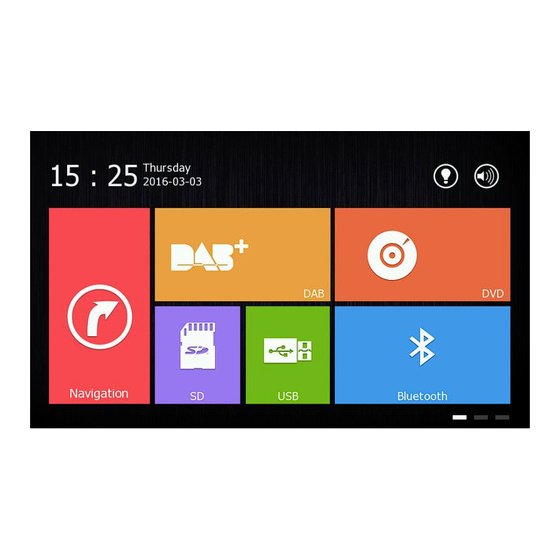
Page 6: Main Menu
Main Menu 1. DAB+ 2. DVD 3. Navigation 4. SD 5. USB 6. Bluetooth... - Page 7 1. Bluetooth Music 2. Radio 3. TV (not supported) 4. AUX Input 5. Settings 6. DVR (not supported)
-
Page 8: Radio
Radio 1. Perform manual tuning 2. Preset channel list Select a frequency you like, then touch and hold any of preset frequency keys to store it. Up to 18 FM stations and 12 AM stations can be stored in memory. 3. -
Page 9: Dab
DAB+ 1. Preset service list Select a service you like, then touch and hold any of preset service keys to store Up to 18 services can be stored in memory. 2. Label list 3. Band (DAB 1, DAB 2, or DAB 3) 4. -
Page 10: Play Dvd
Play DVD DVD Player CAUTION 1. There are two screws on the top face of the unit to protect the disc drive in transit. The screws need to be removed first. Otherwise it cannot accept or play discs. 2. For safety reasons, video images cannot be viewed while your vehicle is in motion. - Page 11 1. Stop 2. Previous file 3. Pause/Play 4. Next file 5. Rewind Select x2, x4, x8, x16, or x32 times playback speed. 6. Fast forward Select x2, x4, x8, x16, or x32 times playback speed. 7. Zoom Choose from 1/4,1/3,1/2, 2, 3, 4, 5, and off. 8.
-
Page 12: Usb/Sd
15. Menu 16. Change the playback point by title number, chapter number, or playing time 17. Equalizer adjustment 18. Volume USB/SD Plug a USB storage device or insert an SD memory card, then tap USB or SD on the Home screen to play music and video files, or view images and photos. AUX Input You can display the video image output by the device connected to this unit. -
Page 13: Bluetooth
Bluetooth Connect your mobile phone to this unit via Bluetooth and use an external microphone to make and receive hands-free calls. CAUTION For your safety, avoid talking on the phone as much as possible while driving. Connect to a Bluetooth device *... - Page 14 2. Recent calls View recent outgoing calls, incoming calls or missed calls. 3. Phone book The contacts from your Bluetooth device will be synchronized to the unit automatically.
-
Page 15: Bluetooth Music
4. Bluetooth settings ① You can change the Pin code (Bluetooth pairing password). The default password is 0000. Tap and enter another four-digit number, then tap OK to set a new password. ② You can turn Auto Pickup on or off. Bluetooth Music After the Bluetooth connection is established, you can play music stored in your Bluetooth device on this unit. -
Page 16: Navigation
Navigation Built-in navigation offers detailed, reliable route guidance information to help you get where you want to go. a. Insert an SD card with maps into the GPS card slot. b. Go to Setup > Navi path, then set up the path for the navigation application. c. - Page 17 1. Navi Path Set up the path for the navigation application. 2. Navigation Settings Autorun GPS at power on When this function is turned on, the navigation will work automatically after the unit is powered on. 3. Beep On: Sounds a beep. Off: Does not sound a beep.
- Page 18 5.2 Fader/Balance Adjustment You can select a listening position that you want to make as the center of the sound effects. 6. Brightness Drag the slider to adjust the screen brightness. 7. Language Set the language for the unit. Choose from English, French, German, Spanish, and more.
- Page 19 8. Wallpaper You can choose from the preset wallpapers, or choose from images or photos stored on an SD memory card. You need to insert the SD memory card into the GPS card slot. 9. Wheel Control This allows you to use the steering wheel control of your vehicle to control the unit.
- Page 20 10. Standby Set Choose from 3 minutes, 5 minutes, 10 minutes, Cancel, and User. Turn Standby Display on or off. 11. Video Settings Choose from Standard, Soft, Bright, and User. Drag the slider to adjust the brightness, Contrast, or Hue. 12.
- Page 21 14. Welcome Display Enter the password 8888. Select one of the preinstalled car manufacturer logos as your start up screen. You can also select images imported from an SD memory card. You need to insert the SD memory card into the GPS card slot. The image size should be 800 pixels x 480 pixels and the image format should be JPEG.
-
Page 22: Troubleshooting
Troubleshooting If you have problems operating this product, refer to this section. The most common problems are listed below, along with likely causes and solutions. No power - Car engine has not been started. Start the car engine. - Incorrect wiring connection. Check the wiring. - Fuse has been damaged. - Page 23 Noise in broadcasts - Signals are too weak. Select other stations with stronger signals. - Check the connection of the vehicle antenna. - Change broadcast from stereo to mono. Preset station lost - Battery cable is not correctly connected. Connect the battery cable to the terminal that is always live.
Need help?
Do you have a question about the D713GDAB and is the answer not in the manual?
Questions and answers