Advertisement
Advertisement

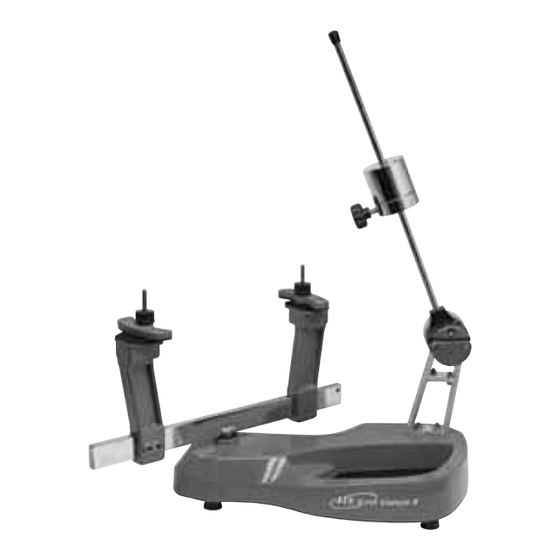
Summary of Contents for ATS Super Stringer II
- Page 1 STRINGING MACHINE OWNER’S MANUAL Issue 3 - January 2009...
-
Page 2: Table Of Contents
EQUIPMENT. Should any defects develop under normal use, ATS will at its option, repair or replace the defective EQUIPMENT provided it is returned to ATS prepaid at the purchaser’s expense. -
Page 3: Assembly Instructions
ASSEMBLY INSTRUCTIONS Installing the Turntable Insert the turntable center post into the bush- ing assembly of the machine base. Installing the Support Posts Slide each support post onto the end of the turntable bar. The posts should be oriented so as to angle away from the turntable center post. - Page 4 ASSEMBLY INSTRUCTIONS Tension Bar Stop Screw Raise the Tension Bar to an upright position. Using the supplied 5MM wrench, securely tighten the Stop Screw. This will prevent the Tension bar from contacting the racquet frame. Clamp Adjustment The floating clamps provided with your ma- chine will need minor adjustments according to what string type, construction, and gauge you are using.
-
Page 5: Mounting The Frame
MOUNTING THE RACQUET Installing the Racquet Support Adapters The machine is supplied with two styles of Racquet Support Adapters. A thick profile adapter for wide body racquets and a thin profile adapter for conventional racquet frames. The Adapters are also tapered, use the highest side of the adapter that does not interfere with the string grommet holes. -
Page 6: Stringing The Frame
STRINGING THE FRAME Setting Tension The drop weight is of a two piece design. When assembled, it will accommodate ten- sions from 20 to 90 lbs. For tensions from 8 to 20 lbs., remove the 5mm bolt on the face of the drop weight, and use the smaller portion of the weight as described above. - Page 7 STRINGING THE FRAME Clamping the First Main String Thread one end of the string through the adjacent grommet hole and pull excess by hand. Clamp both the center and the adjacent string to each other on the inside of the frame. Pulling Tension Wrap the free string clockwise around the gripper drum once and position between...
- Page 8 STRINGING THE FRAME Clamping the String Clamp the tensioned string to the next ad- jacent string using the second string clamp. Release the tensioned string by raising the tension arm. Repeat the procedure for all of the remaining main strings and tie off following the racquet manufacturers recommendations.
-
Page 9: Pathfinder Awl
PATHFINDER AWL The machine includes the pathfinder string- ing awl which creates a pathway between or around strings to make inserting a string through blocked grommets easier and quicker. Insert the awl through the grommet hole in the same manner as for traditional awls. The Pathfinder awl must be in the closed position before insertion. -
Page 10: Parts List
PARTS LIST PART # DESCRIPTION TOOLS & ACCESSORIES 5MM T-HANDLE HEX WRENCH* TURNTABLE BUSHING BOX WRENCH- 10MM RUBBER FOOT CAP SCREW- M8x25 UTILITY KNIFE SET SCREW- M5x6 NEEDLE NOSE PLIERS* KNOB STRINGER’S AWL* TENSION BAR MPSA PATHFINDER AWL* * (NOT SHOWN) TENSION BAR CAP DROP WEIGHT KNOB FRONT WEIGHT... -
Page 11: Parts Drawing
PARTS DRAWING MPFC MRSG... - Page 12 ATS SPORTS 200 Waterfront Drive Pittsburgh, Pennsylvania 15222 Phone: 800.866.7071 Fax: 412.323.1320 Visit our website at www.atssports.com Copyright 2009 ATS Sports - All Rights Reserved...
Need help?
Do you have a question about the Super Stringer II and is the answer not in the manual?
Questions and answers