Table of Contents
Advertisement
Advertisement
Table of Contents
Troubleshooting

Summary of Contents for EGL LYDA203E-6
- Page 1 EGL MOTOR OWNER’S MANUAL- LYDA203E-6 WARNING: READ THIS MANUAL CAREFULLY!
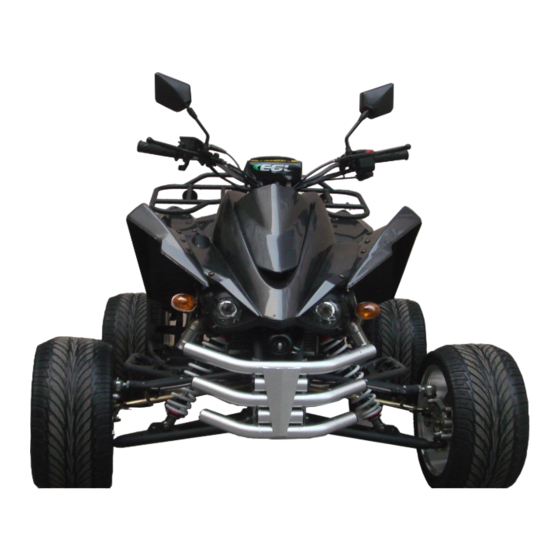
- Page 2 INTRODUCTION Thank you for your purchase LINGYING ATV LYDA203E-6 series. This manual will provide you with a good basic understanding of the features and operation of this ATV. This manual includes important safety information. It provides information about special techniques and skills necessary to ride your ATV.
-
Page 3: Important Manual Information
IMPORTANT MANUAL INFORMATION FAILURE TO FOLLOW THE WINNINGS AND COUTAINED IN THIS MANUAL CAN RESULT IN SERIOUS INJURY OR DEATH. The safety alert symbol means attention! Failure to follow warning instructions could result in severe injury or death to the machine operator, a bystander or others who inspection or repairing the machine. -
Page 4: Table Of Contents
CONTENTS Important manual information…………………………2 Operation…………………………………………………….25 Safety information………………………………………..4 Starting a cold engine……………………………………..25 Specification ………………………………………………7 To start out and accelerate……………………………….27 Description ………………………………………………..8 To decelerate………………………………………………..27 Identification number records………………………….9 Engine break-in…………………………………………….28 Control function………………………………………….10 Periodic maintenance and adjustment……………….28 Main switch……………………………………………….10 Air filter element cleaning……………………………….30 Left switch…………………………………………………11 Carburetor adjustment……………………………………31 Light switch……………………………………………….12 Main technical specifications of the engine…………32... -
Page 5: Safety Information
SAFETY INFORMATION ATV is not a toy, it can be hazardous to operate. An ATV handles difficultly from other vehicles. The accident such as collision and rollover will happen, even while turning and riding back, on hill or over obstacles, If you fail to proper precautions. Severe injury or death can result if you don’t follow below instructions: 1. - Page 6 14. Always follow the proper procedures for climb hills as described in this manual, check the terrain carefully before you start up any hill, shift your weight forward, never accelerate suddenly or sudden change the gears. 15. Always follow the proper procedures for go down hills and for braking on hills as described in this manual, also check the terrain carefully before you start down hills, shift your weight backward, never go down a hill at high speed, avoid go down a hill at an angle that would cause the vehicle to incline sharply to one side, go straight down the hill where possible.
- Page 7 WHAT CAN HAPPEN Gasoline is poisonous and can cause injuries. HOW TO AVOID THE HAZARD If you should swallow some gasoline or inhale a lot of vapor, or get some gasoline on your eyes, see doctor immediately, if gasoline spills on your skin, wash with soap and water.
-
Page 8: Specification
Specification Model LYDA203E-6 Overall length 1700mm Max power 11.5Kw /6500±500 r / min Overall width 1270mm Max speed ≥80km/h Overall height 1020mm Max torque 17.5N.m /5500±500r / m Seat height 740mm Engine oil type SF15W / 40 GB11121-1995 Wheel base... - Page 9 9 / 46...
-
Page 10: Identification Number Records
Identification number records Record the identification numbers information in below space will provide assistance when you order parts or for reference in case stolen. Vehicle identification number: Engine number: Vehicle identification number is stamped on the frame. Engine number is stamped on the bottom of engine left side. 10 / 46... -
Page 11: Control Function
Control function Show a potential hazard that could result in severe injury or death. Main switch Functions of the each switch positions are as below: The engine can be started only at this position OFF: All electric circuits are turned off, the key can be removed in this position 11 / 46... -
Page 12: Left Switch
Left switch 1. Engine stop switch 2. Start switch 3. Turning light switch 4. Horn button 5. Light switch 6. Choke Engine switch stop Make sure the engine switch stop at the RUN position before starting the engine, the engine stop switch control the ignition and can be used to stop engine at all times, especially in the emergency, the engine will not start while this switch is on the “OFF”... -
Page 13: Light Switch
Light switch Set the switch to “LO” position to turn on the low beam and the taillight. Set the switch to “HI” position to turn on the high beam and the taillight Set the switch to “OFF” position to turn off all lights. Choke The choke is used to help starting a cold engine. - Page 14 Check the throttle lever before you start the engine, if it doesn’t work smoothly, check for the reason, correct the problem before riding the ATV. Consult the professional expert or get assistance from dealer if you can’t figure out and solve the problem yourself. Speed limiter The speed limiter keeps the throttle from fully opening when the throttle lever pushed to maximum.
-
Page 15: Clutch Lever
Clutch lever The clutch lever is located on the left handlebar, pull the clutch lever to handlebar to disengage the clutch, and release the lever to engage the clutch. The clutch lever should be pulled rapidly and released slowly for smooth clutch operation. Brake lever The brake lever is located on the right handlebar. -
Page 16: Brake Pedal
Brake pedal The brake pedal is located on the right side of machine, push down the pedal to apply the rear brake Parking brake lever Use the parking brake when you have to park your ATV, especially on a slope 1 park brake locked position, move the parking brake lever to a direction apply the parking brake, 2 unlocked position, move the parking lever to direction b to release the park brake. - Page 17 Potential hazard Improper operate the parking brake WHAT CAN HAPPEN The ATV could start moving unexpectedly if the parking brake is not applied before starting the engine. This could result in beyond control or a collision. The brake disc could overheat if you ride ATV without releasing the parking brake. it could loss of the brake performance and an accident might to happen, and you will wear out the brake earlier.
- Page 18 Fuel tank cap Remove the fuel tank cap by turning it counterclockwise as the cambered arrow of below picture showing. Fuel cock The fuel cock supplies the fuel from tank to carburetor . The fuel cock has 3 positions. OFF: fuel will not flow at this position, always turn the fuel cock to this position when the engine is not running. ON: fuel can flows to the carburetor from tank, provides the normal riding when the fuel cock in this position RES: this shows reserve, turn to this position if you run out of the fuel while riding.
- Page 19 Seat To remove the seat, inset your hand between the rear of seat and the rear fender, pull the seat lock lever upward and pull up the seat at the rear. To install the seat, insert the protecting of front seat into front seat holder and push down the seat at reat. 1.
- Page 20 PRE-OPERATION CHECKS Before ride this ATV, please check the below points: Description Routine Front and rear brake Check operation, lever free play, fluid level and fluid leakage. Fill brake fluid if necessary Clutch Check operation, condition and free play Parking brake Check operation, condition and cable length fuel Check fuel level, fill with fluid if necessary...
-
Page 21: Front And Rear Brakes
Front and rear brakes Brake lever and brake level Check the free play in the brake lever and the pedal height, if the condition is incorrect, should adjust it and make sure it can be proper working after adjustment. Check the operation of the brake lever and the brake pedal, they should move smoothly and a firm feeling when the brakes are applied, if not, adjust it to correct condition. -
Page 22: Fuel
FUEL Make sure there is enough gasoline in the tank Recommended fuel: RQ-90 or higher classification Unloaded gasoline only Fuel tank capacity: 6.3L CAUTION Use only unloaded gasoline, the use of leaded gasoline will lead to severe damage to internal engine parts, such as the valves and piston rings, as well as the exhaust system. -
Page 23: Engine Oil
Engine oil Make sure the engine oil keeps at the specified level. Add engine oil if necessary. Check the engine oil level as below procedures: The level must be kept between the upper and lower level which marks on the dipstick 1. -
Page 24: Coolant Reservoir
Coolant reservoir Check the coolant level in the coolant reservoir when the engine is cold, since the coolant level will vary with engine temperature. If the coolant level lack of, add distilled water up the level to satisfy with normal coolant level. Change the coolant every two years. CAUTION Hard water or salt water is harmful to the engine. - Page 25 Lights Check the headlight and tail/brake light to make sure they are in the working conditions, repair as necessary for proper operation. Tire POTENTIAL HAZARD Operate this ATV with improper tires, or with improper or uneven tire pressure. WHAT CAN HAPPEN Use of the improper tires on this ATV, or operation of this ATV with improper tire pressure, may cause loss of control and lead to risk or accident.
-
Page 26: Operation
Operation Indicates a potential hazard that could result in serious injury or death Potential hazard Operating ATV without being familiar with all controls What can happen Loss of control, which could cause an accident or injury How to avoid the hazard Read the owner’s manual carefully, if there is a control or function you don’t understand, ask your dealer. - Page 27 (in position ”a” the choke is closed, position”b” the choke is opened and cold start position.) Start the cold engine with the choke in position “b”, continue to warm up the engine after started until it idles smoothly and return it to position “a”...
-
Page 28: To Start Out And Accelerate
To start out and accelerate: 1. Release the throttle lever, and release the parking brake. CAUTION: Always close the throttle while shifting gears. Otherwise, the engine and drive train will be damaged. 2. Pull the clutch to disengage the clutch. 3. -
Page 29: Engine Break-In
Engine break-in This is the most important period in the life of your ATV. because the engine is brand new, you can’t put an excessive load and over speed on it for the first several hours or within 500km running. During this time, the various parts in the engine wear and polish themselves to the correct operating clearances. - Page 30 Engine oil Replace(warm engine before draining) √ √ √ √ √ √ √ √ √ √ √ √ √ √ √ √ Engine oil filter element Replace √ √ √ √ √ √ √ √ √ √ √ √ √ √ √ √ Brake Check operation/fluid leakage/ √...
-
Page 31: Air Filter Element Cleaning
Air filter element cleaning NOTE: There is a hose at the bottom of air filter case. If dust or water collects in this hose, empty the hose and clean the air filter element and air filter case. 1. Remove the seat 2. -
Page 32: Carburetor Adjustment
Carburetor adjustment The carburetor is a vital part of the engine and requires very skilled adjustment. Most adjusting should be worked by dealers who has professional maintenance routine. knowledge and experience to do. However, the idling speed may be performed by the owner as a part of the usual CAUTION The carburetor was set by producer after many tests. -
Page 33: Main Technical Specifications Of The Engine
Main Technical Specifications of the Engine : lubricating oil S F15W / 40 GB11121-1995 : : 1. Type o ne cylinder, four stroke, water cooling, under-layout cam, inclined lubrication oil capacity 1.1L 2. Main specifications of performance : 9. Dimension :... - Page 34 a new motorcycle. Never open the throttle completely nor use the same speed for . If the engine is started at non-neutral, disengage the clutch; and if the engine is a long time. The speed can not exceed 50Km/h. started at cooled state, close the choke and operate the throttle while starting. Open b.
-
Page 35: Troubleshooting Of The Engine
Defective magneto coil Replace or re-welding or defective welding Improper circuit connecting or open Check and get through circuit All joint- face leaks Tighten all joint bolts Air cleaner plugged Clean Spark plug leaks Tighten the spark plug Tighten the nut on cylinder Cylinder gasket leaks cover Cylinder... - Page 36 too high Idle speed jet is wide Replace the carburetor Incorrect ignition timing Adjust the ignition time Idle Mixed gas is over thick or over speed is Adjust the carburetor thin unstable Spark plug gap is narrow Reset the spark plug gap 3.
- Page 37 4. The engine is overheating. Problem Cause Correction Defective cooling system (see Repair or replace parts Poor radiating chapter 5) condition Running at high speed in a place Stop the engine for cooling for a long time The engine is operated at a low Improve operation method or speed or running at poor quality Over loading or...
-
Page 38: Troubleshooting Of Cooling System
6 clutch failure Problem Cause Correction Troubleshooting of Cooling System Improper adjustment clutch Adjust, repair or replace Phenomena: poor engine dynamic performance, water thermometer mercurial is operation system or defective clutch pointed at the red area for a long time, and the coolant is boiling and squirting out from Clutch slip Defective friction plate Replace... -
Page 39: Electric Fan Wiring Diagram
Front and rear hydraulic disc brake The ATV is equipped with hydraulic disc brake for front and rear, the brake pedal controls front and rear hydraulic disc brake together. Electric Fan Wiring Diagram Negative Green DJ221 Positive Blue/White DJ622-A The two plugs is reversal. Throttle lever adjustment NOTE: Adjust the engine idling speed before adjusting the throttle lever free... -
Page 40: Brake Pads Inspection
Brake pads inspection ○ ○ ○ ○ ○ ○ ○ ○ ○ ○ ○ ○ ○ ○ ○ ○ , aadjusting bolt , blocknut , cadjust nut , d.lock nut A cable length 1. Loosen the locknut and adjust the adjusting nut on the brake cable 2. -
Page 41: Clutch Lever Free Play Adjustment
Clutch lever free play adjustment The clutch lever free play should be adjusted to 8-13mm Drive chain slack adjustment 1.Loosen the locknut of 1 and 2 2. adjust the locknut of 3 and 4 both them frontward till chain at the proper degree of tightness 3. -
Page 42: Lubricating The Drive Chain
Damaged control cables WHAT CAN HAPPEN Lubricating the drive chain becomes Corrosion can result when the outer covering of control cables The drive chain must be cleaned and lubricated at the intervals specified in damaged. Cables also can become frayed. Operation of controls could be the periodic maintenance and lubrication chart. -
Page 43: Lubrication For A-Arm
Lubrication for A-arm Rear arm pivot lubrication Lubricates the front upper and lower A-arms pivots Lubricates the rear arm pivot 1 upper arm grease nipple 2 lower arm grease nipple 43 / 46... -
Page 44: Cleaning And Storage
2. Block off the end of exhaust pipe to prevent water entry Battery 3. Make sure the spark plug and all filler caps are properly installed. Battery electrolyte is poisonous, never discard it at random. Handle it 4. If the engine case is excessively greasy, apply degreaser with a paint be comply with national or local environmental protection rules. - Page 45 NOTE: Make the necessary repairs before storing the ATV. Assembling figure for that was disassembled while packing 45 / 46...
- Page 46 Circuit diagram 46 / 46...
Need help?
Do you have a question about the LYDA203E-6 and is the answer not in the manual?
Questions and answers