Sony dsc-w310 Instruction Manual
Hide thumbs
Also See for dsc-w310:
- Instruction manual (515 pages) ,
- Handbook (98 pages) ,
- Service manual (12 pages)
Chapters
Table of Contents

Related Manuals for Sony dsc-w310


Summary of Contents for Sony dsc-w310
- Page 1 4-169-317-21(1) DSC-W310 GB Digital Still Camera/Instruction Manual ES Cámara fotografía digital/Manual de instrucciones © 2010 Sony Corporation Downloaded from ManualsCamera.com Manuals...
-
Page 2: Battery Pack
English Owner’s Record The model and serial numbers are located on the bottom. Record the serial number in the space provided below. Refer to these numbers whenever you call upon your Sony dealer regarding this product. Model No. DSC-W310 Serial No. ______________________________... -
Page 3: Battery Charger
• Do not incinerate or dispose of in fire. • Do not handle damaged or leaking lithium ion batteries. • Be sure to charge the battery pack using a genuine Sony battery charger or a device that can charge the battery pack. -
Page 4: Regulatory Information
For Customers in Europe Notice for the customers in the countries applying EU Directives The manufacturer of this product is Sony Corporation, 1-7-1 Konan Minato-ku Tokyo, 108-0075 Japan. The Authorized Representative for EMC and product safety is Sony Deutschland GmbH, Hedelfinger Strasse 61, 70327 Stuttgart, Germany. For any service or guarantee matters please refer to the addresses given in separate service or guarantee documents. - Page 5 This product has been tested and found compliant with the limits set out in the EMC Directive for using connection cables shorter than 3 meters (9.8 feet). Attention The electromagnetic fields at the specific frequencies may influence the picture and sound of this unit.
- Page 6 If the plug supplied with this equipment has a detachable fuse cover, be sure to attach the fuse cover after you change the fuse. Never use the plug without the fuse cover. If you should lose the fuse cover, please contact your nearest Sony service station. Downloaded from ManualsCamera.com Manuals...
-
Page 7: Table Of Contents
Table of contents Getting started Refer to “Cyber-shot Handbook” (PDF) on supplied CD-ROM..................8 Checking the accessories supplied...........8 Notes on using the camera ............8 Identifying parts ...............11 Charging the battery pack ............12 Inserting the battery pack/a memory card (sold separately) ................14 Setting the clock ..............17 Shooting/viewing images Shooting still images ..............18... -
Page 8: Refer To "Cyber-Shot Handbook" (Pdf) On Supplied Cd-Rom
• Battery charger BC-CSN/BC-CSNB (1) • Power cord (mains lead) (not supplied in the USA and Canada) (1) • Rechargeable battery pack NP-BN1 (1) • Dedicated USB cable (1) (Sony Corporation 1-837-597-) • Dedicated A/V cable (1) (Sony Corporation 1-837-778-) • Wrist strap (1) •... - Page 9 Notes on recording/playback • To ensure stable operations of the memory card, we recommend that you use this camera to format any memory card being used with this camera for the first time. Note that formatting will erase all data recorded on the memory card.
- Page 10 JEITA (Japan Electronics and Information Technology Industries Association). • Sony does not guarantee that the camera will play back images recorded or edited with other equipment, or that other equipment will play back images recorded with the camera.
-
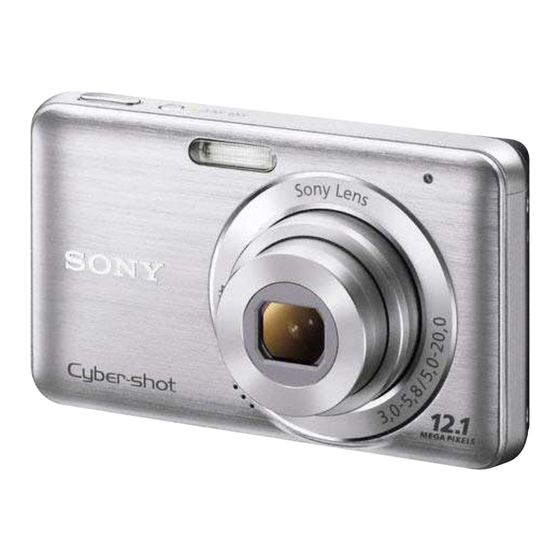
Page 11: Identifying Parts
Identifying parts A ON/OFF (Power) button B Shutter button C Flash D Microphone E ON/OFF (Power) lamp F Self-timer lamp/Smile Shutter lamp G Speaker H Lens I LCD screen (Playback) button K For shooting: W/T (zoom) button For viewing: (Playback zoom) button/ (Index) button (USB)/A/V OUT jack... -
Page 12: Charging The Battery Pack
Charging the battery pack Insert the battery pack into the battery charger. • You can charge the battery even when it is partially charged. Battery pack Connect the For customers in the USA and Canada battery charger to Plug the wall outlet (wall socket). -
Page 13: Charging Time
• When charging is finished, disconnect the power cord (mains lead) from the wall outlet (wall socket), and remove the battery pack from the battery charger. • Be sure to use the battery pack or the battery charger of the genuine Sony brand. Battery life and number of images you can record/ view Battery life (min.) -
Page 14: Inserting The Battery Pack/A Memory Card (Sold Separately)
Inserting the battery pack/a memory card (sold separately) Open the cover. Insert a memory card (sold separately). With the notched corner down as illustrated, insert the memory card until it clicks into place. Note the notched corner facing the correct direction Insert the battery pack. -
Page 15: To Remove The Memory Card
Close the cover. • Closing the cover with the battery inserted incorrectly may damage the camera. Memory card that you can use The following memory cards are compatible with this camera: “Memory Stick PRO Duo” media, “Memory Stick PRO-HG Duo” media, “Memory Stick Duo”... -
Page 16: To Remove The Battery Pack
When there is no memory card inserted Images are stored in the camera’s internal memory (approximately 6 MB). To copy images from the internal memory to a memory card, insert a memory card in the camera, then select MENU t (Settings) t (Memory Card Tool) t [Copy]. -
Page 17: Setting The Clock
Setting the clock Press the ON/OFF (Power) ON/OFF (Power) button button. The camera is turned on. • It may take time for the power to turn on and allow operation. Select a setting item with v/V on the control button, then press z. -
Page 18: Shooting Still Images
Shooting still images Set the mode switch to ON/OFF (Power) button (Still Image), then Mode switch press ON/OFF (Power) button. Hold the camera steady as illustrated. • Press the T button to zoom in, W button to zoom out. Press the shutter Shutter button halfway down button... -
Page 19: Shooting Movies
Shooting movies Set the mode switch to ON/OFF (Power) button (Movie), then press Mode switch ON/OFF (Power) button. Press the shutter button fully down to start recording. Press the shutter button fully down again to stop recording. Downloaded from ManualsCamera.com Manuals... -
Page 20: Viewing Images
Viewing images Press the (Playback) button. The last image shot is displayed. (Playback) button Selecting next/previous image Select an image with B (next)/b (previous) on the control button. • Press z in the center of the control button to view movies. Deleting an image 1 Press (Delete) button. -
Page 21: Cyber-Shot Handbook" (Pdf)
Learning more about the camera (“Cyber-shot Handbook”) “Cyber-shot Handbook”, which explains how to use the camera in detail, is included on the CD-ROM (supplied). Refer to it for in-depth instructions on the many functions of the camera. For Windows users Turn on your computer, and insert the CD-ROM (supplied) into the CD-ROM drive. -
Page 22: List Of Icons Displayed On The Screen
List of icons displayed on the screen When shooting still images Display Indication Smile Detection Sensitivity indicator • The icons are limited in (Easy Zoom scaling Mode). When shooting movies Display Indication AE/AF lock ISO400 ISO number Shutter speed F3.5 Aperture value +2.0EV Exposure Value... - Page 23 Display Indication Recording folder Number of recordable images 100Min Recordable time Recording/Playback Media (memory card, internal memory) Red-eye reduction Flash mode Flash charging Display Indication Self-timer Face Detection Burst AF range finder frame Spot metering cross- hairs Downloaded from ManualsCamera.com Manuals...
-
Page 24: Number Of Still Images And Recordable Time Of Movies
Number of still images and recordable time of movies The number of still images and recordable time may vary depending on the shooting conditions and the memory card. Still images (Units: Images) Capacity Internal Memory card formatted with this camera memory Approx. -
Page 25: Precautions
Notes • The recordable movie file size is up to approx. 2 GB for each file. If the file size reaches approx. 2 GB, the camera stops recording the movie automatically. • The camera does not support HD recordings or playbacks for movies. Precautions Do not use/store the camera in the following places •... - Page 26 On the internal rechargeable backup battery This camera has an internal rechargeable battery for maintaining the date and time and other settings regardless of whether the power is on or off. This rechargeable battery is continually charged as long as you are using the camera. However, if you use the camera for only short periods, it discharges gradually, and if you do not use the camera at all for about one month it becomes completely discharged.
-
Page 27: Specifications
Specifications Camera [Input and Output connectors] (USB)/A/V OUT terminal: [System] Video output Image device: Audio output (Monaural) 7.79 mm (1/2.3 type) R, G, B USB communication primary color mosaic filters USB communication: Hi-Speed USB Total pixel number of camera: (USB 2.0 compliant) Approx. - Page 28 Trademarks Additional information on this • The following marks are trademarks product and answers to frequently of Sony Corporation. asked questions can be found at , “Cyber-shot,” our Customer Support Website. “Memory Stick,”...
- Page 29 Downloaded from ManualsCamera.com Manuals...
- Page 30 Español Nombre del producto: Cámara Digital Modelo: DSC-W310 POR FAVOR LEA DETALLADAMENTE ESTE MANUAL DE INSTRUCCIONES ANTES DE CONECTAR Y OPERAR ESTE EQUIPO. RECUERDE QUE UN MAL USO DE SU APARATO PODRÍA ANULAR LA GARANTÍA. AVISO Para reducir el riesgo de incendio o descarga eléctrica, no exponga la unidad a la lluvia ni a la humedad.
- Page 31 • No la incinere ni la arroje al fuego. • No manipule baterías de iones de litio dañadas o con fugas. • Asegúrese de cargar la batería con un cargador de baterías original de Sony o con un dispositivo que pueda cargarla.
- Page 32 Aviso Si la electricidad estática o el electromagnetismo interrumpen la transmisión de datos (fallo), reinicie la aplicación o desconecte el cable de comunicación (USB, etc.) y vuelva a conectarlo. Tratamiento de los equipos eléctricos y electrónicos al final de su vida útil (aplicable en la Unión Europea y en países europeos con sistemas de recogida selectiva de residuos) Este símbolo en el equipo o el embalaje indica que el presente producto no puede ser tratado como residuos domésticos normales, sino que debe...
- Page 33 Índice Preparativos Consulte la “Guía práctica de Cyber-shot” (PDF) en el CD-ROM suministrado ...............6 Comprobación de los accesorios suministrados.......6 Notas sobre la utilización de la cámara........6 Identificación de las partes............9 Carga de la batería ..............10 Inserción de la batería/una tarjeta de memoria (se vende por separado) ............13 Ajuste del reloj .................16 Toma/visionado de imágenes...
-
Page 34: Consulte La "Guía Práctica De Cyber-Shot" (Pdf) En El Cd-Rom Suministrado
• Cable de alimentación (no suministrado en EE.UU. y Canadá) (1) • Batería recargable NP-BN1 (1) • Cable USB exclusivo (1) (Sony Corporation 1-837-597-) • Cable de audio y vídeo exclusivo (1) (Sony Corporation 1-837-778-) • Correa para muñeca (1) • CD-ROM (1) –... - Page 35 Notas sobre la grabación/reproducción • Para asegurar operaciones correctas de la tarjeta de memoria, le recomendamos que utilice esta cámara para formatear cualquier tarjeta de memoria que vaya a utilizar con esta cámara por primera vez. Tenga en cuenta que al formatear se borrarán todos los datos grabados en la tarjeta de memoria.
- Page 36 No hay compensación por daño del contenido o fallo de grabación Sony no compensará por no poder grabar o por la pérdida o daño del contenido grabado debido a un mal funcionamiento de la cámara o el soporte de grabación, etc.
-
Page 37: Identificación De Las Partes
Identificación de las partes E Lámpara ON/OFF (Alimentación) F Lámpara de autodisparador/ Lámpara de Captador de sonrisas G Altavoz H Objetivo I Pantalla LCD J Botón (Reproducción) K Para tomar imagen: Botón W/T (zoom) Para visionado: Botón (Zoom de reproducción)/Botón (Índice) L Toma (USB)/A/V OUT... -
Page 38: Carga De La Batería
Carga de la batería Inserte la batería en el cargador de batería. • Puede cargar la batería incluso cuando esté parcialmente cargada. Batería Conecte el Para clientes en EE.UU. y Canadá cargador de Clavija batería a la toma de corriente de la pared. - Page 39 • Cuando finalice la carga, desenchufe el cable de alimentación de la toma de corriente de la pared, y extraiga la batería del cargador de batería. • Asegúrese de utilizar la batería o el cargador de batería de la marca Sony genuina. Duración de la batería y número de imágenes que se pueden grabar/ver Duración de la batería...
- Page 40 Utilización de la cámara en el extranjero Puede utilizar la cámara y el cargador de batería (suministrado) en cualquier país o región donde el suministro de corriente sea de entre 100 V a 240 V ca 50/60 Hz No utilice un transformador electrónico (convertidor para usar en viajes). Ello podría ocasionar un mal funcionamiento.
-
Page 41: Inserción De La Batería/Una Tarjeta De Memoria (Se Vende Por Separado)
Inserción de la batería/una tarjeta de memoria (se vende por separado) Abra la tapa. Inserte una tarjeta de memoria (se vende por separado). Con la esquina cortada hacia abajo como se muestra en la ilustración, inserte la tarjeta de memoria hasta que encaje en su sitio con un chasquido. - Page 42 Cierre la tapa. • El cerrar la tapa con la batería insertada incorrectamente podrá dañar la cámara. Tarjeta de memoria que puede utilizar Las siguientes tarjetas de memoria son compatibles con esta cámara: “Memory Stick PRO Duo”, “Memory Stick PRO-HG Duo”, “Memory Stick Duo”, tarjeta de memoria SD y tarjeta de memoria SDHC.
- Page 43 Cuando no hay tarjeta de memoria insertada Las imágenes se almacenan en la memoria interna de la cámara (aproximadamente 6 MB) Para copiar imágenes de la memoria interna a una tarjeta de memoria, inserte una tarjeta de memoria en la cámara, después seleccione MENU t (Ajustes) t (Her tarjeta memoria) t [Copiar].
-
Page 44: Ajuste Del Reloj
Ajuste del reloj Pulse el botón ON/OFF Botón ON/OFF (Alimentación) (Alimentación). La cámara se enciende. • Es posible que lleve algún tiempo en conectarse la alimentación y permitir realizar operaciones. Seleccione un ajuste con v/V del botón de control, después pulse z. Format fecha y hora: Selecciona el Botón de formato de visualización de fecha y... -
Page 45: Toma De Imágenes Fijas
Toma de imágenes fijas Ajuste el conmutador de Botón ON/OFF (Alimentación) modo a (Imagen fija), Conmutador después pulse el botón de modo ON/OFF (Alimentación). Sujete la cámara sin moverla como se muestra en la ilustración. • Pulse el botón T para acercar con zoom, y el botón W para alejar con zoom. -
Page 46: Toma De Películas
Toma de películas Ajuste el conmutador de Botón ON/OFF (Alimentación) modo a (Película), Conmutador después pulse el botón de modo ON/OFF (Alimentación). Pulse el botón del disparador a fondo para iniciar la grabación. Pulse el botón del disparador a fondo otra vez para detener la grabación. -
Page 47: Visualización De Imágenes
Visualización de imágenes Pulse el botón (Reproducción). Se visualiza la última imagen tomada. Botón (Reproducción) Selección de la imagen siguiente/anterior Seleccione una imagen con B (siguiente)/ b (anterior) del botón de control. • Pulse z en el centro del botón de control para ver películas. -
Page 48: Para Saber Más Sobre La Cámara ("Guía Práctica De Cyber-Shot")
Para saber más sobre la cámara (“Guía práctica de Cyber-shot”) La “Guía práctica de Cyber-shot”, que explica cómo utilizar la cámara en detalle, está incluida en el CD-ROM (suministrado). Consúltela para ver instrucciones exhaustivas sobre las muchas funciones de la cámara. Para usuarios de Windows Encienda su ordenador e inserte el CD-ROM (suministrado) en la unidad de CD-ROM. -
Page 49: Lista De Iconos Visualizados En La Pantalla
Lista de iconos visualizados en la pantalla Cuando se toman imágenes Visualiza- Indicación fijas ción Balance del blanco Modo de medición SteadyShot Aviso de vibración Indicador de sensibilidad de detección de sonrisas • Los iconos están limitados en (Modo fácil). Cuando se toman películas Relación del zoom Visualiza-... - Page 50 Visualiza- Indicación ción Carpeta de grabación Número de imágenes que se pueden grabar 100Min Tiempo que se puede grabar Soporte de grabación/ reproducción (tarjeta de memoria, memoria interna) Reducción del efecto ojos rojos Modo de flash Carga del flash Visualiza- Indicación ción Autodisparador...
-
Page 51: Número De Imágenes Fijas Y Tiempo Grabable De Películas
Número de imágenes fijas y tiempo grabable de películas El número de imágenes fijas y el tiempo que se puede grabar podrán variar dependiendo de las condiciones de la toma y la tarjeta de memoria. Imágenes fijas (Unidades: Imágenes) Capacidad Memoria Tarjeta de memoria formateada con esta interna... -
Page 52: Precauciones
Notas • El tamaño de archivo de película que se puede grabar es de hasta aprox. 2 GB para cada archivo. Si el tamaño de archivo alcanza aprox. 2 GB la cámara detendrá la grabación de película automáticamente. • La cámara no admite grabaciones HD ni reproducciones para películas. Precauciones No utilice o almacene la cámara en los siguientes lugares •... - Page 53 Acerca de la temperatura de funcionamiento Su cámara está diseñada para ser utilizada a temperaturas de entre 0 °C y 40 °C No se recomienda tomar imágenes en lugares extremadamente cálidos o fríos que excedan esta gama. Acerca de la batería interna de respaldo recargable Esta cámara tiene una batería recargable interna para mantener la fecha y hora y otros ajustes independientemente de si la alimentación está...
-
Page 54: Especificaciones
Especificaciones Cámara [Conectores de entrada y salida] Terminal (USB)/A/V OUT: [Sistema] Salida de video Dispositivo de imagen: Salida de audio (Monoaural) Filtros mosaico de colores Comunicación USB primarios rojo, verde, azul (RGB) Comunicación USB: Hi-Speed USB de 7,79 mm (tipo 1/2,3) (compatible con USB 2.0) Número total de píxeles de la cámara: Aprox. -
Page 55: Marcas Comerciales
Marcas comerciales son, en general, marcas comerciales o • Las marcas siguientes son marcas marcas comerciales registradas de sus comerciales de Sony Corporation. respectivos desarrolladores o , “Cyber-shot”, fabricantes. Sin embargo, las marcas “Memory Stick”, , “Memory... - Page 56 Printed in China Downloaded from ManualsCamera.com Manuals...
Need help?
Do you have a question about the dsc-w310 and is the answer not in the manual?
Questions and answers