
Summary of Contents for Taiden HCS-3316HDB
- Page 1 HCS-3316HDB Videoconference Camera Excellent solutions for conferences Installation and Operating Manual V 1.1...
- Page 2 Safeguard Before installing the camera, please read this manual carefully, please follow this manual during installation and operation, and keep it manual for future use. Before powering up the camera, please check the local power supply; make sure it complies with the requirements of the camera power adapter.
-
Page 3: Table Of Contents
Contents 1. Overview ....................3 1.1 Introduction..................3 1.2 Features ...................4 1.3 Specifications ...................6 1.4 Structure ...................8 2. Camera Installation ................10 2.1 Matters Needing Attention ..............10 2.2 Installation ..................11 3. Camera Video Out Mode ..............12 3.1 Switch Configuration ..............12 3.2 Format Configuration..............14 4. -
Page 4: Overview
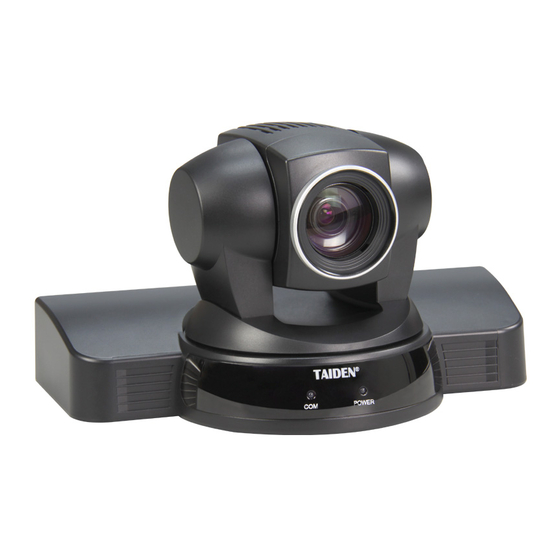
1. Overview 1.1 Introduction This high-definition, all-in-one, Pan/Tilt/Zoom (PTZ) Video Camera brings the HD scenes to your life. This unique camera is equipped with a DVI-I interface designed to maximize high video quality displays and is capable of displaying both digital and analog signals (output options are Y/Pb/Pr, HDMI, DVI-D, VGA, RGBHV and HD-SDI, etc.). -
Page 5: Features
1.2 Features Features Benefit The camera incorporates a 1/2.7-type HD CMOS Superb Picture Quality 5 Mega sensor (a total of five mega effective pixels) Pixels HD CMOS Sensor providing outstanding picture quality and high resolution images. The camera allows for HD 720p to 1080p60 Video Format Compatible with migration. - Page 6 Features Benefit RS-485/422 and RS-232 Serial All camera settings and pan/tilt/zoom functions Control by PELCO-D/VISCA for the camera can be controlled remotely via Protocol 240x Zoom Ratio(20x Optical + The fast and stable auto-focus zoom lens on the 12x Digital) camera has an impressive 240x zoom ratio.
-
Page 7: Specifications
1.3 Specifications Items Specifications Image Sensor 1/2.7-type HD CMOS sensor, 5 mega pixels HD: 1080p60/1080p50/1080p30/1080p25/1080i60/ Signal System 1080i50/720p60/720p50/720p30/720p25; SD: NTSC, PAL 20x optical zoom lens, Lens f=4.7-94mm, Fw/1.6-Ft/3.5 Zoom ratio 20x optical zoom, 12x digital zoom Minimum object distance 0.5m (wide) - 1.5m (tele) Horizontal viewing angel 58.7°... - Page 8 Items Specifications Multiple video output 3-ways HD and 1-way SD Control Protocol PELCO-D, VISCA Control Interface RS-485/422, RS-232 Baud Rate 2400/4800/9600/19200/38400 bps Address 0~255 Operating temperature: 0℃~+50℃ Temperature Storage temperature: -20℃~+70℃ Relative Humidity 0~95% (not condensing) Power Requirements DC 12 V Power Consumption <10 W Dimensions (mm)
-
Page 9: Structure
1.4 Structure Note: for HD-SDI interface (HD), the maximum transmission distance is 100 meters. Pin assignment of RS-232... - Page 10 Pin assignment of RS-485/422 Corresponding pin Corresponding pin of of RS-485 cable RS-422 cable RXD- White Black TXD- RXD+ Green TXD+ Black...
-
Page 11: Camera Installation
2. Camera Installation 2.1 Matters Needing Attention 1. All of the installation work should be serviced by qualified technical personnel or system installers. 2. Handle with care when unpacking and removing the camera; do not impact the camera and other parts of the camera with hard objects to avoid preventable problems. -
Page 12: Installation
2.2 Installation There are two installation methods of the camera: a) tabletop installation and b) ceiling installation. a) Tabletop installation b) Ceiling installation... -
Page 13: Camera Video Out Mode
3. Camera Video Out Mode 3.1 Switch Configuration Before using the camera, configure the DVI interface output color format, etc. Switch 2, to configure these settings is located on the back panel of the camera. The below figure shows switch 2 on the back panel, the ON direction is marked beside the switches. - Page 14 SW2 Pos 5 Pos 5 Setting Camera video default format: (SD: PAL, HD: 1080i50). Camera video format defined by user. SW2 Pos 6 Pos 6 Setting 50 Hz format 60 Hz format SW2 Pos 8 Pos 8 Setting Open the remote control sensor Close the remote control sensor SW2 Pos 1, 2, 7 Reserved.
-
Page 15: Format Configuration
3.2 Format Configuration Video Format HD-SDI YPbPr HDMI DVI-D 5-BNC 1080p60 √ √ √ √ √ √ 1080p50 √ √ √ √ √ √ 1080p30 √ √ √ √ √ √ 1080p25 √ √ √ √ √ √ 1080i60 √ √... - Page 16 Note: perhaps, some common display devices cannot support 1080p30/1080p25/ 720p30/720p25 format.
-
Page 17: Remote Control
4. Remote Control 1. Reserved 2. HOME (PAN/TILT init) 3. Reserved 4. IRIS control (Iris opened or closed) 5. PAN/TILT control (up, down, left, right, left-up, left-down, right-up, right-down) 6. Frame scan 7. SCAN1 (Scan 300°) 8. SET (Set preset) 9. - Page 18 Power-on initialization When the camera is powered on, the power lamp is on, and pan/tilt will rotate automatically, finally pan/tilt stops and the camera lens is pointing forward. Pan/Tilt control Press the arrow buttons to change camera direction. While adjusting the picture on the screen, press the desired arrow button.
- Page 19 Camera reset Press the HOME button, the camera will reset and reinitialize the Pan/tilt direction. Back light ON/OFF control When one portion of an image is brilliantly bright while the other portions are dark, video will become dark. You can improve the video quality by turning on the backlight compensation function.
-
Page 20: Menu Function
5. Menu Function 5.1 Remote Control Menu Note: Camera has no response for Remote Control command and COM command under OSD menu mode; There is no OSD menu for SD video; To make new setting valid, please exit menu and restart system. -
Page 21: Menu Item
5.2 Menu Item Menu Item Sub Menu Item Content Item 1080p60 1080p50 In general, HDTV 1080p30 cannot support these 1080p25 two formats 1080i60 HD OUT 1080i50 720p60 720p50 In general, HDTV 720p30 cannot support these 720p25 two formats AUTO VIDEO 3D DNR 1-15 PICTURE FLIP... - Page 22 Menu Item Sub Menu Item Content Item AUTO SHUTTER PRIORITY MODE IRIS PRIORITY EXPOSURE SET GAIN LIMIT 0-45 dB, 3dB/step EXPOSURE BCAKLIGHT SHUTTER Display under “SHUTTER PRIORITY” mode IRIS Display under “IRIS PRIORITY” mode EXPOSURE 0-40 VALUE Display under “EXPOSURE SET” mode MAUNAL OUTDOOR INDOOR1...
- Page 23 Menu Item Sub Menu Item Content Item RS-232 CONTROL PORT RS-422 BAUD RATE 2400/4800/9600/19200/38400 VISCA PROTOCOL PELCO-D SYSTEM ADDRESS XXXX ENGLISH LANGUAGE Simplified Chinese Traditional Chinese AUTO PRESET FOCUS MANUAL MODEL ABOUT VERSION MODULE VERSION ROM VERSION RESTORE FACTORY DEFAULTS...
-
Page 24: Presets Description
6. Presets Description Set presets Input the preset number by pressing the NUM button. Then press the SET button to save the preset. Call presets Input the preset number by pressing the NUM button. Then press the CALL button to call the preset. Clear presets Input the preset number by pressing the NUM button. - Page 25 TAIDEN Conference Management System software and setup predefined positions, if you want to recall predefined positions by HCS-3316HDB remote controller, only general use presets can be recalled by remote controller and predefined positions of 32 – 36 and 39 – 49 are reserved as system command.
-
Page 26: Rs Control
7. RS Control 7.1 Switch Configuration Before using the camera RS Control, configure the camera address. Switch 1 to configure these settings is located on the back panel of the camera. The below figure shows switch 1 on the back panel, the ON direction is marked beside the switches. -
Page 27: Menu Configuration
7.2 Menu Configuration Before using the camera RS Control, it must be configured by Menu Operation. Enter the menu item: [SYSTEM], and configure “CONTROL PORT”, “BAUD RATE” and “PROTOCOL” properly. The camera supports a) Control modes: RS-232 and RS-485/422 b) Protocols: VISCA and PELCO-D c) Baud rates: 2400, 4800, 9600, 19200 and 38400 bps... -
Page 28: Control Cables
7.3 Control Cables RS-232 Cable RS-485/422 Cable Note: when connecting more than one HCS-3316HDB with RS-485/422 cable, simply merge the lines with the same color and connect to the console. -
Page 29: Control Mode
7.4 Control Mode Note: when connecting cameras in daisy chain mode, the addresses of the cameras should begin with 1, up to 7. Please set the correct address for each camera. -
Page 30: Connection
7.5 Connection Figure: Connection with TMX-0808SDI Figure: Connection with TMX-0804HTK Note: when using PELCO-D protocol, please use RS-485 as control interface, and use HCS-3316RS485 as video switch (TMX-0808SDI, TMX-0804HTK) protocol. When using VISCA protocol, please use RS-232 as control interface, and use HCS-3316RS232 as video switch (TMX-0808SDI, TMX-0804HTK) protocol. -
Page 31: Dimensions
8. Dimensions... -
Page 32: Product And Accessories
9. Product and Accessories Camera Remote controller Power adaptor RS-232 cable RS-485/422 cable... - Page 33 User manual Ceiling installation template Screws Notes: There are two types of installation----tabletop and ceiling mounting. Accessory 7 and 8 are only provided for ceiling mounting.
-
Page 34: Troubleshooting
10. Troubleshooting 1. Self-checking exceptions, noise Check power supply (input 100 - 240 V, 50/60 Hz, 0.8 A; output 12 V, 2.5 A), mechanical failures need manufacturer repairing. 2. DVI - DVI-D / DVI-VGA interface has no image output Confirm that Pos 3 of SW2 is ON and the color format is RGB. 3. - Page 35 Open the OSD menu〈MAIN〉 〈WHITE BALANCE〉to set〈WEB MODE〉as 〈MANUAL〉or〈ONE PUSH〉. Note: there are some effects for WHITE BALANCE if no white/gray object in camera visual field, please put a white object in the visual field to check and adjust. 6. Image with normal color but with bias of light or deep Check and adjust color effects of display or encoder;...
- Page 36 11. Change the HD output format, but cannot take effect after restart. If change the HD output format through Remote Control menu, please exit the OSD menu to save the change, and then restart; Confirm that Pos 5 of SW2 is ON. If Pos 5 of SW2 is OFF, the HD output format is 1080i50 forever after repower.
- Page 37 TAIDEN INDUSTRIAL CO., LTD. Copyright by TAIDEN Last Revision: 04/2015...