Table of Contents
Advertisement
Advertisement
Table of Contents

Related Manuals for Acer Iconia A3-A20


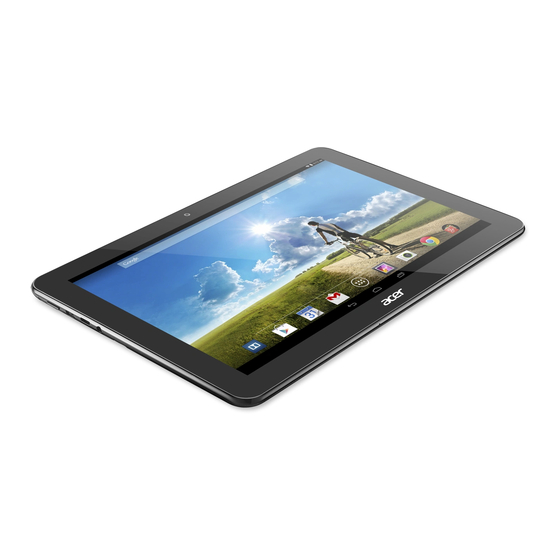
Summary of Contents for Acer Iconia A3-A20
- Page 1 User’s Manual Downloaded from LpManual.com Manuals...
- Page 2 This revision: August 2014 Sign up for an Acer ID and enjoy great benefits Open the Acer Portal app from the Start screen to sign up for an Acer ID or sign in if you already have an Acer ID.
-
Page 3: Table Of Contents
Table of contents - 3 A B L E O F C O N T E N T S Getting started with your tablet Setting up the Email application .... 23 Features and functions ......4 Google services ........24 Unpacking your tablet...... -
Page 4: Getting Started With Your Tablet
Your new tablet comes packed in a protective box. Carefully unpack the box and remove the contents. If any of the following items are missing or damaged, contact your dealer immediately: • Acer Iconia A3-A20FHD / A3-A20 tablet • Product setup and safety information • USB cable •... -
Page 5: Getting To Know Your Tablet
Getting started with your tablet - 5 Getting to know your tablet iews No. Item Description Insert a small thin object (such as a Reset pinhole paperclip) to reset the tablet. Increases and decreases the tablet Volume control key volume. Long press to turn the tablet on, press briefly to turn the screen on/off or enter Power button... -
Page 6: Turning On For The First Time
Turning on for the first time To turn on your tablet, press and hold the power button until you see the Acer logo. Wait a moment for your tablet to boot up. You will then be asked some questions before you can use your tablet. - Page 7 Getting started with your tablet - 7 Sign in to or create a Google account If you have internet access, your tablet allows you to synchronize information with a Google account. During the start-up process, you may create or sign in to an account, which will be used to synchronize your contact list, email, calendar and other information.
-
Page 8: Charging Your Tablet
8 - Charging your tablet H A R G I N G Y O U R T A B L E T Assembling the power adapter Your tablet is bundled with one of two types of USB power adapters: a fixed-prong type or a removable-prong type. -
Page 9: Connecting Power
Connect the power connector to your tablet and plug the AC adapter into any AC outlet. Warning Only use an Acer-approved adapter to charge your device. Note It is normal for the tablet surface to become warm during charging or long periods of use. -
Page 10: Using Your Tablet
10 - Using your tablet S IN G Y O U R T A B L E T Using the touchscreen Your tablet uses a touchscreen for selecting items and entering information. Use your finger to tap the screen. Tap: Touch the screen once to open items and select options. Drag: Hold your finger on the screen and drag across the screen to select text and images. - Page 11 Using your tablet - 11 The Home screen already features some useful controls and information. Status and notification area Search Widgets Application (APPS) menu Navigation Note Bundled apps differ depending on region and configuration. When auto-rotate is enabled, the home screen can rotate to portrait view.
- Page 12 12 - Using your tablet Search To search for APPs, files or for information on the internet, tap the Google icon in the top-left corner. Simply enter the text you want to find. Tap the arrow or Enter key to search the internet, or tap one of the suggestions, APPs or files shown in the list.
-
Page 13: Status And Notification Area
Using your tablet - 13 The extended Home screen The Home screen extends to either side of the initial Home screen, giving you more room to add widgets or organize shortcuts. To view the extended Home screen, swipe your finger to the left or right. A total of five pages are available, two to the left and two to the right. - Page 14 14 - Using your tablet "next track" when music is playing. Swipe down from the top-right side to display Quick Settings. Downloaded from LpManual.com Manuals...
- Page 15 Using your tablet - 15 Quick Settings icons Note Many Quick Settings icons turn green when active. Icon Name Description Tap to toggle Airplane mode on and off. When on, Airplane mode all wireless connectivity is disconnected. Audio profiles Tap to select a predefined audio profile Tap to toggle automatic screen rotation on and Auto rotate off.
-
Page 16: Personalizing The Home Screen
16 - Using your tablet Note If your device’s battery is getting too hot, you will be notified and advised to turn off the device. If you fail to turn it off, it will shut down automatically. Personalizing the Home screen You may personalize your Home screen by adding or removing application shortcuts or widgets, and by changing the wallpaper. -
Page 17: The Onscreen Keyboard
Using your tablet - 17 interactive backgrounds, or Video wallpapers that feature your recorded personal videos. The onscreen keyboard When you tap a text box to enter text, an onscreen keyboard will appear. Simply tap on keys to enter text. Note The layout of the keyboard varies slightly, depending on the application and information that is required. -
Page 18: Editing Text
18 - Using your tablet Predictive text or auto correction The Google keyboard can provide predictive text input. As you tap the letters of a word, a selection of words are displayed above the keyboard that continue the sequence of letters tapped, or are a close match allowing for errors. -
Page 19: Shutting Down Your Tablet
Using your tablet - 19 Inserting text To type new text or add text that you have copied: 1. Tap where you want to insert text. If you can select this text, a cursor is inserted below the text. To replace a word, double tap the word. In both cases, if you previously copied text, a PASTE button displays. -
Page 20: 20 - Connecting Devices To Your Tablet
20 - Connecting devices to your tablet O N N E C T I N G D E V I C E S T O Y O U R T A B L E T Connecting to AC power See Charging your tablet on page 8 Inserting a microSD card You may install a microSD card to expand your device's storage space. -
Page 21: Connecting A Bluetooth Device
For Bluetooth settings, tap APPs > Settings, then under WIRELESS & NETWORKS tap Bluetooth. Turn Bluetooth on and tap Search for devices to scan for nearby devices. Accessories For a complete list of accessories, visit store.acer.com. Downloaded from LpManual.com Manuals... -
Page 22: Going Online
22 - Going online O I N G O N L I N E Managing Wi-Fi connections If you did not connect to a Wi-Fi network when you first started your tablet, or want to connect to a new network, tap APPs > Settings > Wi-Fi to manage your connection settings. -
Page 23: Setting Up The Email Application
Going online - 23 To navigate forward and backward in your browser’s history, view your bookmarks, adjust browswer settings, and perform other tasks, tap the Menu icon. Chrome enables you to open multiple tabs. When a page is open, tap the small New tab button. -
Page 24: Google Services
24 - Going online Google services Note APPs may not be available in all countries and regions. You must activate a Google account before using Google services. The first time you access Google services, you must read and accept the Terms of Service. -
Page 25: Voice Search
Going online - 25 Voice Search Note Voice Search is available only in selected regions. With voice actions, you can send emails, find directions to locations, search the internet and even send a note to yourself using your own voice. In Chrome, tap the microphone icon in the address bar for voice searches. - Page 26 26 - Going online seem unusual, tap Accept & download to proceed with the installation. You may keep track of the download progress from both the APP’s page and the tablet’s notification area. Downloaded from LpManual.com Manuals...
- Page 27 Going online - 27 Important Some APPs may require payment before you can download them. You will need to have a Google Wallet account in order to pay for these APPs. Using downloaded APPs Once you’ve downloaded and installed an application, you may find it in the APPs or WIDGETS sections of the application menu.
-
Page 28: Playing Music
28 - Playing music L A Y I N G M U S I C Multimedia playback Your tablet comes supplied with a variety of programs that you can use to enjoy multimedia content. Note The available option of Google Play Music varies by region. For example, in some regions, Google Play Music can serve as cloud storage for your personal music collection and make it available on all your devices. - Page 29 Playing music - 29 the music you currently have on the tablet. The Menu button in the top-right of the main screen contains general options like Refresh, Settings, Help, and Send feedback. Albums and invidividual tracks have their own Menu buttons as well, each with their own set of options.
-
Page 30: Managing People And Contacts
30 - Managing people and contacts A N A G I N G P E O P L E A N D C O N T A C T S Your tablet features an address book that allows you to save contacts to the internal memory, SIM card or your Google account. -
Page 31: Editing A Contact
Managing people and contacts - 31 The amount of information you can store for a contact on your SIM will be limited to their Name, Phone and Email. Storing contacts to your Google or Tablet contact list will allow you to store additional information such as: Address, Events, Groups, Notes, Nickname, Website, Relationship, etc. - Page 32 32 - Managing people and contacts will also be made to your tablet’s contact list. Important Back up your contacts before making any changes. Tap the Menu button and select Import/Export. You may then Export your contact list to your tablet’s internal memory, or other options depending on installed APPs.
-
Page 33: Using The Camera And Camcorder
Using the camera and camcorder - 33 S I N G T H E C A M E R A A N D C A M C O R D E R Your tablet features a front-facing camera. This section will take you through all the steps in taking photos and videos with your tablet. -
Page 34: Settings
34 - Using the camera and camcorder camcorder settings. Tap the red Stop recording button to stop filming. Settings Camera mode Picture Collage: Combine multiple pictures to create a collage. Capture mode: Normal Smile Shutter Beautification EV bracket shot Multi-Angle View Photo with sound Continuous shooting Presentation... -
Page 35: Taking A Photo
Using the camera and camcorder - 35 ISO: Select from Auto, 100, 200, 400, 800 or 1600. Metering Modes: Select from Average, Spot or Center. Image adjustment: Adjust the Brightness, Contrast, Saturation, Sharpness, Hue or choose Reset all. Choose between Wide or Regular. Scale: 4M (2560 x 1440 pixels), 2M (1792 x 1008 pixels) or Resolution:... -
Page 36: Supported Formats
36 - Using the camera and camcorder 3. Tap to begin recording. 4. Tap to stop recording. Supported formats Type Formats Image JPEG Video H.264 BP, MPEG-4 SP, H.263 Audio AAC-LC, AMR-WB, AMR-NB Viewing photos and videos After you have taken your photo or video, it is automatically saved; normally to internal memory. -
Page 37: Advanced Settings
Advanced settings - 37 D V A N C E D S E T T I N G S To access Settings, open the application menu and tap Settings. Wireless & Networks Activating or deactivating connections Displays all available wireless networks. Turn the Wi-Fi function on or off. -
Page 38: Device
38 - Advanced settings Data Usage The Data Usage section shows how much data has been transmitted to your tablet, either in total or for each APP. This information is useful if you are using a metered service. More... Putting your tablet in Airplane mode You can enter Airplane mode (also known as flight mode) to turn off network and Bluetooth functions and use your tablet during a flight. - Page 39 Advanced settings - 39 Settings > Sound. Also adjust the volume for notification and alarm settings. Display You can adjust your tablet screen settings by tapping APPs > Settings > Display. Item Description Lock screen Enable or disable notifications on lock screen. notifications Wallpaper Set the Home screen background image.
-
Page 40: Personal
40 - Advanced settings Uninstalling an application You can remove programs installed on your tablet to free up extra storage memory. Tap the program icon from the application menu and drag it into the Uninstall area in the top-left corner. Note You cannot uninstall APPs that were pre-loaded on your tablet. -
Page 41: System
Advanced settings - 41 To manually synchronize an item, make sure the item is checked, tap the Menu icon and then tap Sync now. Multiple Google accounts If you have multiple Google accounts, such as separate accounts for personal and business contacts, you can access and synchonize them from the Accounts settings section. -
Page 42: Updating Your Tablet's Operating System
42 - Advanced settings You can delete an alarm by tapping . This action can be undone by tapping UNDO. Updating your tablet’s operating system Your tablet can download and install system updates, adding support for new devices or expanding software options. To check for updates, tap APPs >... -
Page 43: Faq And Troubleshooting
FAQ and troubleshooting - 43 F A Q A N D T R O U B L E S H O O T I N G This section lists frequently asked questions that may arise during the use of your tablet, and gives easy answers and solutions to these questions. - Page 44 I forgot my unlock You must have an active Google Unlock pattern pattern. account on the tablet and an Internet connection. If this option is not available, please contact your local Acer service center. Downloaded from LpManual.com Manuals...
-
Page 45: Other Sources Of Help
All Acer tablets are factory-tested before release. Other sources of help For information on: Refer to: Up-to-date information www.acer.com... -
Page 46: 46 - Specifications
46 - Specifications P E C I F I C A T I O N S Performance ™ ® Google Android KitKat 4.4 operating system A3-A20FHD • MTK MT8127 turbo version quad-core Cortex 1.5 GHz processor • System memory: • 2 GB of RAM •... -
Page 47: Usb Connector
Specifications - 47 Formats supported Type Formats Audio recording AAC-LC, AMR-WB AAC-LC, AAC, AAC+ (not raw AAC), AMR-NB, Audio playback AMR-WB, MP3, OGG Vorbis, WAV Video recording H.264 BP, MPEG-4 SP, H.263 BP H.264 BP, H.264 MP, H.264 HP, MPEG-4 SP, H.263 Video playback USB connector •... - Page 48 48 - Specifications Battery • 22 Wh 5910 mAh 3.8 V 2-cell Li-polymer battery pack Battery life: Up to 8 hours (based on video playback test results) Note Length of battery operation will depend on power consumption which is based on system resource use. For example, constantly using the backlight or using power-demanding APPs will shorten battery life between charges.
-
Page 49: End User License Agreement
6. Sublicense or otherwise make the Software available to third parties, except that you may, after prior written notification to Acer, transfer the Software as a whole to a third party so long as you do not retain any copies of the Software and such third party accepts the terms of this Agreement. - Page 50 Title, ownership rights and intellectual property rights in and to the Software and all copies thereof shall remain with Acer or Acer's licensors or suppliers (as applicable). You do not have or shall not gain any proprietary interest in the Software (including any modifications or copies made by or for you) or any related intellectual property rights.
- Page 51 Privacy policy During registration you will be asked to submit some information to Acer. Please refer to Acer’s privacy policy at www.acer.com/worldwide/support/swa.htm or your local Acer website. Downloaded from LpManual.com Manuals...
- Page 52 52 - End user license agreement Trademark information Manufactured under license from Dolby Laboratories. Dolby and the double-D symbol are trademarks of Dolby Laboratories. Downloaded from LpManual.com Manuals...
Need help?
Do you have a question about the Iconia A3-A20 and is the answer not in the manual?
Questions and answers