
Related Manuals for Cameo FLAT PAR CAN TRI 3W IR


Summary of Contents for Cameo FLAT PAR CAN TRI 3W IR
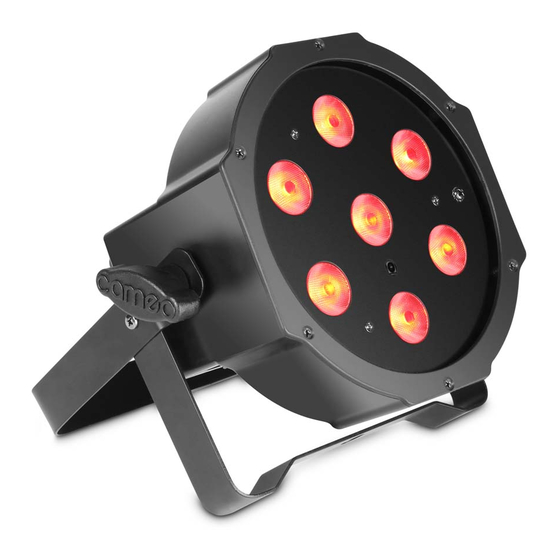
- Page 1 USER´S MANUAL BEDIENUNGSANLEITUNG MANUEL D´UTILISATION MANUAL DE USUARIO INSTRUKCJA OBSŁUGI MANUALE D‘USO FLAT PAR CAN TRI 3W IR CLPFLAT1TRI3WIR FLAT PAR CAN RGB 10 IR CLPFLAT1RGB10IR...
- Page 2 Thank you for choosing Cameo Lights! We have designed this product to give you reliable operation over many years. Please, take a few moments to read these instructions carefully, as we want you to enjoy your new Cameo Lights products quickly and to the fullest.
- Page 3 FLAT PAR CAN TRI 3W IR CLPFLAT1TRI3WIR FLAT PAR CAN RGB 10 IR CLPFLAT1RGB10IR...
-
Page 4: Preventive Measures
PREVENTIVE MEASURES: 1. Please read these instructions carefully. 2. Keep all information and instructions in a safe place. 3. Follow the instructions. 4. Observe all safety warnings. Never remove safety warnings or other information from the equipment. 5. Use the equipment only in the intended manner and for the intended purpose. 6. - Page 5 SAFETY: to clean the equipment. Always unplug the power cord and power adapter from the power outlet at the plug or adapter and not by pulling on the cord. Never touch the power cord and power adapter with wet hands. 27.
- Page 6 The Cameo LED light can can be used both individually and in master/slave mode, with music control, and via DMX-512 protocol and an optional infrared remote control.
-
Page 7: Dmx Input
3-pole XLR socket for connection of a DMX controller (e.g., DMX mixer). MODE ENTER DOWN DMX OUTPUT 3-pole XLR socket for looping through the DMX control signal. IEC POWER OUTPUT SOCKET Used to supply power to additional CAMEO lights (maximum 3 A). -
Page 8: Rear View
REAR VIEW: MODE ENTER DOWN MICROPHONE FOR MUSIC CONTROL MODE Selection of the standalone functions, DMX modes, and DMX address. ENTER Makes it possible to change a value and confirm changes. UP AND DOWN BUTTONS Press the UP and DOWN buttons, for example, to change the microphone sensitivity, stroboscope speed or DMX address. -
Page 9: Operation
OPERATION: STATIC COLOUR Press the MODE button repeatedly until "C000" appears on the display. Press ENTER and then use the UP and DOWN buttons to select the desired colour or the stroboscopic effect ("C1" = red, "C2" = green, "C3" = blue, “CF”... -
Page 10: Colour Change
OPERATION: COLOUR CHANGE Press the MODE button repeatedly until "JU00" appears on the display. Now the light is in colour change mode. Afterwards, press ENTER and then use the UP and DOWN buttons to choose the 7 colours function "JU00" or stroboscope "JF00". To set the colour- change and stroboscope rate (00 - 99), press ENTER again (all 4 digits on the display flash) and then use the UP and DOWN buttons to change the values. -
Page 11: Slave Mode
OPERATION: AUTO MODE Press the MODE button repeatedly until "AUTO" appears on the display. In this operating mode, the light switches automatically between colour change and colour blending mode. The colour change and/or colour blending rate is determined by the settings of the respective mode. SLAVE MODE Press the MODE button repeatedly until "SLAV"... -
Page 12: Infrared Remote Control
INFRAREDREMOTE CONTROL (optional) CLPFLAT1REMOTE Point the infrared remote control directly at the infrared sensor installed on the front of the spotlight. The maximum range is about 8 metres. In the DMX and slave modes, the sensor of the spotlight is disabled. BL (Blackout) / ON/OFF The BL button is used to switch off the spotlights, regardless of the mode selected on the remote control. - Page 13 INFRAREDREMOTE CONTROL (optional) Su (Music-Control Colour Changing Program) The microphone for the sound control mode can be found at the back of the spotlight. CM (Colour Macros) Colour presets that can be accessed using the CM+ and CM- buttons. The number of colour presets depends on the model.
-
Page 14: Dmx Control
DMXCONTROL: 2-CHANNEL MODE CHANNEL VALUE FUNCTION 000 - 255 Master dimmer (0-100%) 000 - 255 Colour macro 000 - 036 037 - 073 Green 074 - 110 Blue 111 - 147 Yellow 148 - 184 Magenta 185 - 221 Cyan 222 - 255 White 3-CHANNEL MODE 1... - Page 15 DMXCONTROL: 3-CHANNEL MODE 2 CHANNEL VALUE FUNCTION 000 - 255 Red (0 - 100%) 000 - 255 Green (0 - 100%) 000 - 255 Blue (0 - 100%) 6-CHANNEL MODE CHANNEL VALUE FUNCTION 000 - 255 Master dimmer (0-100%) 000 - 255 Stroboscope (rate 0 - 100%) 000 - 225 Red (0 - 100%)
-
Page 16: Dmx Connection
DMX CONNECTION: DMX-512 DMX (Digital Multiplex) is the name of a universal transmission protocol for communication between corresponding devices and controllers. A DMX controller sends DMX data to the connected DMX device(s). The DMX data is always transmitted as a serial data stream that is forwarded from one connected device to the next via the "DMX IN"... - Page 17 DMX CABLE: NOTE: • When fabricating your own cables, always observe the illustrations on this page. Never connect the shielding of the cable to the ground contact of the plug, and always make certain that the shielding does not come into contact with the housing of the XLR plug.
-
Page 18: Specifications
SPECIFICATIONS: Model Name: CLPFLAT1TRI3WIR CLPFLAT1RGB10IR Product Type: LED PAR can LED PAR can Type: flat can flat can Colour Spectrum: Number of LEDs: 144 (48 x R, 48 x G, 48 x B) LED Type: 3 W TRI colour 10 mm Dispersion Angle: 30°... -
Page 19: Manufacturer's Declarations
MANUFACTURER´S DECLARATIONS: MANUFACTURER‘S WARRANTY This warranty covers the Adam Hall, LD Systems, Defender, Palmer, and Cameo brands. It applies to all products distributed by Adam Hall. This warranty declaration does not affect the statutory warranty claims against the manufacturer, but expands them with additional warranty claims vis-a-vis Adam Hall. -
Page 20: Limitation Of Liability
MANUFACTURER´S DECLARATIONS: LIMITATION OF LIABILITY If your Adam Hall branded hardware product fails to work as warranted above, your sole and exclusive remedy shall be repair or replacement. Adam Halls’ maximum liability under this limited warranty is expressly limited to the lesser of the price you have paid for the product or the cost of repair or replacement of any components that malfunction under conditions of normal use. - Page 21 MANUFACTURER´S DECLARATIONS: PROPER DISPOSAL OF THIS PRODUCT (Valid in the European Union and other European countries with waste separation) This symbol on the product, or the documents accompanying the product, indicates that this appliance may not be treated as household waste. This is to avoid environmental damage or personal injury due to uncontrolled waste disposal.
- Page 22 Wir freuen uns, dass Sie sich für ein Produkt von Cameo Light entschieden haben! Dieses Gerät wurde unter hohen Qualitätsanforderungen entwickelt und gefertigt, um viele Jahre einen reibung- slosen Betrieb zu gewährleisten. Bitte lesen Sie diese Bedienungsanleitung sorgfältig, damit Sie Ihren neuen Scheinwerfer von Cameo Light schnell optimal einsetzen können.
- Page 23 FLAT PAR CAN TRI 3W IR CLPFLAT1TRI3WIR FLAT PAR CAN RGB 10 IR CLPFLAT1RGB10IR...
- Page 24 SICHERHEITSHINWEISE: 1. Lesen Sie diese Anleitung bitte sorgfältig durch. 2. Bewahren Sie alle Informationen und Anleitungen an einem sicheren Ort auf. 3. Befolgen Sie die Anweisungen. 4. Beachten Sie alle Warnhinweise. Entfernen Sie keine Sicherheitshinweise oder andere Informationen vom Gerät. 5.
- Page 25 SICHERHEITSHINWEISE: 25. Treten Sie nicht auf das Netzkabel. Sorgen Sie dafür, dass spannungsführende Kabel speziell an der Netz- buchse bzw. am Netzadapter und der Gerätebuchse nicht geknickt werden. 26. Achten Sie bei der Verkabelung des Geräts immer darauf, dass das Netzkabel bzw. der Netzadapter stets frei zugänglich ist.
- Page 26 LEDs auszeichnen. Die Intensität der drei Farbgruppen (rot, grün, blau) kann unabhängig voneinander gesteuert werden und ermöglicht auf diese Weise eine unbegrenzte Zahl unterschiedlicher Farben. Der Cameo LED-Strahler lässt sich sowohl einzeln als auch im Master/Slave-Betrieb, per Musiksteuerung, via DMX-512-Protokoll und über eine optionale Infrarot-Fernbedienung betreiben.
- Page 27 Werten. Sollte die Sicherung wiederholt auslösen, wenden Sie sich bitte an ein autorisiertes Servicezentrum. MODE ENTER DOWN DMX-EINGANG 3-polige XLR-Buchse zum Anschließen eines DMX-Kontrollgerätes (z.B. DMX-Mischpult). MODE ENTER DOWN DMX-AUSGANG 3-polige XLR-Buchse zum Weiterleiten des DMX-Steuersignals. IEC-NETZAUSGANGSBUCHSE Dient der Netzversorgung weiterer CAMEO Scheinwerfer (maximal 3A).
- Page 28 RÜCKANSICHT: MODE ENTER DOWN MIKROFON FÜR DIE MUSIKSTEUERUNG MODE Auswählen der Stand-Alone-Funktionen, DMX-Modi und DMX-Adresse. ENTER Ermöglicht einen Wert zu ändern und Wertänderungen zu bestätigen. UP UND DOWN TASTEN Betätigen Sie die UP und DOWN Tasten, um z.B. Mikrofonempfindlichkeit, Stroboskopgeschwindigkeit, oder DMX-Adresse zu ändern.
-
Page 29: Bedienung
BEDIENUNG: STATISCHE FARBE Drücken Sie die MODE-Taste so oft, bis im Display "C000" erscheint. Drücken Sie ENTER und wählen anschließend mittels der Tasten UP und DOWN die gewünschte Farbe, oder den Stroboskopeffekt aus ("C1" = Rot, "C2" = Grün, "C3" = Blau, “CF” = Stroboskopeffekt). Die beiden folgenden Ziffern stehen für die Helligkeit (00 - 99) und im "CF"-Modus für die Stroboskopgeschwindigkeit. - Page 30 BEDIENUNG: FARBWECHSEL Drücken Sie die MODE-Taste so oft, bis im Display "JU00" erscheint. Der Scheinwerfer arbeitet nun im Farbwechsel- Betrieb. Drücken Sie anschließend auf ENTER um dann mittels der Tasten UP und DOWN die Funktion 7 Farben "JU00", oder Stroboskop "JF00" auszuwählen. Die Farbwechsel- und Stroboskopgeschwindigkeit (00 - 99) stellen Sie ein, indem Sie nochmals auf ENTER drücken (alle 4 Ziffern des Displays blinken) und dann mit Hilfe der UP und DOWN Tasten die Werte verändern.
- Page 31 BEDIENUNG: AUTO-MODUS Drücken Sie die MODE-Taste so oft, bis im Display "AUTO" erscheint. In dieser Betriebsart wird automatisch zwischen Farbwechsel- und Farbüberblenden-Modus gewechselt. Die Farbwechsel- bzw. Überblendgeschwindigkeit wird über die Einstellungen des jeweiligen Modus festgelegt. SLAVE-BETRIEB Drücken Sie die MODE-Taste so oft, bis im Display "SLAV" erscheint. Verbinden Sie die Slave- und die Master-Einheit mit einem DMX-Kabel.
-
Page 32: Infrarot-Fernbedienung
INFRAROT-FERNBEDIENUNG (optional) CLPFLAT1REMOTE Richten Sie die Infrarot-Fernbedienung in Sichtverbindung direkt auf den auf der Vorderseite des Strahlers verbauten Infrarot-Sensors. Die maximale Reichweite beträgt ca. 8 Meter. In der DMX- und der Slave-Betriebsart ist der Sensor des Strahlers deaktiviert. BL (Blackout) / ON/OFF Die BL-Taste dient dazu, den Strahler abzuschalten, unabhängig davon, in welcher auf der Fernbedienung befindlichen Betriebsart er sich befindet. - Page 33 INFRAROT-FERNBEDIENUNG (optional) Au (Automatik-Modus) In dieser Betriebsart wird automatisch zwischen Farbwechsel- und Farbüberblenden-Modus gewechselt. Die Farbwechsel- bzw. Überblendgeschwindigkeit wird über die Einstellungen des jeweiligen Modus festgelegt. Su (musikgesteuertes Farbwechselprogramm) Das Mikrofon zur Steuerung befindet sich auf der Rückseite des Strahlers. CM (Farbmakros) Farbpresets, die mit Hilfe der Tasten CM+ und CM- abgerufen werden können.
-
Page 34: Dmx-Steuerung
DMX-STEUERUNG: 2-KANAL-MODUS KANAL WERT FUNKTION 000 - 255 Master-Dimmer (0-100%) 000 - 255 Farb-Makro 000 - 036 037 - 073 Grün 074 - 110 Blau 111 - 147 Gelb 148 - 184 Magenta 185 - 221 Cyan 222 - 255 Weiß... - Page 35 DMX-STEUERUNG: 3-KANAL-MODUS 2 KANAL WERT FUNKTION 000 - 255 Rot (0 - 100%) 000 - 255 Grün (0 - 100%) 000 - 255 Blau (0 - 100%) 6-KANAL-MODUS KANAL WERT FUNKTION 000 - 255 Master-Dimmer (0-100%) 000 - 255 Stroboskop (Geschwindigkeit 0 - 100%) 000 - 225 Rot (0 - 100%) 000 - 225...
- Page 36 DMX-VERBINDUNG: DMX-512 DMX (Digital Multiplex) ist die Bezeichnung für ein universelles Übertragungsprotokoll für die Kommunika- tion zwischen entsprechenden Geräten und Controllern. Ein DMX-Controller sendet DMX-Daten an das/ die angeschlossene(n) DMX-Gerät(e). Die DMX-Datenübertragung erfolgt stets als serieller Datenstrom, der über die an jedem DMX-fähigen Gerät vorhandenen „DMX IN“- und „DMX OUT“-Anschlüsse (XLR- Steckverbinder) von einem angeschlossenen Gerät an das nächste weitergeleitet wird.
- Page 37 DMX-KABEL: HINWEIS: • Beachten Sie bei der Anfertigung eigener Kabel unbedingt die Abbildungen auf dieser Seite. Verbinden Sie auf keinen Fall die Abschirmung des Kabels mit dem Massekontakt des Steckers, und achten Sie darauf, dass die Abschirmung nicht mit dem XLR-Steckergehäuse in Kontakt kommt. Hat die Abschirmung Massekontakt, kann dies zu Kurzschlüssen und Systemfehlern führen.
-
Page 38: Technische Daten
TECHNISCHE DATEN: Modellbezeichnung: CLPFLAT1TRI3WIR CLPFLAT1RGB10IR Produktart: LED Par Can LED Par Can Typ: Flat Can Flat Can Farbspektrum: LED Anzahl: 144 (48 x R, 48 x G, 48 x B) LED Typ: 3 W TRI Colour 10 mm Abstrahlwinkel: 30° 14°... - Page 39 GARANTIEBESTIMMUNGEN Diese Garantie erstreckt sich auf die Marken Adam Hall, LD Systems, Defender, Palmer und Cameo. Sie gilt für alle Produkte im Vertrieb von Adam Hall. Diese Garantieerklärung berührt nicht die gesetzlichen Gewährleistungsansprüche an den Hersteller, sondern er- weitert diese um zusätzliche Garantieansprüche gegenüber der Firma Adam Hall.
-
Page 40: Inanspruchnahme Der Garantie
herstellerERKLÄRUNGEN: HAFTUNGSBESCHRÄNKUNG Falls an Hardware-Produkten von Adam Hall innerhalb der Garantiezeit Material- oder Verarbeitungsfehler (gemäß der Garantieerklärung oben) auftreten, besteht Ihr alleiniger und ausschließlicher Anspruch aus dieser Garantie in der Reparatur oder dem Austausch des Geräts. Die maximale Haftung der Firma Adam Hall ist ent- sprechend dieser Garantie ausdrücklich auf den Kaufpreis oder die Kosten für eine Reparatur oder Ersatz –... - Page 41 herstellerERKLÄRUNGEN: KORREKTE ENTSORGUNG DIESES PRODUKTES (Gültig in der Europäischen Union und anderen europäischen Ländern mit Mülltrennung) Dieses Symbol auf dem Produkt oder dazugehörigen Dokumenten weist darauf hin, dass das Gerät am Ende der Produktlebenszeit nicht zusammen mit dem normalen Hausmüll entsorgt werden darf, um Umwelt- oder Perso- nenschäden durch unkontrollierte Abfallentsorgung zu vermeiden.
- Page 42 Cameo CLPFLAT1TRI3W et CLPFLAT1RGB10IR – lumineux, légers et compacts Ces projecteurs à LED Cameo sont pilotables par télécommande à infrarouge : ils sont d'une profondeur réduite, très lumineux, et recréent tout le spectre RVB. Leur boîtier en ABS, léger et compact, intègre un double support ;...
- Page 43 FLAT PAR CAN TRI 3W IR CLPFLAT1TRI3WIR FLAT PAR CAN RGB 10 IR CLPFLAT1RGB10IR...
-
Page 44: Mesures Préventives
MESURES PRÉVENTIVES : 1. Veuillez lire attentivement ce manuel. 2. Rangez tous les documents d‘information et d‘instructions en lieu sûr. 3. Veuillez suivre toutes les instructions 4. Observez tous les messages d‘avertissement N‘enlevez pas de l‘appareil les étiquettes de sécurité ou autres informations. 5. - Page 45 SÉCURITÉ : 26. Lors du branchement de l‘appareil, vérifiez que l‘accès au câble secteur ou au bloc adaptateur reste facile. Sortez la fiche secteur de la prise murale dès que vous n‘utilisez pas l‘appareil pendant un certain temps, ou si vous désirez nettoyer l‘appareil.
- Page 46 Le projecteur LED Cameo peut s'utiliser en mode Master ou Slave, il peut aussi se piloter par la musique ou via le protocole DMX-512, ou encore via télécommande infrarouge (optionnelle).
- Page 47 Connecteur XLR 3 points, pour branchement d'un contrôleur DMX (par exemple : pupitre DMX) MODE ENTER DOWN SORTIE DMX : Connecteur XLR 3 points, pour renvoi du signal de pilotage DMX. RENVOI SECTEUR SUR EMBASE IEC Permet d'alimenter d'autres projecteurs CAMEO (intensité maximale 3 A).
-
Page 48: Panneau Arrière
PANNEAUARRIÈRE : MODE ENTER DOWN MICROPHONE POUR LE PILOTAGE PAR LA MUSIQUE MODE Permet de gérer les modes de fonctionnement : autonome, modes DMX, adresse DMX ENTER Permet de modifier une valeur et de valider les changements de valeurs. TOUCHES HAUT/BAS Appuyez sur les touches Haut/Bas par exemple pour modifier les valeurs de sensibilité... - Page 49 UTILISATION : COULEURS STATIQUES Appuyez sur la touche MODE jusqu'à ce que la mention "C000" apparaisse sur l'afficheur. Appuyez sur ENTER, puis choisissez la couleur désirée (ou l'effet Stroboscope) en appuyant sur les touches Haut et Bas ["C1" = rouge, "C2"...
- Page 50 UTILISATION : CHANGEUR DE COULEURS Appuyez sur la touche MODE, jusqu'à ce que la mention "JU00" (JU comme JUmp) apparaisse dans l'afficheur. Le projecteur travaille dès lors en mode Changeur de Couleurs. Appuyez ensuite sur ENTER pour choisir, via les touches Haut/Bas, la fonction 7 couleurs "JU00"...
- Page 51 UTILISATION : MODE AUTO Appuyez sur la touche MODE, jusqu'à ce que la mention "AUTO" apparaisse dans l'afficheur. Dans ce mode de fonctionnement, on passe automatiquement du mode changement de couleurs au mode mélange de couleurs. La rapidité du changement/ mélange de couleurs se règle via les paramètres du mode correspondant.
- Page 52 TÉLÉCOMMANDE INFRAROUGE (option) CLPFLAT1REMOTE Dirigez la télécommande infrarouge, en contact visuel direct, vers le port récepteur infrarouge situé en face avant du projecteur. Sa portée maximale est d'environ 8 mètres. En modes DMX et Slave, le port récepteur du projecteur est désactivé. BL (Blackout) / ON/OFF La touche BL sert à...
-
Page 53: Télécommande Infrarouge
TÉLÉCOMMANDE INFRAROUGE (option) Au (mode automatique) Dans ce mode de fonctionnement, on passe automatiquement du mode changement de couleurs au mode mélangeur de couleurs. La rapidité du changement/ mélange de couleurs se règle via les paramètres du mode correspondant. Su (changeur de couleurs piloté par la musique) Le microphone utilisé... - Page 54 PILOTAGEDMX : MODE 2 CANAUX CANAL VALEUR FONCTION 000 - 255 Master-Dimmer (0-100%) 000 - 255 Macro Couleurs 000 - 036 Rouge 037 - 073 Vert 074 - 110 Bleu 111 - 147 Jaune 148 - 184 Magenta 185 - 221 Cyan 222 - 255 Blanc...
- Page 55 PILOTAGEDMX : MODE 3 CANAUX 2 CANAL VALEUR FONCTION 000 - 255 Rouge (0 - 100%) 000 - 255 Vert (0 - 100%) 000 - 255 Bleu (0 - 100%) MODE 6 CANAUX CANAL VALEUR FONCTION 000 - 255 Master-Dimmer (0-100%) 000 - 255 Stroboscope (Fréquence 0 - 100%) 000 - 225...
-
Page 56: Protocole Dmx
BRANCHEMENTS DMX : DMX-512 Le terme DMX (Digital Multiplex) désigne un protocole de transport universel permettant la communication entre des appareils et des contrôleurs à ce format. Un contrôleur DMX envoie des données DMX aux appareils DMX qui lui sont connectés. Les données DMX sont transportées sous forme d'un flux série, renvoyé... - Page 57 CÂBLE DMX : CONSEIL : • Si vous fabriquez vous-mêmes vos câbles, respectez les modalités de câblage DMX. En particulier : Ne reliez jamais le blindage du câble à la masse du connecteur, et vérifiez bien qu'en aucun cas le blindage du câble n'entre en contact avec le corps du connecteur.
-
Page 58: Caractéristiques Techniques
CARACTÉRISTIQUES TECHNIqUES : Référence modèle : CLPFLAT1TRI3WIR CLPFLAT1RGB10IR Type de produit : Projecteur PAR Can à LED Projecteur PAR Can à LED Type : Flat Can (profondeur réduite) Flat Can (profondeur réduite) Spectre de couleurs : Nombre de LED : 144 (48 x R, 48 x V, 48 x B) Type de LED : Tricolores, puissance 3 W... - Page 59 DECLARATIONS DECLARATIONS GARANTIE FABRICANT LIMITÉE Cette garantie concerne tous les produits de marque Adam Hall, LD Systems, Defender, Palmer et Cameo. Elle s‘applique également à tous les produits distribués par Adam Hall. Elle ne concerne pas les droits statutaires relatifs à la garantie envers le vendeur. En fait, elle justifie des requêtes en garantie supplémentaires, indépendantes, envers Adam Hall.
-
Page 60: Déclaration De Conformité Ce
DECLARATIONS DECLARATIONS RESPONSABILITÉ LIMITÉE Si votre appareil de marque Adam Hall présente, pendant la période de garantie, des défaillances au niveau des composants ou de la fabrication, couvertes par les conditions ci avant, le seul recours, exclusif, est sa réparation ou son remplacement au titre de cette garantie. - Page 61 DECLARATIONS DECLARATIONS MISE AU REBUT DE CE PRODUIT (Applicable dans l‘Union Européenne et les autres pays européens dotés de systèmes de collecte sélective) La présence de ce logo sur le produit ou son manuel d‘utilisation indique qu‘en fin de vie, il ne doit pas être jeté...
- Page 62 Cameo CLPFLAT1TRI3WIR y CLPFLAT1RGB10IR: potentes, ligeros y compactos. Los focos PAR LED de Cameo, de diseño extraplano, se controlan mediante un mando a distancia por infrarrojos, y ofrecen una iluminación intensa en RGB. Su carcasa de material ABS ligero y compacto y su soporte doble...
- Page 63 FLAT PAR CAN TRI 3W IR CLPFLAT1TRI3WIR FLAT PAR CAN RGB 10 IR CLPFLAT1RGB10IR...
-
Page 64: Medidas De Seguridad
MEDIDAS DE SEGURIDAD: 1. Lea atentamente las instrucciones de este manual. 2. Guarde toda la información en un lugar seguro para futuras consultas. 3. Siga las instrucciones indicadas. 4. Siga todas las advertencias. No quite las instrucciones de seguridad ni cualquier otra información indicada en el equipo. 5. - Page 65 SEGURIDAD: desconecte el cable eléctrico y el adaptador de corriente del conector del equipo en vez de desenchufar el cable de la toma eléctrica. No tocar el cable eléctrico ni el adaptador de corriente con las manos húmedas. 27. No encienda y apague el equipo en cortos intervalos de tiempo, ya que se reduce así la vida útil del sistema. 28.
- Page 66 • Mando a distancia por infrarrojos (opcional) USO: El foco PAR plano de Cameo en un foco LED controlable por DMX-512, con mezclador de colores RGB, equipado con LEDs de alta eficiencia y ultrabrillantes. Dispone de tres grupos de colores (rojo, verde y azul) cuya intensidad se puede controlar individualmente, lo que permite crear una gama infinita de colores.
- Page 67 XLR de 3 pines para conectar un equipo de control DMX (como un controlador DMX). MODE ENTER DOWN SALIDA DMX XLR de 3 pines para reenviar la señal de control DMX. CONECTOR IEC Sirve para alimentar otros focos CAMEO (máximo 3 A).
-
Page 68: Panel Posterior
PANEL POSTERIOR: MODE ENTER DOWN MICRÓFONO PARA EL CONTROL POR SONIDO MODE Permite seleccionar el funcionamiento autónomo, el modo DMX y la dirección DMX. ENTER Permite cambiar un valor y confirmar los cambios. BOTONES UP Y DOWN Pulse los botones UP y DOWN para cambiar la sensibilidad del micrófono, la velocidad del estrobo o la dirección DMX. -
Page 69: Operación
OPERACIÓN: MODO COLOR FIJO Pulse el botón MODE hasta que aparezca "C000" en la pantalla. Pulse el botón ENTER y utilice los botones UP (arriba) y DOWN (abajo) para seleccionar uno de los colores fijos o el efecto estrobo ("C1" para rojo, "C2" para verde, "C3"... - Page 70 OPERACIÓN: CAMBIO DE COLOR Pulse el botón MODE hasta que en pantalla se muestre "JU00". El foco funcionará ahora en el modo Cambio de color. A continuación, pulse ENTER y utilice los botones UP y DOWN para seleccionar la función 7 colores "JU00" o el estrobo "JF00". Para ajustar la velocidad de cambio de color y del estrobo (00 a 99), pulse ENTER de nuevo (los 4 dígitos de la pantalla parpadearán) y luego seleccione el valor con los botones UP y DOWN.
-
Page 71: Modo Automático
OPERACIÓN: MODO AUTOMáTICO Pulse el botón MODE hasta que aparezca en pantalla "AUTO" (esclavo). El equipo cambiará automáticamente entre el modo Cambio de color y el modo Mezcla de colores. La velocidad de cambio y mezcla de colores se puede preajustar a través de los modos Cambio de color y Mezcla de colores. -
Page 72: Mando A Distancia Por Infrarrojos
MANDO A DISTANCIA POR INFRARROJOS (opcional) CLPFLAT1REMOTE Apunte el mando a distancia por infrarrojos directamente al panel frontal del sensor de infrarrojos del foco. El alcance máximo es de 8 metros aprox. En los modos DMX y Esclavo, el sensor del foco está desactivado. BL (Blackout, oscurecimiento) / ON/OFF El botón BL se utiliza para apagar los focos, independientemente del modo de funcionamiento. - Page 73 MANDO A DISTANCIA POR INFRARROJOS (opcional) Su (Cambio de color controlado por sonido) El micrófono de control está integrado en el panel posterior del foco. CM (Macros de colores) Mediante los botones CM+ y CM- se activan presets de colores. El número de presets de colores depende del modelo.
- Page 74 CONTROLDMX: MODO 2 CANALES CANAL VALOR FUNCIÓN 000 - 255 Atenuador Maestro (0-100%) 000 - 255 Mezcla de colores con macro 000 - 036 Rojo 037 - 073 Verde 074 - 110 Azul 111 - 147 Amarillo 148 - 184 Magenta 185 - 221 Cian...
- Page 75 CONTROLDMX: MODO 3 CANALES (2) CANAL VALOR FUNCIÓN 000 - 255 Rojo (0 a 100%) 000 - 255 Verde (0 a 100%) 000 - 255 Azul (0 a 100%) MODO 6 CANALES CANAL VALOR FUNCIÓN 000 - 255 Atenuador Maestro (0-100%) 000 - 255 Estrobo (ajustable de 0 a 100%) 000 - 225...
- Page 76 CONEXIONADO DMX: DMX-512 DMX (Digital Multiplex) es el nombre de un protocolo universal utilizado como medio de comunicación entre dispositivos y controladores. El controlador DMX envía datos DMX a los equipos DMX conectados. Los datos DMX se envían como datos serie que se transmiten de equipo a equipo a través de los conectores XLR "DMX IN"...
- Page 77 CABLES DMX: NOTA: • Si fabrica sus propios cables, tenga en cuenta las figuras de esta página. No conecte la malla del cable al contacto de masa del conector ni permita que la malla entre en contacto con la carcasa del conector XLR. Si se produce un contacto de la malla con la masa, puede producir un cortocircuito y un funcionamiento inestable del equipo.
-
Page 78: Características Técnicas
CARACTERÍSTICAS TÉCNICAS: Nombre del modelo: CLPFLAT1TRI3WIR CLPFLAT1RGB10IR Tipo de producto: Foco PAR LED Foco PAR LED Tipo: Foco plano Foco plano Colores: Número de LEDs: 144 (48 rojos, 48 verdes, 48 azules) Tipo de LED: Tricolor de 3 W 10 mm Ángulo de dispersión: 30°... -
Page 79: Declaración Del Fabricante
DECLARACIÓN DEL FABRICANTE: GARANTÍA DEL FABRICANTE La presente garantía cubre las marcas Adam Hall, LD Systems, Defender, Palmer y Cameo. Se aplica a todos los productos distribuidos por Adam Hall. No afecta a los derechos de garantía legal que asume el fabricante. De hecho, le concede al usuario derechos adicionales ante Adam Hall, independientes de la garantía legal. -
Page 80: Limitación De Responsabilidad
DECLARACIÓN DEL FABRICANTE: LIMITACIÓN DE RESPONSABILIDAD Si durante el período de garantía aparecen defectos de material o de fabricación en su producto Adam Hall (de acuerdo con las garantías mencionadas en este documento), tendrá derecho exclusivamente a la reparación o sustitución del mismo. -
Page 81: Eliminación Correcta De Este Producto
DECLARACIÓN DEL FABRICANTE: ELIMINACIÓN CORRECTA DE ESTE PRODUCTO (Aplicable en la Unión Europea y en los países europeos que dispongan de un sistema de recogida selectiva) El símbolo que aparece sobre el producto o en la documentación adjunta indica que al final de la vida útil del equipo, no deberá... - Page 82 Cameo CLPFLAT1TRI3WIR i CLPFLAT1RGB10IR – lekki i kompaktowy, oferujący duże natężenie światła! Sterowane za pomocą pilota na podczerwień reflektory Cameo LED to niezwykle płaskie reflektory PAR o dużym natężeniu światła, które obsługują całe spektrum barw RGB. Lekka i kompaktowa konstrukcja ABS z podwójnym pałąkiem przeznaczona jest do różnorodnych cichych zastosowań.
- Page 83 FLAT PAR CAN TRI 3W IR CLPFLAT1TRI3WIR FLAT PAR CAN RGB 10 IR CLPFLAT1RGB10IR...
-
Page 84: Środki Ostrożności
ŚRODKI OSTROŻNOŚCI: 1. Należy dokładnie przeczytać niniejszą instrukcję. 2. Wszystkie informacje i instrukcje przechowywać w bezpiecznym miejscu. 3. Należy przestrzegać zaleceń. 4. Należy przestrzegać wszystkich wskazówek ostrzegawczych. Nie wolno usuwać wskazówek bezpieczeństwa ani innych informacji znajdujących się na urządzeniu. 5. Używać urządzenia wyłącznie w sposób zgodny z jego przeznaczeniem. 6. - Page 85 BEZPIECZEńSTWO: 26. Przy podłączaniu urządzenia zawsze należy zadbać o to, aby kabel sieciowy lub adapter sieciowy był zawsze łatwo dostępny. Odłączyć urządzenie od źródła zasilania, gdy nie jest ono używane lub gdy ma zostać poddane czyszczeniu. Zawsze należy wyjmować kabel sieciowy i adapter sieciowy z gniazda, chwytając za wtyczkę lub adapter, a nie za kabel.
- Page 86 • pilot na podczerwień (opcjonalnie) OBSŁUGA: Urządzenia Cameo FLAT PAR to reflektory LED ze sterowaniem DMX 512, oferujące mieszanie kolorów RGBW i wyposażone w niezwykle wydajne, wyjątkowo jasne diody LED. Intensywność trzech grup kolorów (czerwony, zielony, niebieski) można regulować niezależnie od siebie, dzięki czemu możliwe jest tworzenie nieograniczonej liczby różnych kolorów.
- Page 87 WEJŚCIE DMX 3-stykowe gniazdo XLR do podłączenia urządzenia kontrolnego DMX (np. pulpitu mikserskiego DMX). MODE ENTER DOWN WYJŚCIE DMX 3-stykowe gniazdo XLR do przesyłania sygnału sterowania DMX. GNIAZDO SIECIOWE IEC Gniazdo służy do zasilania dodatkowych reflektorów CAMEO (maksymalnie 3 A).
-
Page 88: Widok Z Tyłu
WIDOK Z TYŁU: MODE ENTER DOWN MIKROFON DO STEROWANIA MUZYKą MODE Wybór funkcji Standalone, trybów DMX i adresu DMX. ENTER Umożliwia zmianę wartości i potwierdzanie zmian wartości. PRZYCISKI UP I DOWN Przyciski UP i DOWN służą do zmiany czułości mikrofonu, prędkości efektu stroboskopowego lub adresu DMX. - Page 89 OBSŁUGA: KOLOR STATYCZNY Naciskać przycisk MODE, dopóki na wyświetlaczu nie pojawi się napis „C000”. Nacisnąć przycisk ENTER, a następnie za pomocą przycisków UP i DOWN wybrać żądany kolor lub efekt stroboskopowy („C1” = czerwony, „C2” = zielony, „C3” = niebieski, „CF” = efekt stroboskopowy). Dwie kolejne cyfry oznaczają...
- Page 90 OBSŁUGA: ZMIANA KOLORÓW Naciskać przycisk MODE, dopóki na wyświetlaczu nie pojawi się napis „JU00”. Reflektor pracuje teraz w trybie zmiany kolorów. Następnie nacisnąć przycisk ENTER, aby za pomocą przycisków UP i DOWN wybrać funkcję 7 kolorów „JU00” lub stroboskopu „JF00”. Prędkość...
- Page 91 OBSŁUGA: TRYB AUTOMATYCZNY Naciskać przycisk MODE, dopóki na wyświetlaczu nie pojawi się napis „AUTO”. W tym trybie pracy reflektor automatycznie przełącza się między trybami zmiany kolorów i przenikania kolorów. Prędkość zmiany lub przenikania kolorów regulowana jest za pomocą ustawień dla danego trybu. TRYB SLAVE Naciskać...
- Page 92 PILOT NA PODCZERWIEń (opcjonalnie) CLPFLAT1REMOTE Pilota na podczerwień skierować bezpośrednio w stronę czujnika podczerwieni znajdującego się na przednim panelu reflektora. Maksymalny zasięg wynosi ok. 8 metrów. W trybie pracy DMX i slave czujnik reflektora jest nieaktywny. BL (Blackout) / ON/OFF Przycisk BL służy do wyłączania reflektora niezależnie od tego, w którym z trybów dostępnych na pilocie urządzenie w danym momencie pracuje.
- Page 93 PILOT NA PODCZERWIEń (opcjonalnie) Au (tryb automatyczny) W tym trybie pracy reflektor automatycznie przełącza się między trybami zmiany kolorów i przenikania kolorów. Prędkość zmiany lub przenikania kolorów regulowana jest za pomocą ustawień dla danego trybu. Su (program zmiany kolorów sterowany muzyką) Mikrofon do sterowania muzyką...
- Page 94 STEROWANIEDMX: TRYB 2-KANAŁOWY KANAŁ WARTOŚĆ FUNKCJA 000–255 Master – ściemnianie (0–100%) 000–255 Kolory makro 000–036 Czerwony 037–073 Zielony 074–110 Niebieski 111–147 Żółty 148–184 Magenta 185–221 Cyjan 222–255 Biały TRYB 3-KANAŁOWY 1 KANAŁ WARTOŚĆ FUNKCJA 000–255 Master – ściemnianie (0–100%) 000–255 Stroboskop (prędkość...
- Page 95 STEROWANIEDMX: TRYB 3-KANAŁOWY 2 KANAŁ WARTOŚĆ FUNKCJA 000–255 Czerwony (0–100%) 000–255 Zielony (0–100%) 000–255 Niebieski (0–100%) TRYB 6-KANAŁOWY KANAŁ WARTOŚĆ FUNKCJA 000–255 Master – ściemnianie (0–100%) 000–255 Stroboskop (prędkość 0–100%) 000–225 Czerwony (0–100%) 000–225 Zielony (0–100%) 000–225 Niebieski (0–100%) 000–080 Makro kolorów 000–004 Zaciemnienie/Mieszanie kolorów CH3–CH5...
- Page 96 ZŁąCZE DMX: DMX-512 DMX (Digital Multiplex) to nazwa uniwersalnego protokołu transmisji do komunikacji między odpowiednimi urządzeniami a kontrolerami. Kontroler DMX wysyła dane DMX do podłączonych urządzeń DMX. Transmisja danych DMX następuje zawsze w formie szeregowego strumienia danych, który jest przekazywany z jednego urządzenia do następnego przez znajdujące się...
- Page 97 KABEL DMX: WSKAZÓWKA: • W przypadku stosowania własnych kabli należy bezwzględnie przestrzegać informacji podanych na ilustracjach na tej stronie. W żadnym wypadku nie wolno łączyć osłony kabla z końcówką uziemiającą wtyczki. Należy także pamiętać, aby osłona nie miała kontaktu z obudową wtyczki XLR. Jeśli osłona ma kontakt z uziemieniem, może dojść...
-
Page 98: Dane Techniczne
DANE TECHNICZNE: Oznaczenie modelu: CLPFLAT1TRI3WIR CLPFLAT1RGB10IR Rodzaj produktu: reflektor LED Par reflektor LED Par Typ: reflektor płaski reflektor płaski Spektrum kolorów: Liczba diod LED: 144 (48 czerwonych, 48 zielonych, 48 niebieskich) Typ diod LED: 3 W TRI Colour 10 mm Kąt wiązki światła: 30°... -
Page 99: Deklaracje Producenta
DEKLARACJE PRODUCENTA: GWARANCJA PRODUCENTA Niniejsza gwarancja dotyczy marek Adam Hall, LD Systems, Defender, Palmer i Cameo. Obejmuje ona wszystkie marki znajdujące się w ofercie firmy Adam Hall. Niniejsze oświadczenie gwarancyjne nie ogranicza ustawowych roszczeń wobec producenta wynikających z rękojmi, lecz rozszerza je o dodatkowe roszczenia gwarancyjne wobec firmy Adam Hall. -
Page 100: Ograniczenie Odpowiedzialności
DEKLARACJE PRODUCENTA: OGRANICZENIE ODPOWIEDZIALNOŚCI Jeśli w produktach sprzętowych firmy Adam Hall w trakcie trwania okresu gwarancji wystąpią szkody materiałowe lub technologiczne (zgodnie z powyższym oświadczeniem gwarancyjnym), jedyne i wyłączne prawo klienta wynikające z niniejszej gwarancji dotyczy naprawy lub wymiany urządzenia. Maksymalna odpowiedzialność... - Page 101 DEKLARACJE PRODUCENTA: PRAWIDŁOWA UTYLIZACJA NINIEJSZEGO PRODUKTU (dotyczy Unii Europejskiej i innych krajów europejskich, w których stosuje się segregację odpadów) Niniejszy symbol na produkcie lub związanych z nim dokumentach wskazuje, iż po zakończeniu okresu użytkowania urządzenie nie może być utylizowane razem ze standardowymi odpadami domowymi, ponieważ mogłoby to spowodować...
- Page 102 Cameo CLPFLAT1TRI3WIR e CLPFLAT1RGB10IR - potente, leggero e compatto! I proiettori LED controllabili con il telecomando a infrarossi di Cameo sono fari PAR piuttosto piatti e potenti che coprono lo spettro RGB. La struttura compatta ABS con doppia staffa è idonea per impiego flessibile e silenzioso...
- Page 103 FLAT PAR CAN TRI 3W IR CLPFLAT1TRI3WIR FLAT PAR CAN RGB 10 IR CLPFLAT1RGB10IR...
-
Page 104: Misure Precauzionali
MISURE PRECAUZIONALI: 1. Leggere attentamente il presente manuale di istruzioni. 2. Conservare tutte le indicazioni e le istruzioni in un luogo sicuro. 3. Seguire le istruzioni. 4. Rispettare tutte le avvertenze. Non rimuovere dal dispositivo le indicazioni sulla sicurezza o altre informazioni. 5. - Page 105 SICUREZZA: 27. Evitare per quanto possibile di accendere e spegnere velocemente il dispositivo per non pregiudicarne la durata. 28. NOTA IMPORTANTE: Sostituire i fusibili esclusivamente con fusibili dello stesso tipo e valore. Se un fusibile continua a saltare, rivolgersi a un centro di assistenza autorizzato. 29.
- Page 106 UTILIZZO: I fari Cameo FLAT PAR sono proiettori LED controllabili tramite DMX-512 e dotati di mixer colori RGB, che si distingue per i suoi LED ad alta efficienza e particolarmente luminosi. L'intensità dei tre gruppi di colori (rosso, verde, blu) può...
- Page 107 Presa XLR a 3 poli per collegare un apparecchio di controllo DMX (ad es. mixer DMX). MODE ENTER DOWN USCITA DMX Presa XLR a 3 poli per inoltrare il segnale di controllo DMX. PRESA DI USCITA CEI Serve per l'alimentazione elettrica di altri fari CAMEO (massimo 3 A).
-
Page 108: Vista Posteriore
VISTA POSTERIORE: MODE ENTER DOWN MICROFONO PER COMANDO TRAMITE MUSICA MODE Selezione delle funzioni Stand-alone, delle modalità DMX e degli indirizzi DMX. ENTER Permette di modificare un valore e di confermarne le modifiche. TASTI UP/DOWN Premere i tasti UP/DOWN, ad es. per modificare la sensibilità del microfono, la velocità stroboscopica o gli indirizzi DMX. - Page 109 UTILIZZO: COLORE STATICO Premere più volte il tasto MODE finché sul display non appare "C000". Premere ENTER, quindi con i tasti UP/DOWN selezionare il colore desiderato o l'effetto stroboscopico (C1 = rosso; C2 = verde; C3 = blu; CF = effetto stroboscopico). I due digiti seguenti indicano la luminosità (00-99); se si è in modalità CF, indicano invece la velocità...
- Page 110 UTILIZZO: CAMBIO COLORE Premere più volte il tasto MODE finché sul display non appare "JU00". Il faro funziona ora in modalità Cambio colore. Premere ENTER, quindi selezionare la funzione 7 colori JU00" o Stroboscopio "JF00" con i tasti UP/DOWN. La velocità di cambio colore e stroboscopica (00-99) si imposta premendo di nuovo ENTER (i 4 digiti del display lampeggiano) e modificando in seguito i valori con i tasti UP/DOWN.
-
Page 111: Modalità Automatica
UTILIZZO: MODALITà AUTOMATICA Premere più volte il tasto MODE finché sul display non appare "AUTO". In questa modalità di funzionamento, si passa automaticamente dalla modalità Cambio colore a Dissolvenza colori e viceversa. La velocità di cambio o dissolvenza del colore viene determinata dalle impostazioni della modalità... -
Page 112: Telecomando A Infrarossi
TELECOMANDO A INFRAROSSI (opzionale) CLPFLAT1REMOTE Dirigere il telecomando a infrarossi direttamente sul sensore a infrarossi sul pannello frontale del proiettore. Il raggio d'azione è di circa 8 metri. Nelle modalità DMX e slave, il sensore del proiettore è disattivato. BL (Blackout) / ON/OFF Il tasto BL serve per spegnere il proiettore indipendentemente dalla modalità... - Page 113 TELECOMANDO A INFRAROSSI (opzionale) Au (modalità automatica) In questa modalità di funzionamento, si passa automaticamente dalla modalità Cambio colore a Dissolvenza colori e viceversa. La velocità di cambio o dissolvenza del colore viene determinata dalle impostazioni della modalità selezionata. Su (programma cambio colore controllato dalla musica) Il microfono di controllo si trova sul pannello posteriore del proiettore.
-
Page 114: Controllo Dmx
CONTROLLO DMX: MODALITà A 2 CANALI CANALE VALORE FUNZIONE 000 - 255 Dimmer master (0-100%) 000 - 255 Macro colore 000 - 036 Rosso 037 - 073 Verde 074 - 110 111 - 147 Giallo 148 - 184 Magenta 185 - 221 Ciano 222 - 255 Bianco... - Page 115 CONTROLLO DMX: MODALITà 3 CANALI (2) CANALE VALORE FUNZIONE 000 - 255 Rosso (0 - 100%) 000 - 255 Verde (0 - 100%) 000 - 255 Blu (0 - 100%) MODALITà A 6 CANALI CANALE VALORE FUNZIONE 000 - 255 Dimmer master (0-100%) 000 - 255 Stroboscopio (velocità...
-
Page 116: Connessione Dmx
CONNESSIONE DMX: DMX-512 DMX (Digital Multiplex) è la sigla di un protocollo universale di trasmissione per la comunicazione tra dispositivi e controller. Un controller DMX invia dati DMX ai dispositivi DMX collegati. I dati DMX vengono sempre trasmessi come flusso di dati seriale, che viene inoltrato da un dispositivo collegato al successivo attraverso le connessioni (connettori XLR) "DMX IN"... - Page 117 CAVO DMX: NOTA: • Se si fabbricano i cavi da sé, seguire le figure in questa pagina. Non collegare mai la schermatura dei cavi con il contatto di massa del connettore, e assicurarsi che la schermatura non entri in contatto con l'involucro del connettore XLR.
-
Page 118: Dati Tecnici
DATI TECNICI: Nome del modello: CLPFLAT1TRI3WIR CLPFLAT1RGB10IR Tipo di prodotto: Proiettore piatto LED Proiettore piatto LED Tipo: Proiettore piatto Proiettore piatto Spettro cromatico: Numero LED: 144 (48 x R, 48 x G, 48 x B) Tipo LED: Tricolore da 3 W 10 mm Angolo di proiezione: 30°... -
Page 119: Dichiarazioni Del Produttore
DICHIARAZIONI DEL PRODUTTORE: GARANZIA DEL PRODUTTORE La presente garanzia copre i marchi Adam Hall, LD Systems, Defender, Palmer e Cameo. Essa è valida per tutti i prodotti distribuiti da Adam Hall. La presente dichiarazione di garanzia non influisce sui diritti legali di garanzia verso il produttore, bensì li estende con ulteriori diritti di garanzia nei confronti della ditta Adam Hall. -
Page 120: Limitazione Di Responsabilità
DICHIARAZIONI DEL PRODUTTORE: LIMITAZIONE DI RESPONSABILITÀ Laddove nei prodotti hardware Adam Hall insorgessero difetti di materiale o di fabbricazione (in conformità con la dichiarazione di garanzia di cui sopra) durante il periodo di garanzia, il Cliente usufruirebbe, come unico ed esclusivo diritto previsto dalla presente garanzia, della riparazione o sostituzione dell‘apparecchio. -
Page 121: Corretto Smaltimento Del Prodotto
DICHIARAZIONI DEL PRODUTTORE: CORRETTO SMALTIMENTO DEL PRODOTTO (In vigore nell‘Unione Europea e in altri paesi europei in cui si attui la raccolta differenziata) Questo simbolo apposto sul prodotto o sui relativi documenti indica che, per evitare danni all‘ambiente e alle persone causati da uno smaltimento incontrollato dei rifiuti, alla fine del suo ciclo di vita l‘apparecchio non deve essere smaltito insieme ai normali rifiuti domestici. - Page 124 WWW.cameoliGht.COM adam hall Gmbh | Daimlerstrasse 9 | 61267 Neu-Anspach | Germany Tel. +49(0)6081/9419-0 | Fax +49(0)6081/9419-1000 web : www.adamhall.com | e-mail : mail@adamhall.com...
Need help?
Do you have a question about the FLAT PAR CAN TRI 3W IR and is the answer not in the manual?
Questions and answers