Table of Contents
Advertisement
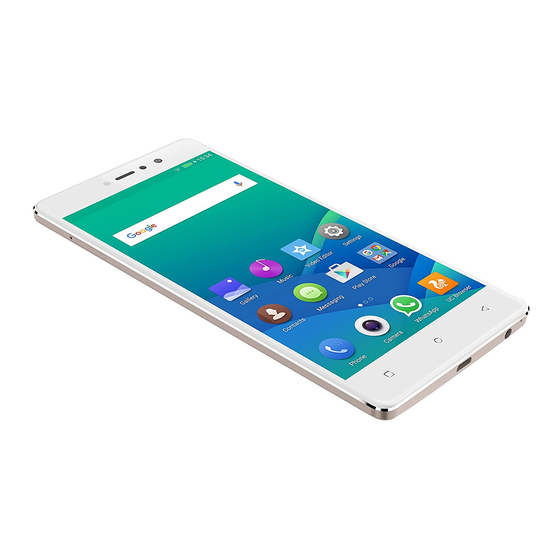
GIONEE
S6s
User Guide
Disclaimer: The colors, specifications, functions and graphics shown/mentioned in
the user manual may differ from the actual product. In such a case, the latter shall
govern. Images shown are for representation purpose only. Specifications are subject
to change without prior notice. GIONEE keeps the right to modify the content in this
user guide without prior notice.
Advertisement
Table of Contents

Related Manuals for Gionee s6s


Summary of Contents for Gionee s6s
-
Page 1: User Guide
In such a case, the latter shall govern. Images shown are for representation purpose only. Specifications are subject to change without prior notice. GIONEE keeps the right to modify the content in this user guide without prior notice. -
Page 2: Table Of Contents
Contents 1. For your safety ....................... 1 2. Learn about the phone ....................2 Overview ......................... 2 Function Keys ........................ 2 3. Before using ........................2 Insert SIM cards and SD card ..................2 Charge the Battery ......................4 4. - Page 3 E-Waste ......................... 25 Operating Temperature ....................26 11. FAQ ..........................26...
-
Page 4: For Your Safety
For your safety Please read this manual before using the cell phone to ensure your safe and proper use. SWITCH OFF IN HOSPITALS Please abide by relevant provisions or regulations. Please turn off your mobile phone near medical equipment. SWITCH OFF WHEN REFUELING Don’t use the phone at a refueling point. -
Page 5: Learn About The Phone
Learn about the phone Overview Function Keys Keys Functions Press to turn on/off the screen. Power Key Press and hold to power off the phone, reboot, and turn on airplane mode or silent. Press to adjust the volume of device. Volume Key ... - Page 6 Put SIM card and SD card to card tray correctly. SIM 1 supports Micro SIM card. SIM 2 supports SD card OR Nano SIM card. Note: SD card can be used as internal storage. Option 1: Notification Center --> tap the notice to set up --> Use as internal storage --> Next -->...
-
Page 7: Charge The Battery
Option 2: Settings -- > Advanced settings-- >Storage & USB --> Format as internal storage --> Erase & format Push the card tray into the phone. Note: SIM cards and SD card support hot plugging. Do not remove the cards while the device is transferring data. Doing so may cause data to be lost or damage to the cards and device. -
Page 8: Home Screen
phone. Restart the phone Option 1: Long press the power key until a menu shows. Choose “Reboot’’ to restart the phone. Option 2: Long press the power key till 10 seconds to auto restart the phone. Lock the screen Option 1: Press the power key to turn off the screen and lock it Option 2: In the Home screen, double tap the screen to lock it. - Page 9 - Notification access - Display network speed Control Center Slide up on the bottom of the screen to open the control center. In the control center, it’s a quick access to Torch, Wi-Fi, Data connection, Bluetooth, Sound, Vibrate, Super screenshots and Extreme mode. Tap “More”, and then drag to adjust the icons in control center.
-
Page 10: Touch Screen
Uninstall an application Touch & hold the icon you want to uninstall. On the top of the icon will appear “x”. Tap it to uninstall. Creating a folder Drag an icon on the top of another one to create a folder. Open the folder and then tap the “Folder”... -
Page 11: Ongoing Call
Touch to open contacts Touch to open advanced option. Touch to make an audio call. Ongoing call Make a phone record Hold on the line Get contacts information Make another call Mute the line Take a note Number keyboard Speaker End the current call Incoming call Swipe to ignore calls. -
Page 12: Send A Message
Note: You can make an emergency call without SIM cards if the locations are available for the network service. But you should not rely on it for emergencies. It’s also depends on the local mobile network operator. For more information, please contact with operator. - Page 13 Take a photo Touch to set flash to On, Off or Auto. Touch to transfer between rear camera and front camera. Touch to enter the Mode Touch to enter the Camera Settings. Settings. Slide down the screen to Pinch or spread the screen to enter Mode Settings zoom in or zoom out.
-
Page 14: Shoot A Video
Professional Mode - Change the clarity and focus mode. Time-lapse Mode - Capture images in low rate and then play with normal or faster rate. Slow motion Mode - Using slow motion function make a short video, playing with a slow speed. -
Page 15: Gallery
Touch the Video icon. Camera starts shooting the video. Touch Stop video icon to stop shooting. An image from your most recent video is displayed as a thumbnail at the bottom left. Gallery Touch the Gallery icon in the Launcher to view albums of your pictures and videos which you’ve taken from camera. -
Page 16: Airplane Mode
WLAN hotspot. Airplane mode Option1: Settings-->More-->Airplane mode to turn it on Option2: Swipe up from the bottom edge to open control center--> More --> tap Airplane mode Some locations like Airplane may require you to turn off your phone’s Cellular network, WLAN, and Bluetooth wireless connections. -
Page 17: Usb
Turn on the Handsfree device, make it in a searchable state; Settings-->Bluetooth, Select “Search for devices”; After searching for the Handsfree device,Select it in the list to pair. After pairing, you can use the Handsfree device to listen to music, video and receive call. -
Page 18: Abroad Service
Abroad Service Abroad Service provides considerate services to the persons abroad. It covers more than 600 cities in the world. You can take a memo, do a checklist, and Add flight / hotel information. Child Mode It’s an exclusive place for children. As a parent, you can manage the applications and set up the limit usage time with a password. -
Page 19: Amiclone
Settings Extend use time. Settings Exit Exit Add Applications for setting up. AmiClone Amiclone allows data migration from old smartphone to a new one. Connect each other to transfer contacts, messages, pictures, music, videos and Apps. Settings --> Advanced settings --> Backup & reset --> AmiClone 1) Set up a connection with two smartphones. -
Page 20: Security
3) Receive successfully in the new one. Security Security features protect the information on your phone from being accessed by others. Guest Mode Guest mode hides some private information like call logs, messages, albums, desktop edit etc. On lock screen, it’s a quick success to enter Guest Mode with three fingers slide to the top of the screen. -
Page 21: Super Screenshot
Mobile Security If you lost your phone unfortunately, you could control it by remote. A security password and close friend’s phone number must be necessary. Home screen --> Tools --> Mobile Security Lock the phone Send a message with “lockphone*security password” to the lost phone to lock the device thoroughly. - Page 22 Long screenshots Capture 10 pages at most in screenshots. It’s easy for you to save conversations in commutation tools, articles in website and so on.
- Page 23 Part screenshots Capture part size in screenshots. You can adjust the size with square on the screen.
-
Page 24: Chameleon
Chameleon With Chameleon, you can pick color with front or rear camera. Click anywhere or drag the color point to pick your favorite to design the colors of phone background. Home screen --> Tools --> Chameleon Introduction Tap to restore the Tap to transfer between system default colors. -
Page 25: Operation
Access to extreme mode Home screen-->Control center-->Tap Extreme mode Home screen-->System Manager-->Power Manager -->Tap Extreme power saving mode Settings--> Advanced settings --> Manage battery --> Power manager-->Tap Extreme power saving mode Tap to exit the extreme mode Operation Smart gestures Settings-->Advanced settings-->... - Page 26 Black screen gestures Settings--> Advanced settings--> Smart gestures --> Select Black screen gestures Draw pattern to access menu quickly while phone is on sleep mode. Smart vibration reminder Settings--> Advanced Settings--> Smart Gestures-->Select Smart vibration reminder Phone vibrate to remind the unread message or missed call notification in sleep mode. ①...
-
Page 27: Suspend Option
① ② Suspend option It’s a quick access to lock the screen, return to home screen or previous screen, and one hand operation. Long press can hide it in the notification bar. Settings--> Advanced settings--> Suspend option to turn it on. Tap to open one hand operation Tap to lock the screen. - Page 28 INFORMATION UNDER E-WASTE (MANAGEMENT AND HANDLING) RULES, 2011 For disposal of e-waste, please call our helpline no. 1800 208 1166 or visit our website: http://gionee.co.in/social/ Do’s for disposal of product Always drop your used electronic products, batteries, and packaging materials after...
- Page 29 Never dump E-waste in garbage bins or municipal solid waste stream. Do not dispose of your product as unsorted municipal waste. Do not throw used batteries into household waste. Do not dispose damaged or leaking Lithium Ion (Li-Ion) battery with normal household waste.
- Page 30 USB Mass Storage. Drivers can be storage? downloaded from our website http://gionee.co.in. All GIONEE Smart phones come with Pre-loaded Internet How to add Data Settings. User needs to insert SIM and turn the Data Account or APN Connectivity On.
- Page 31 COPYRIGHT All rights reserved. Reproduction, transfer, distribution or storage of part or all of the contents in this document in any form without the prior written permission of GIONEE is strictly prohibited. Android, Google, Google Play and other marks are trademarks of Google Inc.
Need help?
Do you have a question about the s6s and is the answer not in the manual?
Questions and answers