
Summary of Contents for Eurolab LE32G90GD
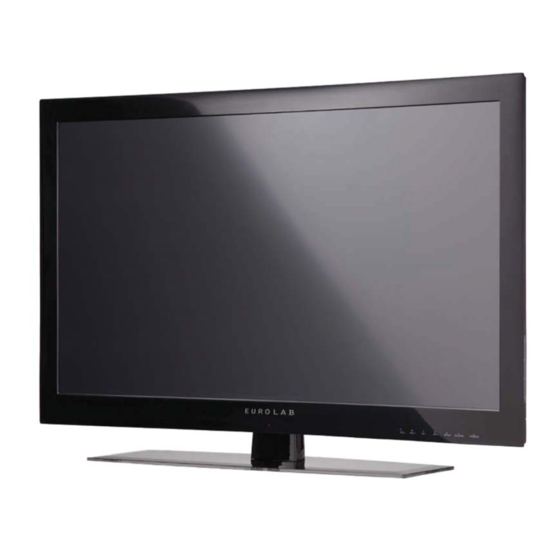
- Page 1 32 inch (80CM) FULL HD Digital LED TV Instruction Manual Read all of the instructions before using this TV and keep the manual in a safe place for future reference.
-
Page 2: Important Safety Instructions
Important Safety Instructions Read these instructions – All the safety and operating instructions should be read before this product is operated. Keep these instructions – The safety and operating instructions should be retained for future reference. Heed all warnings – All warnings on the appliance and in the operating instructions should be adhered to. Follow all instructions - All operating and safety instructions should be followed . -
Page 3: Table Of Contents
Contents Preparation....................................4 Unpacking the TV ........................................4 Front / Top / Side View and Controls ................................5 Rear View and Sockets......................................6 Installing Batteries in the Remote Control ..............................7 Remote Control Operation Range..................................7 Remote Control ........................................8 Connections.................................... 11 Connecting to External Devices..................................11 Initial Setup .................................... -
Page 4: Preparation
Unpacking the TV Remove all items from the packaging. It is advisable to retain the packaging, however if you dispose of it, please do so according to local regulations. The following items are included: LED TV Remote Control / AAA Batteries x 2 included Video 32 inch (80CM) FULL HD Digital LED TV Instruction Manual... -
Page 5: Front / Top / Side View And Controls
Front / Top / Side View and Controls Item Description Illuminates blue when the TV is turned on. Illuminates red when the TV is in standby LED Indicator mode. The LED will illuminate blue when the timer recording has started in the standby mode. -
Page 6: Rear View And Sockets
Rear View and Sockets VIDEO2 HDMI3 Item Description Connect to external driver for PVR function and muti-media playback. Connect to a High Definition (HD) signal output device, such as a set-top box, Blu-ray HDMI player, or AV receiver. Connect earphones for private listening. VGA / PC AUDIO Connect to a computer or other devices with a VGA interface. -
Page 7: Installing Batteries In The Remote Control
Installing Batteries in the Remote Control 1. Press and lift the back cover up to open the battery compartment of the remote control. 2. Insert two AAA size batteries. Make sure to match the (+) and ( - ) ends of the batteries with the (+) and ( - ) ends indicated in the battery compartment. -
Page 8: Remote Control
Remote Control Switch the TV between on and standby mode. Mute and restore your TV sound. 3 0-9 Number Button Select a programme. Select numbered items in a menu. CH.LIST Display the channel list. Return to previous viewing channel. 6 P.MODE Selects picture mode: Standard / Mild / User / Dynamic. - Page 9 13 MENU Display the OSD menu. 14 EXIT Exit the OSD menu. Press to stop playback. (USB mode) Display the Favourite Channel list. (ATV / DTV mode) One button recording function button, Press it to record the current DTV video. Press to start playback or pause.
- Page 10 Press to advance playback rapidly. (USB mode) REVEAL Reveal hidden information such as the answer to a quiz in Teletext. (ATV / DTV mode) 25 INDEX Press to select the page number of the Index from Teletext. (ATV / DTV mode) 26 SUBPAGE Display the subpage on the teletext screen.
-
Page 11: Connections
Connecting to External Devices VIDEO2 HDMI3 USB(not included ) Earphone Cables RF coaxial cable (not included ) (not included) Component Cable AV Cable (not included) (not included) Blu-Ray Player/Recorder Satellite antenna Video Camera Game Console cable Satellite Receiver HDMI Cable VGA Cable Audio Cable (not included) -
Page 12: Initial Setup
Turning the TV On for the First Time 1. Connect the supplied main cables to the AC~ socket at the back of your TV after you have completed all the connections. 2. Switch on the POWER ON/OFF switch at the side of the TV. At this stage, the TV switches to standby mode. -
Page 13: Using The Features
Selecting the Input Source You can select the input source by pressing the SOURCE button on the front pane or the SOURCE Input Source button on the remote control, then press the OK button to confirm. S-VIDEO YPBPR1 YPBPR2 HDMI1 HDMI2 HDMI3 Move... -
Page 14: Customising The Picture Setting
Customising the PICTURE Setting Picture Mode Allows you to set your preferred Picture Mode. 1. Press the MENU button to display the main menu. Press the buttons to select PICTURE in the main menu, then press the or OK button, it Plcture Mode Standard will highlight the first option. -
Page 15: Aspect Ratio
Aspect Ratio Allows you to watch the screen in various picture formats. For ATV Mode, 16:9 / Zoom1 / Zoom2 / Auto / 4:3 are the available options. 1. Press the MENU button and then use the buttons to select the PICTURE menu . -
Page 16: Customising The Sound Setting
Customising the SOUND Setting Sound Mode Allows you to select an audio-enhancement technique. 1. Press the MENU button to display the main menu. Press the buttons to select Sound in the main menu, then press the or OK button to highlight the first option. Sound Mode User Treble... -
Page 17: Customising The Time Setting
Stereo / Dual Sound Reception (ATV Mode) When a programme is selected, press the NICAM button to display the sound information for the selected station. Broadcast On Screen Display Mono MONO Stereo STEREO Dual Dual I, Dual II, Dual I/II Mono sound selection If the stereo signal is weak in stereo reception, you can switch to mono by pressing the NICAM button. -
Page 18: Customising The Setup Setting
Customising the Setup Setting OSD Language Allows you to select your preferred OSD language. 1. Press the MENU button to display the main menu and then use the buttons to select OPTION in the main menu and then press the or OK button, it will highlight the first option. -
Page 19: Blue Screen
OSD Duration Allows you to select the display time of the on-screen menu. 1. Press the MENU button to display the main menu and then use the buttons to select OPTION in the main menu and then press the OK button. Subtitle Languages 1st English Subtitle Languages 2nd... -
Page 20: Customising The Lock Setting
Restore Factory Default Restores all settings to factory defaults. 1. Press the MENU button to display the main menu and then use the buttons to select OPTION in the main menu and then press the OK button. Country Australia 2. Press the buttons to select Restore Factory Default and then press the MEMC Restore Factory Default... -
Page 21: Customising The Tv Settings (Atv / Dtv Mode)
Parental Guidance This function allows you to set up blocking schemes to block specific channels and ratings. It operates according to information from the broadcasting station, therefore if the signal has incorrect information, this function does not operate. This TV is programmed to remember which option it was last set to even if you switch the TV off. When a programme is locked or rated with delayed state, the message “locked programme”... -
Page 22: Atv Manual Tuning
ATV Manual Tuning Allows you to make manual fine tuning adjustments if the channel reception is poor under ATV mode. 1. In the CHANNEL menu, Press the buttons to select ATV Manual Tuning and then press the button or the OK button to enter sub-menu. a. -
Page 23: Programme Edit
Programme Edit Allows you to edit DTV programmes in the Channel List 1. Press the MENU button to display the main menu and then use the buttons to select CHANNEL in the main menu and then press the or OK button. 2. -
Page 24: Teletext (Atv Mode)
Teletext (ATV Mode) Teletext is a free service broadcast by some TV stations which gives up-to-the-minute information on news, weather, television programmes, share prices and many other topics. Using the Teletext control buttons, you can view pages of information that are listed in the teletext index. -
Page 25: Digital Teletext (Dtv Mode)
Digital Teletext (DTV Mode) Digital teletext can access special digital teletext services and specific services which broadcast digital teletext. The subtitle will temporarily auto off when digital teletext function is turned on. Teletext within Digital Service 1. In DTV mode, press the CH.LIST button to display the Channel List. Press the buttons to select a channel. -
Page 26: Pvr (Personal Video Recorder)
PVR Menu Function Details PVR function is only available in DTV, and includes Record, Timeshift and Playback Function. There are two types of recording: In-time record and preserve record. PVR File System (DTV Mode) 1. Press the MENU button to display the main menu and then use the buttons to select SETUP in the main menu and then press the OK button. -
Page 27: Format
Format Format 1. In the PVR File System menu, press the buttons to select Format and File System Size then press the OK or button to enter sub-menu as follows, and then press PVR File System Type FAT32 the OK button. PVR File System Size 2. -
Page 28: Schedule List
Schedule List 1. Press the MENU button to display the main menu and then use the buttons to select CHANNEL in the main menu and then press the OK button. 2. Press the buttons to select Schedule List to scan record schedule. Recorded List Recorded Mode 3. -
Page 29: Play Recorded Programme
Play Recorded Programme You can play recorded program from the recorded program list or from a USB Storage Device. Method 1 1. In DTV mode, press the INDEX button to enter the Recorded List. 2. Press the buttons to select the recorded programme you want to play and then press the OK button to play. Method 2 1. -
Page 30: Using The Remote Control
Using The Remote Control You can shift playback to any point within the recorded programme. When playing, press the button repeatedly to speed up x 2 / x 4 / x 8 / x 16 press the button repeatedly to speed up x 2 / x 4 / x 8 / x 16 During fast forward / fast backward state, press the button to return to normal playback. -
Page 31: Using The Features Via Usb Port
My Photo 1. Press the SOURCE button to display the input source list and then press the buttons to select the USB and then press the OK button. 2. Press the buttons to select PHOTO and then press the OK buttons . Disk C: 3. -
Page 32: My Movie
My Movie 1. Press the SOURCE button to display the input source list and then press the buttons to select the USB and then press the OK button. 2. Press the buttons to select Movie and then press the OK button. Disk C: MOVIE USB 2.0... -
Page 33: Trouble Shooting, Specification And Safety Warnings
Trouble Shooting, Specification and Safety Warnings The following table contains various hints and tips to get the best performance from your TV. The TV does not operate properly. Check to see if there are any objects between the TV and the remote control causing an obstruction. - Page 34 There is a problem in PC mode. The signal is out of range (Invalid Adjust resolution, horizontal frequency, or vertical frequency. format) Vertical bar or stripe on background Use Auto configure or adjust clock, phase, or H/V position. & Horizontal Noise & Incorrect position Screen colour is unstable or single Check the signal cable.
-
Page 35: Specification
Specification Model EUROLAB Panel System 32’’ 80cm LED panel Display Resolution 1920 pixels (horizontal) x 1080 pixels (vertical) Television System PAL / SECAM ( BG, DK, I, L ) / DVB-T Brightness 300~420 cd/m Contrast Ratio 3,000-4,500:1 Inputs/Output HDMI PC AUDIO... -
Page 36: Safety Warnings
Safety Warnings Read all the instructions carefully before using the unit Safety and keep them for future reference. Always disconnect the unit from the mains supply before connecting/disconnecting other devices or Retain the manual. If you pass the unit onto a third moving the unit. - Page 37 Earphones This symbol on the product or in the Listening to loud sounds for prolonged periods of time instructions means that your electrical and may permanently damage your hearing. electronic equipment should be disposed at the end of its life separately from your Before putting on earphones, turn the volume down household waste.
Need help?
Do you have a question about the LE32G90GD and is the answer not in the manual?
Questions and answers