
Summary of Contents for Observer AWS3155
-
Page 1: User Guide
7" Touch Screen Wireless Surveillance System Model AWS3155 User Guide Please read these instructions completely Wireless Made Simple. before operating this product. -
Page 3: Table Of Contents
TABLE OF CONTENTS IMPORTANT SAFETY INSTRUCTIONS ................3 INTRODUCTION ........................6 System Contents .......................6 Getting to Know Your LCD Touch Screen Monitor .............7 Getting to Know Your Camera ...................8 INSTALLATION ........................9 Installation Tips ......................... 9 Night Vision ........................9 Setting Up the Monitor .....................10 Installing the Camera(s) ....................12 SYSTEM INTRODUCTION ....................14 Live Screen and Menu .....................14... - Page 4 Requirements for Remote View ..................51 Connecting to the Internet ....................52 Connecting to the Intranet (Home Network) ..............54 Downloading the ALC Observer App ................55 ALC Observer Android Setup Wizard ................56 ALC Observer Apple Setup Wizard ..................57 ALC Observer App Icons ....................59 To Take Snapshots ......................62...
-
Page 5: Important Safety Instructions
IMPORTANT SAFETY INSTRUCTIONS PRODUCT SAFETY: When used in the directed manner, this unit has been designed and manufactured to ensure your personal safety. Improper use of this product can result in potential electrical shock or fire hazards. Please read all safety and operating instructions carefully before installation and use, and keep these instructions handy for future reference. - Page 6 IMPORTANT SAFETY INSTRUCTIONS Recycling and Disposal Information: • Do not dispose of electronic devices or any of their components (especially batteries and LCD displays) in your municipal trash collection. • Consult your local waste management authority or a recycling organization like Earth911.com to find an electronics recycling facility in your area.
- Page 7 IMPORTANT SAFETY INSTRUCTIONS Ventilation - Slots and openings in the case are provided for ventilation to ensure reliable operation of the product and to protect it from overheating. These openings must not be blocked or covered. The openings should never be blocked by placing the video equipment on a bed, sofa, rug, or other similar surface.
-
Page 8: Introduction
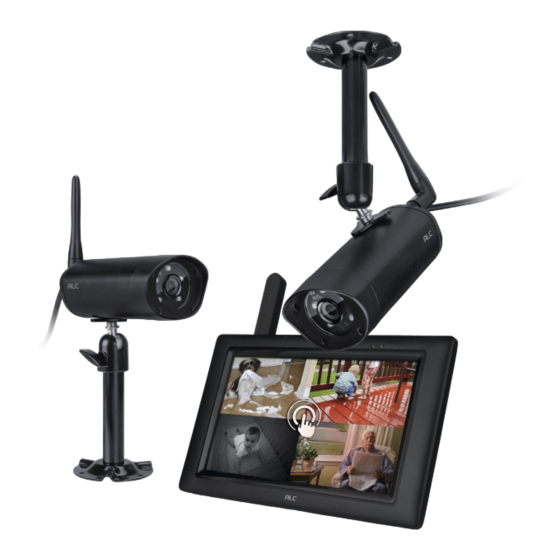
INTRODUCTION System Contents After unpacking, you will have the following items: Monitor x 1 Camera x 2 Antenna x 2 Camera Bracket x 2 AC Adapter x 3 Micro SD Card x 1 Internet Cable x 1 7” Connected Touch Screen Wireless Surveillance System Model AWS3266 Quick Start... -
Page 9: Getting To Know Your Lcd Touch Screen Monitor
INTRODUCTION Getting to Know Your LCD Touch Screen Monitor FRONT Signal Indicator Power Indicator Monitor Touch Screen Microphone REAR Antenna Power Button Micro SD Card Slot Internet Jack Reset Button Stand Power Jack Speaker — 7 —... -
Page 10: Getting To Know Your Camera
INTRODUCTION Getting to Know Your Camera FRONT Mounting Socket Cover Mounting Socket Power Status Link Status REAR Antenna Connector Power Pigtail — 8 —... -
Page 11: Installation
INSTALLATION Installation Tips WARNING: Weatherproof, IP66 rated cameras are suitable for outdoor installation. However, if possible, it is recommended to install in a location that provides some shelter from the elements, such as beneath roof eaves. • Before you install the camera, plan where and how it will be positioned, and where you will route the cable that connects the camera to the power adapter. -
Page 12: Setting Up The Monitor
INSTALLATION Setting Up the Monitor TIP: You can skip the AC adapter step if the unit is charged and you want to use the unit using the rechargeable battery. Flip out the stand on the back of the monitor. Connect the AC adapter to the Power Jack on the side of the monitor. - Page 13 INSTALLATION Setting Up the Monitor Connect the other end of the adapter to a 120 volt AC (standard indoor) power outlet. When connected to an AC Outlet, the rechargeable battery will be charged. Press and hold the Power button on the top of the monitor for 3-4 seconds to power it up.
-
Page 14: Installing The Camera(S)
INSTALLATION Installing the Camera(s) IMPORTANT: Please set up the camera first before mounting and stay in close range with the camera during setup. If not mounting, but just using on a flat surface (desk, table, etc.), skip to step 4. Secure the multi-position camera bracket to a stable surface, ceiling or wall using the three screws. - Page 15 INSTALLATION Installing the Camera(s) Screw Antenna clockwise into rear of camera. Connect one end of an AC adapter to the camera’s power pigtail and plug the other end of the adapter to a 120 volt AC (standard indoor) power outlet. TIP: A 6 foot power extension cable is included for your camera setup if needed.
-
Page 16: System Introduction
SYSTEM INTRODUCTION Live Screen and Menu Your monitor’s system software operates through a series of screens that let you choose groups of operations. For example, when you tap on the camera icon in the Pop-up menu, you can set how you want the main viewing screen (“Live screen”) to display images from the paired cameras. -
Page 17: Description Of Icons
SYSTEM INTRODUCTION Description of Icons Icon Icon Description Camera Mode Select how you want the Live screen to display camera input: SCAN: Scan between cameras (5 seconds) QUAD: Quad view (all paired cameras display) Cam1-Cam4: Full view (1 camera displays on full screen) Volume Adjust the volume level. - Page 18 SYSTEM INTRODUCTION Description of Icons Icon Icon Description Internet Status Status Appears in LIVE view. Indicates connection to the internet/intranet is in progress. Appears in LIVE view and Pop-Up Menu. Indicates internet connection is established. Appears in LIVE view. Indicates remote viewing is in progress.
- Page 19 SYSTEM INTRODUCTION Description of Icons Icon Icon Description Motion Detection System indicates motion detection recording in progress. See page 28 for more details. Scheduled Recording System indicates scheduled recording in progress. See page 31 for more details. Pop-Up Menu Tab Tap this icon to open and close the pop-up menu display.
-
Page 20: Live Screen Displays
SYSTEM INTRODUCTION Live Screen Displays The Live screen displays in two views - Quad View or Full View. Quad View divides the screen’s image area into four quadrants and displays camera video in each quadrant. If less than four cameras are connected and on, only those cameras’ videos will display on the Live screen. The other sections of the screen where no camera is connected will be blank. -
Page 21: Zoom Feature
SYSTEM INTRODUCTION Zoom Feature You cannot Zoom In or Out in Quad view so if in Quad View, tap the desired Quad section to go to the Full View. Tap the icon to activate the Zoom mode. Select the desired zone to zoom into by tapping the zone area. -
Page 22: Recording Live Video
SYSTEM INTRODUCTION Recording Live Video To record live video: Make sure a micro SD card is inserted into the micro SD Card Slot, see page 11. TIP: You cannot record while in the Full view, you must be in the Quad view. Tap the icon of the desired camera’s quadrant to start... -
Page 23: Playing Back A Recorded Video
SYSTEM INTRODUCTION Playing Back a Recorded Video Tap the Pop-Up Menu tab to access the Menu options. 08-27-2014 10 : 22 AM Tap the icon to enter the screen as shown to the right. Tap the icon to view the Record List. - Page 24 SYSTEM INTRODUCTION Playing Back a Recorded Video Tap on any area of the screen that does not have control icons to bring up the playback progress bar. While playback progress is visible, you can fast forward/rewind by dragging the playback bar. Tap any area of the screen that 00:10 02:00...
-
Page 25: Deleting A Recorded Video
SYSTEM INTRODUCTION Deleting a Recorded Video 08-27-2014 10 : 22 AM Tap the Pop-Up Menu tab to access the Menu options. Tap the icon to enter the screen as shown to the right. Tap the icon to view the Record List. Record List Tap on the day that contains the recording you want to delete. -
Page 26: System Menu
SYSTEM MENU System Menu Tap the Pop-Up Menu tab to access the Menu options. Motion Tap the icon to enter the status SCAN screen as shown at right. QUAD Cam1 Pop up menu tab Cam2 Cam3 Cam4 08-27-2014 10 : 22 AM Tap the icon to access the System Setup screen. -
Page 27: Camera Pairing
SYSTEM MENU Camera Pairing Your cameras are paired to the monitor at the factory to channels 1 and 2. When you add a new camera to your system, you have to “introduce” the camera and Monitor to each other so they can communicate. -
Page 28: Turning The Camera On Or Off
SYSTEM MENU Turning the Camera On or Off After adding a camera, it will automatically be active (On) in this setting. To turn the camera on or off, perform the following: Follow steps 1 through 3 on page 24 to access the System Setup. Tap Camera Setup to access the Camera Setup screen. -
Page 29: Adjusting Brightness
SYSTEM MENU Adjusting Brightness To adjust a camera’s brightness, perform the following: Follow steps 1 through 3 on page 24 to access the System Setup. Tap Camera Setup to access the Camera Setup screen. Tap Brightness. TIP: The number under the camera represents the Brightness (-2 to 2). -
Page 30: Motion Detection
SYSTEM MENU Motion Detection This setting will allow you to set the Sensitivity options for motion detection. Follow steps 1 through 3 on page 24 to access the System Setup. Tap Recorder Setup to access the Recorder Setup screen. Tap Motion Detection. TIP: The Motion Detection default setting for the cameras included in this... -
Page 31: Email Alert
SYSTEM MENU Email Alert This system can notify you when it detects motion from any camera by sending you an email alert. The email alert contains information such as the time that motion was detected and by which camera. In order to enable the system, you must enter both incoming and outgoing email addresses and be connected to the internet (see page 52). - Page 32 SYSTEM MENU Email Alert Tap Enable to enable or Disable to disable Email alerts. Tap the SSL box to make sure it is checked. Tap on the SMTP Server field. A Gmail notice displays with the port information; tap OK or wait a few seconds and the keyboard will appear.
-
Page 33: Schedule Record
SYSTEM MENU Schedule Record You can schedule up to five recording sessions. The total recording time available is limited to the size of your SD card. A higher capacity SD card will provide more recording time. These recording sessions must begin and end within a single 24-hour period; they cannot cross into the next day. - Page 34 SYSTEM MENU Schedule Record Set the recording start time. Tap the hour and number boxes separately and use the UP and DOWN arrows to scroll through the times. Tap the AM/PM block to toggle between them. Set the recording end time. Tap the hour and number boxes separately and use the UP and DOWN arrows to scroll through...
-
Page 35: Clearing A Scheduled Recording
SYSTEM MENU Clearing a Scheduled Recording Follow steps 1 through 3 on page 24 to access the System Setup. Tap Recorder Setup to access the Recorder Setup screen. Tap Schedule Record. Tap the program you want to delete. Tap CLEAR to clear that recording. -
Page 36: Network Setup
SYSTEM MENU Network Setup Use the Network Setup to select the Internet Type, set the Security code and display System Default Configurations. To Setup an Internet connection and to use any features with Internet, connect the monitor via an ethernet cable from your router to the Internet jack on the rear of the monitor. -
Page 37: Security Code
SYSTEM MENU Security Code Set a security code to limit access to the system from remote locations. Follow steps 1 through 3 on page 24 to access the System Setup. Tap Network Setup to access the Network Setup screen. Tap Security Code. If you previously set a code it will show here, otherwise the default code of 123456 will appear. -
Page 38: Network Information
SYSTEM MENU Network Information The Network Information page will display important information about your network connection. It is especially important to note the DID number in order to use with remote access. Follow steps 1 through 3 on page 24 to access the System Setup. Tap Network Setup to access the Network Setup screen. -
Page 39: Alarm Setup - Siren Period
SYSTEM MENU Alarm Setup – Siren Period Set the duration the alarm will sound as follows: Follow steps 1 through 3 on page 24 to access the System Setup. Tap Alarm Setup to access the Alarm Setup screen. Tap Period. This screen will show the alarm’s siren duration. -
Page 40: Alarm Setup - Siren Melody
SYSTEM MENU Alarm Setup – Siren Melody Set the siren melody as follows: Follow steps 1 through 3 on page 24 to access the System Setup. Tap Alarm Setup to access the Alarm Setup screen. Tap Melody. This screen will show the selected siren melody. -
Page 41: System Setup - Power Saving
SYSTEM MENU System Setup – Power Saving Set the Power Saving Mode as follows: Follow steps 1 through 3 on page 24 to access the System Setup. Tap System Setup to access the System Setup screen. Tap Power Saving. System Setup Tap the desired Power Saving Select to Activate Power Saving Mode Mode:... -
Page 42: System Setup - Screen Auto Lock
SYSTEM MENU System Setup – Screen Auto Lock When you turn on Auto Lock mode, the monitor will automatically enter Screen Lock mode after it has been idle for two minutes. Auto Lock disables the touch screen and removes the icons from the display. -
Page 43: System Setup - Setting The Time
SYSTEM MENU System Setup – Setting the Time Set the time as follows: Follow steps 1 through 3 on page 24 to access the System Setup. Tap System Setup to access the System Setup screen. Tap Time. Tap Time Setting. Time Zone Tap of the desired setting (Month, Day, Hour, etc.) and set using the... -
Page 44: System Setup - Setting The Alarm
SYSTEM MENU System Setup – Setting the Alarm The alarm is independent of the system operation (recording, etc.) and will not affect it. Set the alarm as follows: Follow steps 1 through 3 on page 24 to access the System Setup. Tap System Setup to access the System Setup screen. - Page 45 SYSTEM MENU System Setup – Setting the Alarm Tap on the desired setting (Hour, Minutes or AM/PM) and set using the Up and Down arrows. After setting the alarm time, tap SAVE. The button will then change to SAVED. Activate the alarm by tapping the “X”...
-
Page 46: System Setup - Setting The Time Zone
SYSTEM MENU System Setup – Setting the Time Zone Set the time zone as follows: Follow steps 1 through 3 on page 24 to access the System Setup. Tap System Setup to access the System Setup screen. Tap Time. Tap Time Zone. Tap the arrows to set the desired Time Zone time zone you are in. -
Page 47: System Setup - Storage Management
SYSTEM MENU System Setup – Storage Management Storage Management lets you reformat your micro SD card (erasing all records) or allow new video records to copy over older records when the micro SD card is full. Overwrite erases the oldest record to free space for the new file. More than one record may be erased depending on the new file’s size. -
Page 48: System Setup - System Upgrade
SYSTEM MENU System Setup – System Upgrade It is important to make sure the firmware is up to date with the latest version. To upgrade the firmware, do as follows: Download the file from our site (www.ALCWireless.com/support/) to your computer. This file must then be transferred to the root directory of the SD card used in your monitor. -
Page 49: System Setup - Default Language
SYSTEM MENU System Setup – Default Language English is the default language. When you change languages, all system settings default to the original factory settings. You will have to re-enter any specialized settings. Follow steps 1 through 3 on page 24 to access the System Setup. -
Page 50: System Setup - Frequency
SYSTEM MENU System Setup – Frequency It is important to select the desired frequency of your electric outlet (50Hz or 60Hz) as follows: Follow steps 1 through 3 on page 24 to access the System Setup. Tap Default to access the Default screen. -
Page 51: Quick Tips
SYSTEM MENU Quick Tips The Quick Tips screen provides additional details on important subjects of system operation. Tap on a subject to display the information. Follow steps 1 through 3 on page 24 to access the System Setup. Tap Quick Tips to access the Quick Tips screen. -
Page 52: Adjusting The Alarm And Overall Volume
ADJUSTING THE ALARM AND OVERALL VOLUME Adjust the volume of alarms as well as the volume of the overall sound as follows: Tap the Pop-Up Menu tab to access the Menu options. Motion Tap the icon to enter the status screen as shown at right. -
Page 53: Remote Access
REMOTE ACCESS Overview This camera system allows you view live video from an iPhone , iPad , iPod Touch ® ® ® Android smartphone or tablet. Free apps are available through the Apple App Store or the Android Market/Google Play. Up to three remote users can access live video at the same time as long as they have the User ID (DID) Code and Security Code. -
Page 54: Connecting To The Internet
REMOTE ACCESS Connecting to the Internet Connect one end of the supplied Ethernet cable into the back of the monitor and the other end to your primary router (from your internet service provider). Included Ethernet Cable Internet Router (not included) A screen asks if you want to connect to the internet or only charge the monitor. - Page 55 REMOTE ACCESS Connecting to the Internet NOTES: • While the system is connected to the internet, the live screen display rate may reduce to 2 - 3 frames per second. • When you connect remotely to the monitor, the Internet Connection Status Indicator will show indicate remote view is in progress.
-
Page 56: Connecting To The Intranet (Home Network)
REMOTE ACCESS Connecting to the Intranet (Home Network) When the monitor is placed in the docking station and Charge Only is selected, you can still access your live video from a PC or smartphone as long as those devices are also connected to the same network as the monitor. -
Page 57: Downloading The Alc Observer App
From your iPhone or iPad, go to the App Store and search for ALC Observer. See page 57. Observer ANDROID DEVICE: From your Android smartphone or tablet device, go to Google Play and search for ALC Observer. See the following page. — 55 —... -
Page 58: Alc Observer Android Setup Wizard
Also make sure the camera and monitor is connected to the internet (see page 52) or intranet (see page 54). Launch the ALC Observer App and the Setup Wizard screen will appear. Tap “+” to start the Wizard. The Android Device will now search for the camera. -
Page 59: Alc Observer Apple Setup Wizard
ALC Observer Apple Setup Wizard Make sure the monitor is connected to the internet (see page 52) or intranet (see page 54). Launch the ALC Observer App and the Setup Wizard screen will appear. Tap “+” to start the Wizard. — 57 —... - Page 60 REMOTE ACCESS ALC Observer Apple Setup Wizard The Apple Device will now search for the camera. Once the screen indicates the camera is connected, Tap Live View. ‘HD-000011’ has been connected. — 58 —...
-
Page 61: Alc Observer App Icons
REMOTE ACCESS ALC Observer App Icons MAIN SCREEN The following icons appear when on the Main screen. Tap the arrows to access the live video screen. If you have already selected a view and go back to the previous screen (arrows screen) a still picture of the live video appears instead. - Page 62 REMOTE ACCESS ALC Observer App Icons Icon Icon Description Add System Tap this icon to enter the set up wizard; see page 56 for Android devices or page 57 for Apple devices. Edit Setting Tap this icon to access the App’s options. See below: Tap this icon to set up camera configuration or make changes to your existing settings.
- Page 63 REMOTE ACCESS ALC Observer App Icons Icon Icon Description Snapshot Tap to capture screen images. The snapshots will be saved into the camera roll of your mobile device. See page 62 for more details. Record Tap to record and tap again to stop recording.
-
Page 64: To Take Snapshots
REMOTE ACCESS To Take Snapshots From the main screen, tap to remote view your camera system. Select a camera by tapping the Camera pull down menu, then select the desired camera. — 62 —... - Page 65 REMOTE ACCESS To Take Snapshots Tap the Snapshot icon to take a snapshot of the current image. To View Snapshots For Apple: Your snapshots will be named with the time stamp and saved into the Camera Roll > snapshot folder on your mobile device. For Android: Your snapshots will be named with the time stamp and saved into the Photo gallery >...
-
Page 66: To View And/Or Take Videos
REMOTE ACCESS To View and/or Take Videos From the main screen, tap to remote view your camera system. Select a camera by tapping the Camera pull down menu (Camera 1 - 4). — 64 —... - Page 67 REMOTE ACCESS To View and/or Take Videos Tap the Record icon to start recording. The App will record for 2 minutes. PINCH AND ZOOM: To zoom in or out use the simple pinch and zoom gesture with this app. — 65 —...
-
Page 68: To Play Videos
REMOTE ACCESS To Play Videos From the main screen, tap the Settings icon. Tap the Events icon; the “Select Event Filter” pop-up will appear. — 66 —... - Page 69 REMOTE ACCESS To Play Videos Select the desired Start Time/Date of the videos you want to view by tapping on the respective option (date or time) and then tapping “+” or “-” to adjust. When finished, tap Done. Repeat for Stop Time/Date, then Tap OK;...
- Page 70 REMOTE ACCESS To Play Videos Tap the video name once to play the video clip. When playing back a video, tap the Pause icon to pause the video. Tap again to resume. PINCH AND ZOOM: To zoom in or out use the simple pinch and zoom gesture with this app;...
-
Page 71: To Delete Videos
REMOTE ACCESS To Delete Videos Access the Events List as shown on pages 66 and 67. Tap the Edit Icon. To Delete One File, select the file you wish to delete (a check mark will appear in the box to the right of the selected file) then tap the Delete Selected icon. - Page 72 REMOTE ACCESS To Delete Videos To Delete All Files, tap the Delete All icon. A pop-up box will appear asking you to confirm; tap Yes. — 70 —...
-
Page 73: Information Screen Options
REMOTE ACCESS Information Screen Options From the main screen, tap the Information icon, a pop-up will appear. To view information (Version, etc.), tap About. — 71 —... - Page 74 Launch Settings/System Preferences from your Home screen on the Apple device. Tap Notification Center; a list of Apps will appear. Scroll down to find “ALC Observer” App and click on it. The setting screen displays. Turn the notification ON or OFF as desired.
- Page 75 REMOTE ACCESS Information Screen Options To Setup the Pin Lock, tap Setup PIN Lock. TIP: Setting a PIN Lock code will prevent others from activating the app and viewing your camera images. Tap the Enable Lock When Starting switch to enable (will be blue), or disable (will be white) the PIN Lock.
- Page 76 REMOTE ACCESS Information Screen Options Using the keyboard, enter a four digit code. Then confirm this exact code. Now that the pin is set and enabled, whenever the App is opened you must enter this code. — 74 —...
-
Page 77: Did Setting Screen
REMOTE ACCESS DID Setting Screen From the main screen, tap the Settings icon. Tap the Settings icon; the System Information Screen will appear. — 75 —... - Page 78 REMOTE ACCESS DID Setting Screen Simply tap on a field to change it. To enable Email Alert, which will email your Gmail account whenever motion is detected, simply tap the Enable Email Alert switch so it is blue. — 76 —...
-
Page 79: Maintenance
MAINTENANCE Monitor As you use your touch-screen monitor, fingerprints, etc. will appear on the screen. Keep the screen clean by wiping it with a microfiber cloth. It is not recommended to use any chemicals or harsh detergents on the touch screen. Cameras When dust and grime builds up on the camera lens and glass, it will affect the night vision capability. -
Page 80: Troubleshooting
TROUBLESHOOTING If you have any trouble with your system, try these simple steps which should handle most common issues. Problem Possible Solution Screen lock may be on. Tap the Power button to unlock the screen. Make sure the camera’s power is on. Make sure the monitor has enough charge / connect it to No Image. - Page 81 TROUBLESHOOTING Problem Possible Solution Screen lock may be activated, tap the power button to Live screen has no icons. unlock the screen. Turn off the monitor and restart. If power button does not System has locked up. respond, use a pin to press the reset button located on the side of the monitor.
-
Page 82: Product Specifications
PRODUCT SPECIFICATIONS Camera Communication Range ............500 ft (164 yards) in open space Camera Resolution Single Camera ................480 x 272 Camera Resolution Multiple Camera ................. 320 x 240 Operating Temperature ...............14°F ~ 122°F (-10°C ~ 50°C) Operating Voltage ....................DC 5V, 1A Current Consumption .................. -
Page 83: Warranty
WARRANTY One-Year Limited Warranty Important: Evidence of original purchase is required for warranty service. Atoms Labs LLC (“ALC”) ELEMENTS OF WARRANTY: ALC warrants, if properly installed and used thereafter in strict accordance with the use and care guidelines provided in the instructions manual, the Product shall be free from manufacturing defects in material and workmanship for one (1) year from the documented date of purchase. - Page 84 ONE-YEAR LIMITED WARRANTY WARRANTY IMPORTANT: Evidence of original purchase is required for warranty service. WARRANTOR: Atoms Labs LLC (“ALC”) ELEMENTS OF WARRANTY: The ALC warranty covers the product for one (1) year LEGAL REMEDIES: This limited warranty gives you specific legal rights, and you may also have other from the documented date of purchase.
- Page 85 Wireless Made Simple. ALCWireless.com 040416_v3.0...
- Page 86 Wireless Made Simple. ALCWireless.com...
Need help?
Do you have a question about the AWS3155 and is the answer not in the manual?
Questions and answers